Page 4 of 14 FirstFirst ... 23456 ... LastLast
Results 31 to 40 of 137

Thread: Disc Brakes

  1. #31
    Join Date
    Jan 2008
    Location
    Nowra NSW
    Posts
    3,906
    Total Downloaded
    0
    Quote Originally Posted by Sitec View Post
    I'm guessing there is a good reason you've not tried this, but would the calliper support plate bolt on 'one hole further round' lifting the calliper above the filler plug, or do the calliper bolts then hit the swivel housing?

    I looked at that. it must go where it is.
    The only reason the caliper must be ground away slightly to fit is a stuff up in the CNC machining of the caliper support bracket.
    I found a answer to the oil filler problem.
    Will post pics.
    The caliper is easy to remove as is the brake pipe going to it.
    Most of the work to access the level/filler plug would be removing the wheel and wheel tread plate so the caliper could be moved away.

  2. #32
    Join Date
    Jan 2008
    Location
    Nowra NSW
    Posts
    3,906
    Total Downloaded
    0
    Quote Originally Posted by stuee View Post
    On the same topic as Sitec, how hard is it to remove the caliper? Looks reasonably straight forward, two bolts and its off, or is it a case of having to loctite them up afterwards? A bit excessive to check an oil level I guess but I thought the oil weeped through from the main housing when needed so should almost self regulate or is that not how it works at all . I'll have to go back and look at my parts manual, I may be confusing things again.

    Do those brake pipes come with the kit or did you make them up? If you have to make them up and caliper removal became a regular thing would flexible hoses be suitable in that application?
    Brake pipes come with the kit.
    I was going to use a pipe bender, but found they bend easily by hand.
    I am going the other way with the calipers and using anti seize on the bolts.
    The spring washers are working well on the allen head bolts supplied.
    Because if is a bit difficult to get square on to the allen head bolts you wouldnt want to loctite them or have them rust in place.
    The caliper will not need to come off again except for hub oil seal/wheel bearing or Disc changes.
    Pads are changed with the caliper bolted up.
    I have a solution for the C/V joint oil filler, no need to remove the caliper to check the oil.

  3. #33
    Join Date
    Jan 2008
    Location
    Nowra NSW
    Posts
    3,906
    Total Downloaded
    0
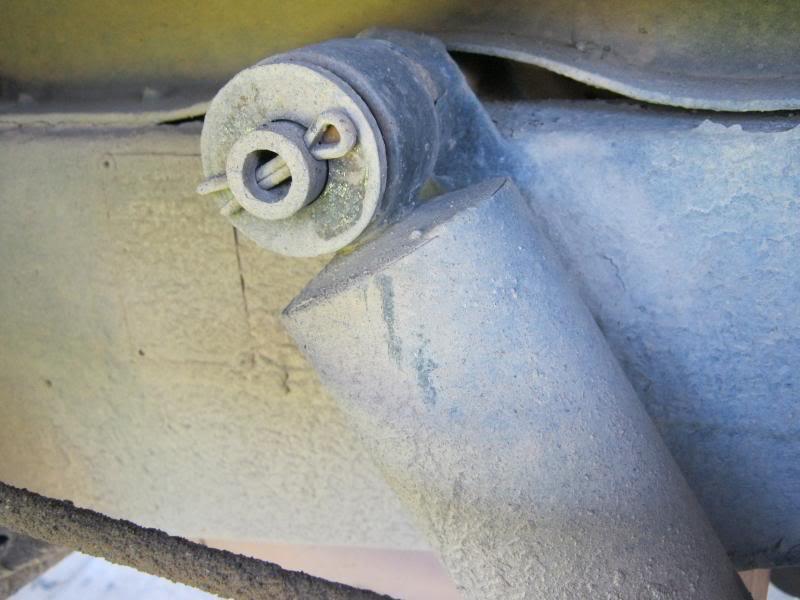
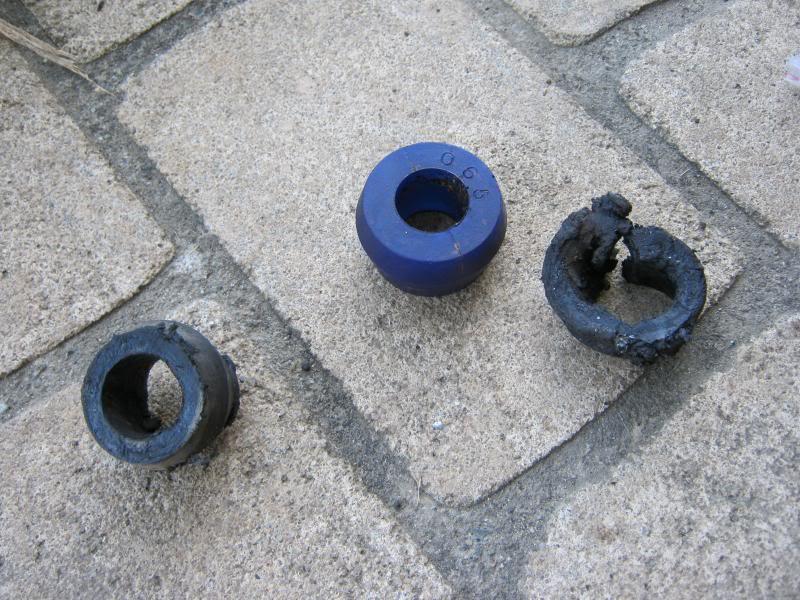
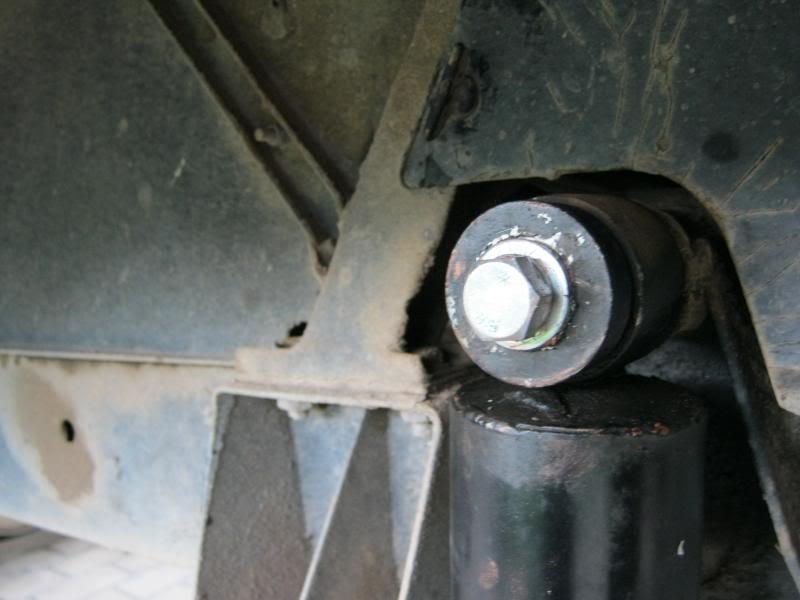
    First up today after the mothers day kissy/kissy stuff, I though while the front of the 101 is easy to get at, look at the poly shock bushes I got from AJ.


    I found the poly bushes were not going to let me fit them without taking material from the bushes themselves, as they must be very slight bigger than the standard bush and have less give.
    Fitting the split pin back in was not a option as is.
    I have had trouble with the front shocker bushes with the 101 before and really wanted the poly bushes for longer life.
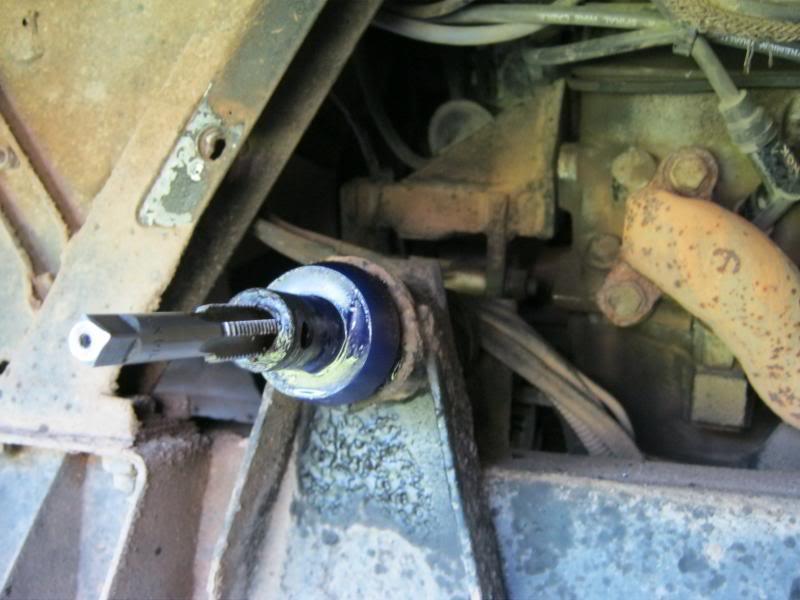
    AJ told me when purchasing the bushes he threaded the shocker bush shaft some how and eliminated the split pin set up.
    I have tapped a 14mmx2 thread in the centre of the top shocker bush supports.
    I have to buy the bolts yet.
    A bolt and simple washer will allow adjustment of pressure and tightness of the poly bushes which are better than the rubber items to be done this way.


  4. #34
    Join Date
    Jan 2008
    Location
    Nowra NSW
    Posts
    3,906
    Total Downloaded
    0
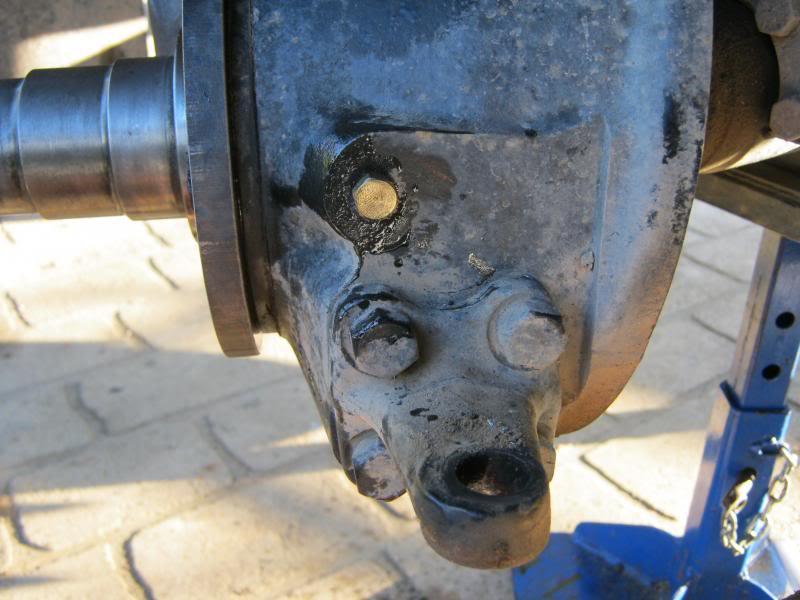
    After not being able to go any futher with the shock bushes I decide to look at the C/V joint oil filler/ level access problem again.
    Just above the stub arms on the front face of the C/V housing is a flat area and has reasonable access.
    this part of the C/V is very thick as the steering stub arms are designed to bolt up there .
    It fact the bolts for the steering stub arms screw into holes threaded right though the C/V housing..........it is possible to check the oil at a lower level by removing one of these bolts.
    I drilled a 11/32 hole above the steering stub arm though the C/V housing at the correct level.
    The steering rod ends need to be removed to do this.
    I tapped a 1/8 BSP thread into it.
    I had 2 new brass 1/8 BSP plugs at home which I fitted.
    It is possible to refit the standard 3/8 gas plugs if you want to.
    I chose the smaller size as I wanted to minimise any swarf going into the inside of the C/V.
    Drilling for the standard plug is best left if the C/V is ever removed from the vehicle.
    The oil will still run out if full and my little oil pumper bottle will have no trouble filling the C/V housing this way, even with the wheels fitted.

  5. #35
    Join Date
    Jan 2008
    Location
    Nowra NSW
    Posts
    3,906
    Total Downloaded
    0
    RHS......this shows the hole and a small magnetic pick up tool I used to remove and stop swarf going inside the housing.


    RHS with brass tapered thread plug in place.


    This is the LHS, one rod end is completely removed and the other closest to the plug is a jar and slightly off to the left as it was a pain to remove it, but it gave me enough room the drill the hole.

  6. #36
    Join Date
    Jan 2008
    Location
    Nowra NSW
    Posts
    3,906
    Total Downloaded
    0
    After doing the above I decided I could fit the supplied star drive plugs into the standard oil level/ filler holes.
    The problem is the standard plugs are tapered thread and the replacement plugs are parallel thread.
    This means the replacement /supplied plugs are a lose fit in the threaded holes.
    I could only get them to grab firmly in the old filler hole after using alot of thread tape and loctite.
    Refitting the standard plugs may be a better option, I think the square head may just clear the caliper.

  7. #37
    Join Date
    Jan 2008
    Location
    Nowra NSW
    Posts
    3,906
    Total Downloaded
    0
    I tried the spacer plates onto the hubs today..........they are to keep wheel spacing standard without brake drums.
    The wheel stud holes are perfect, but the centre hole for the hub centre is plasma cut.
    the hole is slightly too small and had to be opened up slightly with my little die grinder .
    One other point is the spacer plate has a chamfer on one side of the hub hole.
    that chamfer should be fitted facing the hub.
    Ron ........Bludger Exordinare........free lance hero.

  8. #38
    cookey is offline Fossicker Gold Subscriber
    Join Date
    Feb 2009
    Posts
    67
    Total Downloaded
    0
    Quote Originally Posted by 101 Ron View Post
    After doing the above I decided I could fit the supplied star drive plugs into the standard oil level/ filler holes.
    The problem is the standard plugs are tapered thread and the replacement plugs are parallel thread.
    This means the replacement /supplied plugs are a lose fit in the threaded holes.
    I could only get them to grab firmly in the old filler hole after using alot of thread tape and loctite.
    Refitting the standard plugs may be a better option, I think the square head may just clear the caliper.
    Hi Ron,
    on my Series disc conversion I swap the swivel housings left to right.
    That way the filler plug is relocated to the front of the vehicle leaving lots of room for access.
    (my calipers mount at the rear of the wheel)
    cookey

  9. #39
    Join Date
    Jan 2008
    Location
    Nowra NSW
    Posts
    3,906
    Total Downloaded
    0
    Quote Originally Posted by cookey View Post
    Hi Ron,
    on my Series disc conversion I swap the swivel housings left to right.
    That way the filler plug is relocated to the front of the vehicle leaving lots of room for access.
    (my calipers mount at the rear of the wheel)
    cookey
    Its a great idea cookey, but the problem is with the 101 the steering arms bolt on the side faces of the C/V and not the top as on other 4wds.
    This means to reverse the C/Vs would involve drilling accurately and threads the eight bolts for the steering arms and plugging the old threaded holes.
    The two holes I have done in situ should work OK and can be easily enlarged.

  10. #40
    Join Date
    Jan 2008
    Location
    Nowra NSW
    Posts
    3,906
    Total Downloaded
    0
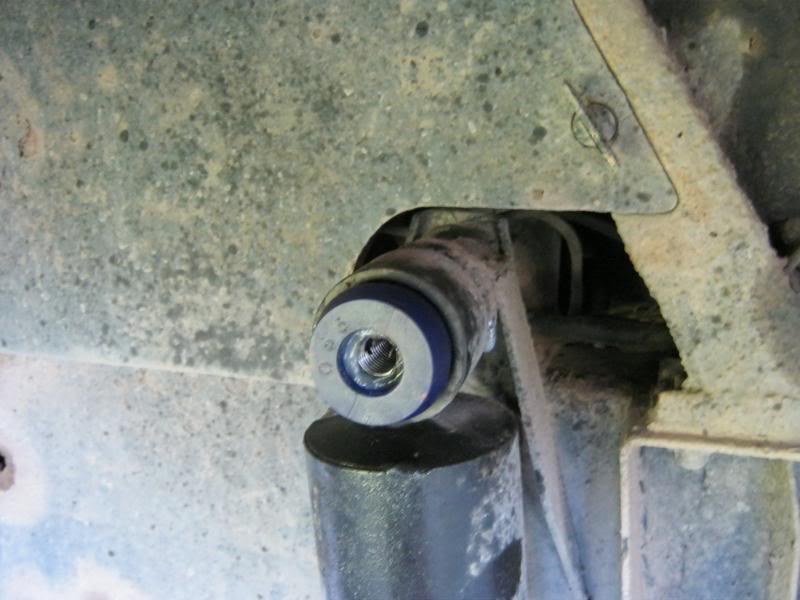
    I got the bolts today.
    This is what the poly shockasorber bushes look like held in place with a bolt.

    Hope for the hub seals tomorrow.

Page 4 of 14 FirstFirst ... 23456 ... LastLast

Bookmarks

Bookmarks

Posting Permissions

  • You may not post new threads
  • You may not post replies
  • You may not post attachments
  • You may not edit your posts
  •  
Search AULRO.com ONLY!
Search All the Web!