Traxide USI-160 install in Discovery 2
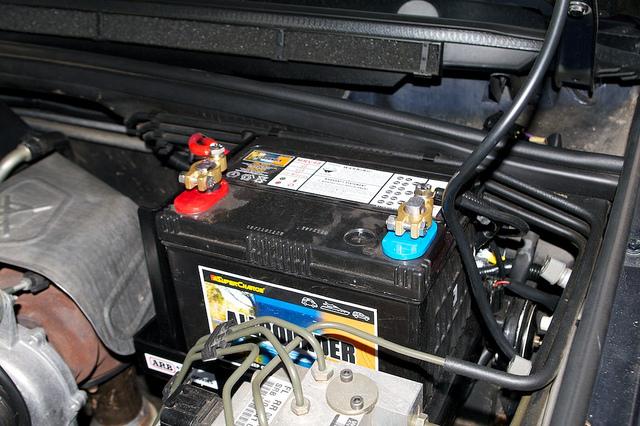
When we purchased the D2 it came with an ARB dual battery system already installed. Battery tray on passengers side in the engine bay, with a Surepower 1314 isolator installed under the battery tray. It was wired to the starter solenoid so that everytime you start the engine the Surepower connects the Aux' battery to assist starting. It's worked well for the last 2yrs, but that setup really only gives us 1-1.5 days max' on average on the 50AHr Century 46T wet cell deep cycle battery ... not really enough for a weekend, and the Surepower isolator can't be used to share the cranking battery for Aux' use. Also, everytime you start the engine, the Aux' gives up a bit of its power, which makes it hard to get a full charge into the Aux' battery if you're doing lots of stop/start driving.
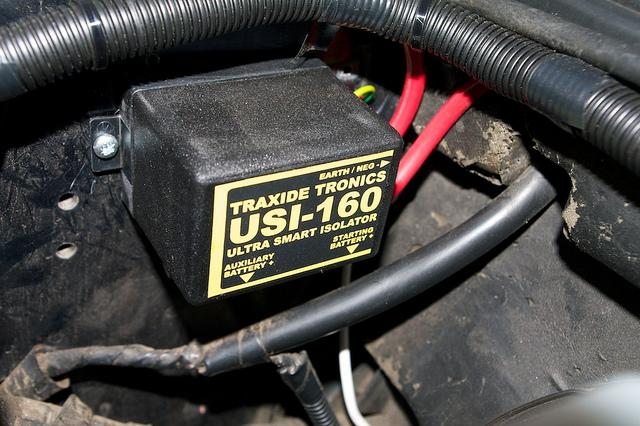
So in March I purchased a Traxide USI-160 isolator from Tim. It's been used several times just jury rigged with some cable and alligator clamps to connect between the batteries. Today was as good a day as any to install it properly.
I forgot to take photo's as I went, so I've put this together after the job was done.
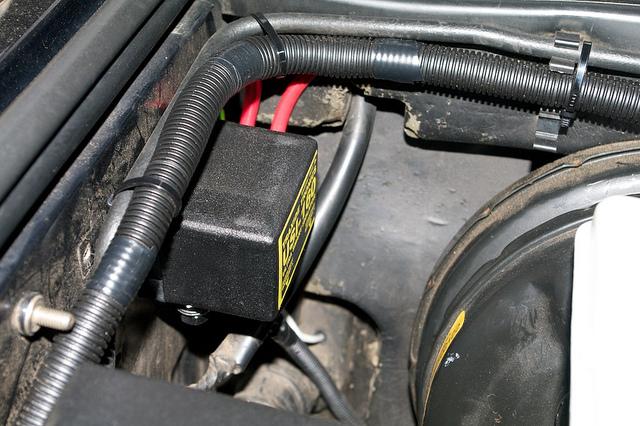
The space in the D2 Td5 engine bay is at a premium, so after much looking, decided the best spot was in the rear right hand corner next to the brake booster. I was going to mount it to the inner guard using the screws supplied, but found it impossible to drill the required holes due to no clearance to get the power drill on there, so I scrounged around the garage and found some galvo brackets the FIL had in a box. The one I used looked almost like this one .....
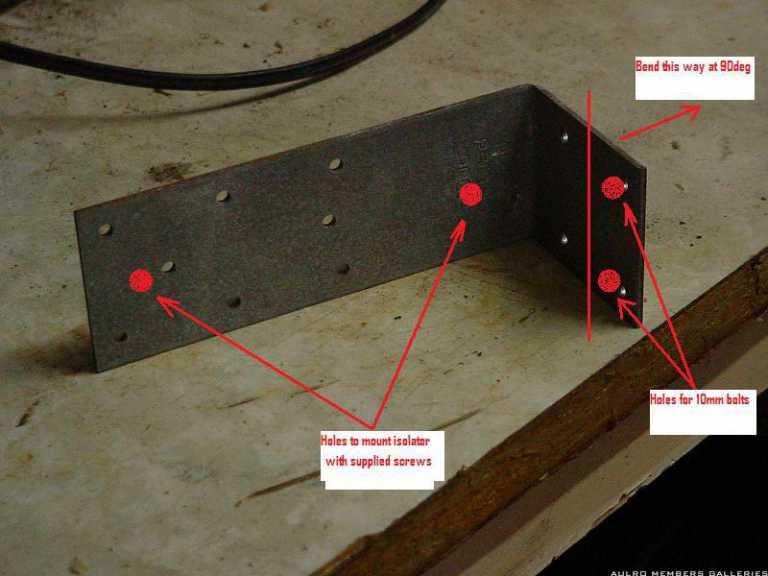
I bent the short end 90deg, and enlarged the two holes (that happened to be at the exact right centres!) for the bolts. The long side had long slots, which made attaching the isolator easy with the supplied screws. The picture above is basically what you need, with mod's shown to adapt to the application.
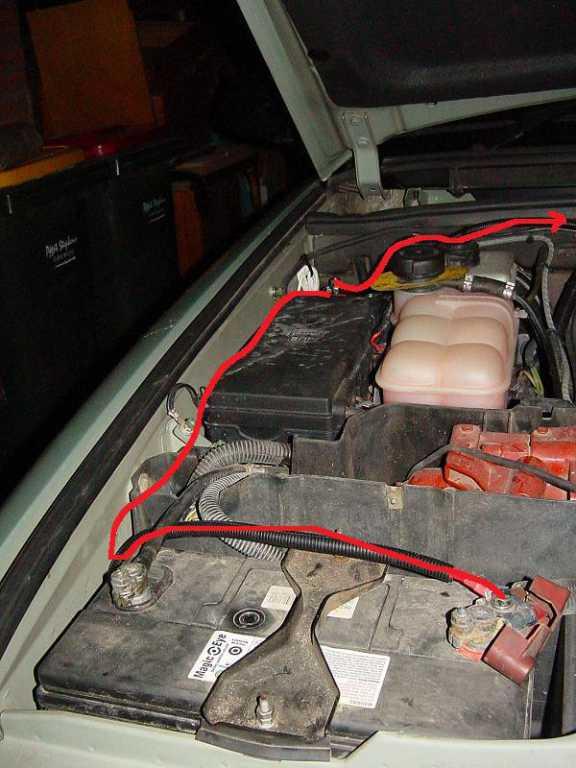
On the inner guard in the install position are 2x 10mm nuts attached to the guard. So 2x 10mm bolts & washers were used to attached the bracket, with the isolator already attached. The white switch cable was run through to the cab via the rubber grommet that sits directly under the isolator position. The earth for the isolator was taken from an earth point already close to the mounting position on the inner guard. The next photos should explain it ...
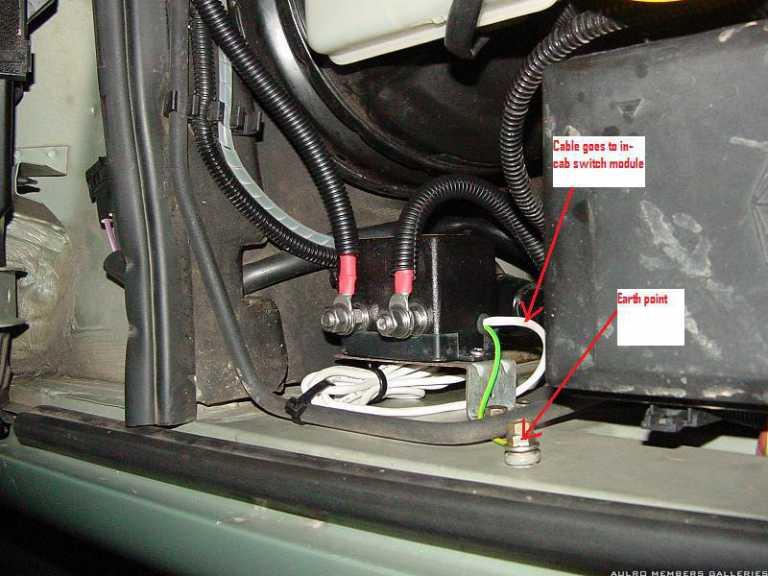
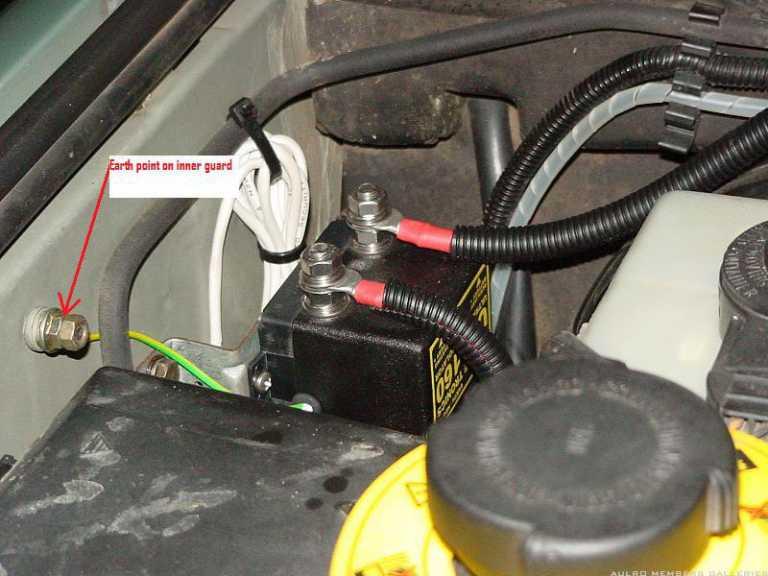
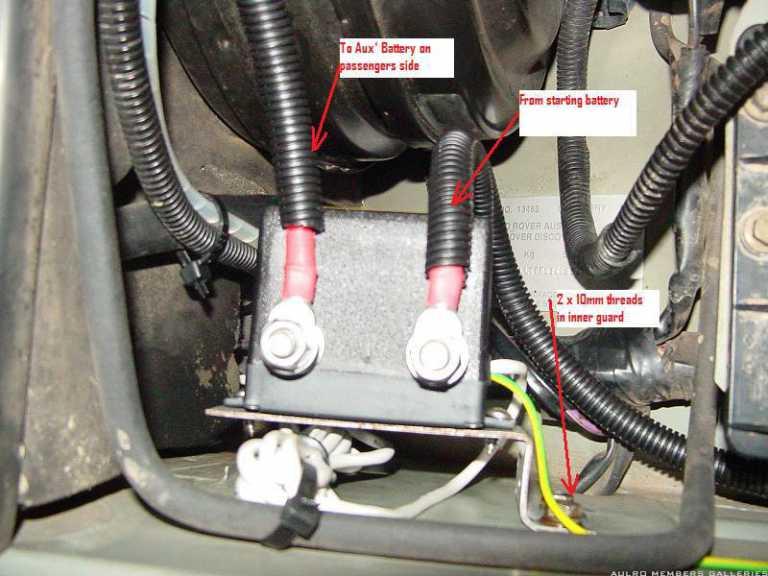
You can see the heads of the 2x 10mm bolts, the shape of the bracket and the earth point. This position really made the cable runs simple. A 1.2m cable from the battery to the isolator, run up the inside of the inner guard, past the fusebox, and a 2.0m cable from the isolator straight across the back of the engine bay to the Aux' battery.
The white switch wire has to be run through the firewall before mounting the isolator, as when mounted it prevents access to the grommit.
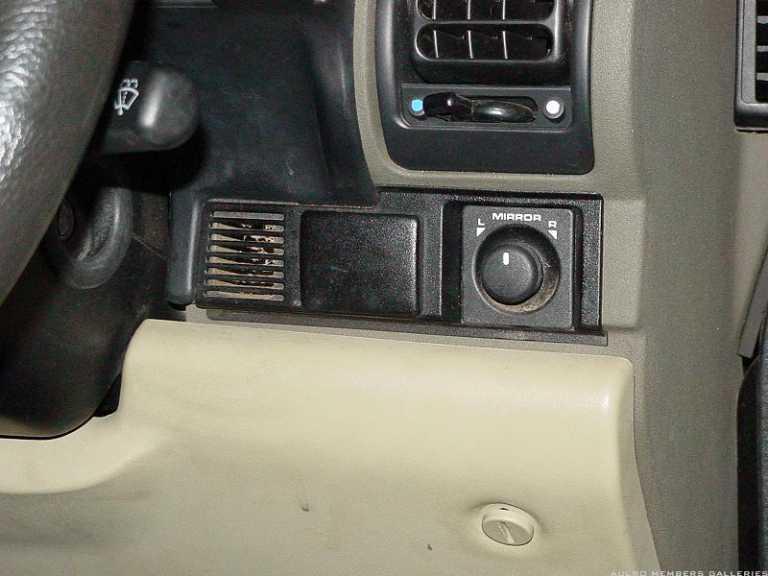
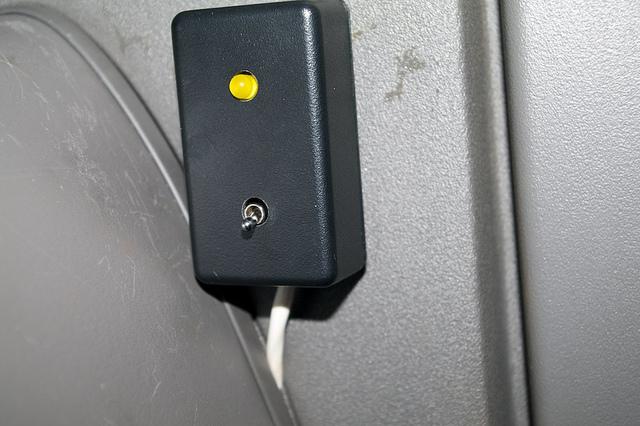
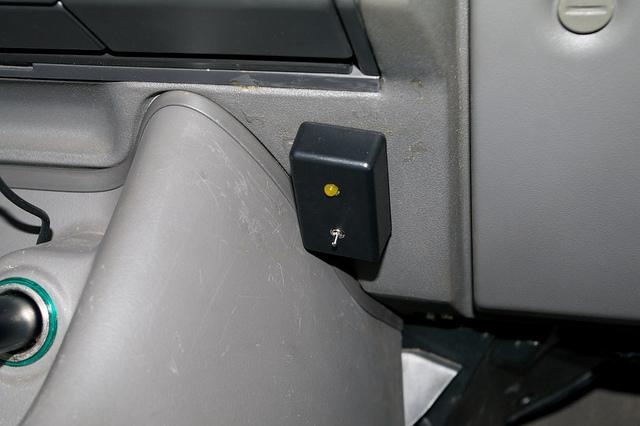
I was intending to mount the in-cab switch box into the blank cover for the headlight levelling switch position next to the mirror controls ...
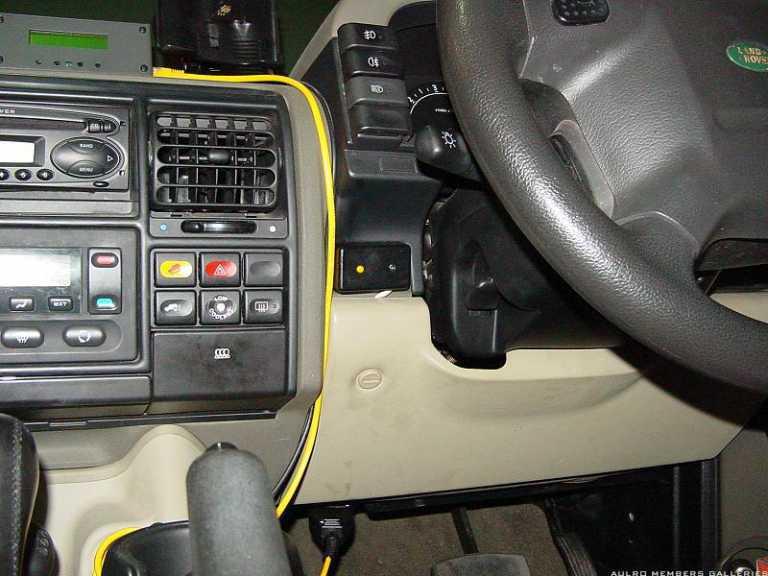
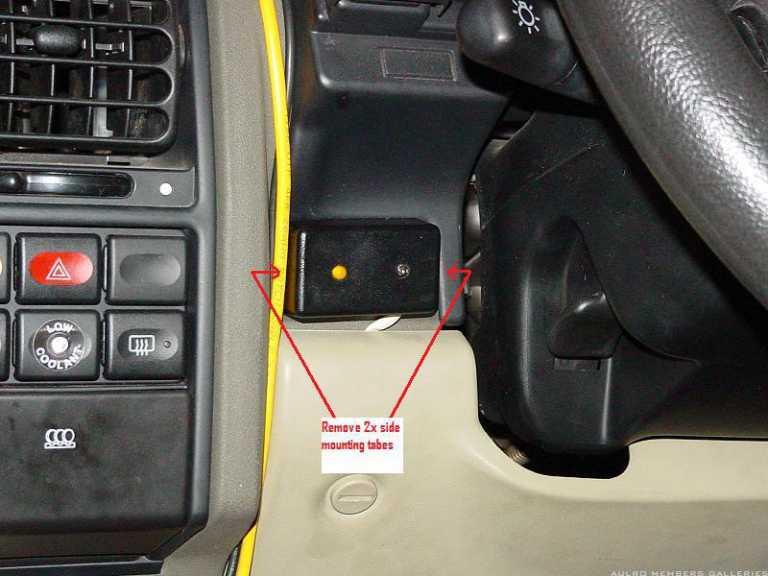
... but that was going to take some nifty engineering. I decided to mount it on the other side of the steering wheel, where there is a space that is a perfect fit for the switch box (after you cut-off the side mounting tabs). I used the velcro backing supplied with the switch box from Traxide, and chased the cable back under the drop down panel. Had to file an appropriate cable exit in the switch box to.
Run the cable across the firewall, tidy everything up with cable ties, and test the system for proper operation. All Good ! 
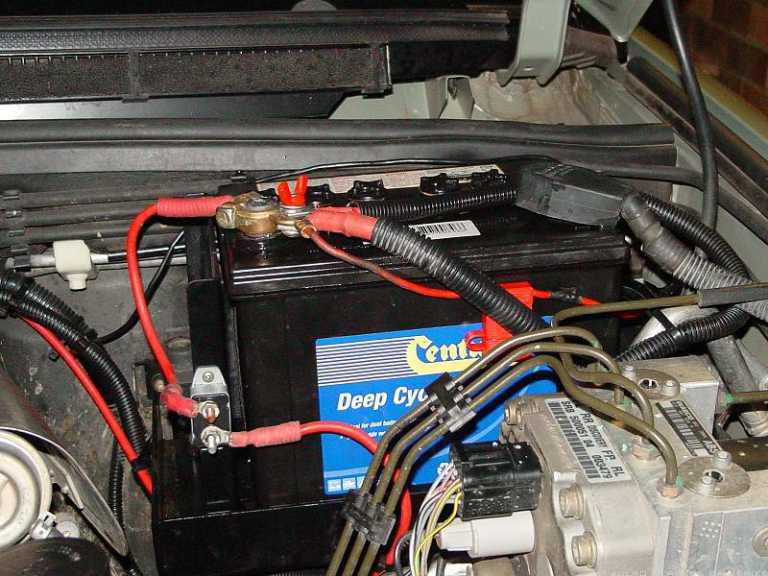
I've left the Surepower isolator and cables all in place, and just disconnected it at the starting battery as the Surepower isolator is installed under the ARB battery tray, which I've tried already once before to remove ... and gave up. Mine has rear A/C, and to get the tray out means removing the ABS modulator & plumbing ...
The red cable in the photo above without split tube runs to the trailer light plug (12pin), which I connect a 15m lead to which runs to the tent to run lights. Next job will be to upgrade that to a heavier cable, and mount an anderson plug at the rear, and run from that up into the cab for a few extra power outlets for lights and the fridge.
All in all a pretty easy job.
Kev..
2014 Isuzu MUX LST with fruit
2008 Isuzu D-Max
2015 Kimberley Kamper "Classic"
Gone ... 2004 D2a Td5 Auto "Classic Country" Vienna Green


 Reply With Quote
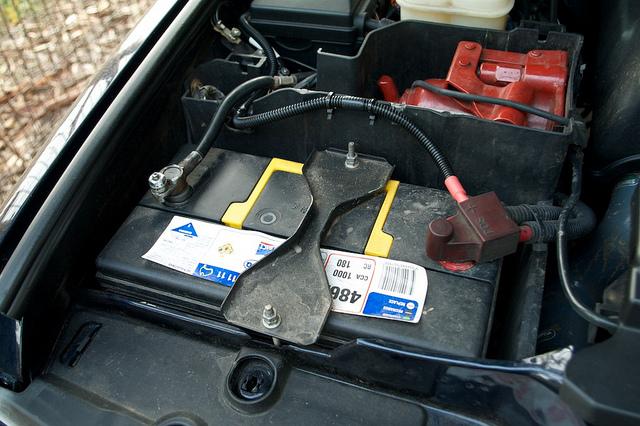


")
")


Bookmarks