Page 1 of 2 12 LastLast
Results 1 to 10 of 18

Thread: Defender 110 Seat Mod

  1. #1
    acidhawk Guest

    Defender 110 Seat Mod

    So after a 3000km trip into Mozambique I realised that my boys (13, 15) need to be more comfortable in the back of 'Churchill', my 2006 Defender 110. They needed more legroom and it would be nice if they had higher seats with a head rest. So after doing some research I decided to try and replace my front Defender seats with Disco II seats and move my Defender front seats to the back in place of the bench seat. This is the story of how I went about it.

    A few things to take note of:
    1. I love to try and do things myself first (It feels amazing to be able to proudly say 'I did that')
    2. I am not a craftsman I am a software developer.
    3. I will change my plan if necessairy however do feel it necessary to plan properly first.


    So here goes.

    I started out wanting to replace the rear bench seats with front seats from a smaller car. For a while I looked for seats from any small vehicle but soon found out that the scrapyard dealers pretty much want around the same price for 2 front seats. I looked for Uno seats, Hyandai Accent seats, etc. all for around R2000 for the pair. My wife asked me why I just didn't get Defender front seats so that the car would not look odd with vastly different style seats. I liked the sound of that so phoned British 4x4 and asked about Defender seats. They quoted me around R900+ each but said that the front Defender seats are quite rare and that they may only had 1 available at the time.

    During the time I was looking for seats I came across a few posts of people making changes replacing the front Defender seats with Disco II seats and putting the Disco II bench (60/40 split) as a replacement for the Defenders bench. Again I contacted British 4x4 and was told that they had a small mountain of Disco II seats to pick from.

    A plan started to emerge, I would put the Disco II front seats in front and move my Defender front seats to the rear in place of the bench, and between the seats I would put our Waeco 40l fridge.

    A stop off at British 4x4 made me realise that finding seats was not going to be so easy, even though they had about 100 seats there. I wanted manual seats, without armrests, in matching material. I couldnt find a pair so out of despiration I went into the yard and looked through the scrap. Under a pile of bits and pieces and spare parts I found a half leather and half suede set. They were very dirty and there was a little tear on the one side of the drivers seat, but in all they looked like they could do the job. I got one of the guys to help me remove them from the trashed skeleton Disco II body and when the guy behind the counter saw them ... he tutted and said "Ja, they are not in great condition give me R600 each for them". I had had some time to go over them in the yard and they were actually not in such bad nick, they had all the knobs and they both seemed to be in good working condition. I thought the price was fair so loaded them into 'Churchill' and headed back east to start the conversion.

    Here is what they looked like when they came home.


    I needed to grind off the extra supports under the seats of the Disco II seats which was no problem. The nice thing was that once that was done I could take the passenger seat out of the Defender and put the Disco seat in place to see what it looked like. I was starting to get excited. I needed a frame to hold the seat, something that would allow me to get to the compartments under the seat. I had seen posts of people putting the seats on a hinged frame and decided that I would do the same. Unfortunately the Disco seat runners do not line up with the Defender seats so I made the following, (No comments about the welding please... my grinding is getting loads of practice though )

    With the extra supports removed.


    The 25mm square tubing goes behind the bulkhead lip on the hinges and the supports going forward (the ones under the seat rails) go over the lip. I decided not to cut the car body at this point so the seats are a little higher than the origonal Defender seats. I made 2 positions that I could fasten the seat onto the frame so I could adjust the placement of the seat easily if needed (I was worried that the runners would be too far forward in the first position I setup).


    Here the frame is in position in the passenger side. I riveted the hinges to the body.


    Fixing the frame to the Disco II seat. This was done with small nuts and bolts.


    Testing that it all fits.


    Painting (Hammerite hides my pathetic welding and my excessive grinding) and actually they didnt turn out too badly.

    Fitted in the vehicle showing just haw much they fold back.

    Some things I decided during the process.

    1. I would simply bolt the front of the frame down. I always keep a toolbox in 'Churchill' so to lift the seat I simply take the ratchet out and remove two bolts, this way the front seats are more secure, or that is my feeling anyway.
    2. I decided to keep the seatbelt points from the defender and remove the ones from the Disco II seats. This was done for safety reasons. I didn't want the pressures during an accident to be put through the tiny hinges under the frame. this did mean I needed to slightly bend the plate holding the seatbelt to the body of the Defender to make a little more space for the seat, but ... safety first.
    3. I needed to add a shim under the seat on the drivers side. (I must have stuffed up my measurements)


    In the end they turned out to be VERY comfortable if a little higher. My driving position is more comfortable and I don't get a pain in my left knee anymore. My wife was worried that she would be too high and that her legs only just reach the floor so I put a block of wood under her feet under the mat and she is now also very happy with the mod.

    So that was all well and good but the project started by me wanting to make my KIDS more comfortable. I needed to make a frame to fix the Defender front seats to in the back.

    I started out wanting to chop the wheel arch so the seats would be lower but started getting nervous when I saw just how badly I weld etc. I also started to think that if I ever decided to sell '
    Churchill' I may be easier to have him back as standard and not have to explain why I chopped the wheel arches and how it won't effect articulation etc. I also soon realised that the Waeco 40l fridge was about 30mm to big to fit between the seats so decided that I would simply move the seats more towards the center for comfort purposes and possibly put a cubby box between the now back seats.


    The start of the frame (Again please hold comments about any welding/grinding ... unless you want to teach me how to do it properly )

    How it will fit into the rear. The second pic has the seat temporarily in place.


    The frame complete for now. I will fix it to rivnuts I put into the top of the flat section that the frame will rest on.


    As you can see I kept the seatbelts in place so the frame fits under the steel brackets that hold the original seatbelts.


    Getting a coat of Hammerite.


    Installed


    With the new Escape gear seat covers...

    The conclusion is that the kids have WAY more legroom. The hight of the seats is not a problem yet, as the tallest in my family so far I am comfortable in the back. My wife had the same complaint that her legs don't comfortably reach the foot well but I have a new project to cater for that.

    I want to make a box that I can store some recovery gear in that will go in the footwell to the same level as the base where the frame currently rests on. I will make to folding flaps that I can lift to have easy access to tow ropes etc.

    I also want to close the frame under the seats so I can use that as storage also. I am looking to rivet some galvanised sheet metal to the frame and cover it in the same carpet as the base. Nice that the seats come apart and I can have easy access to what will be a compartment hopefully soon.

    I am very happy with the outcome and I can say 'I did that'.

  2. #2
    acidhawk Guest

    Part II

    This is the 2nd part of the mod ... which I completed a couple of days ago. I included the first part to explain my first steps.

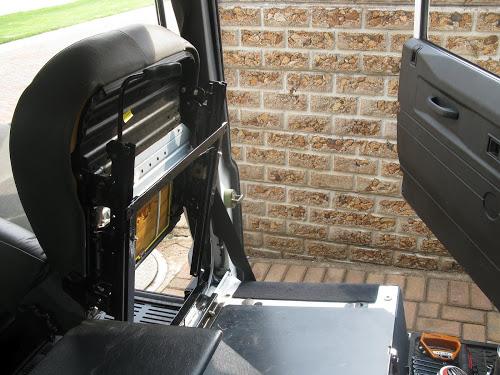
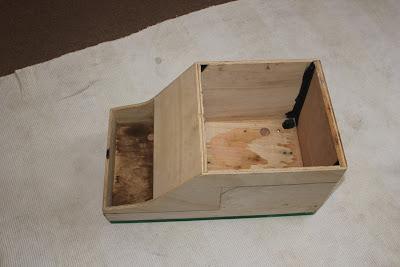
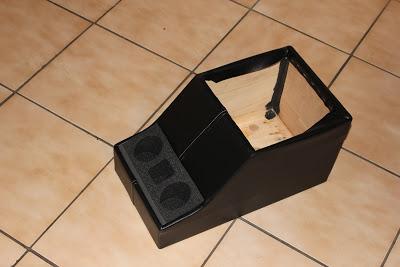
    I created a box for the foot-well so that my kids legs could reach the floor comfortably. They were still small(ish) the seat height was not a problem. When others got in they pretty much looked directly into the roof which for me wasn't a problem because it was mainly my kids that sat in the back whenever we went anywhere. The trouble is, that the kids didn't stay the size they were when I first did this mod. They also started looking into the roof and the box ended up coming out because it was just the wrong size. I had to face it. I needed to modify the frame and lower the rear seats. This meant I would have to cut into the wheel arches.

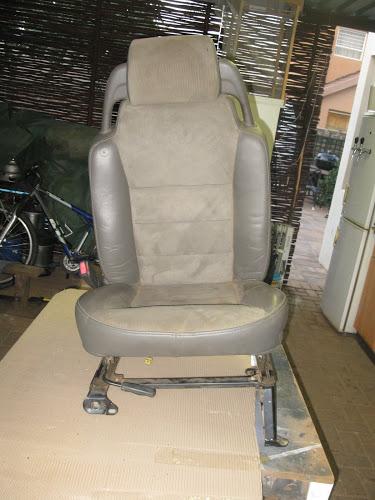
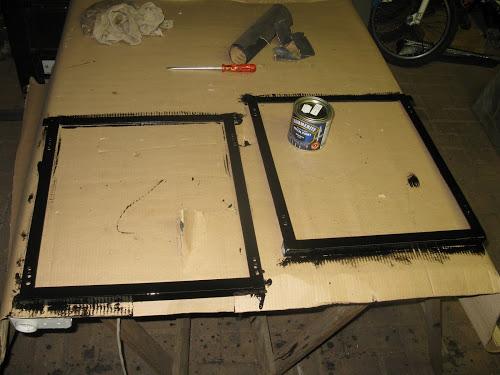
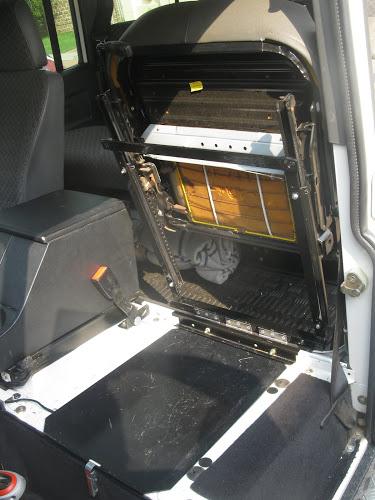
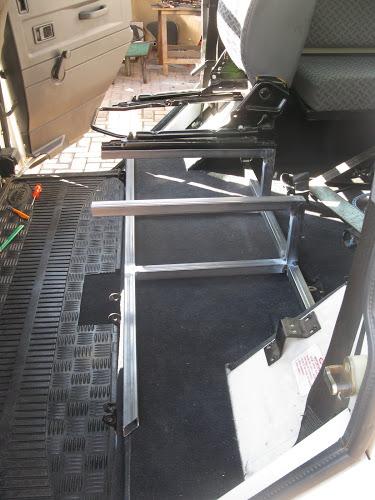
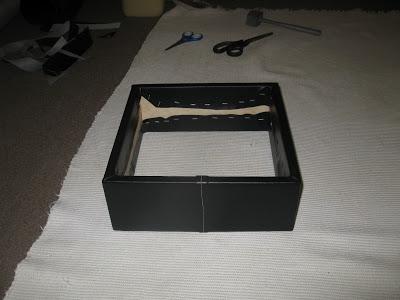
    I started by removing the seats and frame. I then measured CAREFULLY. I didn't want to stuff up my car when I started hacking at my wheel arches. Before I cut the wheel arches I decided to build a kind of box that would fit under the rear seat frame (which I would modify slightly to lower the seat height). After measuring twice (my grandfather taught me measure twice cut once) I started to build the boxes.

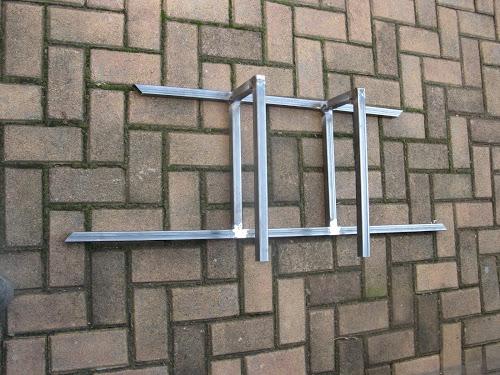
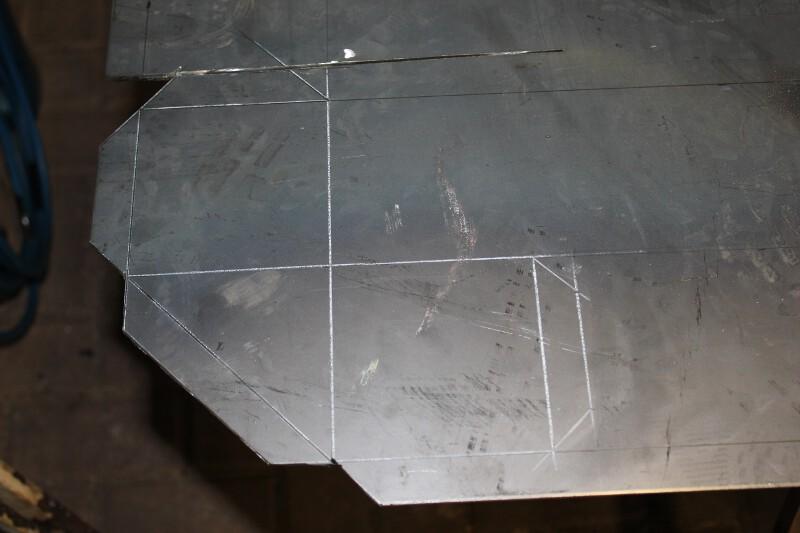
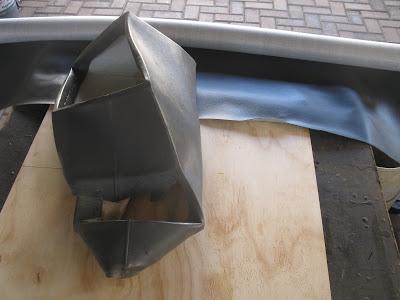
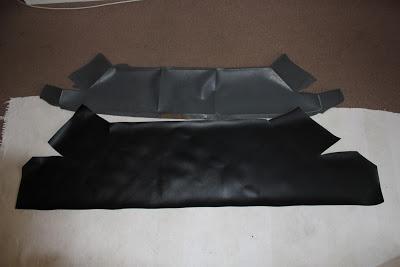
    I used 3mm sheet metal (waaay strong enough) and started marking out the pattern. I freehanded the pattern a few times before, to get an idea of what was needed, and then I settled on a plan. This should give you an idea of wht I was trying to achieve.


    I didn't have a metal break so I had to make a plan with bits of steel I had lying around the garage to try to bend the pattern. Bending 3mm sheet metal proved to be quite challenging. I ended up having to score along the bend a little to get things started. In the long run it would have been better to build a proper metal break.

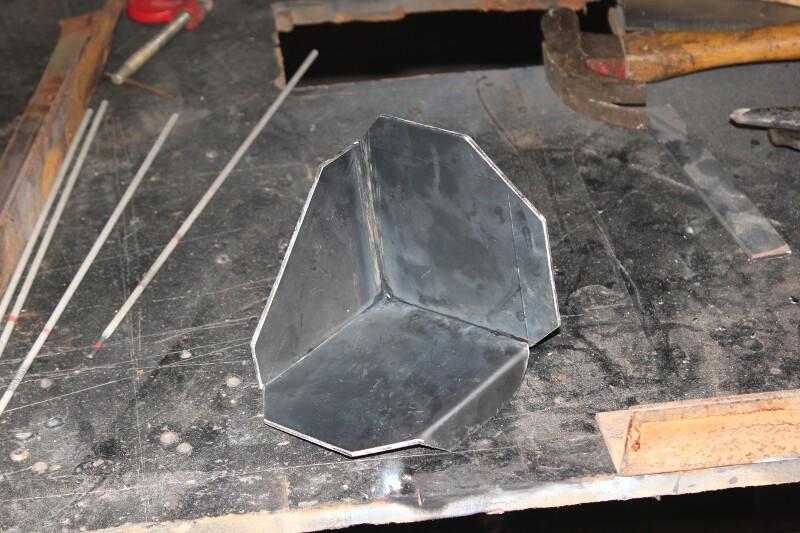
    So I bent on one line and had to weld the join below you can see the box starting to take shape. Actually I started trying to weld without bending but that proved to be far more work.


    With a few more welds and some holes to attach it to the wheel arch gap I would cut shortly.


    I was extra careful to make sure I had one for the left and another for the right hand side.

    (I was so excited .. I had thought of everything.....)

    I was just about to take it to the wheel arch (which I hadn't cut yet) and I realize that <strong>IT IS NOT WIDE ENOUGH</strong>. The seats would not fit. I was so careful to measure everything square that I didn't think that the drop size and the recess size 100mm each was not the same as the width in between the door and the edge of the wheel arch. AAAARRRRRGGGGGGGHHHH !!!!!! I would have to start again. However I was getting quite confident in my welding .. which in fairness is terrible, but is improving all the time so I figured that I could simply add a piece in between the edge flap and the flat part.

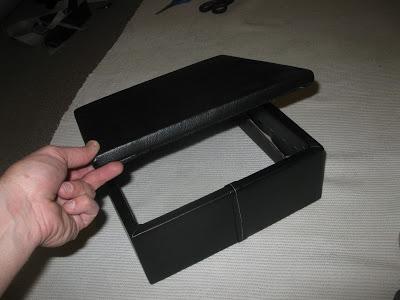
    Excellent, a plan was formulated and I started cutting and welding. I was so happy ... I cleaned up my weld and shot some Hammerite paint onto my new seat recess.

    If you loook carefully at the part on the left you can see the join.

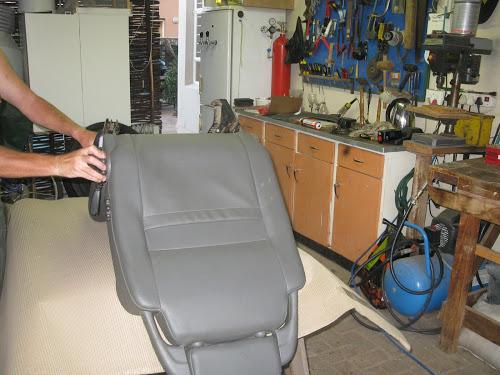
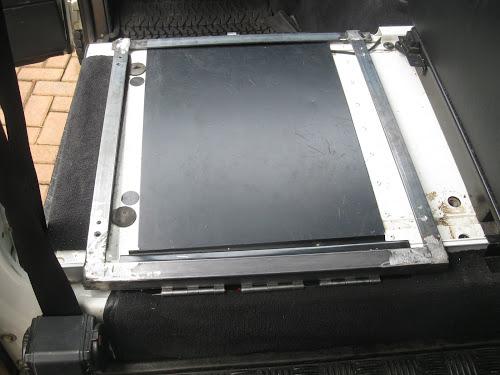
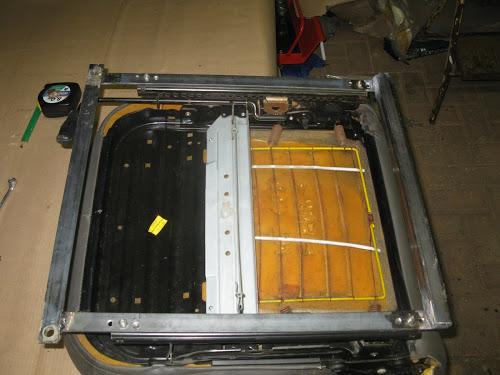
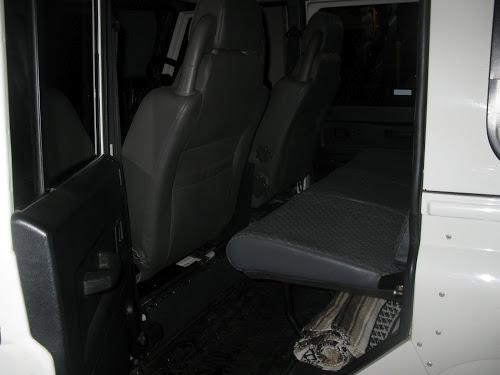
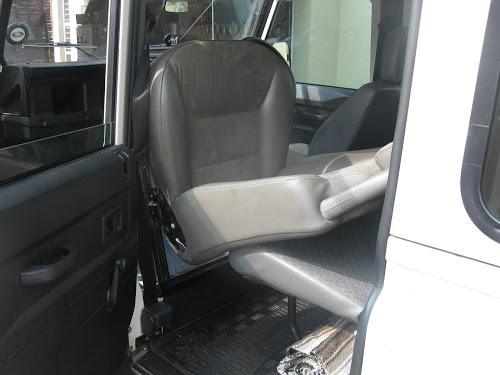
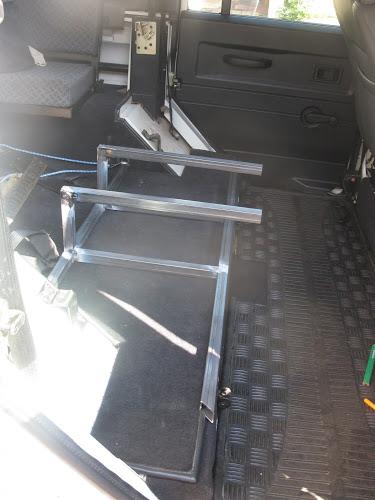
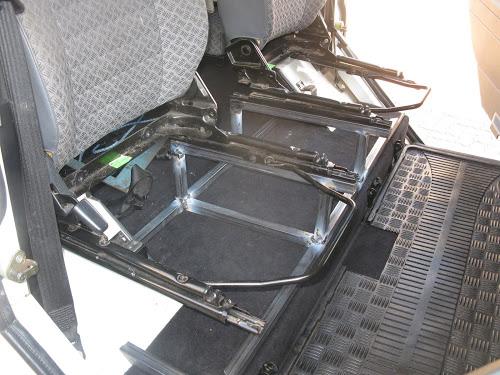
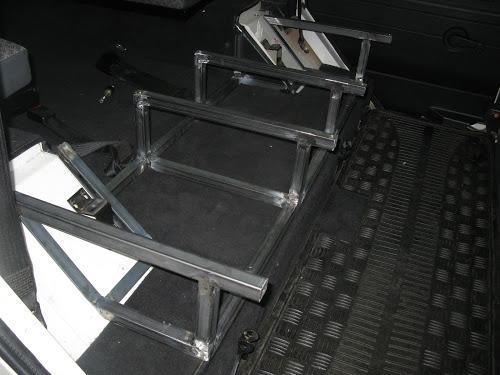
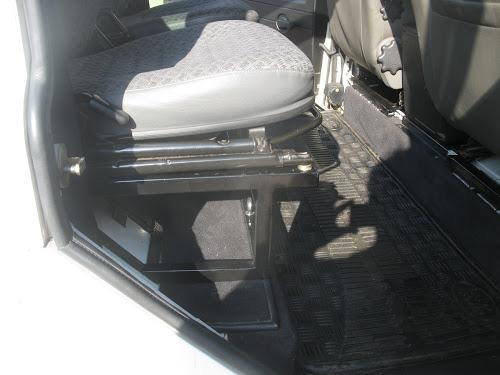
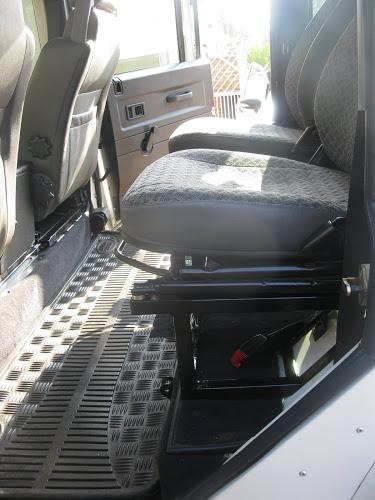
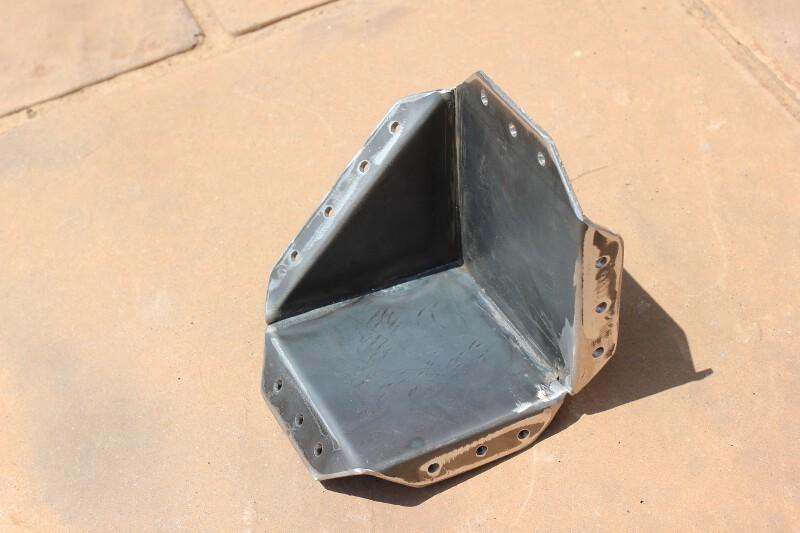
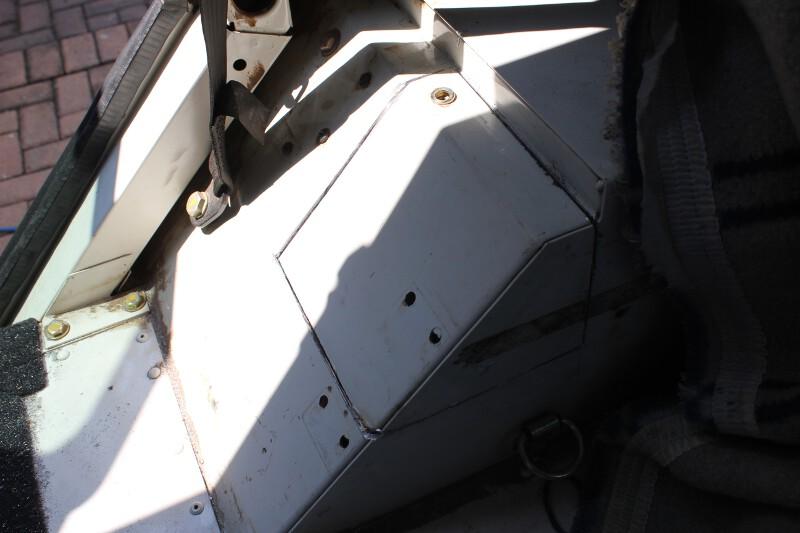
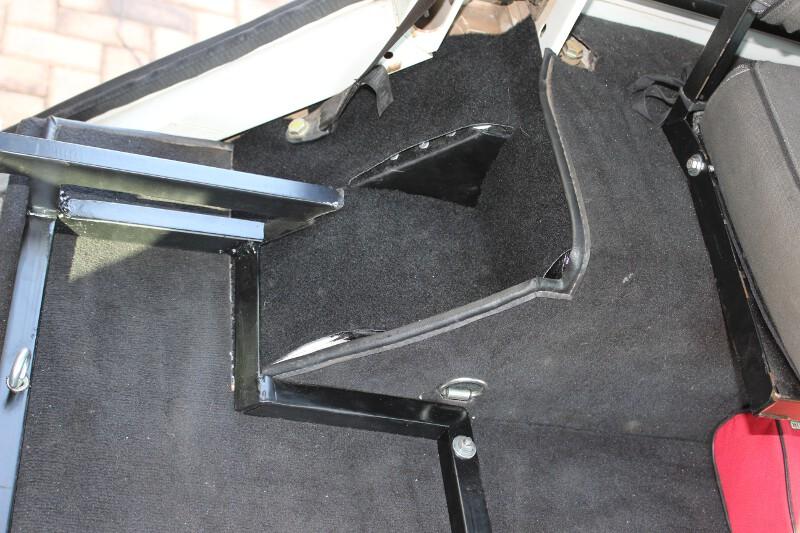
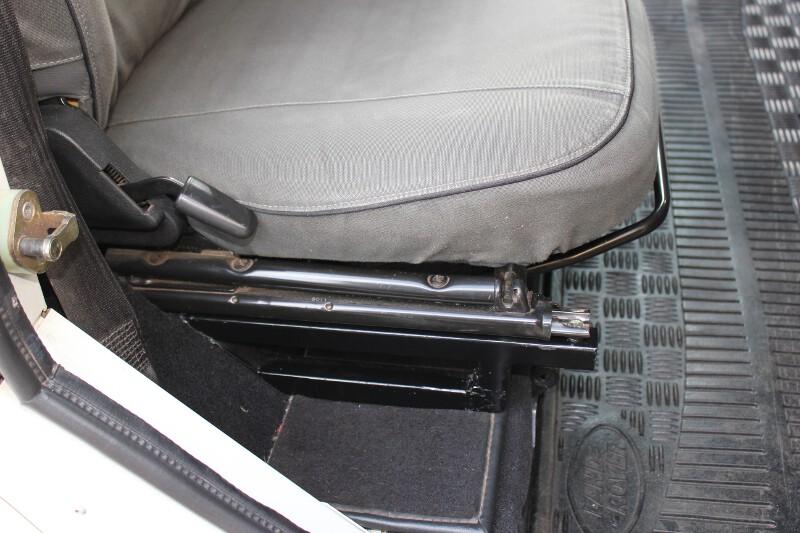
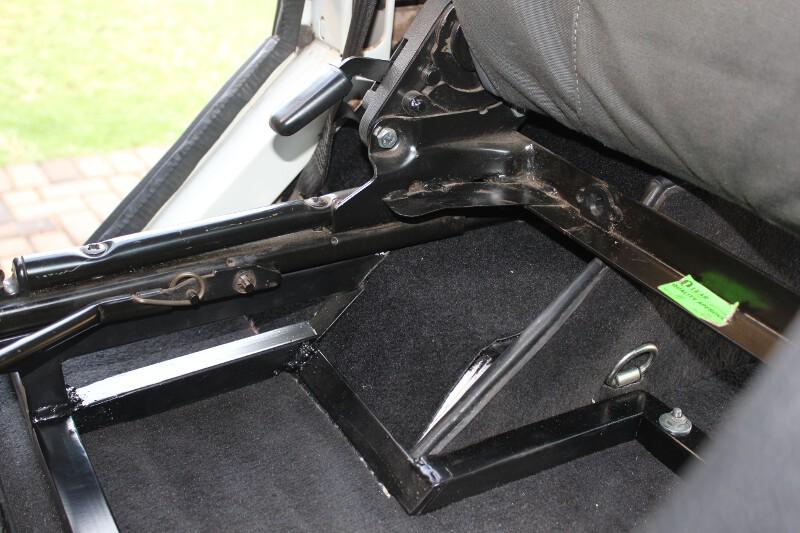
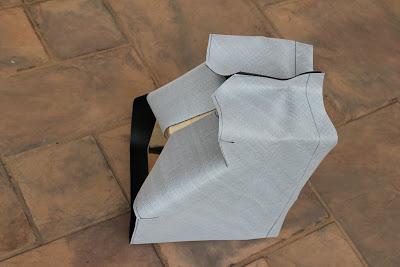
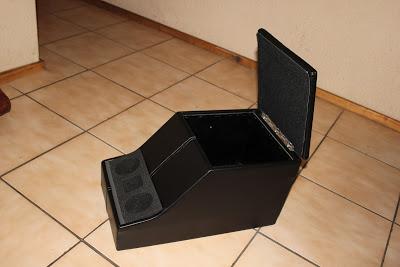
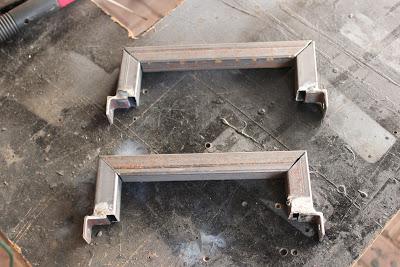
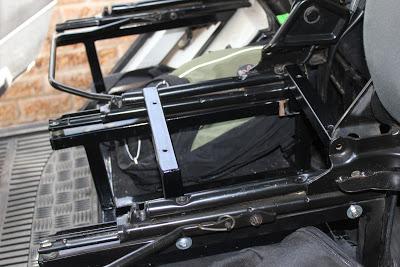
    With the recess parts and the modified frame, which is now lower.


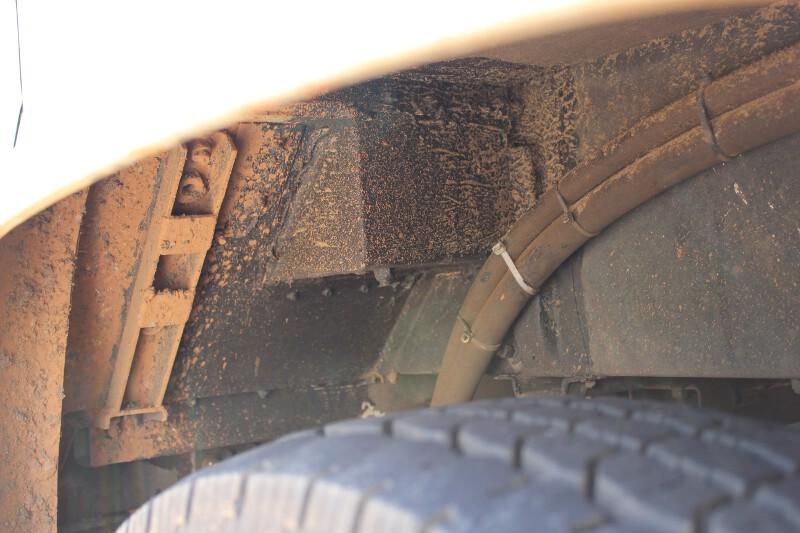
    Excellent .. time to mark the wheel arch and cut. This is the VERY SCAREY part.


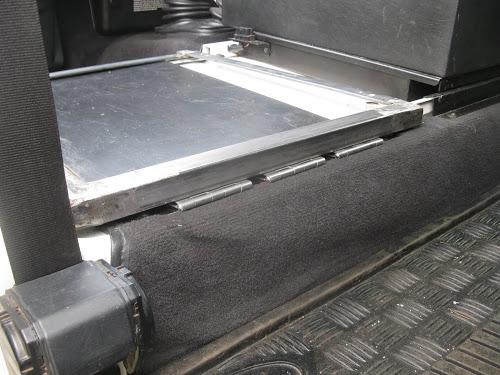
    I drove like this for about half a day

    It is uncomfortable to ride like this ... you realize just how little is between you and the road.

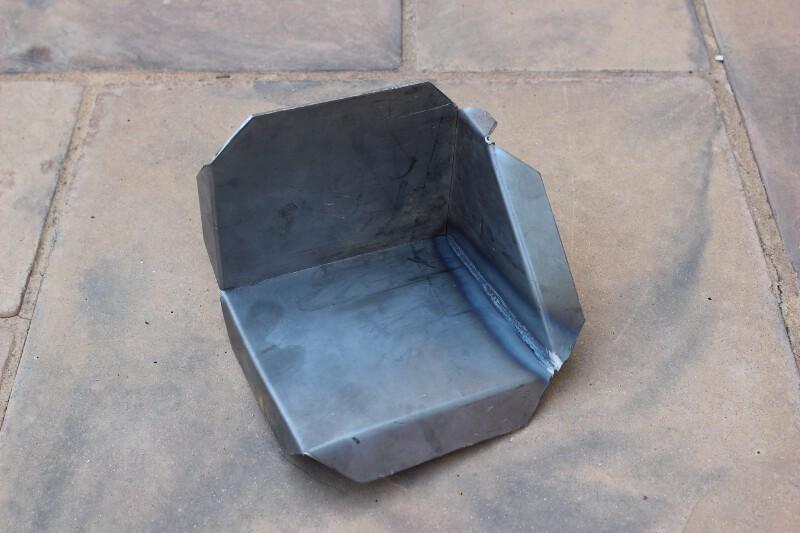
    BAH !@#@%$#^$&*!!! ... I messed up AGAIN... so much for measuring twice and cutting once... I didn't take into account the flat part at the top of the wheel arch. I had to make the recess box again. This time I really paid attention and learnt from my previous mess ups.

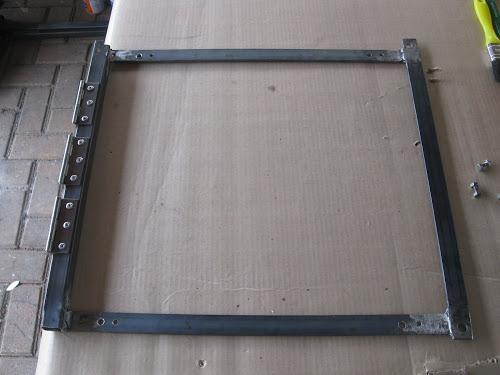
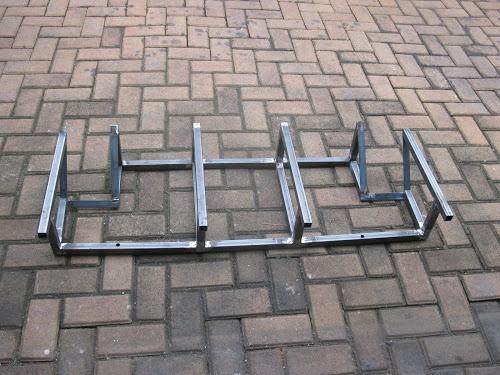
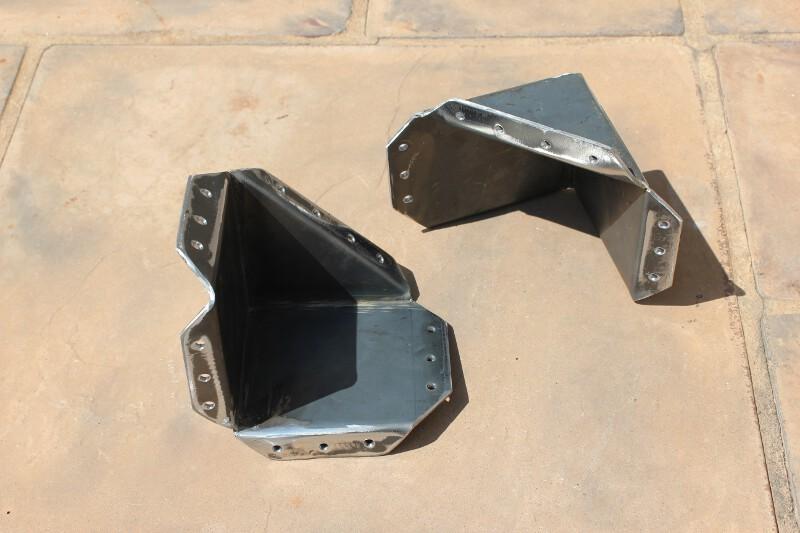
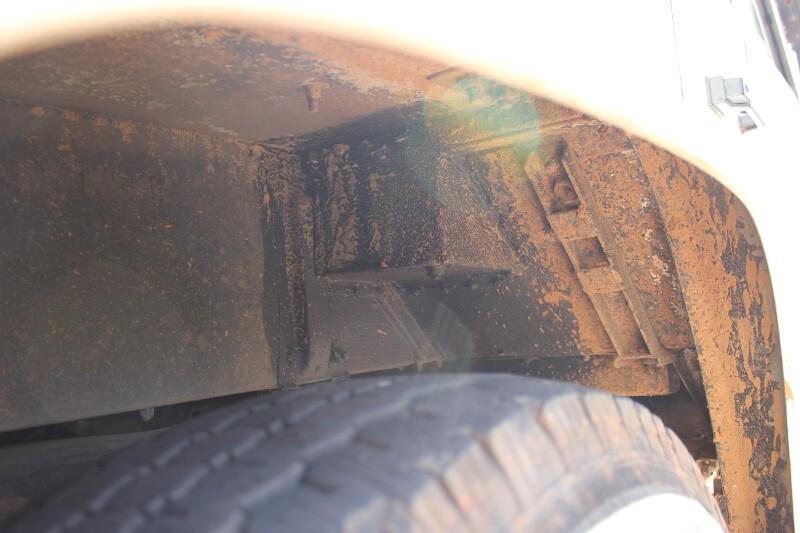
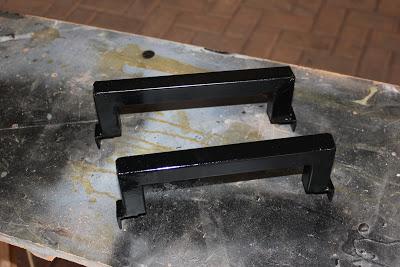
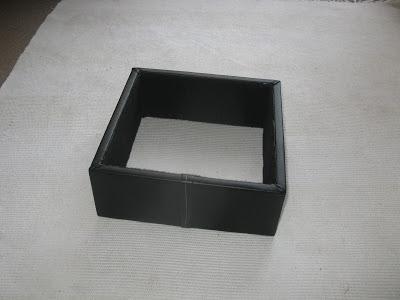
    Below is the new (and I must say far more professional looking recess boxes. No mistakes this time.


    Even my welding has improved for these parts.

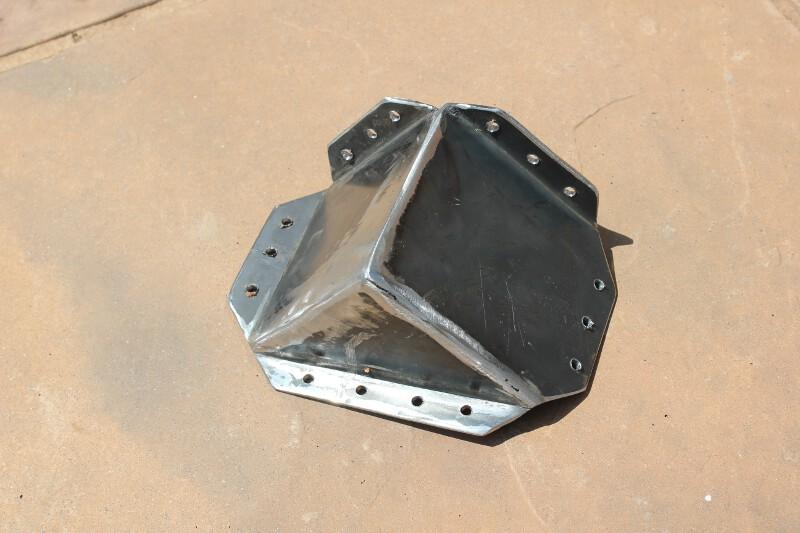
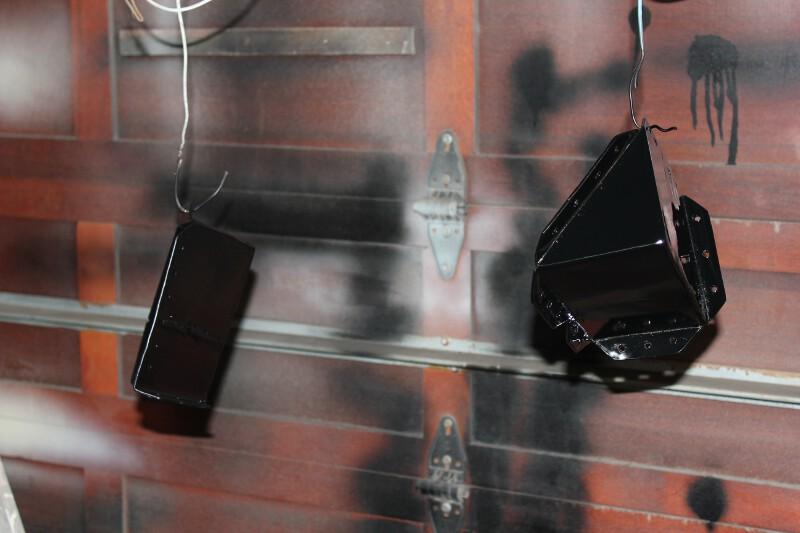
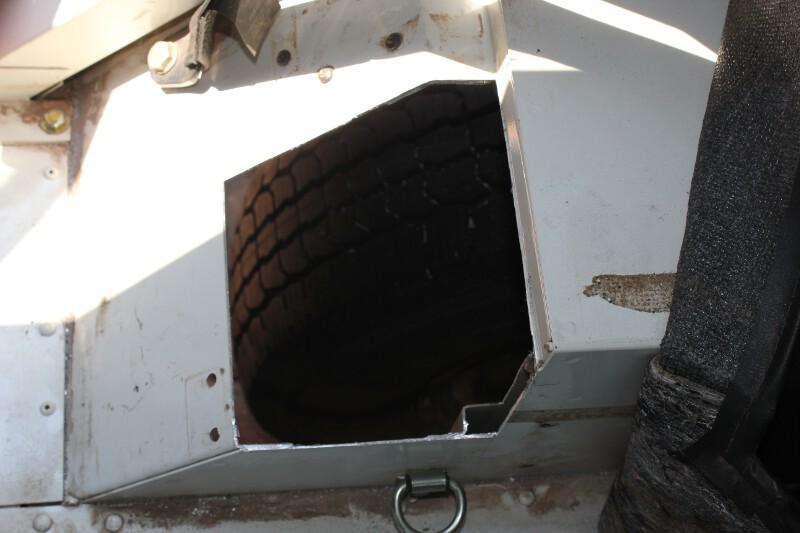
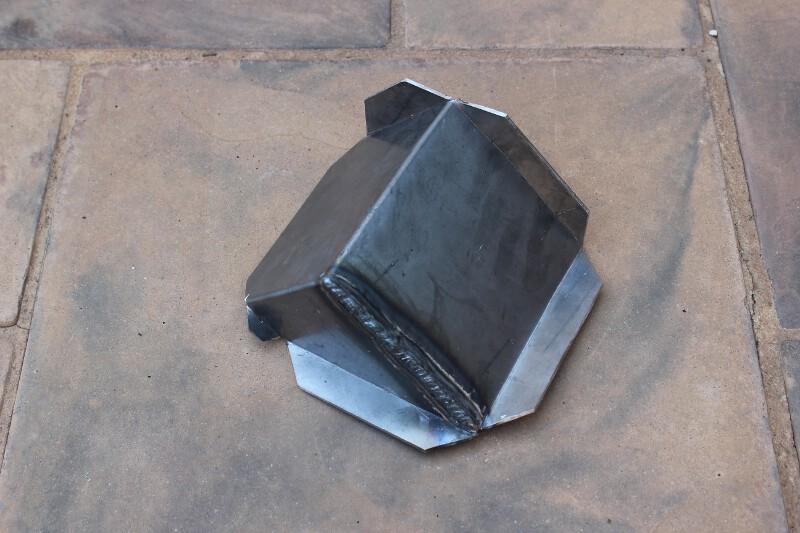
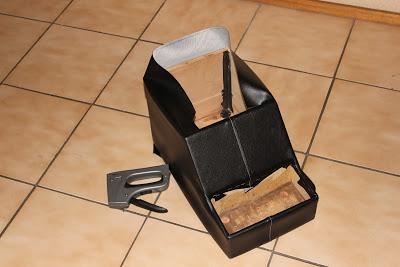
    I shot more black paint. This time taking care with the under coat not to hand paint it but rather to use the spray gun (you can see I didn't have the paint lines that I had in the first attempt). It fitted into the cut wheel arch section like some-one who knew what they were doing had made it. I riveted it in place and added a carpet section so it make it look almost factory built.

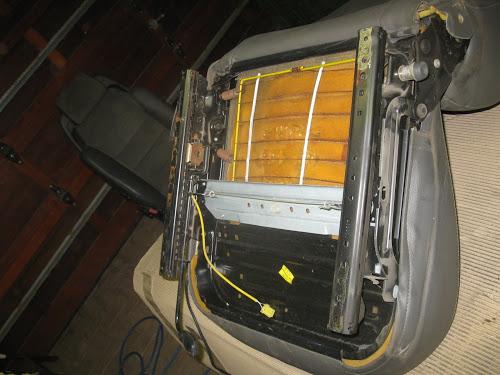
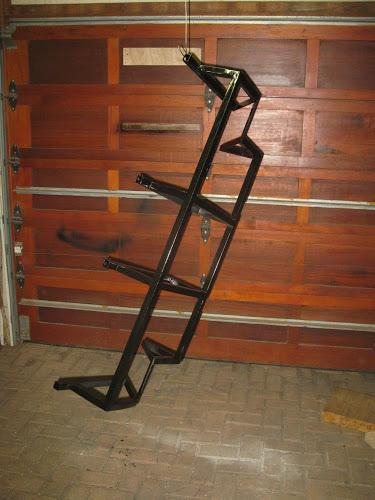
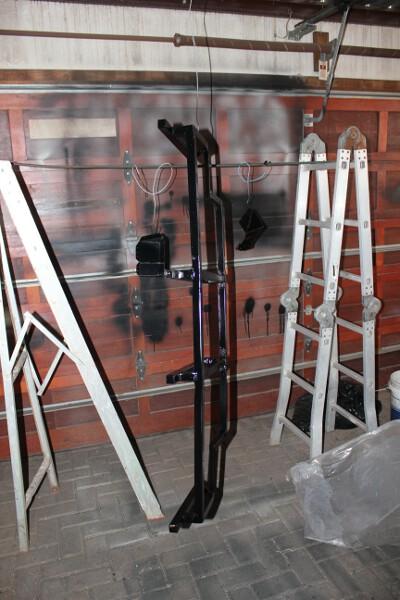
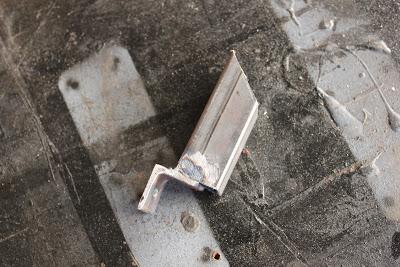
    No comments on the frame welding please ... I actually did this first and let me tell you <strong><em>welding in an angle kicked my @ss and stole my lunch money</em></strong>. I have subsequently removed the frame and cleaned up my mess ... this is an old photo.
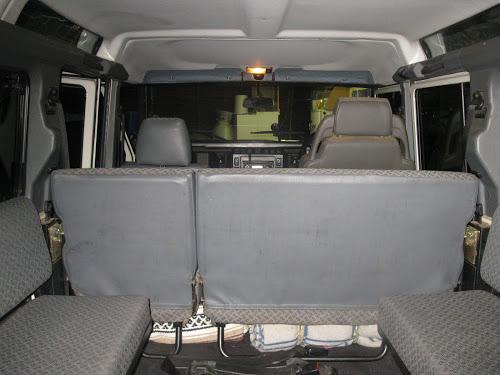
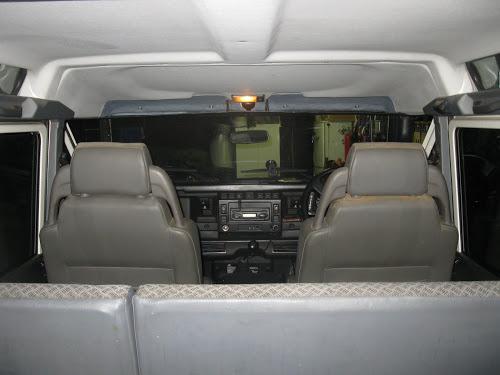
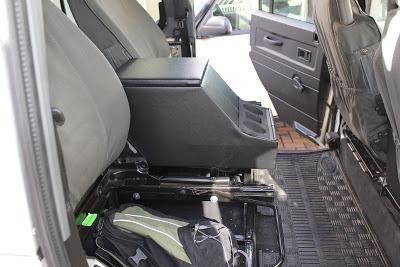
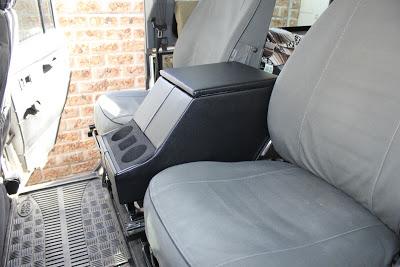
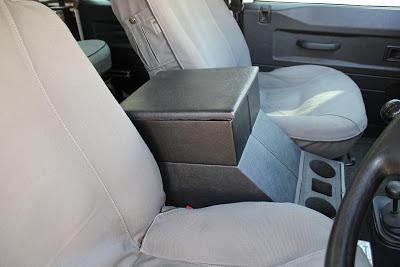
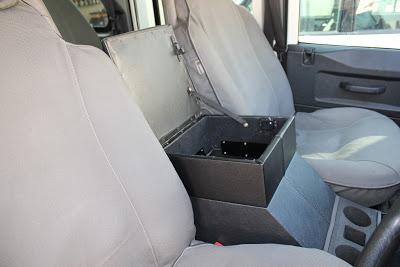
    The end result.


    Again ... no comments on the welding ... it has been fixed.

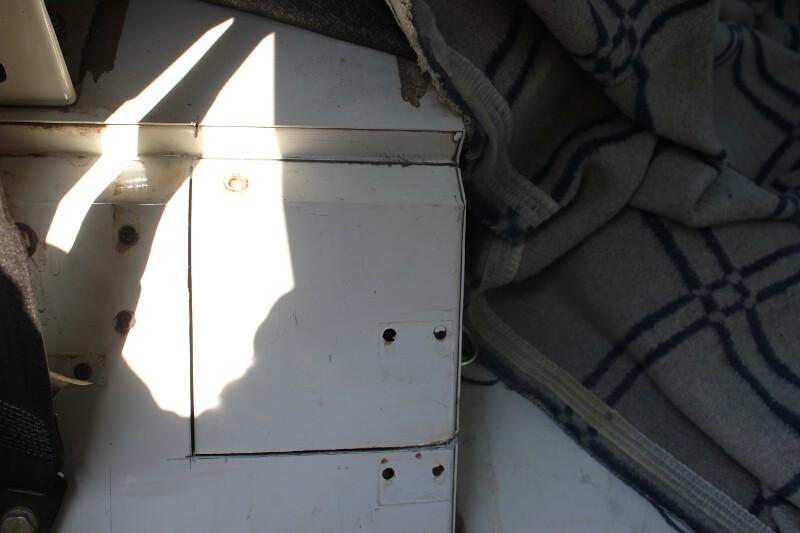
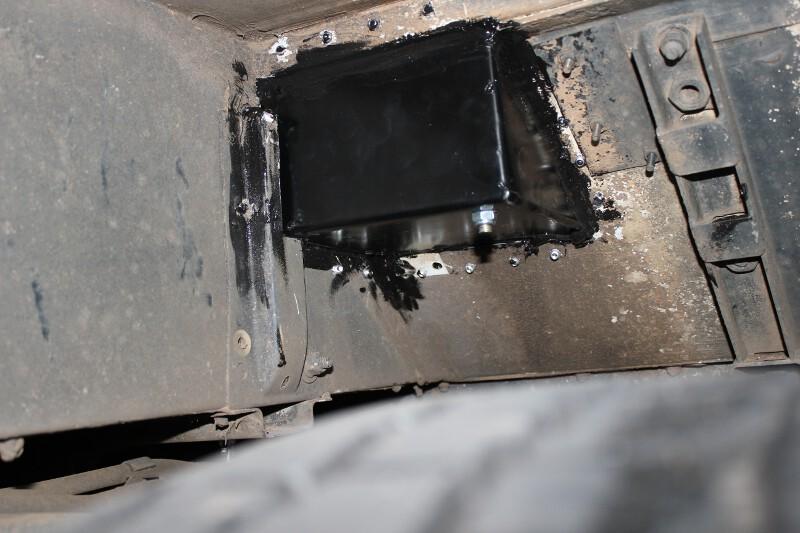
    The view from under the wheel arch. I used auto silicon to try to stop water getting in from the road (although there are so many holes in my Landy, which I keep finding, that this was for my peace of mind more than anything else)


    I also painted on a thick bakkie liner paint that will protect and seal even further. It turned out pretty well ... and as you can see in the pics this has been tested in water and mud successfully.


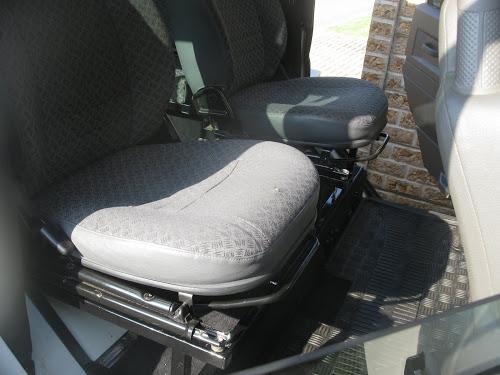
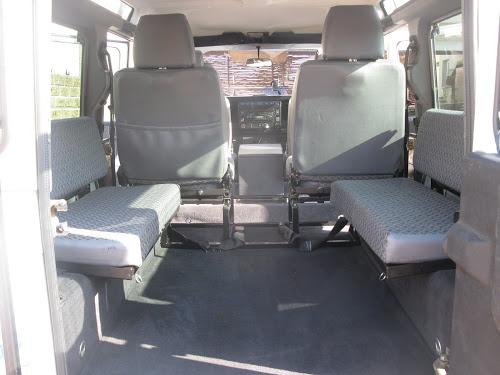
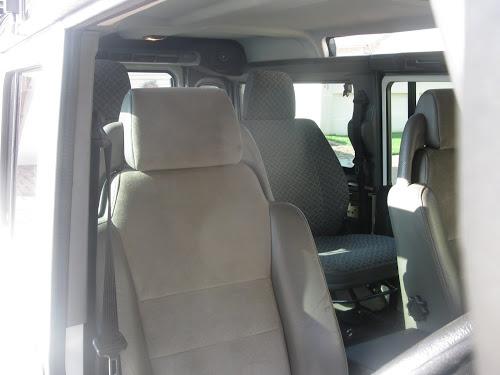
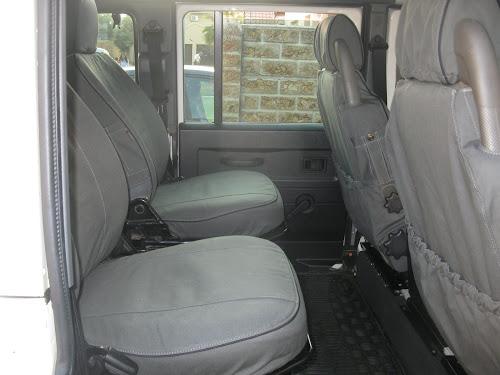
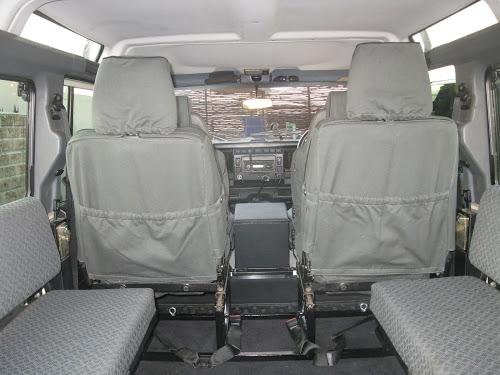
    The result is a resounding success. The lads are VERY happy with the new seat height. Game viewing is now FAR better, even for full grown adults. The leg position is also far more comfortable and so far everybody that can compare the old mod with the new one approves with the change.

    I learnt a huge amount from this modification and even though I fought and got VERY depressed when I had to start over I am still happy with the result and the experience I have gained.

    One other thing. My articulation has not been impacted for the kind of driving I do. I did reverse up to a ramp to see how close the wheel would come to my mod but there is still loads of space. My vehicle is more for over-landing than extreme 4x4 use hence the requirement for comfort. I have the standard suspension that came with the vehicle.

  3. #3
    acidhawk Guest

    Rear Cubby Box

    From the start I wanted to put a cubby box between the defender seats in the rear. You may remember that I didn't want to cut the wheel arches when I did the First Seat Mod in my defender (I may be having second thoughts about that now... watch this space) and I moved the seats in from the doors to make it a little more comfortable. Problem is I didn't measure properly (Grrrrrr) and was about 10mm too narrow for the cubby box in its unmodified shape to fit.

    LandyLuvver (an Indie near me) very kindly gave me a cubby box without a lid, that he had lying around at his workshop. So I didn't even have to build one. I got it home and carefully pulled out the cardboard linning inside.


    Removed the vinyl - I had some black vinyl from before (Overhead shelf) that I wanted to cover the box in (or try anyway). I routed off about 5mm on each side - just enough to allow the seats to still move on their rails and added a stronger bottom.


    I then took some black vinyl and copied the shape of the old piece I had removed.


    Put it inside out around the box - stretched it a bit, and pinned it.


    I then sewed a "French seam" on the lower part.


    This is the part in the front of the cup holder section. With this done I went back to the box and tried to fit it on. Perfect! Now I just had to pin the angled part and take that upstairs to the sewing machine for another seam. When I had this complete I started stapling the vinyl to the cubby box. I was really supprised at how good it looked.


    I had to make a lid and cover it and put a hinge on. I sprayed the inside cardboard and put it back into the cubby box and had completed the box part of the job. (that part took me about 2.5hrs)


    I then needed a bracket to attach the box to the frame between the rear seats.


    Off to the spray booth (actually I just use my work table)


    Installed the brackets in the car (I needed to put a shim (small square of masonite) between the bracket and frame on each side.


    Then fixed the cubby box to the brackets


    There you have it. The cubby box with the seats back in. The family are really chuffed at the result , and best of all the whole thing cost me next to nothing becaused I used leftover stuff from previous projects.


  4. #4
    acidhawk Guest

    Follow up to Seat Mod

    This is a little follow up to the Seat mods I did to Churchill (my defender). I moved my defender front seats to the back, removing the bench. I put Disco2 seats in the front. You can read more of the story here.

    What we found is that the Disco2 seats are higher than the older defender seats. So I had to come up with a plan to raise my cubby box. Raffiki have an extender for about R600 which was more than I was willing to spend. I had some old ply-wood lying around as well as some vinyl from a previous project (Overhead shelf) and decided to make myself my own extension. The job took me all of about 30mins... and yes I did everything including the sewing. That is a very simple "french" or "flat felled seam" boys ... google it


    I attached the lid from the original cubby box, and move the latch and hinge into the correct place.


    I glued some audio carpet/felt to the inside of the extension to finish it off nicely.


    I had a side panel from an old computer which I cut to make brackets. I sprayed them black and then used them to screw the extension onto the original box where the lid used to go.


    It now feels like you are sitting in an armchair, with one arm out the window and the other on the higher cubby box. Ahhhh ... 8)


  5. #5
    Join Date
    Jul 2013
    Location
    Ipswich
    Posts
    12
    Total Downloaded
    0

    Thumbs up

    Hi Mate top post and well detailed, when I get my defender I think I will do the same.
    Cheers

  6. #6
    Join Date
    Oct 2007
    Location
    Wantabadgery, N.S.W.
    Posts
    2,742
    Total Downloaded
    0
    I hope your boys appreciate having a clever and generous Dad.
    Don.

  7. #7
    acidhawk Guest
    Thanks for taking the time to read my story ... Hopefully it can help someone sometime.

  8. #8
    Join Date
    Feb 2008
    Location
    Golden Beach, QLD 4551
    Posts
    672
    Total Downloaded
    0
    Hi,
    Good story to read.

    Welding gets better with practise as you have shown.

    I am looking to do the disco seat mod...when I have the money and the seats are available. So inspiring for me to read this.

    Thank you

    Now for the overhead shelf read.....

  9. #9
    Join Date
    Feb 2008
    Location
    Golden Beach, QLD 4551
    Posts
    672
    Total Downloaded
    0
    Well, the overhead compartment is a 'food for thought' read.

    Any mods you would make now you have been using it....

  10. #10
    acidhawk Guest
    Quote Originally Posted by Chilly View Post
    Well, the overhead compartment is a 'food for thought' read.

    Any mods you would make now you have been using it....
    I have actually removed the shelf. It was very handy but I actually prefer the star viewing capacity without it in.

    I haven't come up with an other ideas for this yet... I am busy with a dash change... Adding a LCD to display outside/inside temp plus angle etc using an arduino.

Page 1 of 2 12 LastLast

Bookmarks

Bookmarks

Posting Permissions

  • You may not post new threads
  • You may not post replies
  • You may not post attachments
  • You may not edit your posts
  •  
Search AULRO.com ONLY!
Search All the Web!