

 Reply With Quote
This is one of the best photo-filled tutorials that I have read.
Congrats.Keep up the good work.
John.

 Master
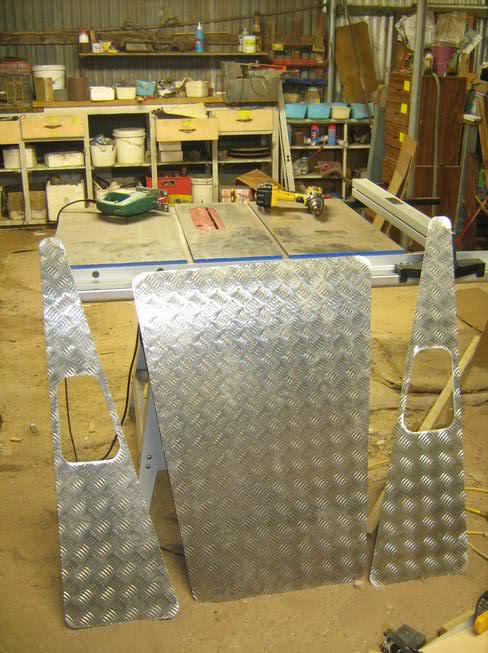
Finished off the chequerplate for the front this evening....
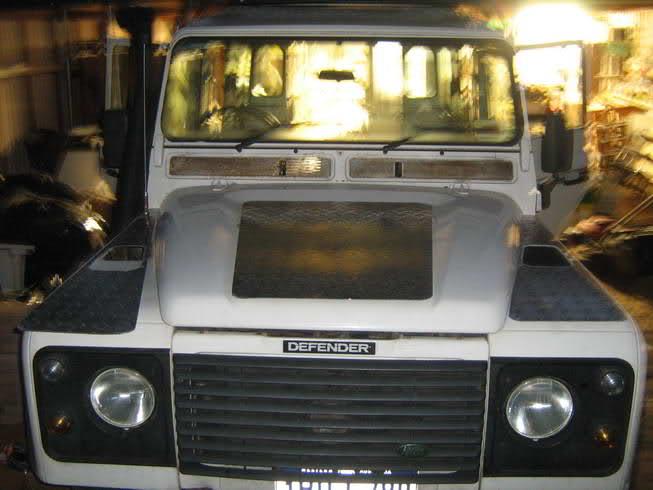
At Rest
This is one of the best photo-filled tutorials that I have read.
Congrats.Keep up the good work.
John.
Master
Don't you just hate it when the simplest of jobs turn into absolute nightmares??
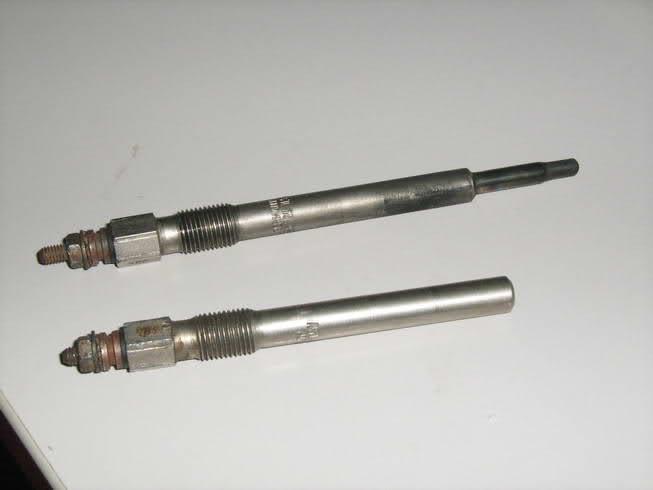
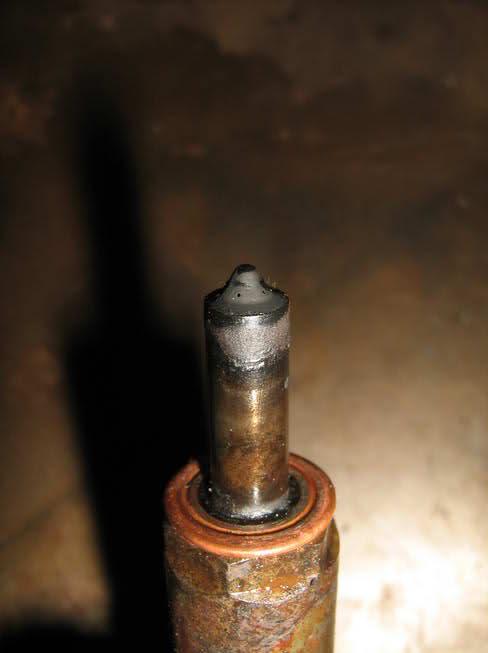
I had a fair idea that one of my glow plugs wasn't heating properly, so I took them out today to make sure that they weren't pitted, and to replace them if necessary. Unfortunately for me, the non working glow plug had apparently fractured, and when I removed it, the tip has remained behind in the block.
Good glow plug, and not-so-good glow plug...
I tried turning the engine over to see if the compression would blow it out - it's stuck fast, no risk of it falling back into the engine, otherwise I wouldn't have tried it - and no joy. So unless anyone has some other suggestions, it looks like I'm going to have to lift the head, and get it out that way.
All for a $5 glow plug.....
Master
Keep up the good mike watching with interest.
Aaron & Jacinta
1994 300Tdi Defender
Master
Well I have soaked, knocked, tapped, hammered, oiled, degreased, pressurised and magnetised the head of the broken glow plug, and while it will not fall in there in a hurry, it sure as hell is not coming out. Looks like the head is coming off today then - another $180 for a new gasket and head bolts...
Master
so a magnet didnent pick it up then? What about those little wire grabbers you can get that are like a bit of bonnet relese cable with little claws on the end. that might work rather than riping the head off. can you see it if you put a torch don the hole?
Master
After lifting the head off and getting the glow plug out that way, it was easy to see that no magnet in the world would have removed itOriginally Posted by Sparksdisco

I'll give a more detailed post later.
Master
CHANGING THE HEAD GASKET
As I mentioned earlier, after trying every method I could think of to extract my broken glow plug, I bit the bullet and took the head off. This is probably just as well in the long run. The broken plug didn't come out without some serious hammering with a punch - there is no way I would have removed it from the outside - and the rest of the plugs were seized up enough to have been troublesome. Out of the four glow plugs I removed, none of them worked!!! I reckon they were the ones that came out of the factory, 16 years ago... here in South Australia you don't have to worry about cold starts I guess. $185 all up for a new gasket and head bolts – three times more expensive than at home - but at least I can take solace in the fact that I get to see the condition of my head, block and valves, and I have a definitive date for when my head gasket was renewed.
Anyhow, on the plus side, the forums get a tutorial on how to change the head gasket on a 300tdi – I hope it comes in useful to someone.
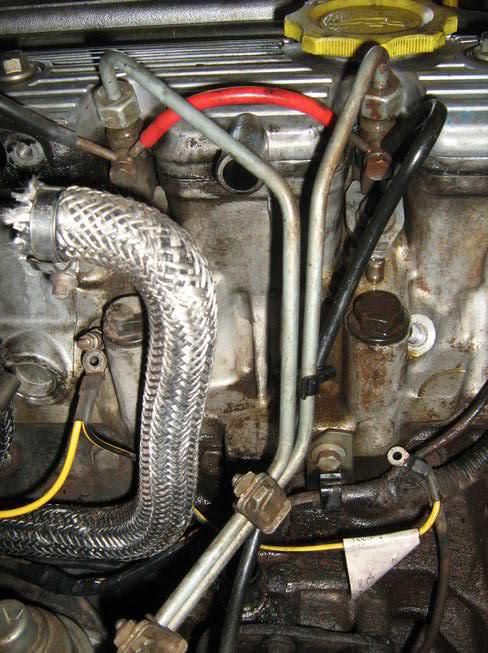
First step is to remove the rocker shaft. To do this, you need to first remove the breather cyclone unit from the rocker cover. Disconnect the hoses, loosen the single bolt securing the cyclone unit to rocker cover and remove the cyclone unit. Check the O ring, and replace if necessary.
Disconnect the breather hoses from cylinder block and rocker cover.
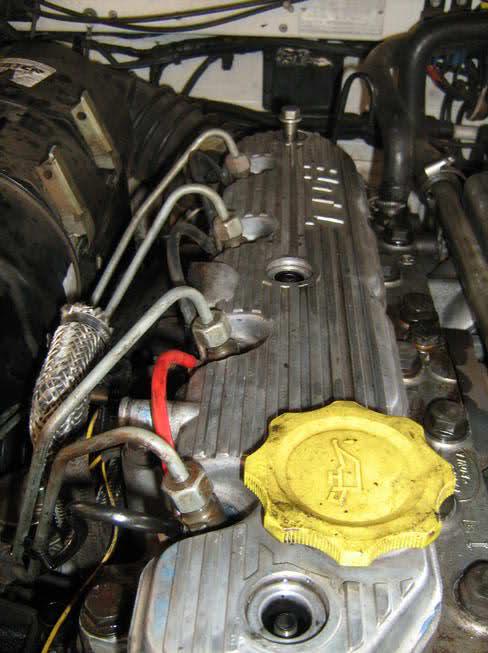
Now remove the three flange nuts securing rocker cover,, set them aside, including the sealing washers, and lift off the rocker cover. Despite what the book says, the rocker cover gasket can be reused a few times, so if it’s in good shape, then hold on to it.
If you go by the RAVE CD, the next step is to slacken the locknut on each tappet adjusting screw, slacken adjusting screws until they are clear of push rods. I blindly followed without thinking, and in hindsight you can just remove the entire rocker shaft assembly without touching the adjusting screws. As long as you put the pushrods and valve caps back in the order that you removed them, then you shouldn’t have to adjust the tappets afterwards. Too late for me, so anyhow...
Slacken the locknut on each tappet adjusting screw, slacken adjusting screws until they are clear of the push rods.
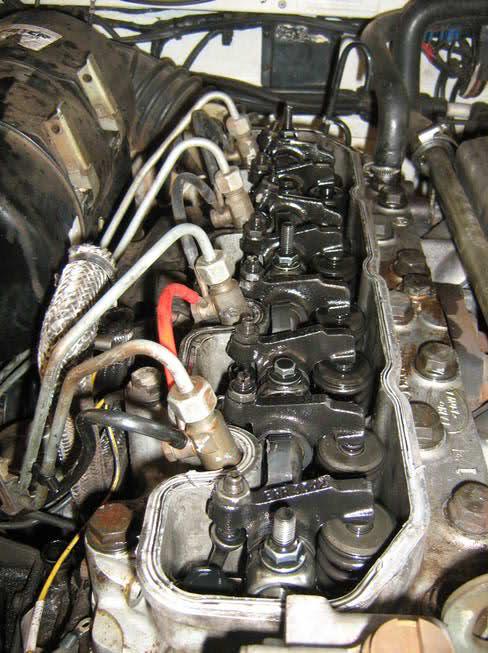
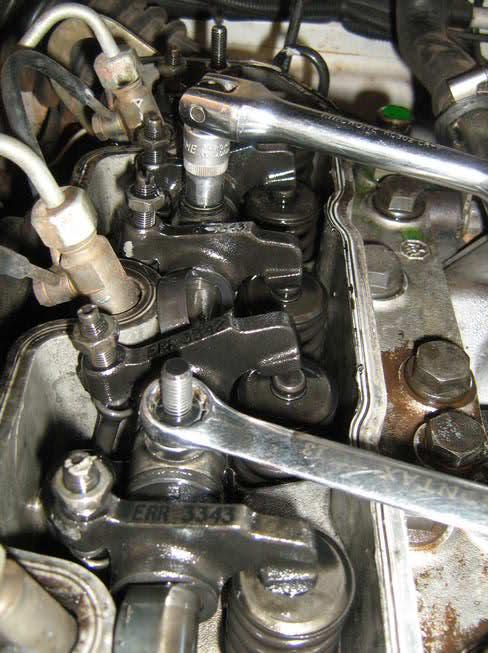
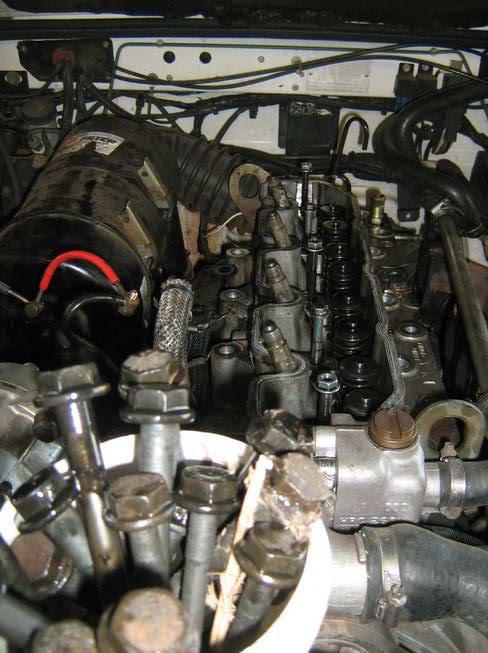
Working from the centre outwards, progressively slacken then remove 3 nuts and 2 bolts securing rocker shaft assembly to the cylinder head.
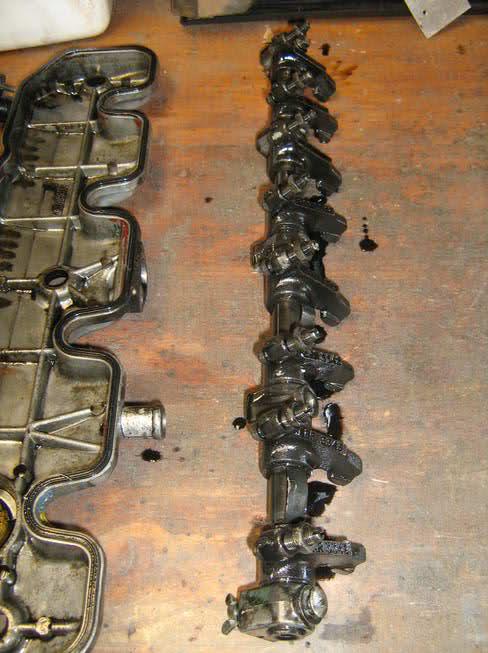
Now you should be able to remove the entire rocker shaft assembly. Put a spare bolt through the holes at each end of the shaft before you set it aside to prevent the rockers sliding off one end.
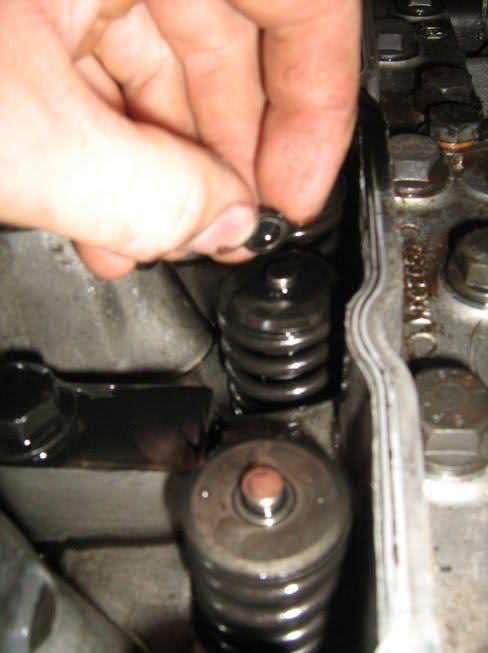
With the rocker shaft assembly removed, you can now withdraw the push rods and remove the valve caps, storing them in the order that they were fitted.
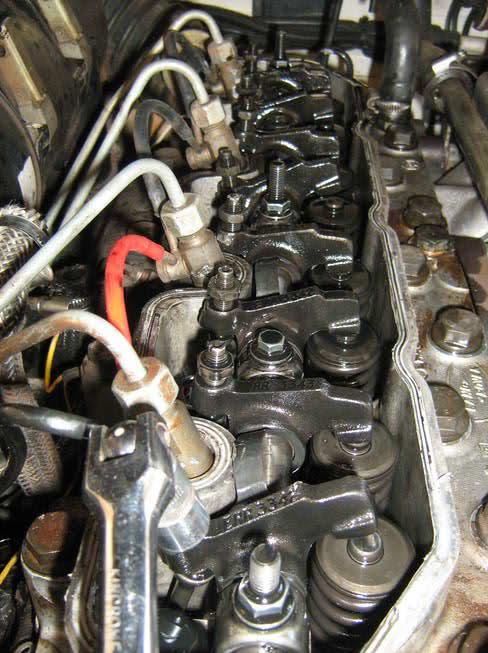
Disconnect each pair of fuel pipes from the injection pump and injectors, and remove them.
Unbolt the banjo bolts securing the fuel return lines to each injector, and set it aside.
If you wish, you can remove the fuel injectors and glow plugs. (If I could remove the glow plugs, I wouldn’t be lifting the bloody head off...) IF you aren’t removing them, then unbolt the wire from the top of each glow plug.
Now remove the inlet/exhaust manifold. Ever feel like you are doing the same job over and over again?? Here is a more detailed post on how to remove the manifold.
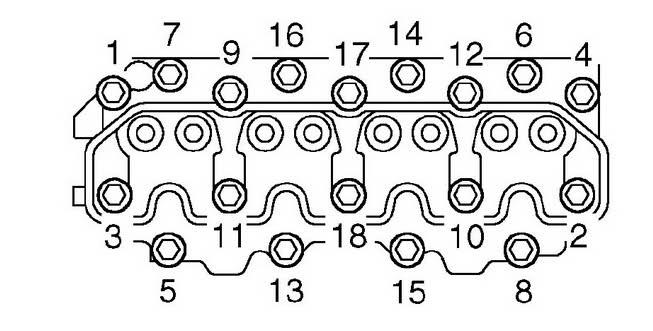
Now it’s time to unbolt the head, and by rights you need to unbolt it in the same sequence used to do it up in the first place. Using the sequence shown, progressively slacken and then remove the 18 bolts securing the cylinder head to the block. You’ll need a decent size breaker bar for this, and a 19mm socket – beg, buy, or borrow one if you don’t have one – it’s not worth the effort of struggling with a small socket set, and you’ll end up wasting an hour and getting nowhere.
There’s always the question as to whether you can reuse the head bolts or not – they are designed to stretch when the correct torque is applied, and whether they maintain their elasticity is debateable. Reading up has revealed that you can reuse the head bolts quite a few times, and at $108 for a replacement set, I can see why people would. But seeing as I’m going to be in the ass end of nowhere with my truck, I decided that it wasn’t worth the risk.
Remove both bolts securing the coolant outlet elbow, and remove it. While you’re at it, check the condition of your thermostat.
Take a good look around the cylinder head and remove anything left attached. For me, a few hoses and cables were clamped to the head, as were the breathers. I also removed the bonnet to make life easier for myself – remove the pin for the bonnet strut, over extend the bonnet and lift it out of its hinges.
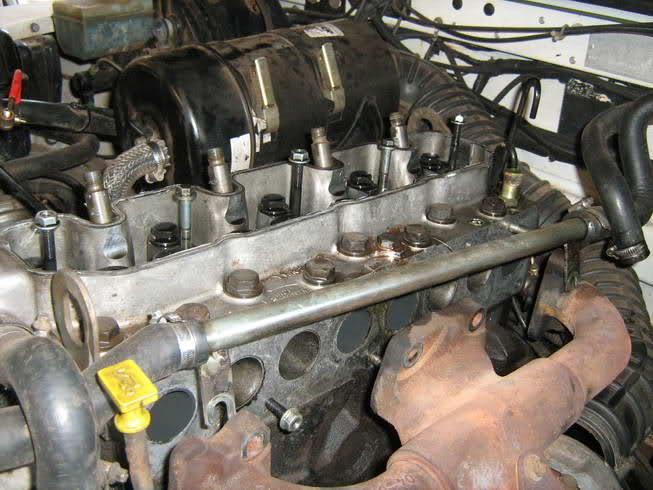
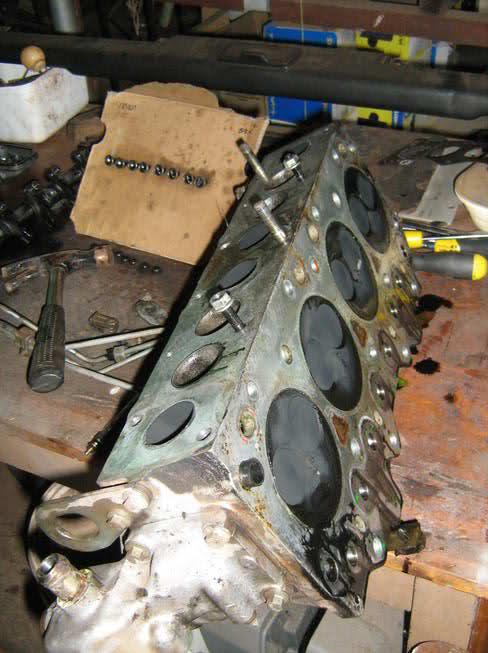
Now you should be able to remove the cylinder head. It’s not overly heavy, but get help to lift it if you can.
No matter what you do, coolant is going to mix in with the oil, so an oil change will be required once the gasket has been replaced. Unlucky for me – I only changed the oil last week!
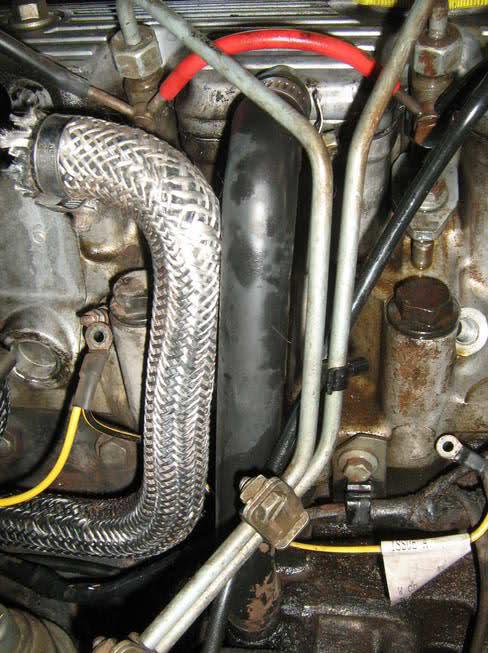
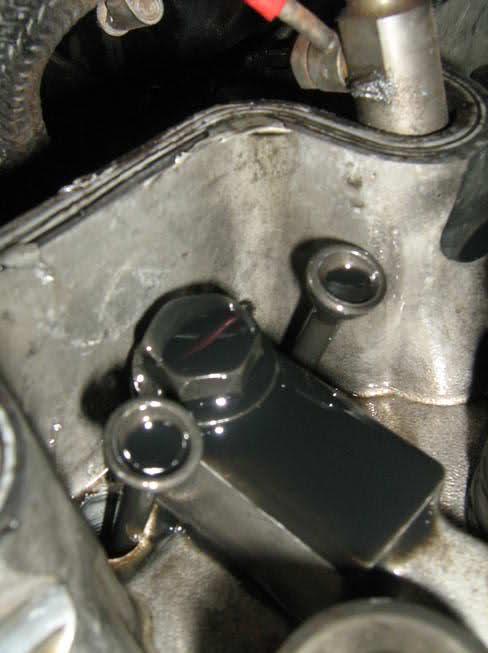
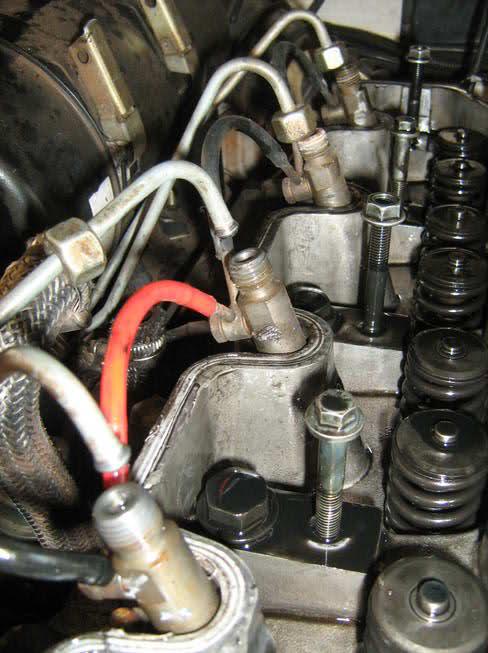
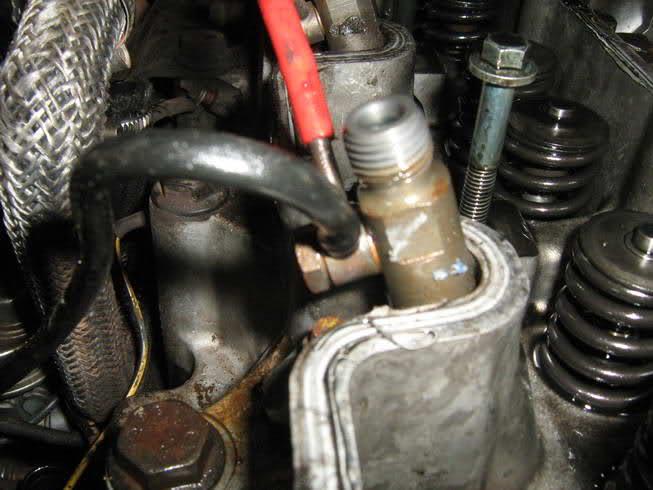
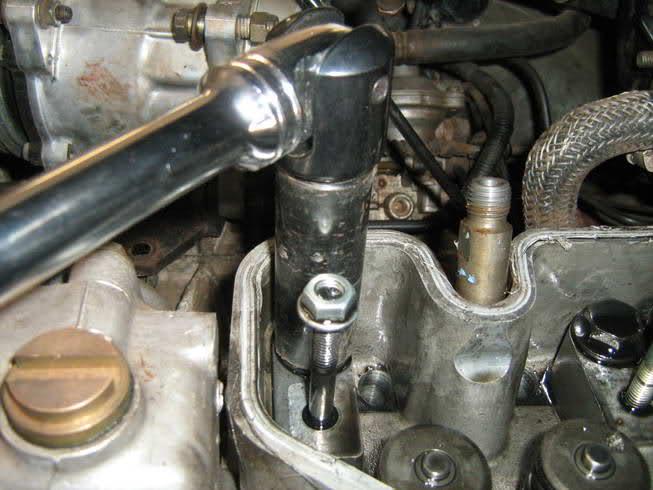
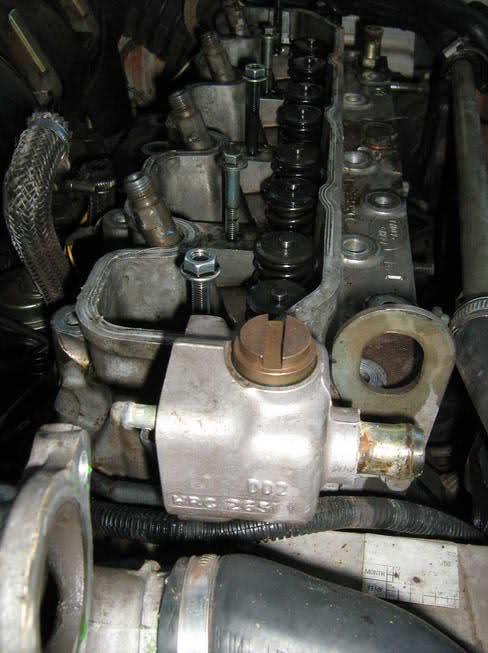
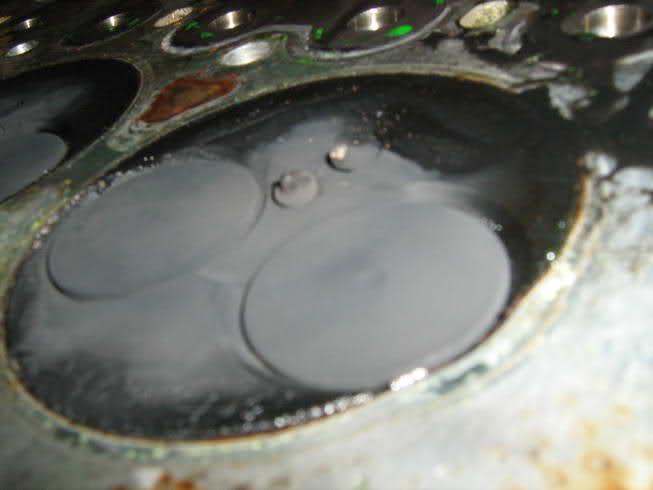
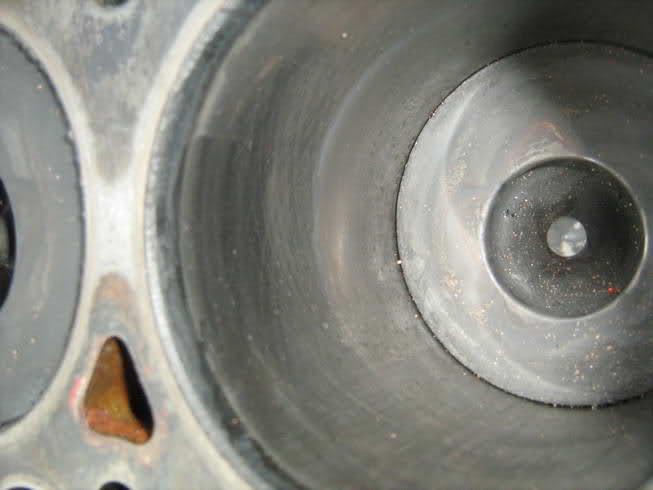
With the head off, it was now time to remove the glow plug that was the source of all my woes. If you look at the photo below, you can see the tip protruding northeast of the injector nozzle. It took a fair amount of persuasion with a hammer and punch to remove it – there was no way I was going to get it out without removing the head.
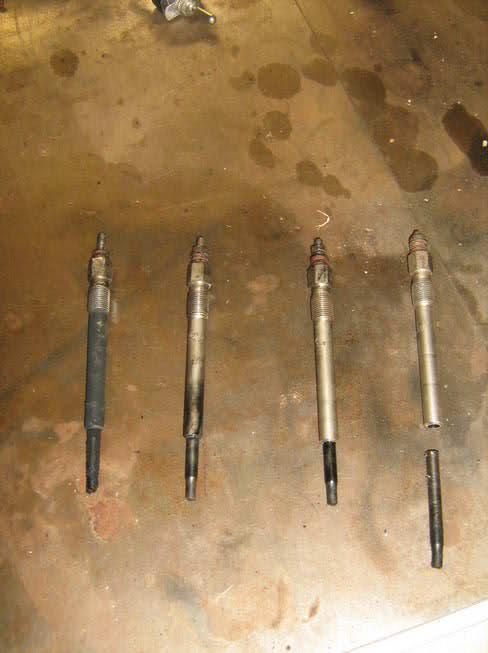
I removed the remaining glow plugs. They were stiff enough to have caused problems had I tried to remove them earlier. You can see for yourself the condition that they were in.
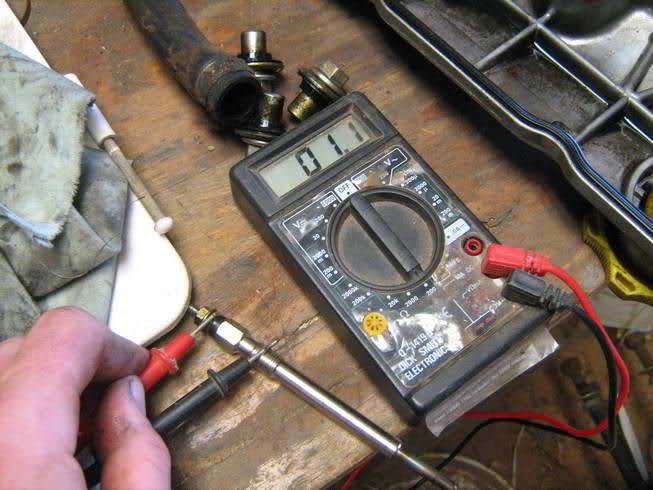
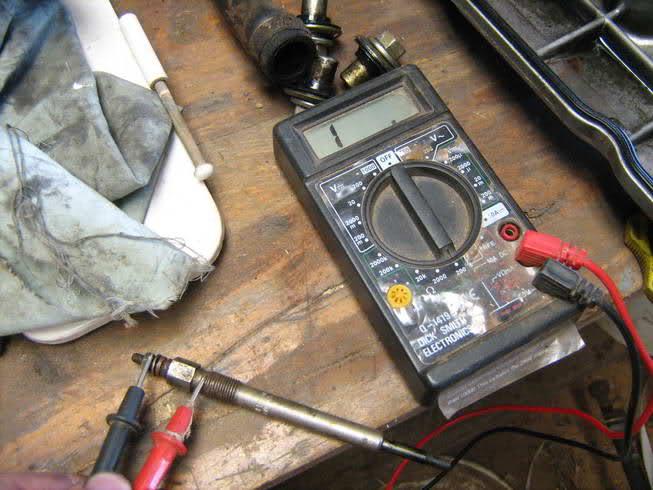
To satisfy my own curiosity I checked to see if they were working. To check your glow plugs (you can do this while they are still in the head), use a multimeter to check their resistance. A functioning glow plug will have a small resistance, a blown plug will create an open circuit (unless the core has fused to the shell
As it turned out, from my four glow plugs, not one had been working, and I reckon that they were the same glow plugs that were in it when the defender left the factory! Guess there’s no need to worry about cold starts here in Australia.
I removed the injectors to check them out too – they look to be in pretty good condition.
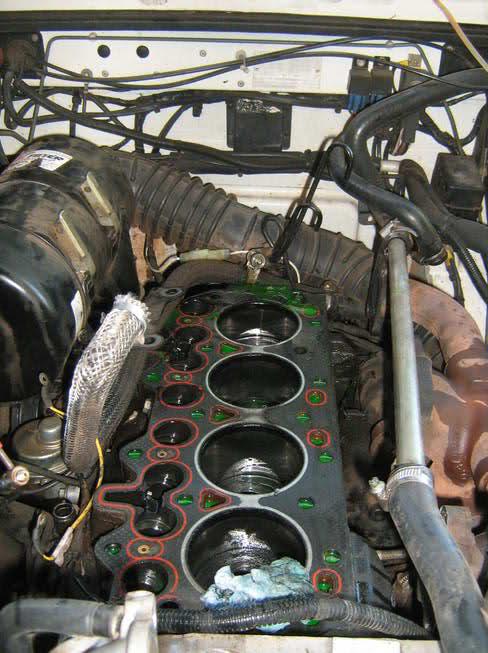
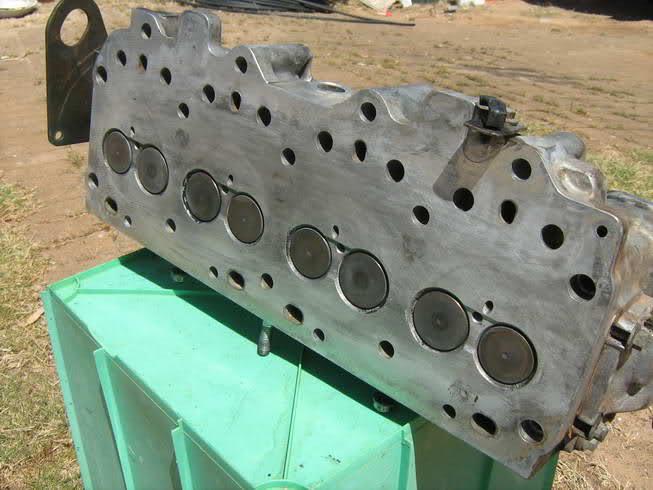
Now remove the old gasket and clean off the mating surfaces of the block and head. Don’t discard the old gasket yet – you’ll need it to identify what gasket you’ll need to replace it with. As for cleaning the block and head, I used degreaser and oven cleaner to remove the coking and dirt.
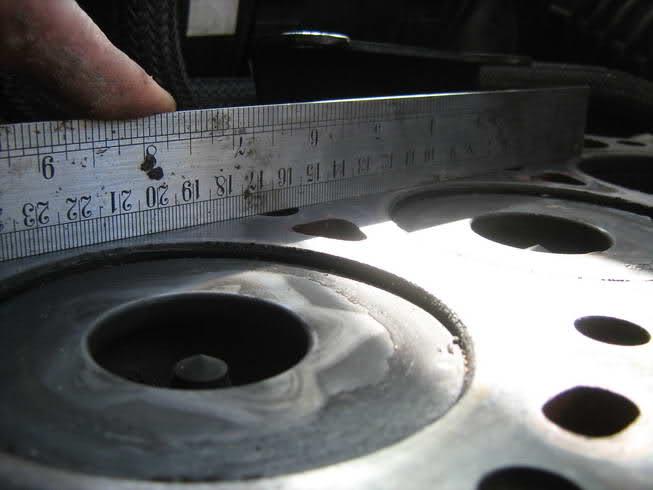
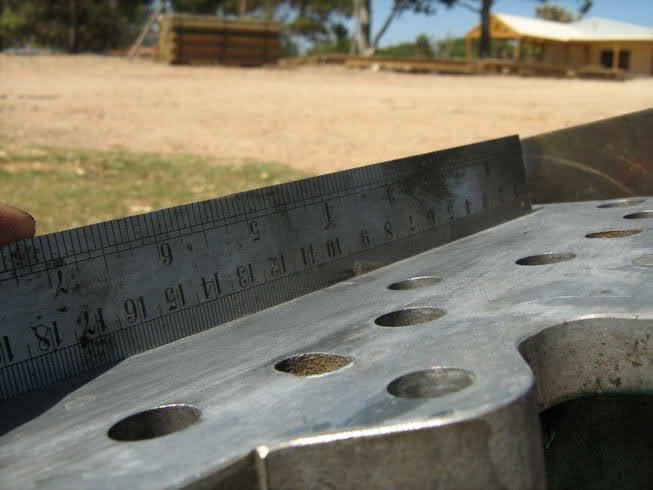
I’m very happy with the condition of the block and head, and in a way it was worth the money spent just to know what condition it’s in. No signs of any cracks or corrosion, no pitting on the piston heads, the cylinders are flawless (yep, I need to blow them out with the airgun before reassembly), and the block and head surfaces are as flat as a chessboard.
Now it’s time to get the replacement parts together. The head bolts are pretty straightforward – they come in three sizes, so make sure you end up with a full set. The gasket is another matter though, as they come in different thicknesses.
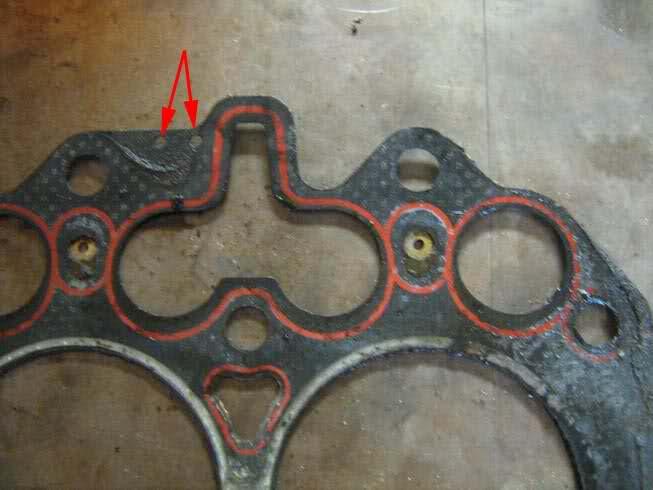
Gasket thickness is dictated by how proud the pistons stand at full extension, and a gasket’s thickness can be identified by the number of holes in the edge of the gasket between numbers 3 and 4 injector ports.
Gasket thicknesses for both 200Tdi & 300Tdi cylinder head gasket sizes are as follows:
1 hole 1.30mm - for piston protrusion between 0.50 to 0.60mm
2 hole 1.40mm - for piston protrusion between 0.61 to 0.70mm
3 hole 1.50mm - for piston protrusion between 0.71 to 0.80mm
NO holes 1.60mm if higher than 0.80mm use the NO HOLE gasket.
In my case the gasket that I removed was a 2 hole gasket, and the replacement that I bought was a no hole gasket. While you can in theory replace your gasket with a thicker one, it will cause the engine to smoke like hell, especially on a cold start, so my head gasket replacement has ground to a halt for today at least – I’ll swap it for a 2 hole gasket tomorrow.
AT REST
SubscriberGreat write up and excellent attention to detail Mike - keep it coming.
While you've got the head off, I was wondering if you had considered doing a little grinding around the inlet/exhaust port area to reduce turbulance and improve flow?
I haven't done the job myself but a friend has done about eight 200/300Tdi's and each one has resulted in improved performance. Apparantly he uses the gasket as a guide and grinds out the head and manifolds to suit. Also removes the casting 'dags' in the head.
Also known as porting and polishing or blueprinting.
Roger
Master
It sounds like a great idea, but seeing as it's something I haven't done before, and the tools that I have available to me are somewhat limited, I'd be worried about ruining the head in the process. And at the end of the day I need a workhorse, not a racecar, so I guess I can live with the head as it is for now.
If I knew a bit more about it, including the tools I'd need and the risks involved, I might be more game though
 Posting Permissions
| Search AULRO.com ONLY! |
Search All the Web! |
|---|
|
|
|


Bookmarks