


 Reply With Quote
Good job, mate!

 Wizard
Howdy:
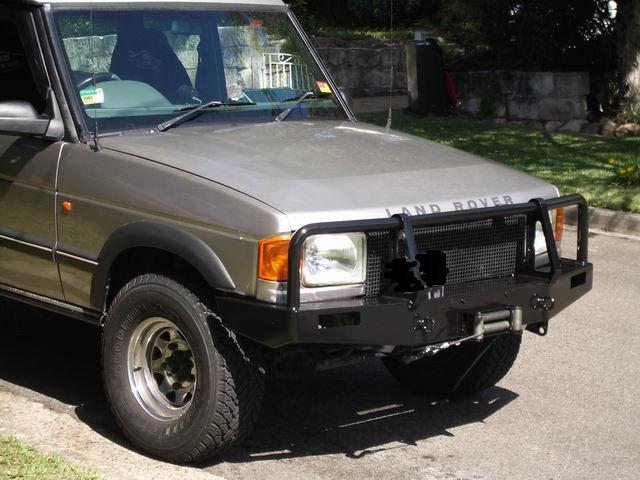
For a long time I've hankered for a winch for my Disco. But, my Disco came with a Team Poly plastic bullbar, and making a winch sit comfortably behind it was difficult. So, when a reportedly broken X9 superwinch and (separately) a slightly damaged steel Disco bullbar came up for sale, I got motivated and put it all together.
So, for those wondering what lies inside their warn low mount or x9 (or even Chinese copy), enjoy.
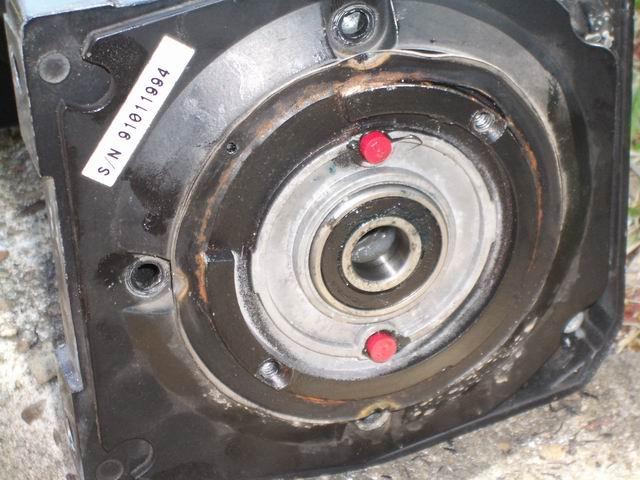
This is first thing you see after removing the motor. A combination end plate/ bearing support. And yes, it is a 6203 bearing in there. That one had a little binding, so I replaced it. Just sits there, held by a collar against the shaft.
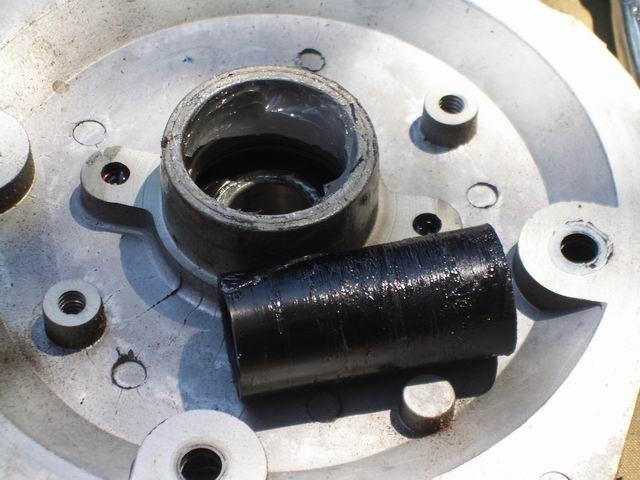
End plate of winch body. The black object is a abs plastic collar that connects the splined shaft of the motor with the bladed end of the winch drive shaft that goes to the gears at the other end. I was surprised when I found it, but then realised that it acts as a shear pin like on Trifor's.
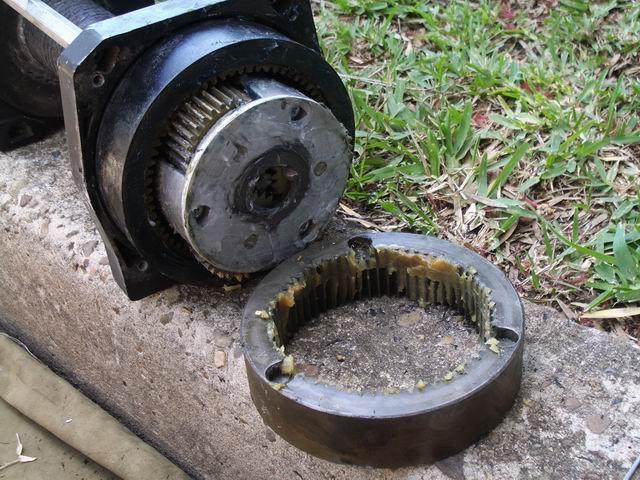
Business end: On a x9, a spring loaded 10mm pin slots into one of those three indents on the gear that is lying on the concrete. Warn do this differently. The transmission shaft you can just see in the middle of the planetary gear set. If you have ever taken a drill apart, this is the same, only bigger. The grease appears to be grade 3 or better, very waxy.
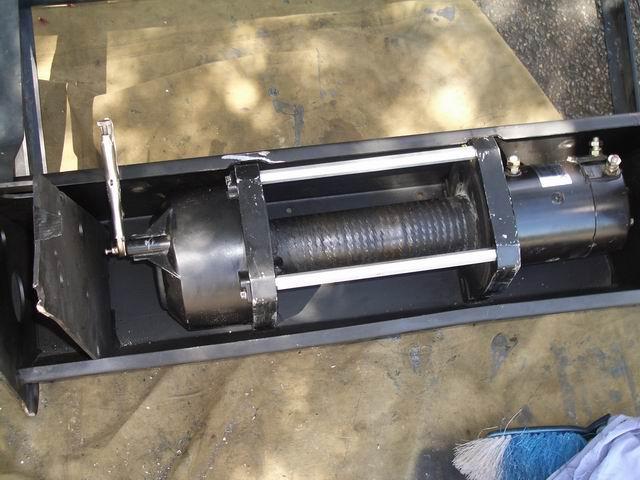
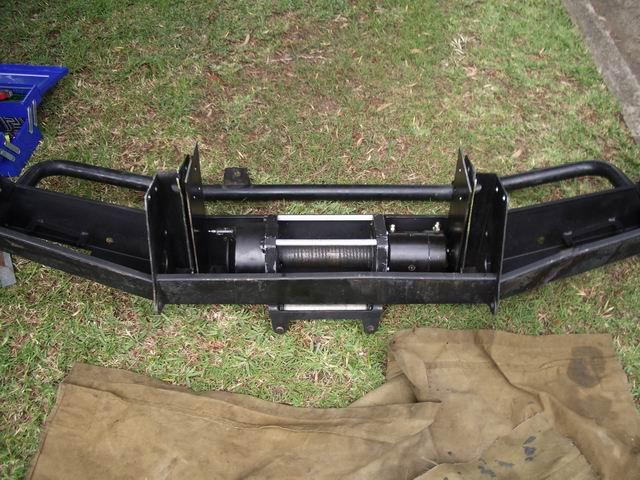
The winch is a snug fit, but with a little grinding, fits OK.
The bullbar appeared to be a normal TJM design. Made of 5mm steel, no cutouts for a winch, nor bracing. On some bullbars I inspected on other vehicles with winches, that's all you get. Even ARB bars only have a extra bit of 3mm plate reinforcement around the edges of the area the winch bolts to,not to the rails.
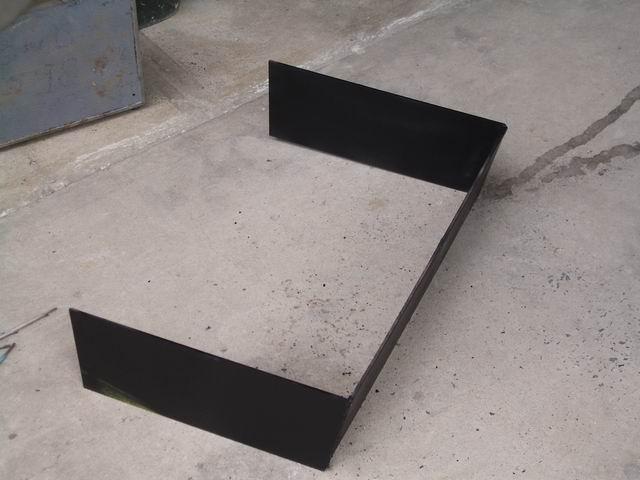
So I made this. 5mm mild steel ( And for Sydney residents, EDCON STEEL SHOP, Daisy St Milperra near Bankstown Airport, were very helpful- nice even cuts with powered shears, and even a slight angle cut)
And it all sits nice with about 1cm each side ( Including space to pull the freewheel device out on the left). I clamped it up and used the existing holes as guides for the drill.
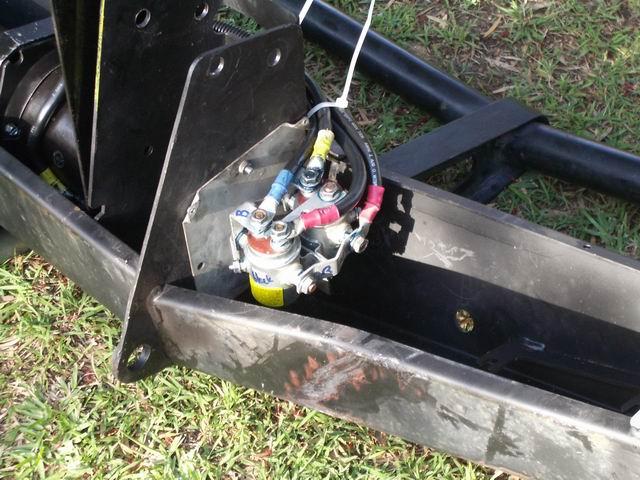
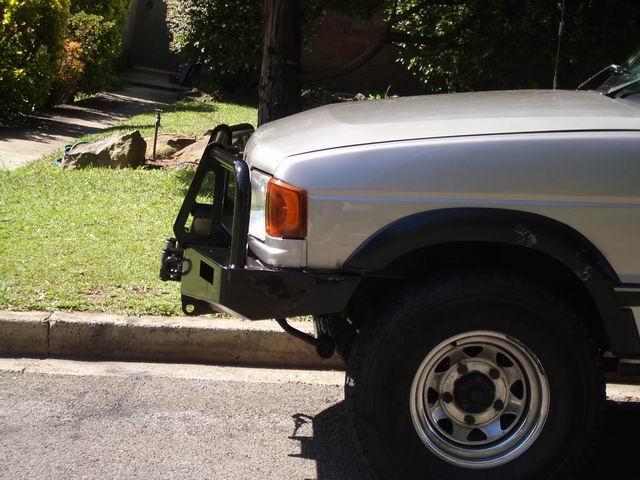
I figured that having the solenoid box out of the way was better than on top of the bar ( And looking a little dorky), so I put it here. EDIT: I finally got around to putting this box into the engine bay, next to the aircleaner. I was surprised that the previous owner had NEVER protected it from corrosion around the terminals EVER. After a good cleanup and application of grease (Like battery terminals), it went back on, and although I didn't take a photo of it, the cover slides in and bolts back over the assembly nice and neat.
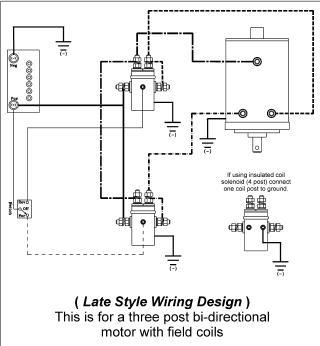
I even found a wiring diagram on the net - it took me a bit of time to figure out the extra wiring is for the motor's winding connections - so they can swap around to give forward and reverse - hence the term series wound.
All on, and a beauty of a tip: A galvanised garbage tin is just the right height to rest the bullbar on so you can slip it onto the chassis rails. 'Cause it is heavy. (even for me)
A quick sand over, a bit of impromptu adjustment ( ie large hammer) a wipe with metho and a can of killrust gloss back and ..Voila ! I managed to get a pair of Barina indicator lights for the cut outs , but looking at the design of the Disco blinkers, it may be that I won't need them since the light is large enough to make it seen both sides of the bar post. I mounted the control cord socket on a magnet ,and it lives behind the bar untill needed.
And, it appears that my approach angle has improved - this bar is mounted closer than the Plastic one.
It appears that the only reason the winch was non fuctional was that the ground cable was loose and rusty. Cleaned it up and tightened it and all good.
Tested the winch out when winding on the cable, and tried some spray on grease whilst doing so ( $8 can at Supercheap). All good. Time will tell if it protects the cable any better than axle grease.
Of course Murphy's law states that now I have a winch I won't need it.
Last edited by langy; 24th January 2008 at 12:48 AM.
Wizard
SubscriberGood job, mate!
Johannes
There are people who spend all weekend cleaning the car.
And there are people who drive Discovery.
Major part of the heart and soul of AULRO.comIf needs be, I have drawn up the wiring diagram for a Warn winch and it can be found here:
http://members.optusnet.com.au/thebe.../warn-sol2.pdf
and another blokes layout diagram can be found here:
http://members.optusnet.com.au/thebe.../warn-sol1.pdf
Ron
Ron B.
VK2OTC
2003 L322 Range Rover Vogue 4.4 V8 Auto
2007 Yamaha XJR1300
Previous: 1983, 1986 RRC; 1995, 1996 P38A; 1995 Disco1; 1984 V8 County 110; Series IIA
RIP Bucko - Riding on Forever
YarnMaster
Did you consider sticking the solenoids in the engine bay??
The Camel vehicles used to have them in a waterproof box, on top of the wheel arch. That way, even with the front of the car burried in a muddy swamp... The solenoids were fine.")
HTH
M
Major part of the heart and soul of AULRO.comMy RR classic had a winch fitted for the previous owner by John Davis Motorworks. They made up a very nice welded alloy mount that allowed the solenoids to sit above the wheel arch on the RHS.Originally Posted by camel_landy

Ron
Ron B.
VK2OTC
2003 L322 Range Rover Vogue 4.4 V8 Auto
2007 Yamaha XJR1300
Previous: 1983, 1986 RRC; 1995, 1996 P38A; 1995 Disco1; 1984 V8 County 110; Series IIA
RIP Bucko - Riding on Forever
OldBushie
Top work.
I can 2nd the Edcon Steel recommendation. Just don't arrive there near closing time as they can get quite busy.
Grippy Rubber at Rydalmere will have that sort of rubber. I can call around there next week & check out their styles/prices for you if you like.
Scott
Wizard
Thanks for the info Mr B - I'll chase it up - I've still got to figure out where to mount said rubber onto the bar.
Wizard
Nice work Langy!
What are those eyelets sticking out of the front of the bar? Did you fit those?
Oh, yeah. Where's your number plate Driver?
Fossicker
......................Looks nice, Good Job!
If you end up needing the original indicators for the bar, (we had same prob) you can get a brand new pair from ARB, they fit perfect and should cost around $33.
Cheers,
Pug.
Swaggie
if you have ever had a faulty solenoid and had to fix it when you are stuck in mud up to your wheels id be moving that control box to a open higher position or you will be digging mud and then lying in the mud to change said wires or solenoids
oh yeah nice job just move the solenoilds
 Posting Permissions
| Search AULRO.com ONLY! |
Search All the Web! |
|---|
|
|
|


Bookmarks