Page 6 of 6 FirstFirst ... 456
Results 51 to 59 of 59

Thread: Rebuilding my 300Tdi

  1. #51
    Join Date
    May 2007
    Location
    NSW, Australia
    Posts
    4,656
    Total Downloaded
    0

    ON with his head!

    Reinstalling a head is also well documented, so I'll simply share some of my little observations.

    I spent a fair bit of time calling a number of suppliers to find a composite gasket, which were in short supply at the time it seemed. About the sixth one said they had one and I asked them to double check that it was definitely composite and not multi-layered steel. The sounded exasperated and said "yes mate, it's definitely composite."

    Surprise surprise; it was not.

    Fortunately at least it is a high-quality Victor Reinz MLS gasket as since I was out of time, I had no choice but to use it.

    Circling back to my pondering about how restrictive the oil hole between the front cam bearing and the head might be, the fact that both the old (Elring composite) and new (Victor Reinz MLS) head gaskets have only similar sized holes reassures me that it is indeed sufficient/necessary.


    I found the easiest way to whack the new dowel in to the block without smashing your fingers or having the dowel flying away was to hold it with a cable tie.


    After putting the head on, the pushrods went back in their respective homes, and I stripped the rocker shaft and replaced the rockers. I'm not entirely sure this was necessary in retrospect, and given the issues others have had with replacement rockers. I was sure to safely retain my OE ones just in case.

    Continuing the theme that new parts do not necessarily equal good parts, this is a brand-new lash cap fresh out of a genuine parts bag and purchased through a reputable supplier.

    Seems that even genuine parts are not always all that crash-hot either!


    [B][I]Andrew[/I][/B]

    [COLOR="YellowGreen"][U]1958 Series II SWB - "Gus"[/U][/COLOR]
    [COLOR="DarkGreen"][U]1965 Series IIA Ambulance 113-896 - "Ambrose"[/U][/COLOR]
    [COLOR="#DAA520"][U]1981 Mercedes 300D[/U][/COLOR]
    [U]1995 Defender 110[/U]
    [SIGPIC][/SIGPIC]

  2. #52
    Join Date
    May 2007
    Location
    NSW, Australia
    Posts
    4,656
    Total Downloaded
    0

    Exhausting the to-do list

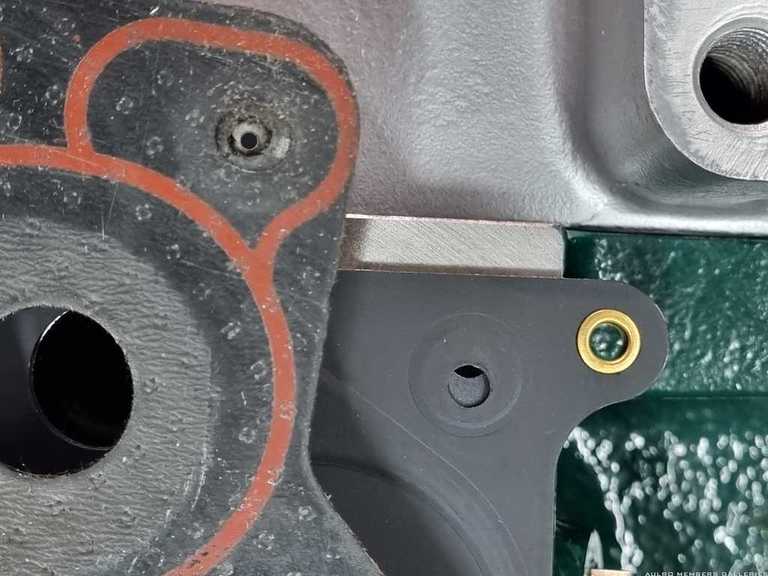
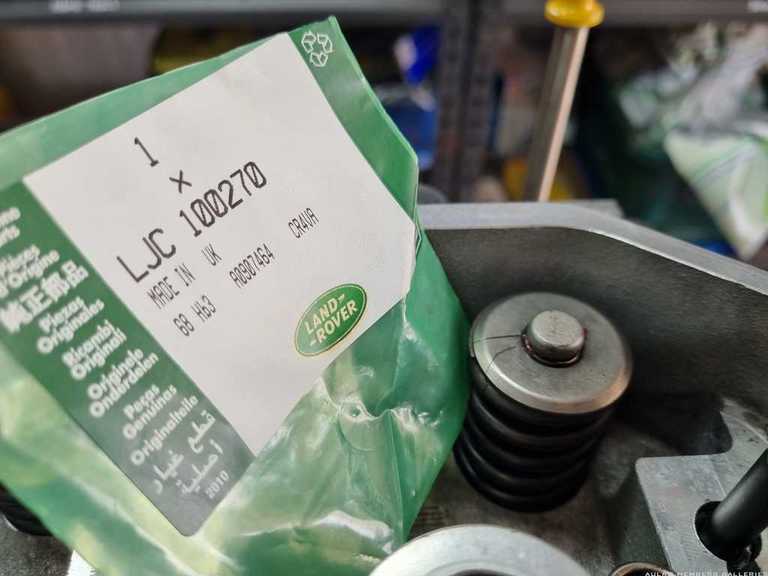
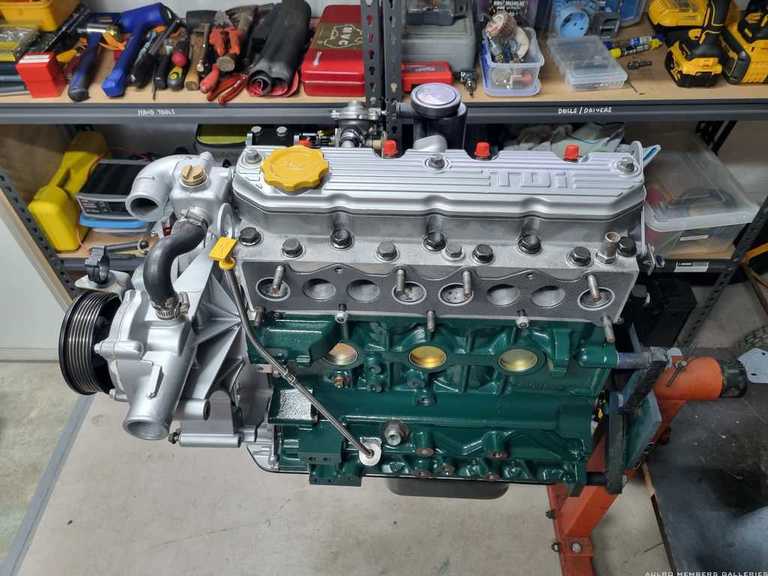
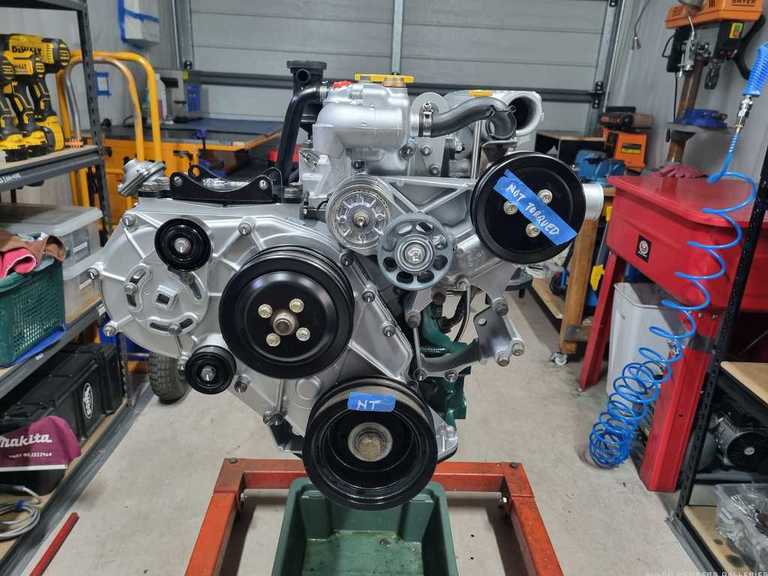
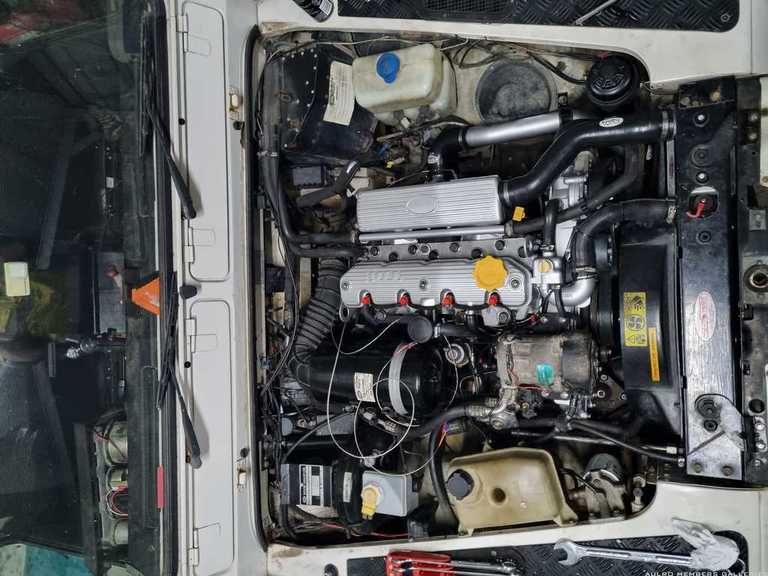
    Valve clearances set, (no, I didn't use that lash cap), rocker cover on, thermostat, timing cover and some other ancillaries in place and now we are here:


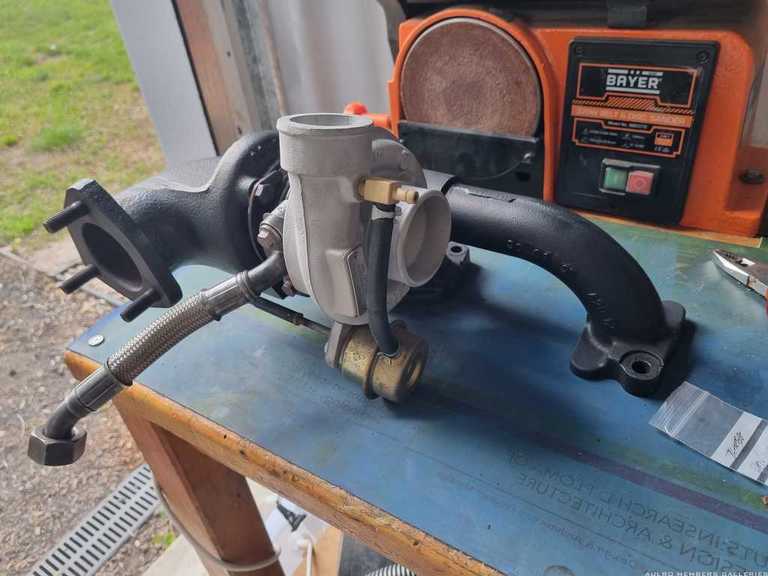
    My old exhaust manifold was full of cracks and rather unhappy, and my old turbo had a little bit of play in it, so both of these were refreshed.

    Scouse very kindly helped me out with a near-new replacement manifold which came off a warranty return back in the day with a turbo of unknown condition. Thanks mate!

    Since my old turbo worked fine, I decided to rebuild the unknown one, and keep my old one as a known-good spare. A genuine, made in UK Garret core was fitted and the housing media blasted leaving it as good as new.


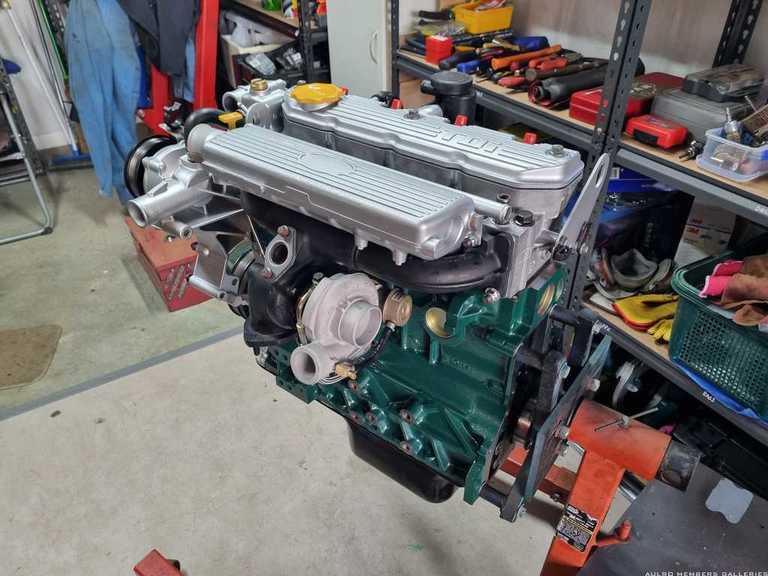
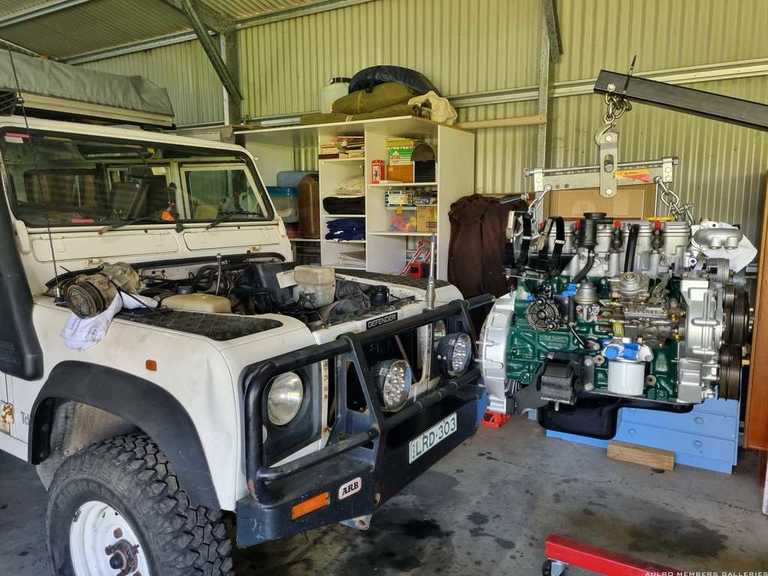
    Bolted on with the intake manifold in place also, it's starting to look like a real engine again!


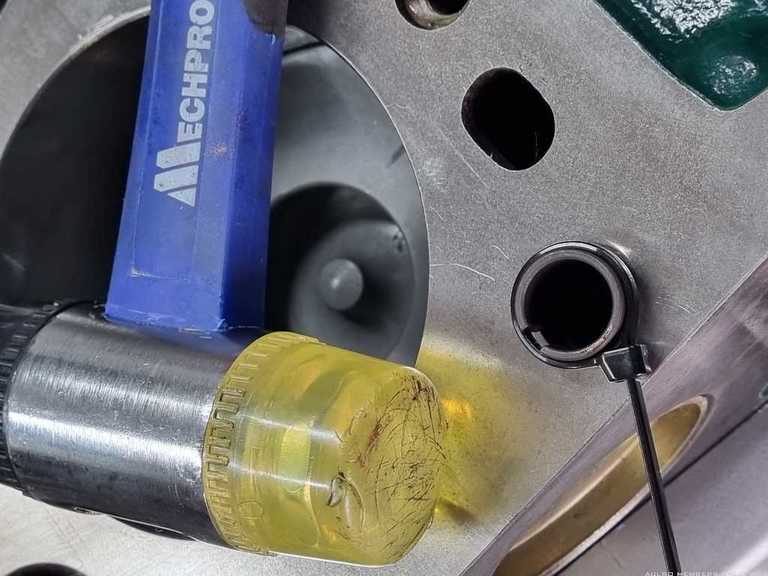
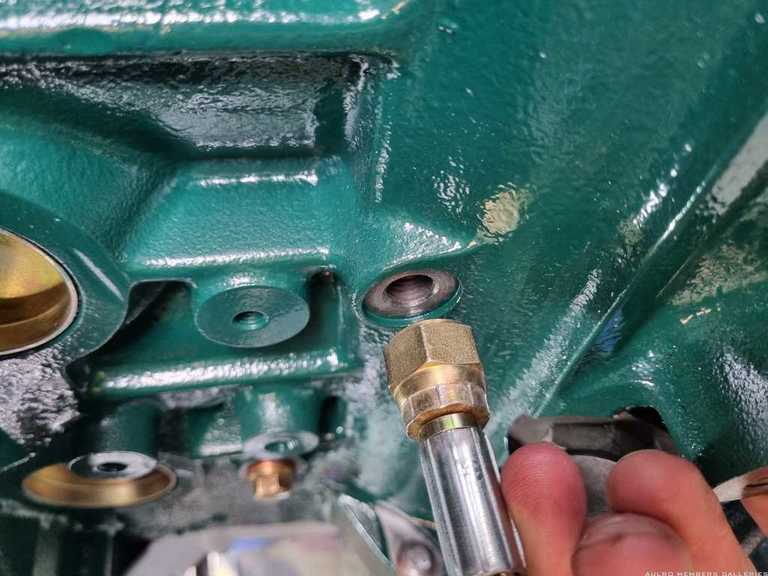
    The last ancillary to attack to the block is the turbo oil feed and drain pipes... and with the clock ticking down I discovered that the adaptor between the feed and the block was missing.


    This is even more annoying because I'm a very organised person and I do not generally lose things. Not only was this an inconvenience, it was an affront to my entire identity. Turns out, the only thing harder than finding a missing part in a messy shed, is finding one in an immaculate garage. You know it's there, but there's nowhere it can be!

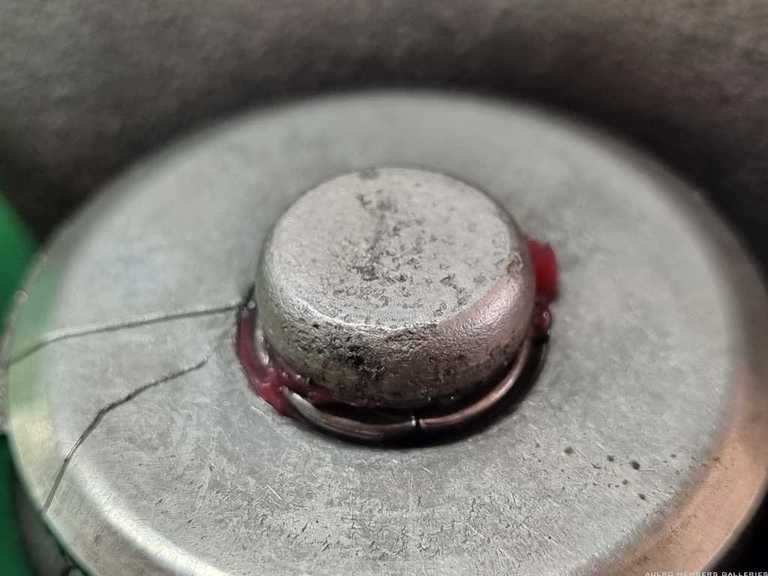
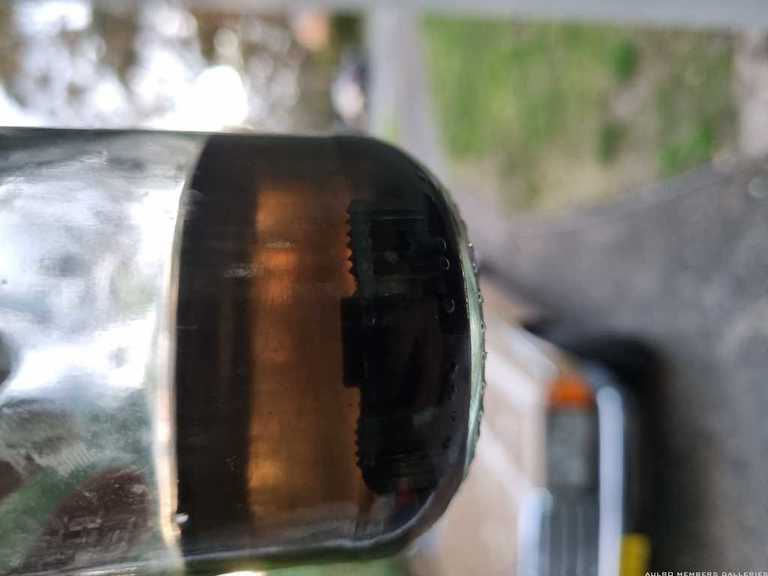
    After a cup of tea to simmer down, I broke the place into zones and conducted a methodical line-search. Of course, the last place I checked was the cleaning bench, and what did I find lurking in the murky depths of the jar of kero?


    What a relief!
    [B][I]Andrew[/I][/B]

    [COLOR="YellowGreen"][U]1958 Series II SWB - "Gus"[/U][/COLOR]
    [COLOR="DarkGreen"][U]1965 Series IIA Ambulance 113-896 - "Ambrose"[/U][/COLOR]
    [COLOR="#DAA520"][U]1981 Mercedes 300D[/U][/COLOR]
    [U]1995 Defender 110[/U]
    [SIGPIC][/SIGPIC]

  3. #53
    Join Date
    May 2007
    Location
    NSW, Australia
    Posts
    4,656
    Total Downloaded
    0

    Sealing up the rear end

    With the deadline to re-register the Defender fast approaching, time was now of the essence.


    Mum kindly offered to drive down from the property with the ute (thanks mum) so I could get the engine back to the shed, and as she arrived I had finished bolting on the flywheel housing and brackets, and had only to install the rear main oil seal before lashing it back onto the custom pallet and calling it finished.


    At this point, careful as I was, I almost derailed everything. Following the instructions, I applied RTV sealant to the rear face of the aluminium seal surround, and installed two guide studs. Keeping the inner slip guide in place to ensure the teflon seal was not damaged as it slid onto the running face, I slide it into position - only to discover that I had contaminated the crank with silicon on the way through.


    I gave as much thought to this as time permitted, considering the relative merits of:

    A ) Removing the seal, attempting to clean it, refitting the slip guide and attempting to refit it (and probably having it leak)
    B ) Leaving it alone, hoping that the seal had squished the RTV out from under the running surface and wouldn't be a problem (and probably having it leak)


    In the end, I settled on the latter. I didn't have time to obtain a new one, and I figured that worst-case scenario, I could pull it apart again after it was registered and removed from the now for-sale shed. Not ideal, but it was my only option.

    I think in future, I will apply the sealant to the mating face on the block to reduce the risk of contaminating the seal.

    Quote Originally Posted by Shonky from the future
    I would like to report that this seems to have paid off, with no oil noted from the flywheel drain plug, and no evidence of clutch contamination.
    [B][I]Andrew[/I][/B]

    [COLOR="YellowGreen"][U]1958 Series II SWB - "Gus"[/U][/COLOR]
    [COLOR="DarkGreen"][U]1965 Series IIA Ambulance 113-896 - "Ambrose"[/U][/COLOR]
    [COLOR="#DAA520"][U]1981 Mercedes 300D[/U][/COLOR]
    [U]1995 Defender 110[/U]
    [SIGPIC][/SIGPIC]

  4. #54
    Join Date
    May 2007
    Location
    NSW, Australia
    Posts
    4,656
    Total Downloaded
    0

    On the move

    After loading the fresh new engine in the filthy old farm ute, putting the engine crane and other necessities in the trailer, and buying the old-dear lunch to thank her for once again being an accessory to Rover, we hit the road back to reunite the engine with the Defender.


    This was Friday afternoon, and my Rego deadline was COB Monday. So I had two and a half days to install the engine, reconnect all the ancillaries, refill the fluids, test everything and resolve any issues, and get a rego check before the registration would be cancelled as 3-months past due and I would be forced to get a full blue slip and start again.

    Better crack on with it then.

    [B][I]Andrew[/I][/B]

    [COLOR="YellowGreen"][U]1958 Series II SWB - "Gus"[/U][/COLOR]
    [COLOR="DarkGreen"][U]1965 Series IIA Ambulance 113-896 - "Ambrose"[/U][/COLOR]
    [COLOR="#DAA520"][U]1981 Mercedes 300D[/U][/COLOR]
    [U]1995 Defender 110[/U]
    [SIGPIC][/SIGPIC]

  5. #55
    Join Date
    May 2007
    Location
    NSW, Australia
    Posts
    4,656
    Total Downloaded
    0

    Progress towards egress

    Having had the engine out a few times now over the years, I didn't run into any problems with the reinstallation.


    And here it is, all neatly tucked in with everything reconnected!


    (except the injector lines)


    In order to closely supervise the new engine, some diagnostics were temporarily plumbed in. These have now been permanently integrated in a much neater fashion, but for the time-being, I just had the display cable tied to my phone bracket.

    [B][I]Andrew[/I][/B]

    [COLOR="YellowGreen"][U]1958 Series II SWB - "Gus"[/U][/COLOR]
    [COLOR="DarkGreen"][U]1965 Series IIA Ambulance 113-896 - "Ambrose"[/U][/COLOR]
    [COLOR="#DAA520"][U]1981 Mercedes 300D[/U][/COLOR]
    [U]1995 Defender 110[/U]
    [SIGPIC][/SIGPIC]

  6. #56
    Join Date
    May 2007
    Location
    NSW, Australia
    Posts
    4,656
    Total Downloaded
    0

    Such a turn-on

    After filling the engine with Penrite running-in oil, I decided to move the truck outside before attempting to start it so I didn't fill the shed with smoke.

    Unfortunately, despite having had the battery on charge overnight it was completely dead, so the suspense continued whilst I drove in to town to buy another battery.

    I was confident that the motor turned over without valves meeting pistons, so I gave it a few cranks with the fuel shut-off solenoid disconnected so it couldn't fire, just to get the oil moving and make sure that everything was still moving correctly.

    With no small amount of trepidation, it was time to find out. Will it run?

    ...

    [B][I]Andrew[/I][/B]

    [COLOR="YellowGreen"][U]1958 Series II SWB - "Gus"[/U][/COLOR]
    [COLOR="DarkGreen"][U]1965 Series IIA Ambulance 113-896 - "Ambrose"[/U][/COLOR]
    [COLOR="#DAA520"][U]1981 Mercedes 300D[/U][/COLOR]
    [U]1995 Defender 110[/U]
    [SIGPIC][/SIGPIC]

  7. #57
    Join Date
    Jan 1970
    Location
    Brisbane
    Posts
    1,652
    Total Downloaded
    0
    Nice Work Andrew.

    Running sweet!

    I finished my rebuild in early December but hadn't driven it much....until Easter when I drove to Cooma and back from Brisbane. No issues apart from a slight oil leak at the turbo oil feed hose at the block. It is super tight, so will have to pull it off and see why it is leaking. It was a brand new part, but like you have experienced, the quality of some new aftermarket parts are not up to scratch.

    What coating is on your exhaust manifold?

    I had mine ceramic coated inside and out plus the hot side of the turbo. Reduced the under bonnets heaps

    I may have some added some 2.8 TGV bits while I was there, like the inlet manifold and rocker cover.

    in relation to the lash caps, genuine rover/brit part etc are rubbish. Next time try Crane Lash Caps part number: 99425-16. They are made from a much harder steel and will last much longer.
    Attached Images Attached Images
    Andrew
    1998 Landrover Defender 300Tdi 130 HCPU Expedition
    1972 Peugeot 504 Sedan - Daily Driver

  8. #58
    Join Date
    May 2007
    Location
    NSW, Australia
    Posts
    4,656
    Total Downloaded
    0
    Quote Originally Posted by 86mud View Post
    Nice Work Andrew.

    Running sweet!

    I finished my rebuild in early December but hadn't driven it much....until Easter when I drove to Cooma and back from Brisbane. No issues apart from a slight oil leak at the turbo oil feed hose at the block. It is super tight, so will have to pull it off and see why it is leaking. It was a brand new part, but like you have experienced, the quality of some new aftermarket parts are not up to scratch.

    What coating is on your exhaust manifold?

    I had mine ceramic coated inside and out plus the hot side of the turbo. Reduced the under bonnets heaps

    I may have some added some 2.8 TGV bits while I was there, like the inlet manifold and rocker cover.

    in relation to the lash caps, genuine rover/brit part etc are rubbish. Next time try Crane Lash Caps part number: 99425-16. They are made from a much harder steel and will last much longer.
    Thanks Andrew!

    Looks like a beautiful job on yours also. Shame I didn't catch you at Cooma so we could compare notes. It looks great with the 2.8 bits!

    My exhaust manifold was just painted with a can of manifold paint I had laying around. I considered ceramic coating but in the end wasn't sure if it would be worth it. If you don't mind my asking, how much did it cost?

    Thanks for the p/n - I'll order some now because I'm certain the ones that are in there will not last long!

    Andrew
    [B][I]Andrew[/I][/B]

    [COLOR="YellowGreen"][U]1958 Series II SWB - "Gus"[/U][/COLOR]
    [COLOR="DarkGreen"][U]1965 Series IIA Ambulance 113-896 - "Ambrose"[/U][/COLOR]
    [COLOR="#DAA520"][U]1981 Mercedes 300D[/U][/COLOR]
    [U]1995 Defender 110[/U]
    [SIGPIC][/SIGPIC]

  9. #59
    Join Date
    Jan 1970
    Location
    Brisbane
    Posts
    1,652
    Total Downloaded
    0
    The ceramic coating cost $350

    How's the new motor going?
    Andrew
    1998 Landrover Defender 300Tdi 130 HCPU Expedition
    1972 Peugeot 504 Sedan - Daily Driver

Page 6 of 6 FirstFirst ... 456

Tags for this Thread

Bookmarks

Bookmarks

Posting Permissions

  • You may not post new threads
  • You may not post replies
  • You may not post attachments
  • You may not edit your posts
  •  
Search AULRO.com ONLY!
Search All the Web!