Results 1 to 10 of 10

Thread: camp oven cooking in the simpson

  1. #1
    Join Date
    Apr 2007
    Location
    NW Tassie
    Posts
    1,884
    Total Downloaded
    0

    camp oven cooking in the simpson

    How many heat beads to cook a small roast with vegies and how long to cook. Same question for a stew. Is it worth while taking a camp oven on a simpson crossing to cook a couple of nice hot feeds (talking late july early aug). Fair bit of weight to carry
    cheers
    blaze

  2. #2
    Join Date
    Sep 2008
    Location
    Geelong, VIC
    Posts
    4,442
    Total Downloaded
    0
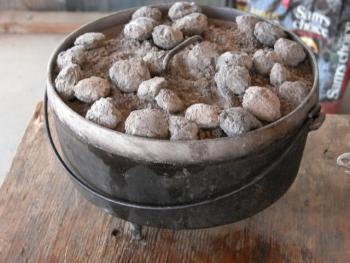
    I've only ever used heat beads on the top of mine, and from memory I put about 6 of them and they last the couple of hours it takes to cook the roast.
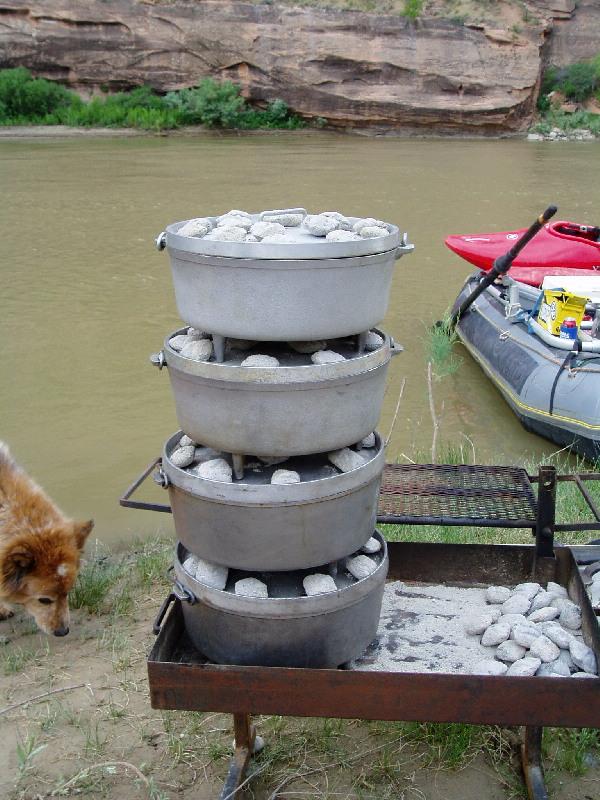
    I sit the camp oven on a small wood stove/bbq (home made "OzPig"), so I don't know how many you'd need under the oven.

    I've got a camp oven book at home that shows how to cook using only heat beads. I'll have a look tonight and see if it says how many.

    When you say its a lot of weight I presume you are meaning the cast iron camp ovens? If so, you might want to consider a spun steel one - much lighter. Not suggesting you buy one specially for the trip, but you might be able to borrow one...

    Steve

  3. #3
    Join Date
    Jun 2007
    Location
    Rodd Point, NSW
    Posts
    734
    Total Downloaded
    0
    Blaze, you shouldn't need the heat beads there. I took my camp oven last year and it was well worth it.

    What I did was,
    -built up some coals in a fire which didn't take long given the wood/wind there
    -dug a hole in the sand at least twice the depth of the oven & pre-heated the oven on the side of the fire.
    - put a good spread of coals in the base of the hole (probably an inch or more deep)
    - put the camp oven with everything I wanted cooked in it into the hole
    - same amount again of coals on top
    - put the handles in the upright position then covered the lot with sand with just the handle sticking out.
    - Leave for 2 hours or so without disturbing

  4. #4
    Join Date
    Jan 1970
    Location
    Melrose Park NSW
    Posts
    1,559
    Total Downloaded
    0
    The gidgee in the Simpson makes better coals and more heat than those heat beads do.

    We had a few great roasts and stews using the camp oven as well as baking bread in the camp oven. Even a good camel stew.

    Go without a camp oven would be a real mistake
    Chenz
    I do not wish to be a member of any club that would have me as a member

    Former Owner of The Red Terror - 1992 Defender 200Tdi
    Edjitmobile - 2008 130 Defender

  5. #5
    Join Date
    Jan 1970
    Location
    Ferntree Gully VIC
    Posts
    10,362
    Total Downloaded
    0
    get yourself a Cobb oven

    bit on the expensive side but you can cook a whole roast and veg's
    with about 4/5 heat beats...........
    and if your concern about get a fire going take one of those small butane torches for the heat beats
    130's rule

  6. #6
    Join Date
    Mar 2008
    Location
    Port Orchard, Wash., USA
    Posts
    95
    Total Downloaded
    0
    Assuming by camp oven you mean like what we call a "dutch oven," the general rule of thumb for your typical charcoal "briquettes" (which Google indicates are the same as "heat beads") is take the diameter of your oven in inches (in my case 12), and prepare twice that many briquettes (24). When they're ready, place 1/3 of them in a ring below the oven (dutch ovens have 3 legs to raise the bottom off the ground) and 2/3 around the top of the lid. So I'd have 8 below and 16 on the top of mine. That will generally give you 350 degrees F for about an hour.

    Not mine, but here are a couple shots I pulled off the Internet:


    We stack them like this to save on briquettes during Scout cookouts:


    In that case, you'd use fewer than double the diameter since you're containing the heat on the lid.

    Do your camp ovens have the legs on the bottom and lip on the lid to facilitate the use of briquettes this way? I'm curious now....

  7. #7
    Join Date
    Apr 2007
    Location
    NW Tassie
    Posts
    1,884
    Total Downloaded
    0
    Hi NM
    Have you got a secondary tray under your bread or am I seeing things.

    Thanks to all reply's
    I have really only used my camp oven ontop of a big fire pot as a heat source, so to use coals or heat beads will be new to me.
    I think I may buy a secondary smaller oven as well as my bigger one and take both along with some heat bead as a backup.
    Thanks again
    cheers
    blaze

  8. #8
    Join Date
    Feb 2007
    Location
    Barossa Valley
    Posts
    76
    Total Downloaded
    0
    Have a look at this web site for all you need to know about camp oven cooking.
    CAMP OVEN COOKING IN AUSTRALIA (COCIA®) - WITH 'THE CAMP OVEN COOK' - DEREK BULLOCK

  9. #9
    Join Date
    Jan 2009
    Location
    Far North Qld
    Posts
    120
    Total Downloaded
    0

    coals on domed lids

    I have seen someone in the past, using a length of thin metal strap, about 1 inch width, bent into a rough circle and with the ends riveted together, placed on top of the lids as a small bund wall to hold the coals on the lid and stop them from rolling off. The diameter of the fit was about an inch or so from the edge of the lid.

  10. #10
    Join Date
    Mar 2008
    Location
    Port Orchard, Wash., USA
    Posts
    95
    Total Downloaded
    0
    Quote Originally Posted by Numpty's Missus View Post
    I would imagine that using head beads/briquettes would make temperature regulation a little more precise
    I agree. As I mentioned, you can pretty much count on 350*F for about one hour with the briquettes. That's all I've ever used.

    Quote Originally Posted by Numpty's Missus View Post
    You don't need to bury the oven as Ricey suggested. I wouldn't do it as it makes just one more chance of getting grit & sand into your meal
    Burying is only needed if you're A] cooking for several hours and B] not wanting to be present to add coals to the oven to keep it going. Burying it in the dirt with coals above and below it, as mentioned above, would let it cook on its own for 4-6 hours or more. Prepare a stew or a roast or such in the morning, bury it like that, then go about your day's activities and when you get back, dinner's ready. But yes, do be careful opening the lid to keep the dirt out! I carry a small whisk broom with my cooking kit to clean dirt and ashes off.

    Quote Originally Posted by Numpty's Missus View Post
    (both our ovens are the cheap Chinese $20 varieties with domed lids and work perfectly)
    A funny side-note.... When I bought our cast iron cooking set (dutch oven, griddle & 2 frying pans), the box was clearly marked "Made in China." My wife (who's Chinese herself! but from Taiwan) really didn't like the idea as most of the stuff you get from China is pretty much junk. But I told her hey, cast iron is something like a 300-year-old technology, so I think this stuff is right in their area of expertise!

Bookmarks

Bookmarks

Posting Permissions

  • You may not post new threads
  • You may not post replies
  • You may not post attachments
  • You may not edit your posts
  •  
Search AULRO.com ONLY!
Search All the Web!