-
6th October 2016, 03:40 PM
#1
Make your own mounting brackets - Milford Cargo Barrier
My car came with a Milford cargo barrier. The seller said it belonged to one of his mates, who gave it to him when he sold his car. Said he never got around to installing it. It had a bunch of bolts and mounting plates with it.
But on closer examination, I realised that all I seemed to have were the following:
Mounting plates for the forward position; and
Fixing bolts for the top and the bottom.
When I looked at the installation instructions, I realised I was missing quite a bit. A bit more searching around on this forum and I found this very helpful post on the installation.
http://www.aulro.com/afvb/discovery-...ll-thread.html
Plus, others saying that Milford want extortionate amounts of $$ for a mounting kit. So I figured I would try and make my own.
Turns out the making the mounting plates etc. was the easy part. The installation was the PIA. But as I had seen a number of barriers kicking around for sale without any fixings, I thought I would post up how I did it as others might be thinking along the same lines.
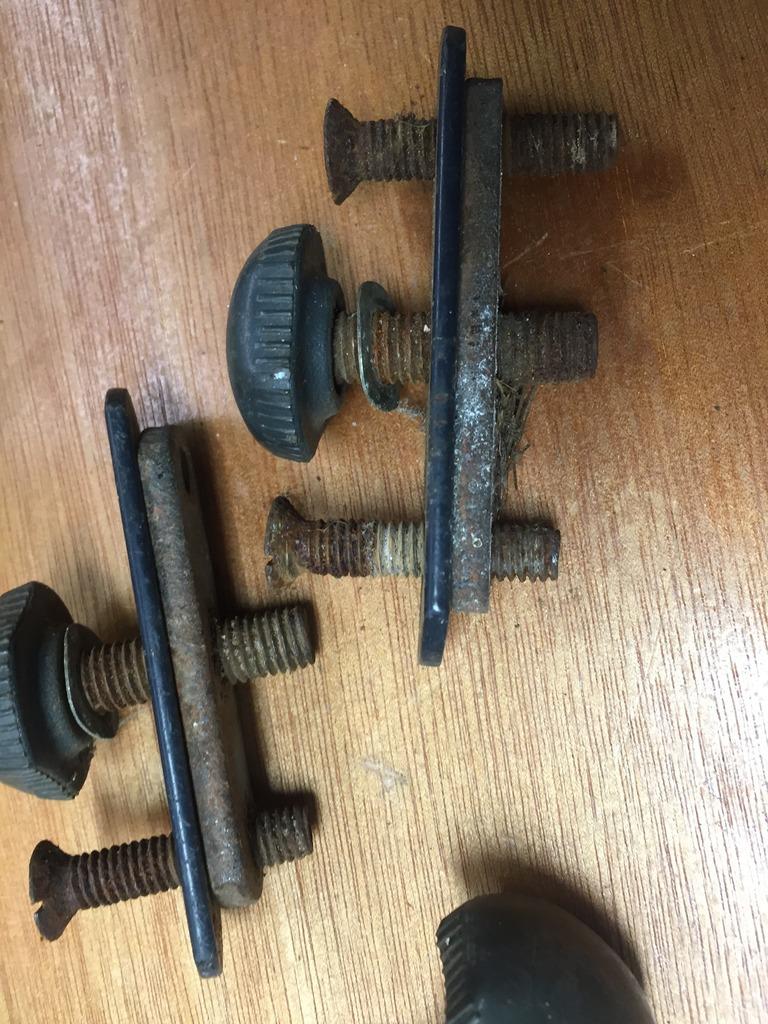
All the bits I got were rusty, so I gave them an electrolysis bath for a few days to clean them up. From that, you can see the mounting plates are just mild steel, and they look to just be flat bar that has been cut with the ends rounded over by hand (as they are not symmetrical), with holes drilled and tapped. The bolts I had again, don't appear to be high tensile and the guy at the nut and bolt place agreed.
So the challenge was working out the dimensions of the cover plates. I had the smaller ones, and the parts list in the instructions, gave me some hints as to what sizes they should be. Plus, the installation post above, gave me a lot of insight into how they install them. So I figured, that the size and the location of the plates or the holes was not super critical, as the mounting plates themselves are used as templates for drilling the holes. The bolts again, were not critical. The main mounting bolt used for fixing the barrier to the mounts, is a M10 bolt. The other bolts for fixing the mounting plates are imperial. I'm not sure why. But as I only had metric tap set, I went for an M8 bolt which was about the same size.
So I made the upper rear mounting plates as follows.
Mild steel flat bar for the material. With the following dimensions 105 x 19 x 4mm
M10 tapped center hole, with two M8 tapped holes with the centers about 15mm in from the ends.
The matching rear cover plates were as follows:
Mild steel flat bar for the material. With the following dimensions 119 x 24 x 2mm
Over sized and counter sunk holes to allow the M10 and M8 bolts to pass through.
Bolts,
4 x stainless M8 at 65mm.
2 x M10 bolts at (I need to measure them)
I got the steel from Di Lena in Perth (he actually just gave it to me for free). But a steel place that sells by the meter would be preferable to Bunnings.
Bolts, I bought from a nut and bolt place that sells them individually.
Total cost to me was $3.60.
Lower mounting plates and the front upper plates are as follows.
Mild steel flat bar for the material. With the following dimensions 71 x 19 x 4mm
M10 tapped center hole, with two M8 tapped holes with the centers about 15mm in from the ends.
The matching rear cover plates were as follows:
Mild steel flat bar for the material. With the following dimensions 85 x 24 x 2mm
Over sized and counter sunk holes to allow the M10 and M8 bolts to pass through.
Bolts,
4 x stainless M8 at (I need to measure them).
2 x M10 bolts at (I need to measure them).
All up pretty easy job to make the mounting plates. This assumes you have the pieces that come off the barrier that then bolt up to the fixed plates. You probably would if the barrier is sold or kept from a previous car. Given the difficulty in mounting the plates, I suspect that no one wants to go to the pain of removing the fixings when they sell the car. They just keep the barrier (which would have those extra bits attached).
The fixing tool the instructions speak of? I don't know what it was, but I just used some copper wire to draw the plates through, and then I found a magnet on a stick helped in holding the cover plate in position while I started the bolts. Also I drilled 25 mm access holes, as that was the only sized drill I had and I didn't want to buy a 22mm. That extra size seemed to help in the installation. I think once I had gotten all the trim off and drilled the holes and then cleaned up, it probably took me 10 mins each side to install the brackets. It was the removal of trim and the hole drilling that takes all the time.
I didn't mount the bottom mounts, as I want to install some drawers and I will cut my barrier to have it mount to the top of my drawers as I think it will give me slightly more space in the drawers.
Also I didn't include details of how I installed them, as it is well covered in the post above
Disclaimer
The above is not ADR approved (obviously) so make them at your own risk. This is just how I did it, and it may not necessarily be safe. For me, it will only be there to stop the light stuff such as sleeping bags, pillows etc. from falling forward into the front cabin. So you may want to fork out for the proper mounts. But up to you to decide.
Original bolts all rusted together
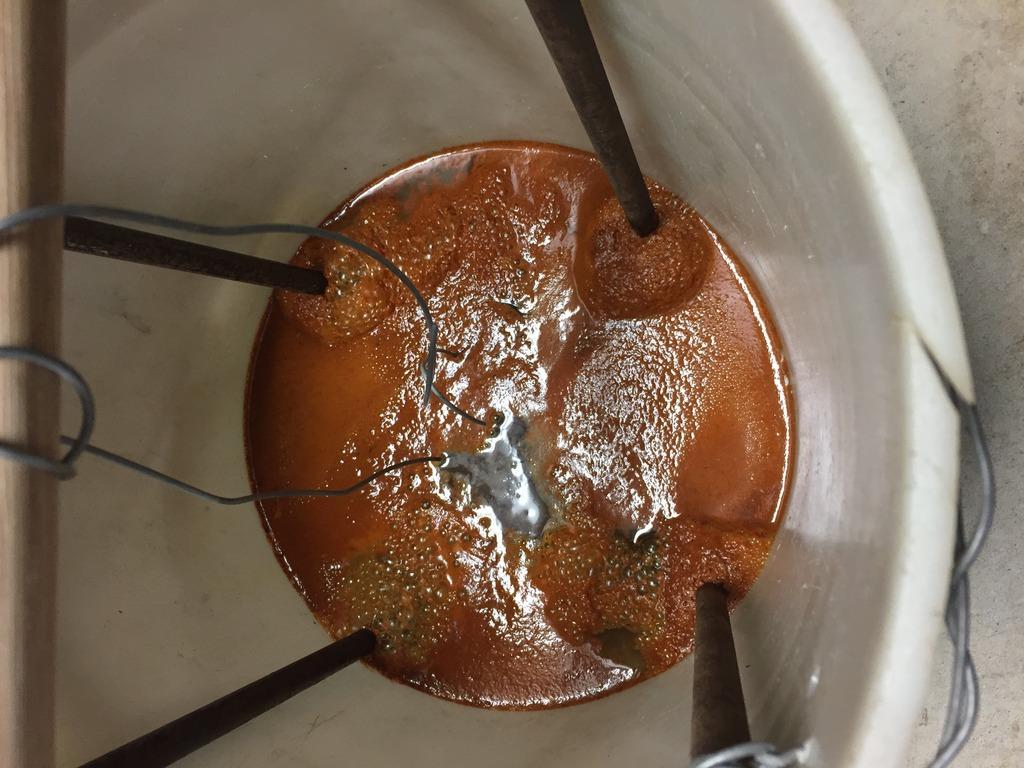
the magic of electrolysis
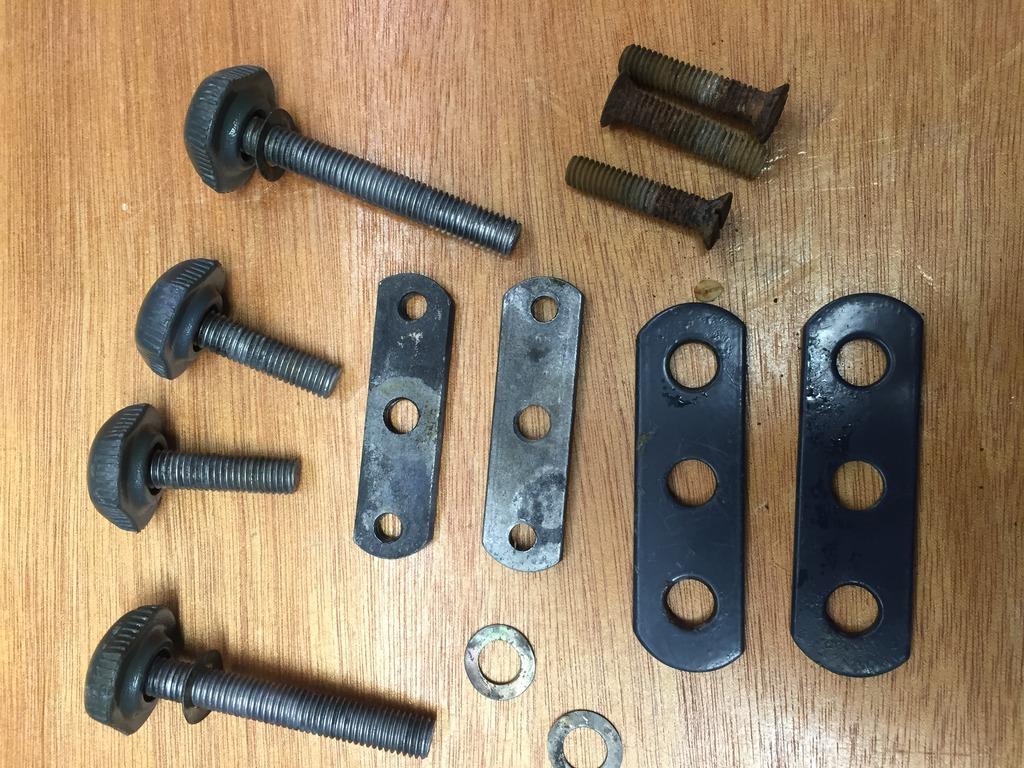
after washing up. I didn't bother with the rusty imperial bolts (they were flat head and I hate flat head screws), I just binned those.
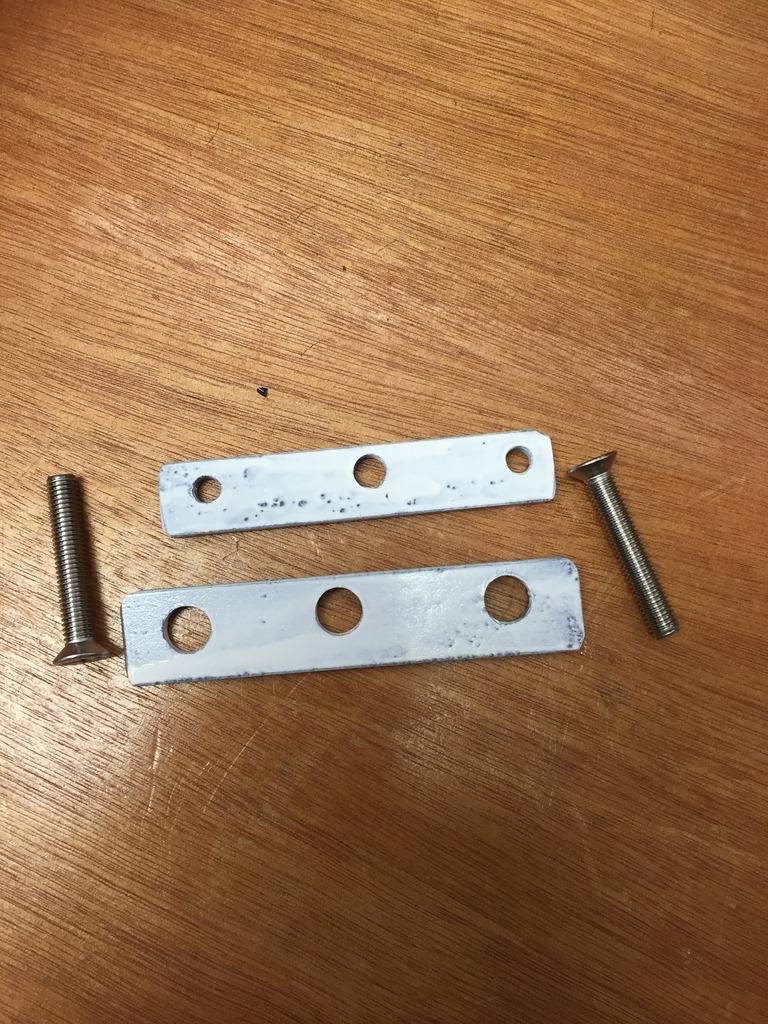
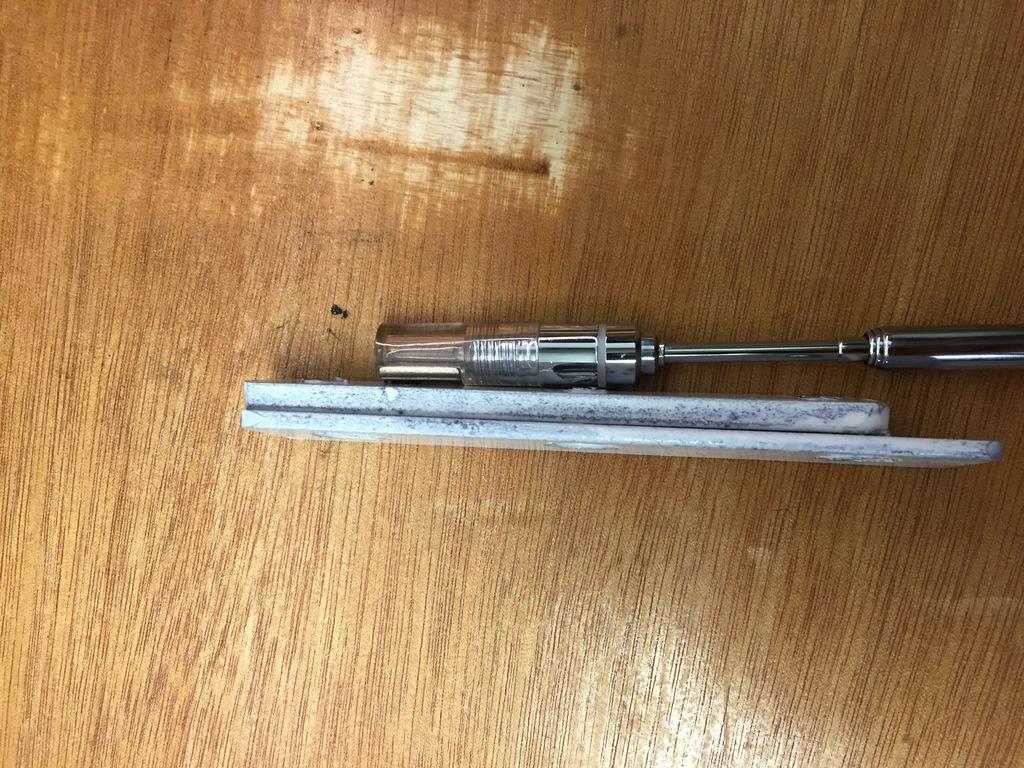
My plates after the first coat of paint
Yes I didn't have the vise quite centered on the drill press...
Side on
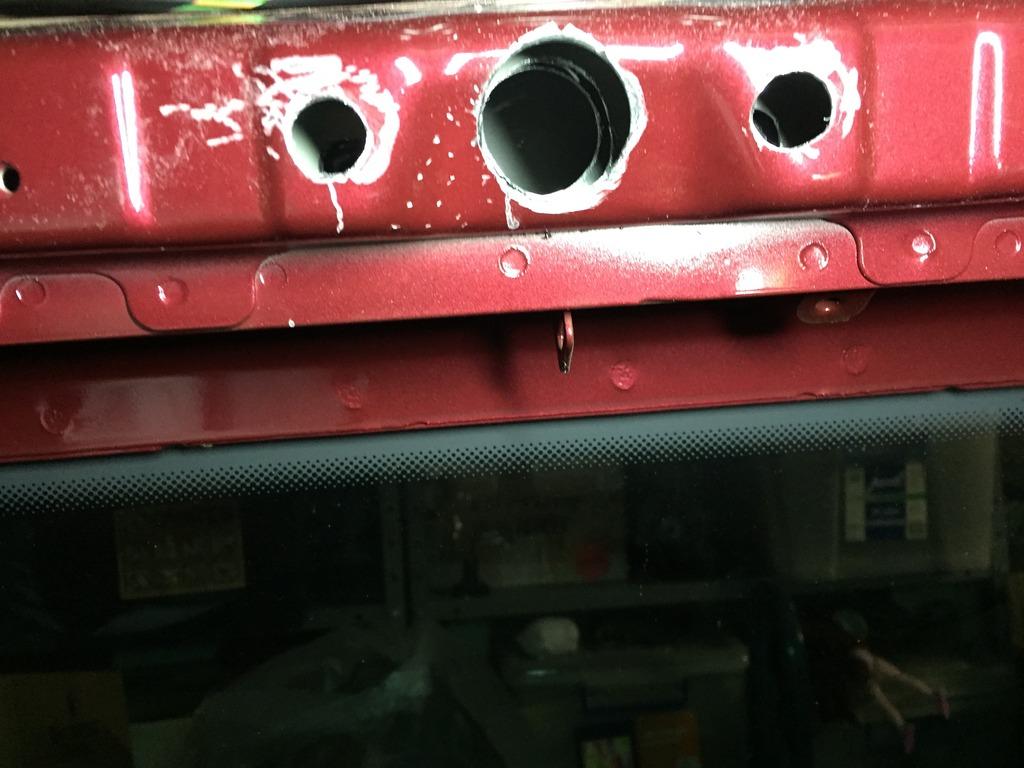
the ugliness behind the trim
 Posting Permissions
- You may not post new threads
- You may not post replies
- You may not post attachments
- You may not edit your posts
-
Forum Rules
Search AULRO.com ONLY!
|
Search All the Web!
|

 Master


 Reply With Quote
Bookmarks