


 Reply With Quote
They are like brand new!
What happens to the waste water?
does it kill the tomatoes?

 ForumSage
A few I took today.Originally Posted by LandyAndy

What everything has started out looking like ................................
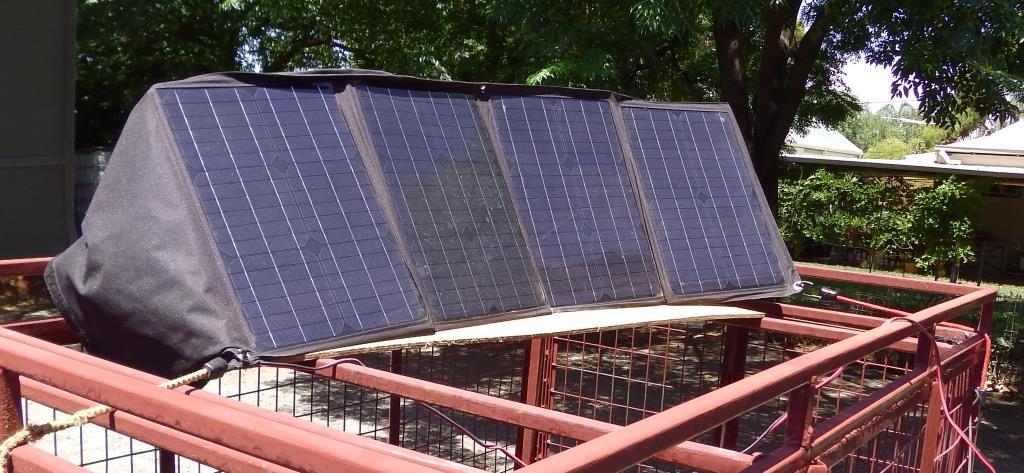
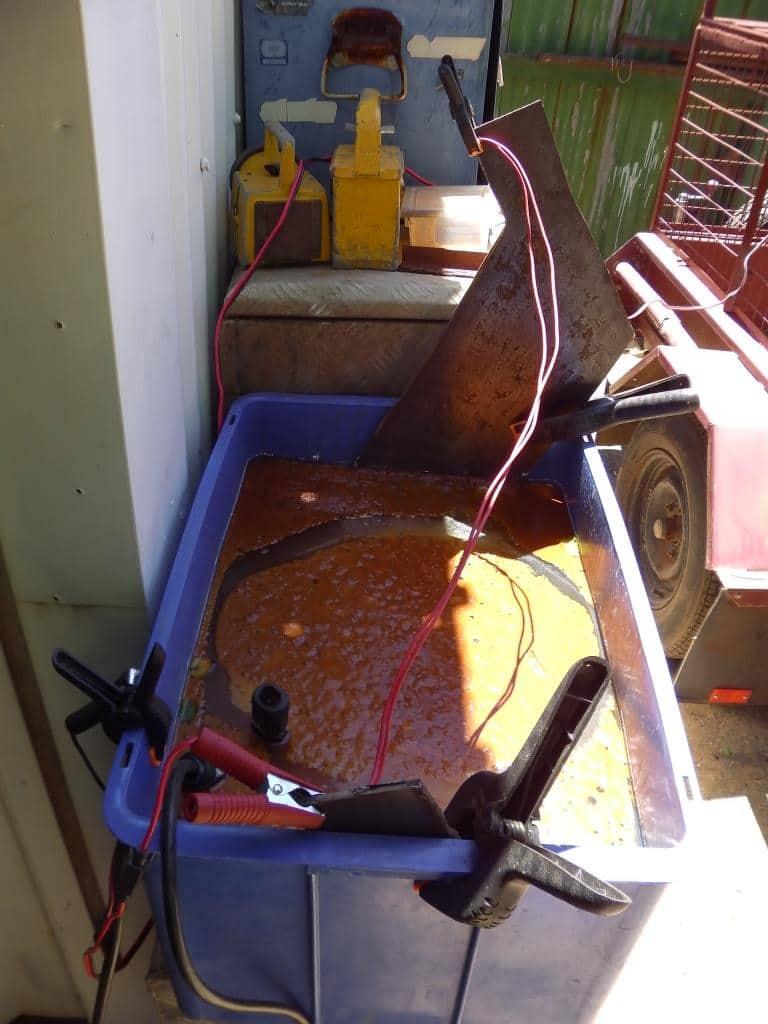
The solar panels currently supplying power - seems to be working well without the voltage controller / regulator. I did have them set up on the roof of the camper trailer, but that has now been set up for a potential buyer to come around and have a look at it, so have moved solar panels down onto the cage on my other trailer.
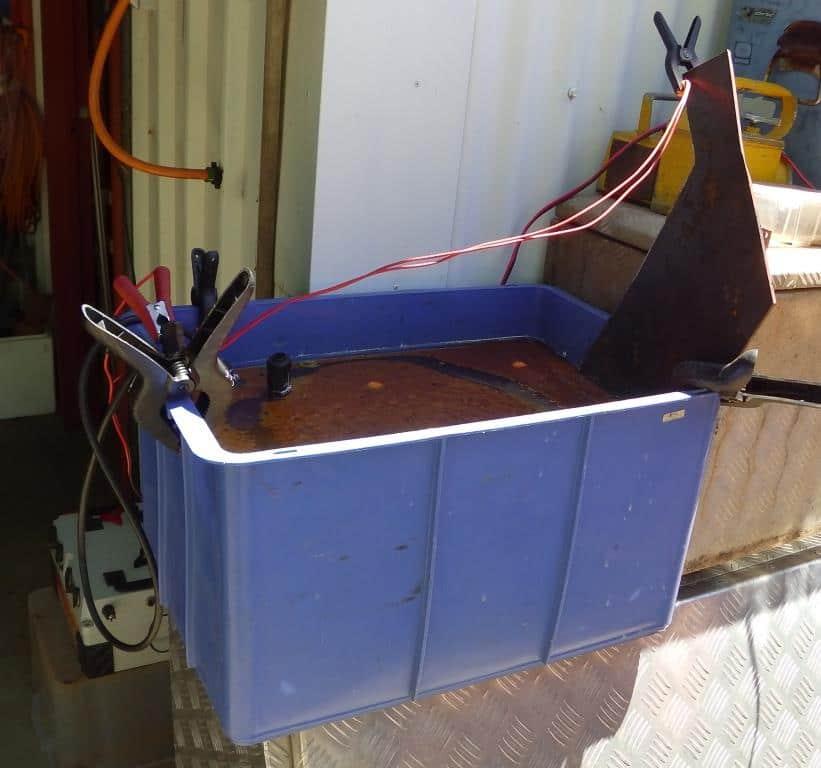
A couple of pics of the actual tub where the electrolytic cleaning is happening. At present, I am running two anodes (one at each end of the tub) which I will pull out and clean tomorrow. I usually get up to 1/2 inch thick rust scaling on these plates before cleaning with hose and wire brush, and then returning to the tub. When I was using a smaller tub for cleaning smaller items, I only had one anode set up in one end of the tub - seemed to work well enough.
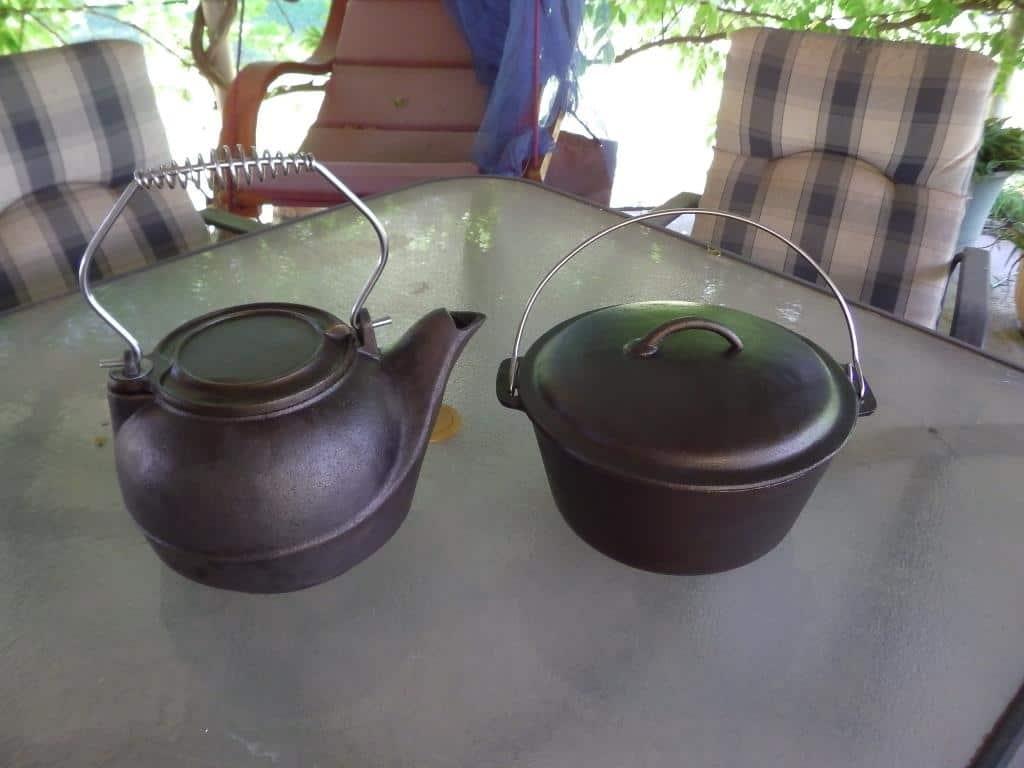
A couple of the finished products. First, an old bench vice that I found that was covered in rust and grease, and was almost siezed solid (took a bit of gentle persuasion with an FBH and some cursing before I eventually got it all stripped down. Came out well though, and I now have two bench vices in my shed.
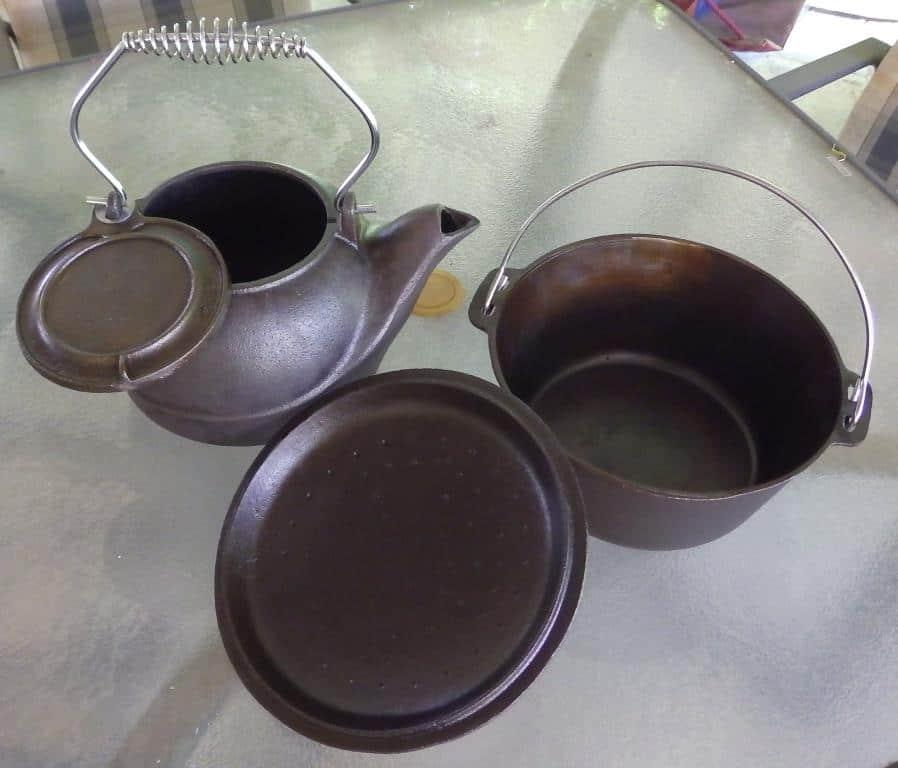
And the first of two camp ovens I wanted to clean, plus a heavy old cast iron kettle / air humidifier that was a rusted out mess.
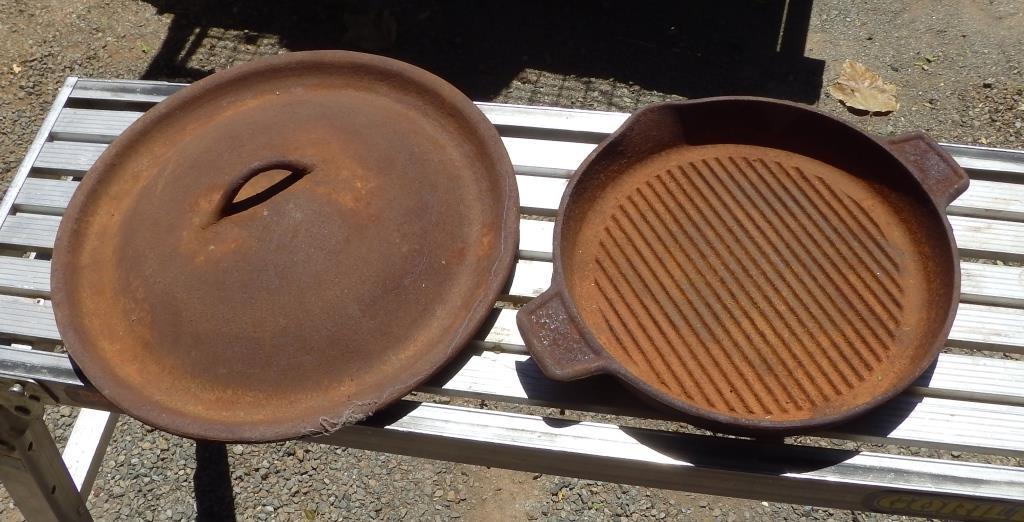
The second and larger camp oven that I want to clean is in the tub now. After that, I only have the lid of that camp oven to do, and that round grill / frying pan. Should be all finished in a few more days. Takes a bit longer using only the solar panels for power, as you only get effective cleaning during daylight hours. But I'm not in any rush ............... and solar power is not costing me anything.
The electrolyte solution in the tub is simply rain water from the tank and washing soda (sodium carbonate - NOT sodium bicarbonate from the kitchen) added at two and a half cups per 10 litre bucket of water. It is recommended not to use tap / scheme water if your water is chlorinated - no problems here as I installed a large rainwater tank alongside the laundry a few years ago, and we always have plenty of rainwater in that.
I usually make up a fresh batch of electrolyte solution for each item that I want to clean. By the time you finish each item, there is usually a layer of rust colored froth / scum about an inch thick floating on top, and the solution itself is dark brown, approaching black with rust and carbon removed from the cast iron.
Cheers .........
BMKAL
The MOD Father
They are like brand new!
What happens to the waste water?
does it kill the tomatoes?
"How long since you've visited The Good Oil?"
'93 V8 Rossi
'97 to '07. sold.
'01 V8 D2
'06 to 10. written off.
'03 4.6 V8 HSE D2a with Tornado ECM
'10 to '21
'16.5 RRS SDV8
'21 to Infinity and Beyond!
1988 Isuzu Bus. V10 15L NA Diesel
Home is where you park it..
[IMG][/IMG]
ForumSage
I don't think that there is anything particularly nasty in the waste water. I have not been wearing gloves while handling any of this - the sodium carbonate is basically soda ash or common washing soda that you will find in one form or another in most laundries. The "metal" in the waste water would be mostly iron oxide. I have simply been emptying it out onto the back lawn and watering it in. No dead spots yet ..........................
Cheers .........
BMKAL
The MOD Father
ya gotta love practical science
"How long since you've visited The Good Oil?"
'93 V8 Rossi
'97 to '07. sold.
'01 V8 D2
'06 to 10. written off.
'03 4.6 V8 HSE D2a with Tornado ECM
'10 to '21
'16.5 RRS SDV8
'21 to Infinity and Beyond!
1988 Isuzu Bus. V10 15L NA Diesel
Home is where you park it..
[IMG]
RoverLord
That's pretty impressive Brian.
Its done a brilliant job.
Andrew
DISCOVERY IS TO BE DISOWNED
Midlife Crisis.Im going to get stuck into mine early and ENJOY it.
Snow White MY14 TDV6 D4
Alotta Fagina MY14 CAT 12M Motor Grader
2003 Stacer 525 Sea Master Sport
I made the 1 millionth AULRO post
ForumSage
And here's the science based solution for seasoning the cast iron (she's on the money):
Sheryl's Blog ? Blog Archive Chemistry of Cast Iron Seasoning: A Science-Based How-To
cheers, DL
RoverLord
Brian.
Using your method,do you need to remove old caked on oils etc???? Thinking both in cooking implements(BBQ grills,camp ovens etc) and machinery parts(engine blocks,gearbox casings,diff casings etc).
Nothing planed at the moment,just filing away the knowledge
Thanks
Andrew
DISCOVERY IS TO BE DISOWNED
Midlife Crisis.Im going to get stuck into mine early and ENJOY it.
Snow White MY14 TDV6 D4
Alotta Fagina MY14 CAT 12M Motor Grader
2003 Stacer 525 Sea Master Sport
I made the 1 millionth AULRO post
ForumSage
Andrew, doing similar with just phosphoric acid there is no need to get the grease off prior.
DL
ForumSage
Thanks for that - hadn't seen that particular article. It is very close to what I have done based on what I have read from other sources. I have used a decent quality organic flaxseed oil. The only real differences between the procedures as described in the link are -
1. I heated the camp oven to dry it after cleaning, then applied the first coat of flaxseed oil while the camp oven was still quite hot (definitely couldn't "rub" the oil into the cast iron with my bare hands). I then put the camp oven into the kitchen oven at about 180 degrees C for an hour. After this, I removed the camp oven from the kitchen oven and allowed it to cool down to a temperature where I could "almost" touch it, and applied another coat of flaxseed oil. The camp oven then went back into the kitchen oven for an hour and a half at 200 degrees C, following which the oven was switched off, but not opened. The camp oven (and other items) were left to cool down with the oven overnight and were removed this morning.
2. I only intend giving everything two coats of flaxseed oil (and not six as suggested in this article). The ventilation in our kitchen isn't that flash (there's no range hood) and as it is I'm trying to do the "seasoning" when SWMBO is not at home to keep the peace.
Good to know that the procedure I've chosen (there were plenty of options suggested by a whole range of different sources on the interweb) is pretty close to what is in this article - it appears that the author has definitely done her research properly and knows what she is talking about.
Cheers .........
BMKAL
ForumSage
That old bench vice had a lot of old, dried out caked on grease and dirt in the underside channel where the threaded rod runs - I scraped most of it out but there was still a fair bit left in there. It all came out over the first day in the tub - I had to change the electrolyte at the end of the first day with that one. It was only in a small tub, and the solution was very dirty with a thick layer of froth / scum on top - such that I could not actually see if there was any bubbling going on.
The only camp oven that had any significant amount of caked on oil on the inside was the one that is in the tub now - and it seems to have cleaned out quite quickly in the tub with no help from me so far.
Nothing comes out of the electrolysis process looking as clean and shiny as in any of the pictures above. In general, everything comes out a dull grey - not attractive at all, but clean and absent of any sign of rust. I hose clean and dry everything off (weather has been quite warm up here recently so it generally only takes a couple of minutes for things to be dry after I remove from the tub and hose them off.Then I hit them with copper wire brush/es. I have a range of different shape / size copper wire brushes in the shed, from the big wheel on the end of one of the bench grinders, plus a couple of different ones that fit into angle grinders, down to a few smaller ones of different shapes that are used in electric drills. Doesn't take much effort at all with the appropriate sized wire brush/es to remove any loose stuff and remaining crud, and this process tends to result in a "shiny" finish. The next step after that is a good thorough wash in the kitchen sink before being placed in the oven to dry and seasoning applied.
Cheers .........
BMKAL
 Posting Permissions
| Search AULRO.com ONLY! |
Search All the Web! |
|---|
|
|
|


Bookmarks