

 Reply With Quote
The only problem is that the top of the tank is flat and vent is in one corner so if concrete at the petrol station is not level i can fill only 50 around litres of diesel.

 ChatterBox
Subscriber
ChatterBox
SubscriberLooks like a great use of the space. Impressed you fitted in a 57L tank and it would be neutral from a total weight point of view with the weight you saved removing the seats.
Fossicker
SubscriberThe only problem is that the top of the tank is flat and vent is in one corner so if concrete at the petrol station is not level i can fill only 50 around litres of diesel.
TDV6, MY13, ARB bar, Led bar
Fossicker
SupporterWhich way does the facer around the seat base locking mechanism lift off (upwards or side-ways)? I have tentatively tried to lift it but nothing seems to be moving other than flexing the trim - don't really want to break it. Are there only two clips and are they under the label?Originally Posted by Chris Preso

Thanks, Ian
Super Moderator
SubscriberJust completed this job today. The instructions earlier in this thread are pretty much spot on but thought I'd add a couple of details and photos that may be of assistance to others.
Original instructions in bold and my comments are in italics.
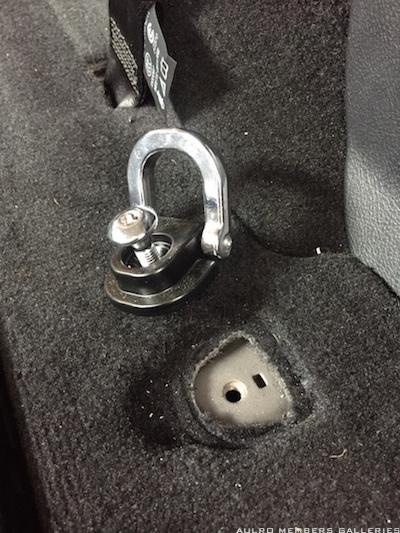
1) Remove the tie down bolts (two on each side).
What the tie-down look like when out.
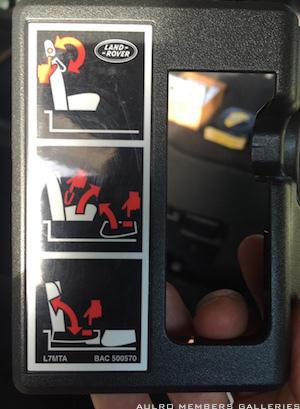
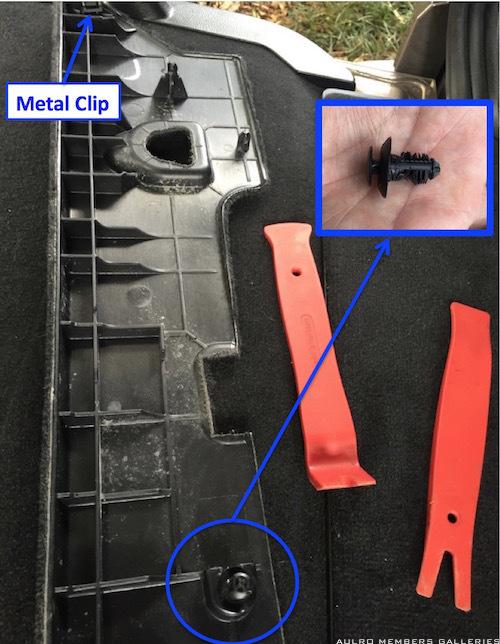
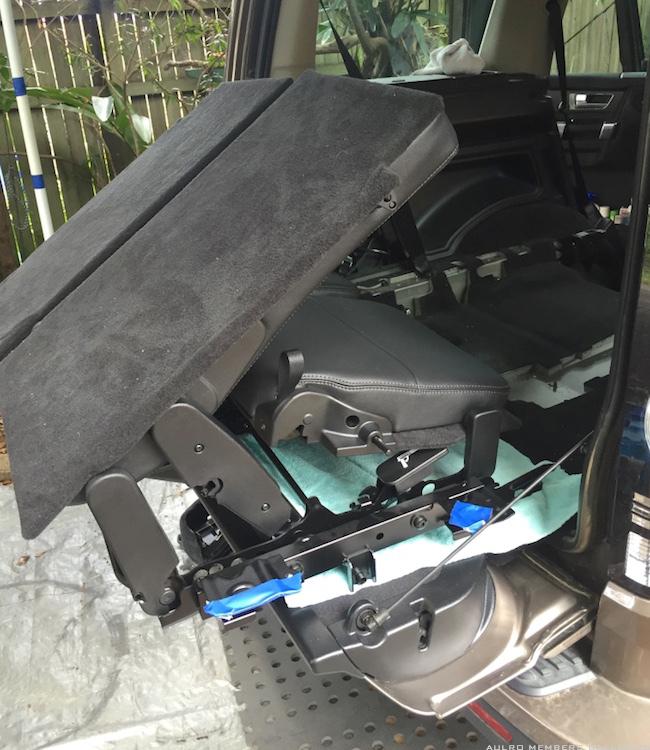
2a) Lift the trim covers off.
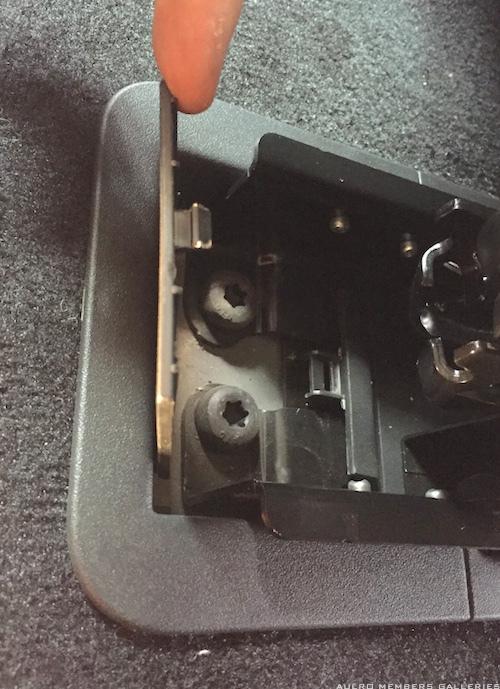
The facer around the seat base locking mechanism is only held on by a couple of plastic clips and pulls off fairly easily.
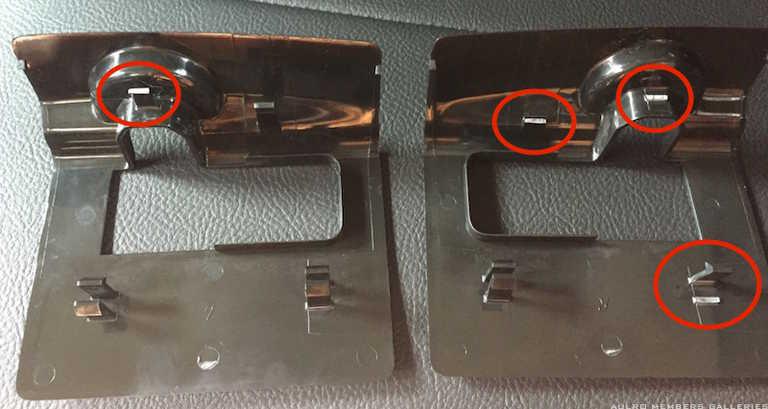
These pieces have easy-to-break tabs (broken ones circled in red below).
You need to pull up only, as vertical as possible.
I did this on the 2nd one but still broke a tab (left one in photo above).
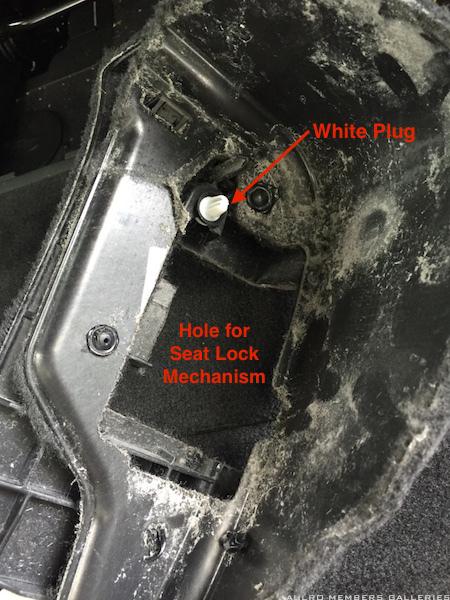
2b) The carpeted trim is also only held on by some plastic clips and just pulls up. This exposes the seat mounting bolts.
Two photos of the underside of the carpeted trim for reference.
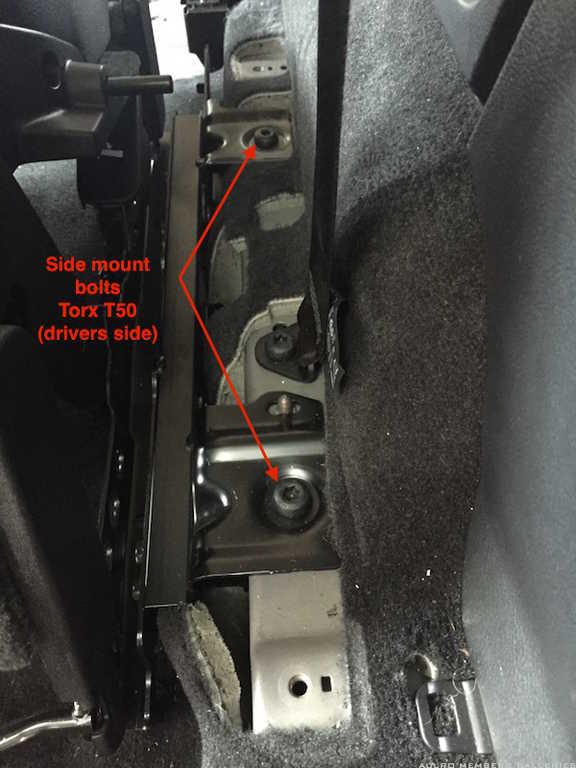
3) Remove the side seat mount bolts. You will need a TORX bit T50.
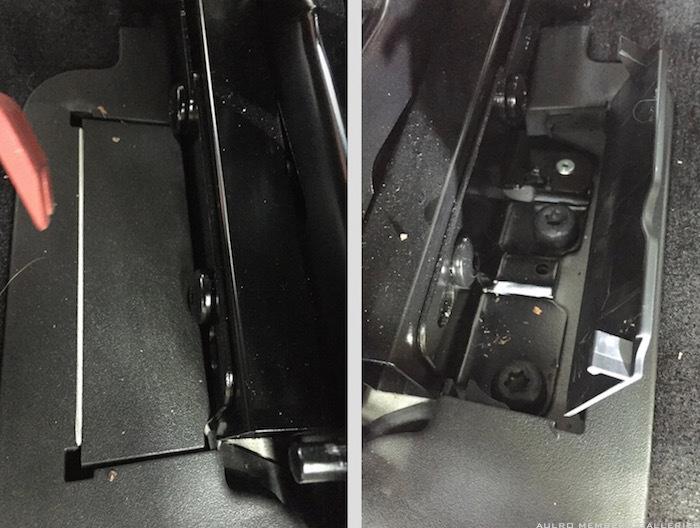
4) Partially lift the rear of the seat to expose the base, lift the plastic covers around the centre mount and remove the four bolts.
Left photo shows plastic cover closed. Right photo shows cover open to expose bolts.
5) Partially lift the front of the seats, lift the plasic cover around the centre mount and remove the two bolts.
6) Lift the whole unit out. It weighs 50+kg so a second person to help would be helpful.
It is a two-person job for sure. It is difficult to weigh but we estimated closer to 40kg using bathroom scales.
Note the blue tape on the side seat bolting brackets. The brackets are sharp and will scratch the trim on the way out.
Cheers,
Scott
D4 TDV6 MY14 with Llams, Tuffant Wheels, Traxide DBS, APT sliders & protection plates, Prospeed Winch Mount w/ Carbon 12K, Mitch Hitch & Drifta Drawers
Link to my D4 Build Thread
D3 2005 V8 Petrol
Ex '77 RRC 2 door. Long gone but not forgotten.
Fossicker
We have removed 2nd row for one journey to Broome and return Perth when we needed extra space for water (flexi bladder) and suitcases as well as all camping gear for 3 weeks as well as the suitcases for boat trip.
Agree with Oldsalt they come out fine with approp. ratchet, flexible wrists and good biceps to finally lift/put back in, oh and that Torx piece for the wrench extension, (assuming 3rd row needs extension, maybe not). Space gained = no damage to flexi water tank plus 2 x suitcases fitted where 2nd seats were. All went back in fine on our return. Goodluck.
Thinking of doing the same for another trip, this time though as per your case, 3rd row, to allow access to spare wheel release nut setup without removing all the rear load space luggage.
Regards, Ian A
Super Moderator
SubscriberJust wanted to add part number details for the trim covers that got broken:
HXT500780PVJ (right hand side)
HXT500790PVJ (left hand side)
$10 each from the dealer spare parts dept.
Scott
Fossicker
Hi Dalil
Just read your post on your in vehicle fuel tank. Looks great.
Would you have the dimensions for your tank and approx cost to fabricate.
Have you put a false floor over the tank.
regards
Peter
Master
SupporterYou actually get a huge amount of space. We have the following where the seats used to be; hi-lift jack base plate, second wooden jack plate, large sidchrome toolkit, snatch strap, 30m of plasma rope, torque wrench, wheel changing wrench, axe(long handle), two puncture repair kits, tarp, tree trunk protector, cable damper, rubber mallet and two safety vests and a drag chain. All easy to access via our custom built sliding tray which holds; the fridge, tool kit, compressor, porta-potti, 36 bottles of wine and our winter clothing given we are currently in the Kimberley and returning to Adelaide late September when it will still be a touch cold
Rob
Rob
MY15 TDV6. Compomotives with KO2's, Traxide 160-DBMS, Llams, OE bar, custom rear storage slide, Rhino roof storage system, LSM TPMS, ICOM 440N, rear ladder and GOE compressor guard
YarnMaster
can you please share with us who made the tank? I'm looking for a similar option but for a water tank under my draw system at the moment.
Cheers LRH
Disco 4 SDV6 Auto
Disco 4 SDV8 Dual Cab Project
Disco 2 M57 Extra Cab Project
Foton Tunland Cummins ISF
Disco 1 3 door 4.6 V8 Auto
RRC V8 Auto "Classic" Softdash
RRC 300 TDI Auto
Disco 1 TD5 Auto Buggy
Disco 1 300 Tdi Auto Ute
SAME Explorer 70HP 4x4 Tractor plus Nell Loader
Subaru GDA WRX
Triumph Bonneville SE
Yamaha TTR250
 Posting Permissions
| Search AULRO.com ONLY! |
Search All the Web! |
|---|
|
|
|

Bookmarks