Page 4 of 4 FirstFirst ... 234
Results 31 to 37 of 37

Thread: Discovery2 Safari Snorkel Install

  1. #31
    Join Date
    Oct 2007
    Location
    Brisbane West
    Posts
    7,372
    Total Downloaded
    0
    My stacker is no longer used. I will get around to removing it one day. I have a manual. I used to have stock seats but now have electric leathers...however with even the stock diffs and box breathers i am confident that they happily wade deeper. I have had in crossings where water has come over the bonnet and down the side of the A Pillars....and that was correct sp?ed with a bow wave just formed nicely, not racing through. The system of pulling in air from the inner guard, convoluted path etc all conspire to give it much higher wading depth than the manual says, in terms of the motor. Coil packs and alternator are up in the valley height for the v8, and tbe bosch system has much more punch than the old lucas systems.

    I have also sealed up the gaps between the rubber seal ends with a bit of clear silicon so it keeps water out pretty well.

    A snorkel would bring piece of mind however if the vehicle stopped mid crossing and the water could wind its way into the air intake without a (properly fitted..) snorkel.

    I can go about another 3 inches over stock anyway due to lift and larger tyres.

    Cheers

  2. #32
    Join Date
    Oct 2007
    Location
    Brisbane West
    Posts
    7,372
    Total Downloaded
    0
    This is interesting - but probably not comparable given what appears to be a significant size difference in the stock intake and the Safari snorkel for the Prado appears to have a much bigger intake (round) hole to cut into the guard than the oblong one for D2.

    Cheers

    Welcome to Land Cruiser Owners On Line

  3. #33
    Join Date
    Dec 2007
    Location
    Sydney, you know. The olympic one.
    Posts
    4,853
    Total Downloaded
    0
    That comes down to the shape of the entry into the airbox in the D2. It's oval, there's an adaptor that fits over the cutout through the inner guard and attaches to the same points as the flexible part form the airbox to the guard. This flexible part needs top be sealed with siliastic as well to be watertight. Just coat, spray liberally with windex and smooth with fingers.

  4. #34
    Join Date
    May 2010
    Location
    melbourne
    Posts
    375
    Total Downloaded
    0

    Template

    I've just found a copy of the install papers and tracing of the template on an old laptop HDD and uploaded them the files section.

    http://www.aulro.com/afvb/local_link...catid=7&id=170

    Please check scale and check against snorkel prior to drilling.

  5. #35
    Join Date
    Jan 1970
    Location
    Eastern Suburbs, VIC
    Posts
    627
    Total Downloaded
    0
    Just saying thanks as I installed a new safari on my d2a today using these instuctions as well as safari's.

    One thing for any new players, check the supplied template on the snorkel first. Mine was out a bit, I guess that's why they get you to go to 16mm on a hole for a 10mm stud! As per OP I only went to about 12-13mm.

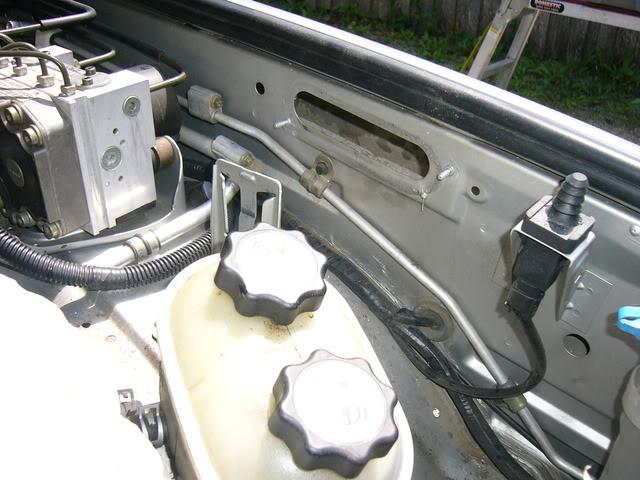
    When sealing the airbox there is a little square hole on the bottom just Infront of the water trap, don't forget about that.

    Although its not required and probably didn't make any differance I opened up the inner panel slightly to match the snorkel inlet as it was slightly off center.
    Another thing I noticed is the snorkel head sits up quite high ( compared to others ), if I noticed this before I fitted everything else up I probably would have cut 10-15mm out of the top of the snorkel body to try get it a bit lower and streamlined but that's just me being picky!

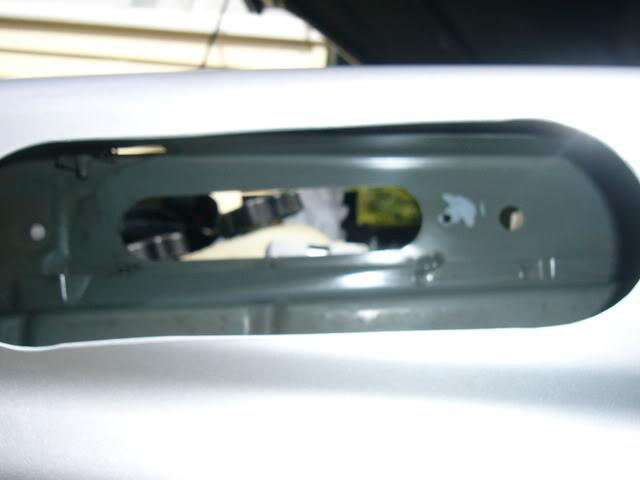
    All in all an easy job with the instructions in this thread, attacking the 1/4 panel with a 70mm holesaw is a little daunting at first haha.

    Have a safari snorkel template in SE suburbs VIC if anyone ever needs to borrow.

    Weighing in to the "do you need one argument" if your going near water I would.
    I believe it would easily be possible to get water up to the factory intake without it getting into the car and compromising other electronics, well unless your "dead in the water"
    1986 Range Rover Hiline
    2004 D2 TD5

  6. #36
    Join Date
    Jan 1970
    Location
    Melb
    Posts
    135
    Total Downloaded
    0
    Quote Originally Posted by 999 View Post
    While the power tools are out mark and drill the hole for the Cast metal inlet piece also drill the casting use a 4mm bit (I had to relocate my PAS/Ace reservoir)to get the drill in


    Do you have to remove the PAS/Ace reservoir? It looks like you can drill it out through the oval hole on the outside?
    Or am I misreading it?

    Ian

  7. #37
    Join Date
    May 2010
    Location
    melbourne
    Posts
    375
    Total Downloaded
    0
    The ps and ace reservoir is easy to move to the side you don't need to disconnect it

    Sent from my Nexus 4 using AULRO mobile app

Page 4 of 4 FirstFirst ... 234

Bookmarks

Bookmarks

Posting Permissions

  • You may not post new threads
  • You may not post replies
  • You may not post attachments
  • You may not edit your posts
  •  
Search AULRO.com ONLY!
Search All the Web!