

 Reply With Quote
top idea = but it only applicable if there is no spare tyre.Dont you like the way you can put the bonnet right up and fix it so it wont fall on your head.
Wayne

 YarnMaster
Supporter
YarnMaster
SupporterDont you like the way you can put the bonnet right up and fix it so it wont fall on your head.
ChatterBox
top idea = but it only applicable if there is no spare tyre.Dont you like the way you can put the bonnet right up and fix it so it wont fall on your head.
Wayne
YarnMaster
SupporterHi Wayne.
Yes this bonnet has not got the carrier. The others with carriers are all cracked.
I will keep the tyre in the back to even out the weight a bit.
Keith
YarnMaster
SupporterThought the tyres looked a bit big so swapped them for the 700,s off Barumbah. Looks and goes better. Get more lock and fit behind the seats where the other did not.
Last edited by 123rover50; 24th January 2012 at 07:29 AM. Reason: spelling
ChatterBox
Hi ther Keith
I will be taking your lead with this idea - buy putting the spare tyre in the back of the car. Due to the fact the kids & wife dont check the oil or water as they are unable to get the bonnet open (weigth issues).
Ps - nice comfortable seat backs.........
Thanks
Wayne
YarnMaster
SupporterAs the engine history is unknown I thought I better replace the Timing belt. While I had the radiator out I thought I would do the winch drive to avoid removing the rad again later.
Bit hard doing a winch drive on a 200 tdi but I turned up a sleeve that fits over the nut and welded on a flange with holes that mate with the 4 8mm bolts that hold the pulley on.
Turned the end of a bit of hollow bar down to slide inside, split it 20 mm
lenghwise into quarters , cut it off and welded two of the pieces inside the end of the sleeve.
I needed a spline end for the sliding bit to engage so found an old forward controll fan shaft that has small uni,s. Cut the joint up and used the 2 ends of the yolk as the drive. Matched it on the grinder to suit the lugs in the sleeve .
The shaft is on an angle so it has to act like a uni too.
Machined the shaft after welding the uni spline on one end and the winch spline on the other. Takes a 19mm bearing housing that I bolted to a tapped plate tacked to the chassis.
This is not ideal as it will be hard to remove however I will attack that when need be.
ForumSage
Hi KeithOriginally Posted by 123rover50

I would love to hear the noise of that Klaxon.
Has anyone put audio files on their posts that can clicked on, so you can hear the sound?
.
Last edited by wrinklearthur; 19th February 2012 at 10:31 AM. Reason: hear here
YarnMaster
SupporterI wish Arthur.
I had one on my first car , a 29 model A when I was 16 but my understanding is the Klaxon is the motor driven Aaa-oooo-gaaaa type.
This has the vibrating diaphram thingo but the pic is not too clear.
More photos of the winch drive. Havnt got the control rod sorted yet but the arm is an old gate hinge with a slot cut in it.
The roller is an old truck axle I had to turn down to fit the fairlead brackets as it was too big.
YarnMaster
SupporterWith the TDI the hole for the flywheel timing pin is directly over the crossmember. I used a holesaw to drill this remembering it is not at 6 o,clock(from front). It is more like 5 past 6 so one has to drill in the right place or it wont line up.
The tool has to be long enough to reach right through so I knocked one up from bits and pieces.
Drilled a 3/16 hole through a suitable metric bolt,. Welded on a bit of hydraulic tube. Used a broken 3/16 drill that had a couple of pop rivet heads stuck on it as the plunger and a yellow knob spring.
Rotate the engine till the key is 10 to 12, screw in the tool tight, back off 1 turn then rotate again. You hear the pin click in just as the key hits 12 o clock.
YarnMaster
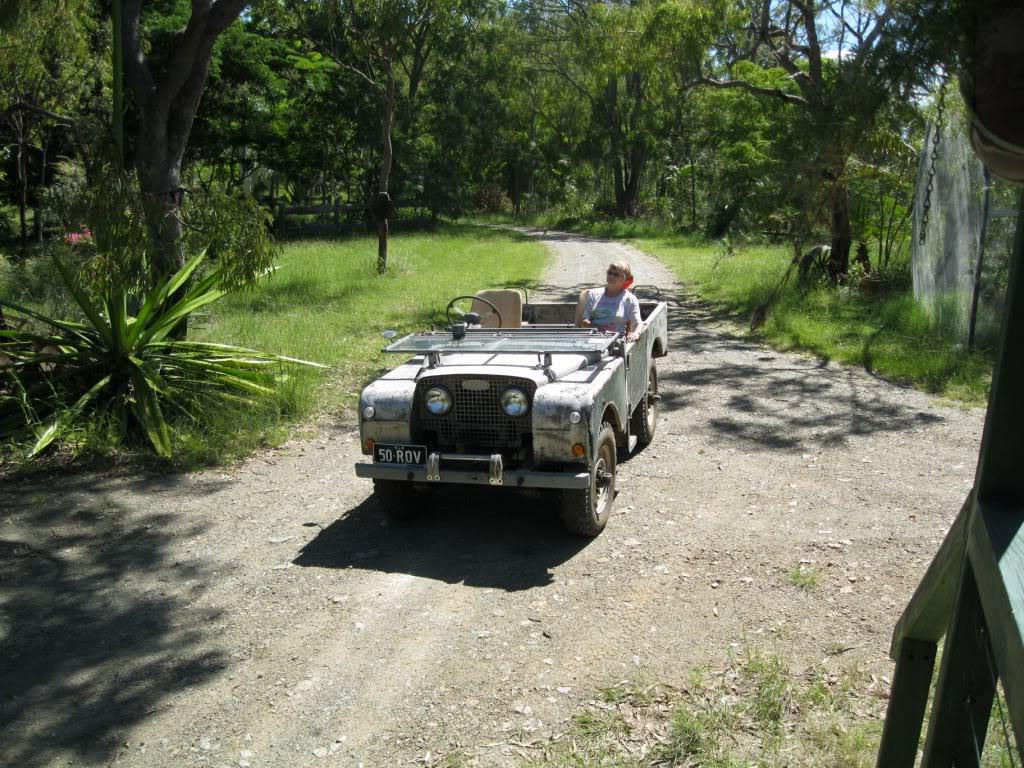
SupporterRegistered and on the road today.
Took Anne into town to pick up the mail.
Well, whats the next project.
Keith
 Posting Permissions
| Search AULRO.com ONLY! |
Search All the Web! |
|---|
|
|
|
Bookmarks