


 Reply With Quote
Hi Martin
I have just been offered another LWB 2A, it's down at Bruny Island, so very rusty but with good mechanicals.
How did you go with that Diesel you showed me the photo's of ?
.

 Master
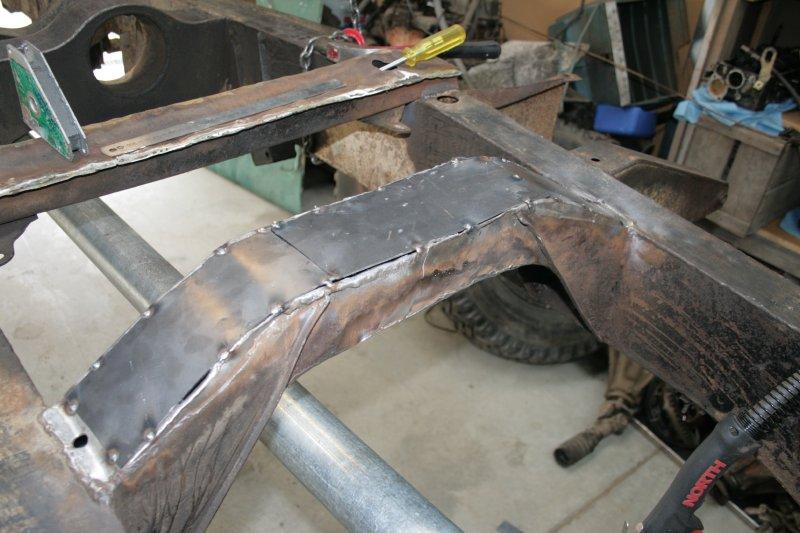
Turns out I completely forgot to take any photos of the gearbox cross member repairs I did. Probably a good thing, it wasn't my finest hour with a welder. Even hitting it with a grinder didn't make it look a whole lot better...
I did however manage to take some photos of the other cross member as I was repairing that.
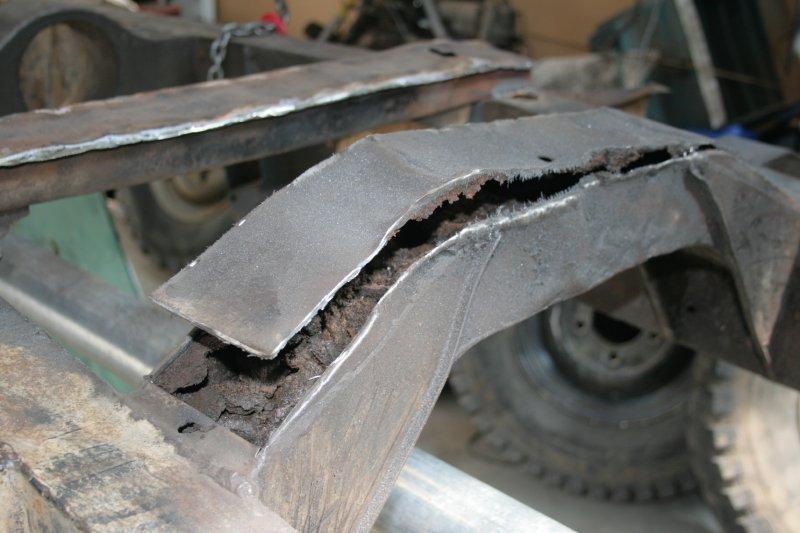
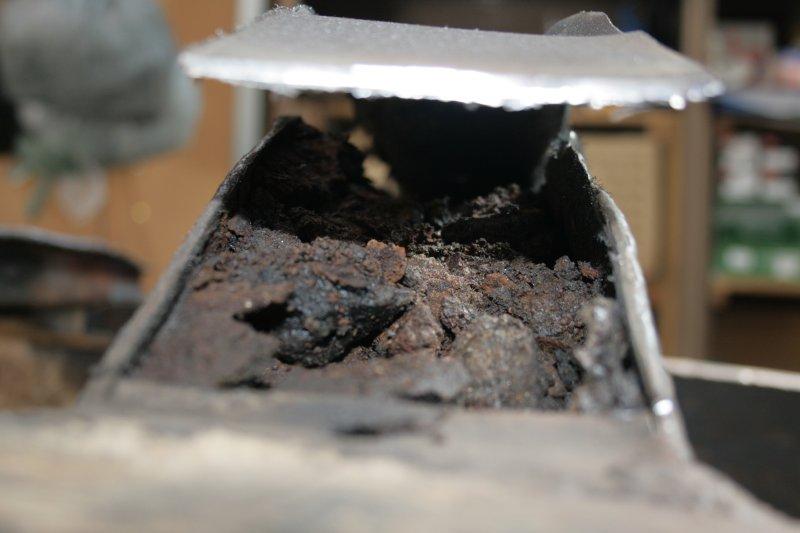
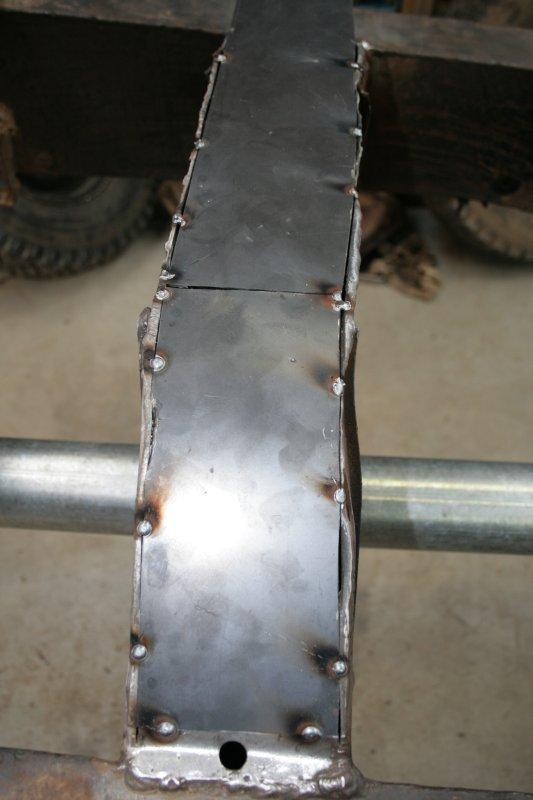
The bottom was fairly badly damaged, so I took the grinder and cut it out. I wasn't entirely prepared for what I was about to find.
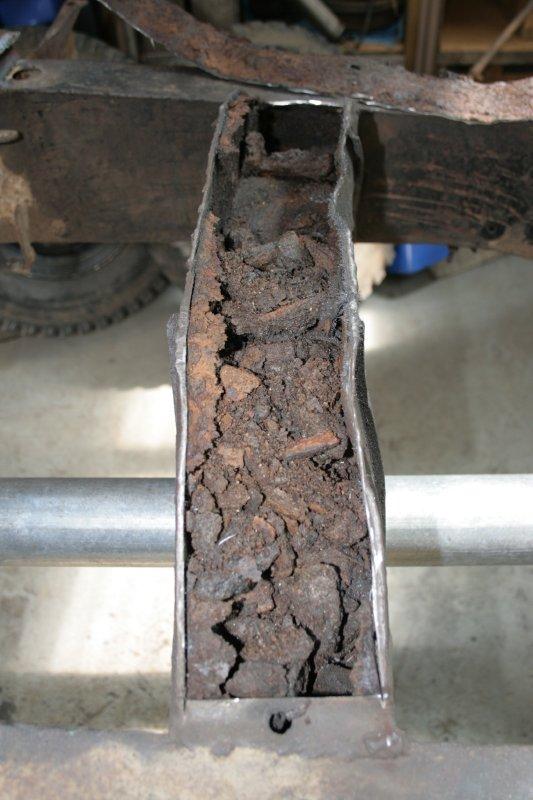
Greasy mud. Delightful. As you can see, the cross member was entirely full of the stuff. What's really frustrating is that even though it was full of grease, it wasn't actually rust free. Thankfully though it was only minor rust, and after cleaning it out and degreasing, a rust converter has got it looking nice again. I've also hit it with a primer and top coat as well, while I still had access.
This is how it was looking post treatment and painting.
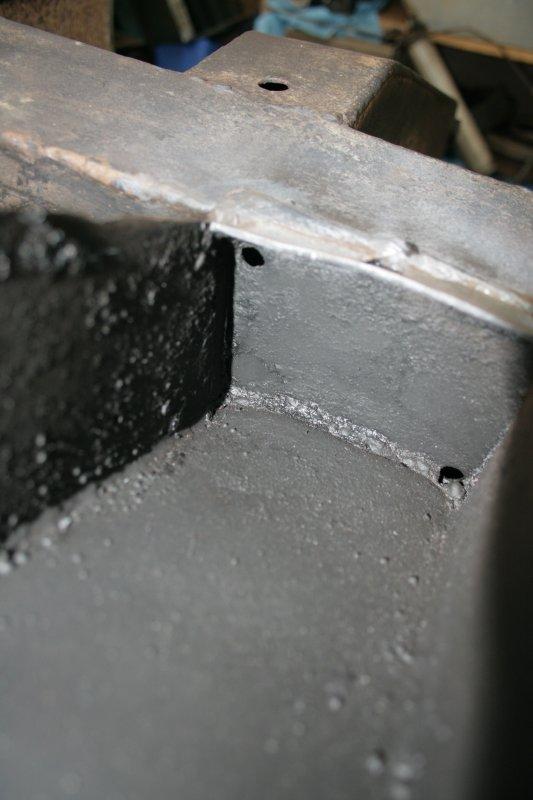
I decided the old bottom wasn't worth reusing, so I used some sheet metal I purchased (which will primarily be used to repair the bulkhead) to add a new bottom section to the cross member. My process of cutting to size was a little odd, as even with panel beating, the gap for the bottom piece wasn't exactly even, partly to do with how straight my cut was. With a vernier caliper, tape measure and some chalk, I took width measurements at critical points along the cross member, transferred them to my new metal and trimmed accordingly. Shockingly, it worked remarkably well.
Tacking up and bending to shape
A few whacks with a hammer sorted out the bends, but I did have to chop the new section into three bits, as I just couldn't convince it to get into the gap any other way.
All ready for welding.
All done.
I had forgotten just how good it was welding under an argon shield, I've had to survive with gasless MIG wire for the past few years as it's a bit hard to justify gas bottle rental all the time. While we've got the bottle we're also going to build some gates for the driveway and rebuild the trailer, which is looking very sorry for itself at the moment. Serenity is going to have to go on hold for a little while I think while that's all sorted out.
Speaking of trailers...
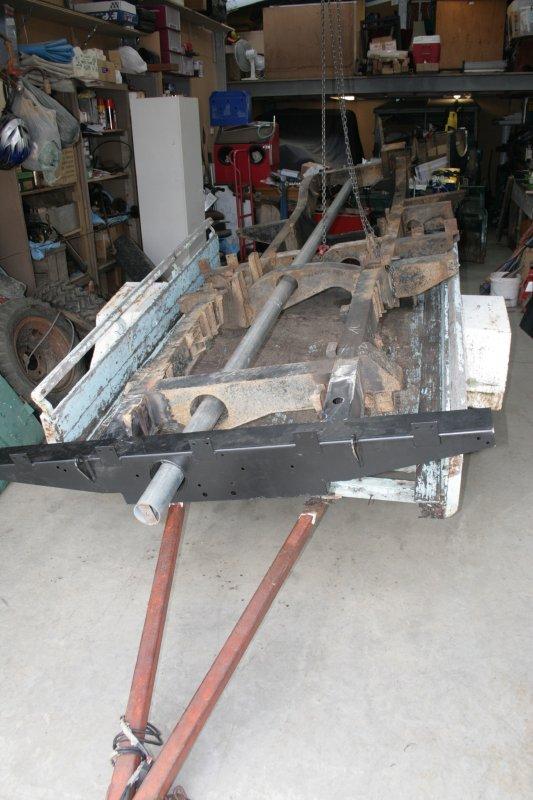
Loading up.
My unfortunate brother dropped in to pick up some cleaning supplies, and was quickly accosted to help me load the chassis up. His timing was truly superb, I had the chassis suspended and was actually just about to get the trailer and try to wrestle it on myself when he decided to poke his head in the door. A little man-handling and it was all ready to rumble.
All ready for its 'big' (it was maybe 5 minutes if you're lucky) trip to the blaster.
The bulkhead has also gone down there as well, that should be back tomorrow afternoon without paint. The intent is to find all the hidden rust spots before repairs take place. The chassis should be back Wednesday next week, but timing there is somewhat irrelevant, as I'll be off gallivanting round the countryside on my annual holiday with my high school mates.
So, in short, I think I've hit a major milestone today. All chassis repairs are complete, and the chassis has been delivered for its coat of paint. Very exciting.
It's been a long week though, I'm exhausted. Totally worth it though!
-Martin
ForumSage
Hi Martin
I have just been offered another LWB 2A, it's down at Bruny Island, so very rusty but with good mechanicals.
How did you go with that Diesel you showed me the photo's of ?
.
OldBushie
looks good. I wish i painted the inside of my chassis parts.
I would recommend putting more and bigger holes in the chassis to let crap out as some of the spots they put holes are useless.
I wish we had gas for the mig as the gas less is a bit painful
Master
A mate checked them out for me on Saturday. The two vehicles are in a pretty sorry state, I suspect much like your Bruny vehicle. There is a pair of salisburys, apparently they feel ok (to my untrained mate), but there is only one prop shaft, and that's badly damaged from when the chassis snapped. On learning this I turned them down, but during this week I've had a look online and it turns out I can import a brand new prop shaft for about A$110. The guy wanted "a couple of hundred" for them, bringing the total price to a bit over $300 for a complete rear salisbury conversion (and plenty of spare parts), assuming I can't knock him down a bit. I'll be up north at the end of next week, and I think I'll drop in and have a look-see, with a view to purchasing them.Originally Posted by wrinklearthur

If you PM me your email address, I'll send you through the photos my mate took for me.
-Martin
Master
I haven't done it yet, but I do intend to add a couple of large holes to the bottom of the rear cross member. If there's any other spots people would recommend, I'm all ears!
I'm still trying to work out how to get the inside fully painted out, I've been far too busy to properly prepare the chassis to get the sand blaster to paint inside for me with POR 15. As it was I'm about 2 days late getting it to the sand blaster.
You might be interested in a paint product I'm looking at, not quite as good as POR 15, but a little easier and much safer to use (I've read the MSDS this time). It's called Eastwood Internal Frame Coating. http://www.eastwood.com/internal-fra...ay-nozzle.html It looks like a reasonable thing and very easy to use, which I like. I also reckon you could apply it to a fully assembled vehicle easily enough.
I'd have bought some by now, but Eastwood's Australian distributor doesn't import any hazardous or aerosol Eastwood products. I'm going to ask the New Zealand distributor if they will ship it to Australia, but I'm not holding my breath. After that, I'm not sure how I'm going to get it. I might have to get somebody in the US to buy it for me and surface mail it over.
-Martin
OldBushie
I have been wondering what i will use to treat the inside of my s1 chassis.
I put holes in anywhere that was closed
from memory the outriggers behind the front door was prone to getting crap in it so i put some holes in there.
I would concentrate on the 2 most rust prone areas of the chassis ie the front dumb irons and rear crossmember
Master
I've been using penetrol for the inside of my chassis. I used about 10 cans the first time I did it. It seems to cover pretty well (just bought an inspection camera from Jaycar).
It seems pretty robust with good capillary action.
I've also used it on the rusty bits of my bulkhead I'm yet to get round to fix and its certainly checked the rusts progress even on the externally exposed bits. I live by the sea as well.
I'm planning to spray 3-4 cans into the chassis each year as preventative maintenance.
Master
My understanding of Penetrol was that it was an additive you added to other paint, much like a thinner. Is it also a proper covering by itself, or is its effect much like fish oil or Waxoyl, where it simply provides an water resistant covering?
Master
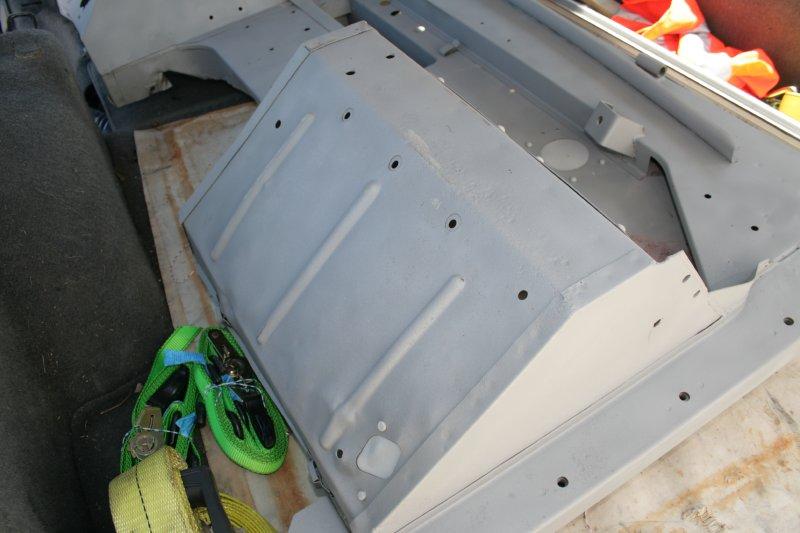
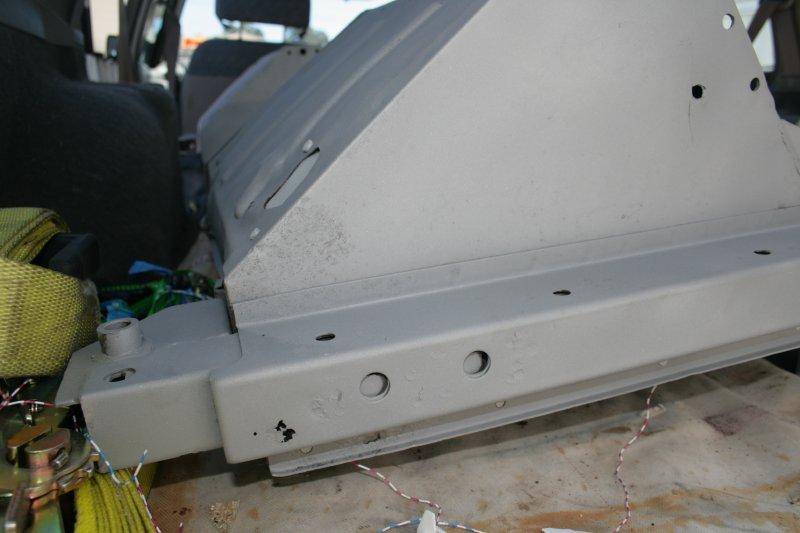
I got the bulkhead back from the sand blaster this afternoon. The chassis won't be done until next week though, but that's no problem at all.
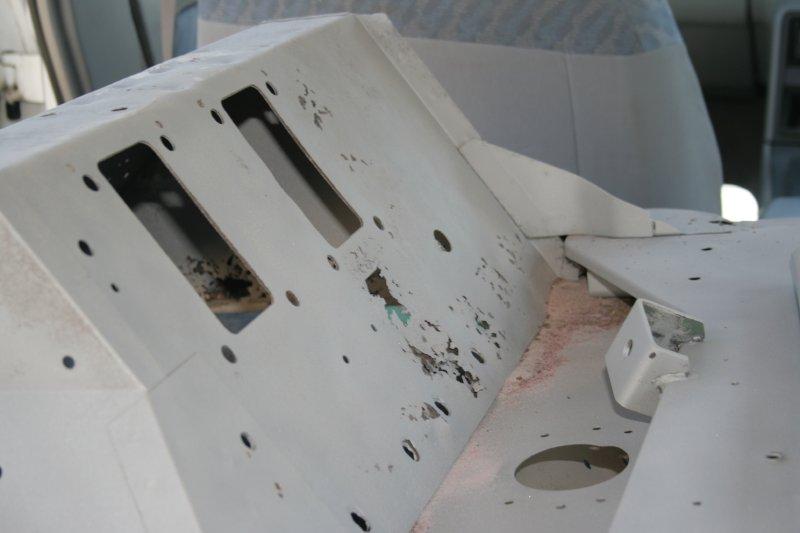
I got the bulkhead blasted to find all the nasty surprises before the repair process. While it looks an awful lot worse than it used to, there doesn't appear to be any more rust in it than I already knew about. Admittedly I've only looked at the front of it, as I'm unable to get it out of my vehicle by myself, but I think the back should be all OK as well.
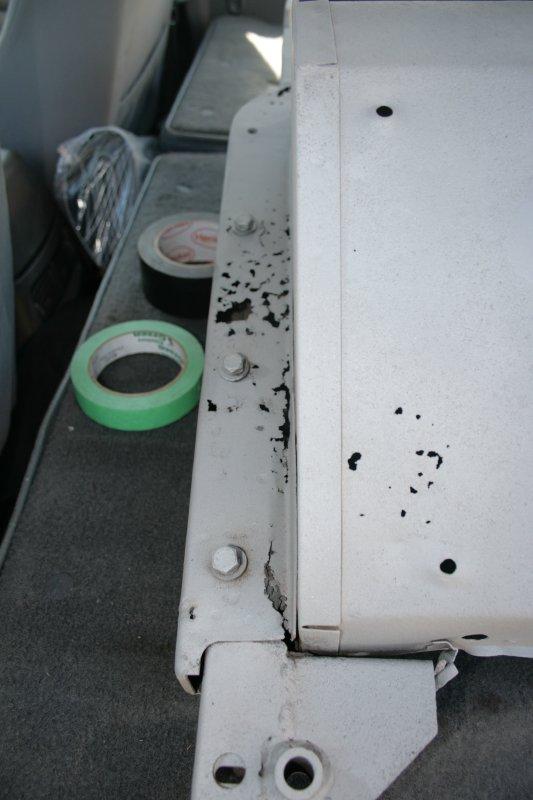
The driver's side is looking a little average.
Pillar
Vertical surface of the footwell
Top of the footwell
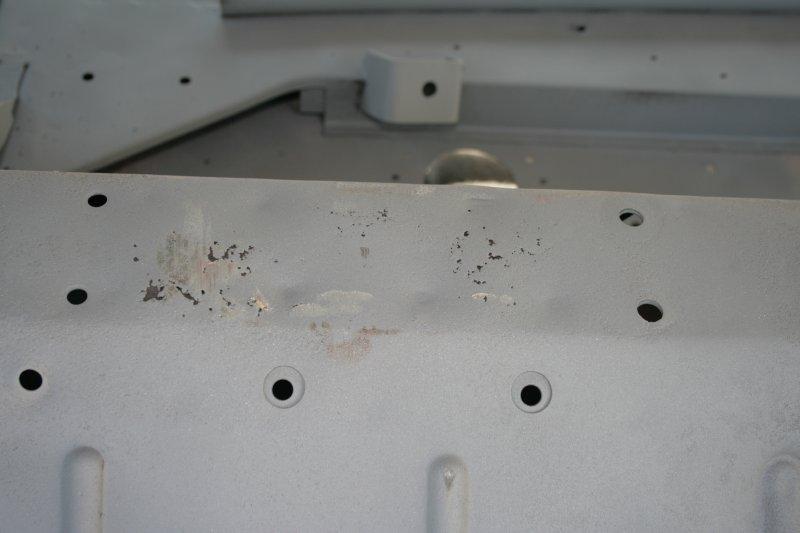
The passenger side looks much better.
There's still the odd hole though. I've got repair sections for both door pillars though, so I'm not bothered by that at all.
The plan is to put the two pillars on and then just cut out the rusty sections of the footwell and add new metal in. I haven't bothered going for the repair sections for the footwells, for such simple shapes it doesn't really seem worthwhile.
By the end of this process I should have one excellent, rust free Land Rover!
-Martin
Wizard
Supporter
I haven't treated the inside of my Landy's chassis yet - but I plan to use Penetrol too. Brilliant stuff.
 Posting Permissions
| Search AULRO.com ONLY! |
Search All the Web! |
|---|
|
|
|

Bookmarks