Page 15 of 16 FirstFirst ... 513141516 LastLast
Results 141 to 150 of 155

Thread: What have I done! IIa sitting out front.

  1. #141
    Join Date
    Nov 2011
    Location
    Sydney
    Posts
    452
    Total Downloaded
    0
    Project 'Gauge' is coming along

    I started off with a broken Smiths gauge set out of a Jag 4.2 that I picked up for 10 quid at an auto jumble back in Blighty last year


    As you can see it was missing the centre clock, and when I took it apart to look at the state of the electrics in the gauges themselves the printed circuitry on the rear delaminated, so it was fairly toast.

    To round it off, the gauge fronts were molded with the surround, whilst the gauges them selves attached to the rear plastic plate, which meant taking them off the surround and using them individually was going to mean fabbing up some casing and a platform to sit them on.
    So I did what any sane person would do - chucked it in a corner and left it.

    On to today. I've got all my shiny new gauges but all the bevels are different shapes and different colours. So picking up the old 4.2 gauge front I realise the bevels will come off if I unpick the glue and bend off the backing tabs.
    Pulling of the new gauge surrounds and a bit of trimming. Voila!! From silver to black.


    Then I chopped up a hack saw into a very narrow blade and cut out the gauge fronts on the 4.2 surround


    I was contemplating leaving the surround whole and having a couple of dummy gauges in the 2 spots I wasn't going to use, but then looking at how to mount it in the cab I decided to cut it down to 3 gauges wide and sit it in the gap between the dash and the steering column.

    I've mounted the gauges using Sugru, as there wasn't a lip for the bezel to sit against once the gauge fronts had been removed


    It's holding very well. I've tried to separate them from the surround, but I can't do it, so I think they'll hold.

    Anyway here's the finished product


    Still need to mount the unit and connect up the gauges but that's for another time...

  2. #142
    Join Date
    Nov 2011
    Location
    Sydney
    Posts
    452
    Total Downloaded
    0
    Well Operation Gauge has been put on hold as several other things have come to light.

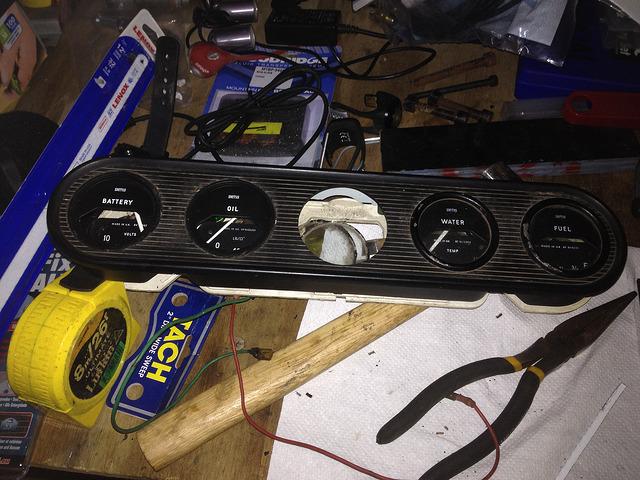
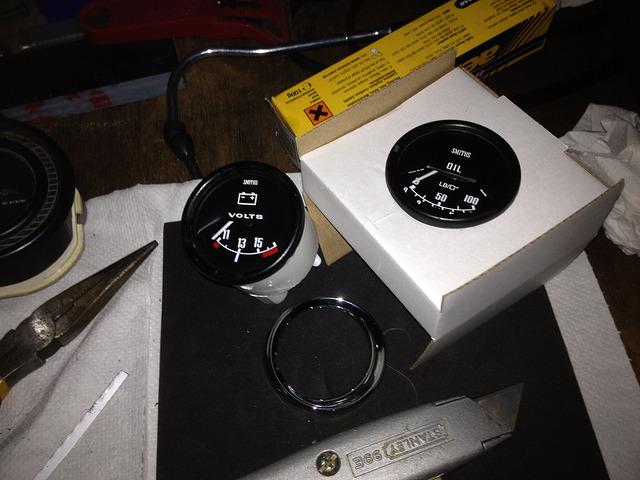
    I've finally got the gauges fitted


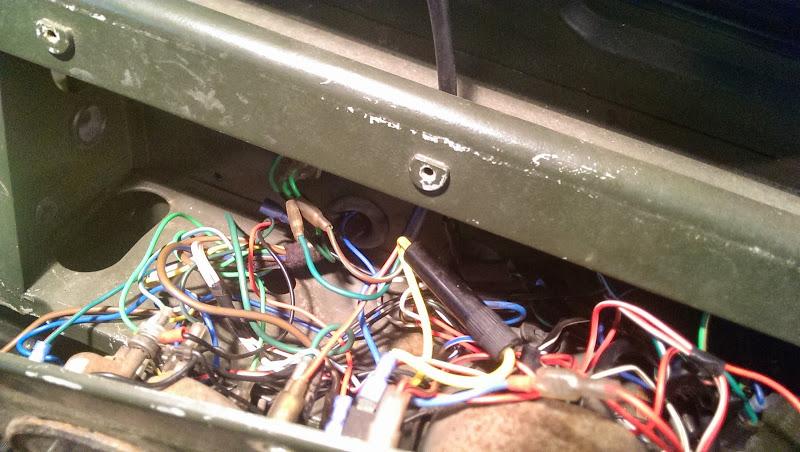
    But they need connecting up.
    The eagle-eyed amongst you will notice that the gauges have swapped places, I couldn't get the vacuum gauge in against the steering plate. Even with the gauges swapped it was a very tight squeeze, but it allowed me to straighten the sawn edge and level the oil gauge which was in slightly tilted so the Smiths name wasn't quite horizontal which would have bugged me.

    First issue that has delayed Operation Gauge was oil dripping from the bellhousing!!! At first I thought the dreaded main seal, but the smell was all wrong and the oil was clean, so it had to be coming from the gearbox.
    Opening the filler plug the oil level was high again and the transfer low.
    My options are - open the box and prevent the bearing that is rotating from doing so with a bit of bearing fit, or join the 2 filler plugs with a bit of pipe.

    Being the slacker that I am ( and not having anywhere near the time to strip a gearbox) option B was implemented
    2 1/2" BSP to 1/2" barb brass fittings were purchased along with a length of fuel hose.

    At transfer


    At gearbox


    You can see the hose is pretty close to the exhaust, so I made a small heat shield


    It makes a small difference enough to keep the hose temp under 100deg (the exhaust is about 145 at that point, but I've only run it for small distances at the moment. I'll either try and get a 90deg BSP/barb fitting or sleeve the fuel pipe with a small section of silicone hose.
    Anyway no more leaks from the bellhousing
    So far

    Anyway rego is coming up so its time to tackle the leaky sump, but on Bill's last voyage prior to draining the oil I came to a halt, felt a small pop/thump through the pedal, and the brakes stayed on. Couldn't drive forward. I reversed out of the way, got out the jack and raise the front wheels one at a time, both turned no problems.
    I had the dog with me and some frozen food in the tray so I decided to make a dash for it with binding brakes as it was only a km or so home.
    Start back up and drove off only to have the brakes work perfectly!!!

    So thats got me worried, I don't like intermittent problems esp of the braking kind, so I'll give the brakes an overhaul.
    I've ordered new pistons, pads and springs, the booster is new, maybe I should get a master as well??

    Anyone got any ideas what might have caused the braking issue? Or how to test for a faulty master?

  3. #143
    JDNSW's Avatar
    JDNSW is offline RoverLord Silver Subscriber
    Join Date
    Jan 1970
    Location
    Central West NSW
    Posts
    29,513
    Total Downloaded
    0
    Most likely cause for the sticking brakes is a sticking master cylinder. This is likely to be due to a corroded bore or swollen cups. Reversing will have freed to shoes and given a little extra back pressure in the line to free the master cylinder. (There are other possibilities, including a similarly sticking wheel cylinder, or oil on a brake shoe)

    John
    John

    JDNSW
    1986 110 County 3.9 diesel
    1970 2a 109 2.25 petrol

  4. #144
    Join Date
    Nov 2011
    Location
    Sydney
    Posts
    452
    Total Downloaded
    0
    Thanks John, I think the MC is the only thing that hasn't been touched in the last few years - the brakes were rebuilt at the wheels just before I bought it, so it seems a logical place to start.

    Is it worth going for a TRW/Lucas MC over a Bearmach one? Happy to pay the extra for better quality, but would be peeved if its only a bit of badge engineering out of the same factory.

  5. #145
    JDNSW's Avatar
    JDNSW is offline RoverLord Silver Subscriber
    Join Date
    Jan 1970
    Location
    Central West NSW
    Posts
    29,513
    Total Downloaded
    0
    Quote Originally Posted by Ozdunc View Post
    ......
    Is it worth going for a TRW/Lucas MC over a Bearmach one? Happy to pay the extra for better quality, but would be peeved if its only a bit of badge engineering out of the same factory.
    For what it is worth, what I did last time I had to replace a brake master cylinder on my 2a was to get the old one stainless steel sleeved and overhauled. Haven't installed it yet as the temporary one is still going.

    John
    John

    JDNSW
    1986 110 County 3.9 diesel
    1970 2a 109 2.25 petrol

  6. #146
    Join Date
    Nov 2011
    Location
    Sydney
    Posts
    452
    Total Downloaded
    0
    Been meaning to write this down for a while so this might be a long one

    Back at the beginning of April, my leaky sump became too much for my OCD, so it was time for a oil change and a new gasket.
    I got a Payen gasket which is still paper but about 1mm thick instead of the standard thin one.
    Drained the oil out, no bits (yay!), cleaned the old gasket off the sump and gave it a clean up


    Dropping a straight edge over the sump and the engine facing showed no noticeable warping.

    I then decided to make the gasket leakproof with 4 coatings of Hydromar Blue. one on the sump on on either side of the gasket and one on the engine mating surface.
    So far this had taken about 20mins to do once the oil was out.

    Then came the mission - refitting the sump! What a bloody palaver that was. Dunno why, but trying to support the sump whilst feeding bolts through the pan and into the block whilst not disturbing the gasket took me nearly 3hours and almost drove my wife to distraction with all the swearing coming from under the car

    And it still leaks.

    Under the engine looking up


    There Bill sat for a week or so until I could face doing some more. Changing the filter made me pull my finger out on completing the gauges as I need to plumb in the oil pressure hose to the pressure switch outlet


    If you look carefully you can see the hose exiting from the middle of the brass adapter.

    I drilled out an existing hole in the firewall to 1/2" and fed the oil pressure pie, vacuum gauge pipe, plus tacho feed through.


    Here is the birds nest of wiring and piping to run a pressure gauge, vacuum gauge, voltmeter and tacho. It doesnt look this bad really, I stuck the camera up behind the guages.


    As you can see I had a slight weeping of the oil piping, but nipping up the brass joiners sorted that

  7. #147
    Join Date
    Nov 2011
    Location
    Sydney
    Posts
    452
    Total Downloaded
    0
    Then it was on to the brakes.

    I decided to go for a new MC.

    This was nice and easy to fit and didn't need the pedal removing


    Ignore the slight fluid where the hose fits in, the photo was taken just after fitting.
    Having the remote booster made bleeding very simple, as I only had to bleed as far as the nipple on that, rather than all 4 wheels. Which was great as it was only a couple of months since I'd replaced all the fluid.

    I'm still having some intermittent pressure coming back through the brake pedal, which I think is vacuum related, but to be sure I removed all the drums to look at the condition of the pads and the wheel cylinders.
    Pads and WCs were great but the drums are quite badly scored, so I'll be getting new ones all round.

    But current set up is good enough to pass rego with flying colours once again

    I've also investigated the pedal pressure and I think it was a slight leak on the hose from the booster to the manifold, possible where I tee'd into it for the vacuum gauge feed.
    All seems to working fine now and the booster passes all the integrity tests, so hopefully I'm done until the drums arrive.

  8. #148
    Join Date
    May 2015
    Location
    Southern Adelaide
    Posts
    878
    Total Downloaded
    0
    Quote Originally Posted by Ozdunc View Post
    Here is the birds nest of wiring and piping to run a pressure gauge, vacuum gauge, voltmeter and tacho. It doesnt look this bad really, I stuck the camera up behind the guages.


    I'm going to call you on this. Where is the 'bird's nest' and what is there to feel embarrassed about? Mate, if I can get my wiring that neat, I'd be ecstatic.

    As for the leaky sump, you might be facing issues around the sump holes themselves from some gorilla who's overtightened things. As for your dramas getting it back on, simply applying any sort of goop automatically makes things a billion times harder to put back together - it's a subset of Sod's Law and has no rational reason (see my signature).

  9. #149
    Join Date
    Apr 2009
    Location
    Sandgate, Brisbane
    Posts
    804
    Total Downloaded
    0
    Bird's Nest?????

    you're joking aren't you?


  10. #150
    Join Date
    Nov 2011
    Location
    Sydney
    Posts
    452
    Total Downloaded
    0
    Ha ha. Alright its not that bad, but its visible slightly. Unlike behind the dash where it really is a bird's nest - but out of sight out of mind

Page 15 of 16 FirstFirst ... 513141516 LastLast

Bookmarks

Bookmarks

Posting Permissions

  • You may not post new threads
  • You may not post replies
  • You may not post attachments
  • You may not edit your posts
  •  
Search AULRO.com ONLY!
Search All the Web!