

 Reply With Quote
That looks great, well done! What did it originally come out of? Make sure you show us when it's in the vehicle

 Fossicker
Supporter
Fossicker
SupporterOk.. finally got around to finishing radio conversion..
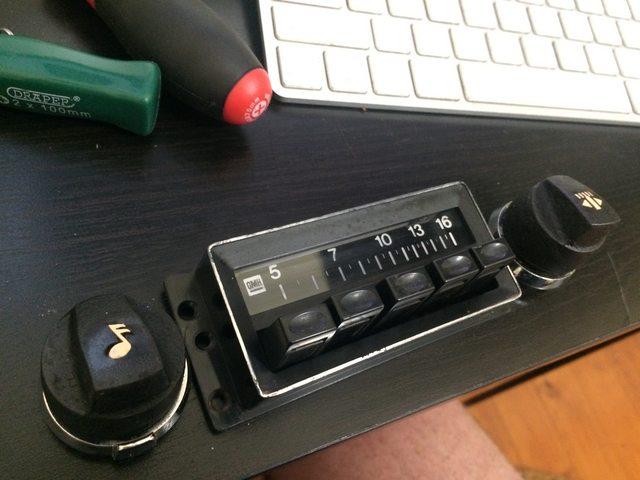
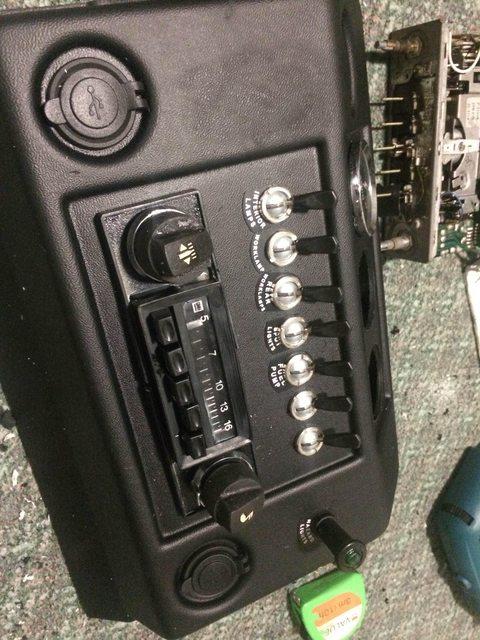
Ripped apart an old radio, which fits the car vintage.. just kept the fascia.
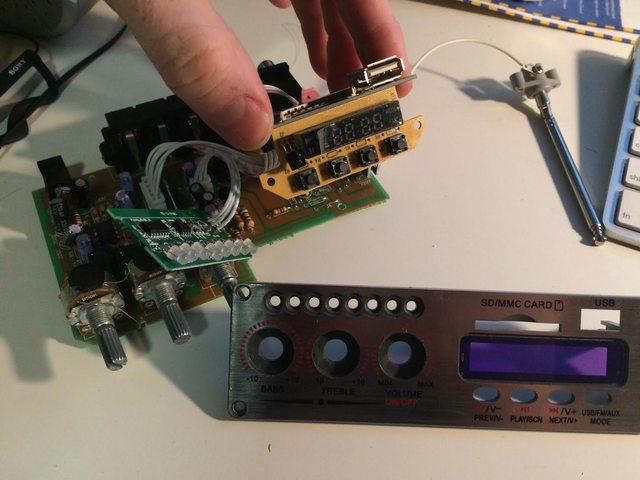
Pull apart a new amp:
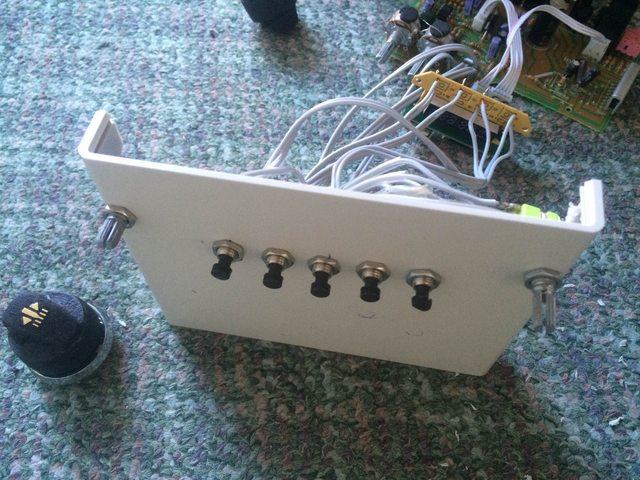
wiring up new buttons, along with a digtal rotary switch, so I can use the tuning knob to skip bluetooth tracks, as well as use it for FM tuning:
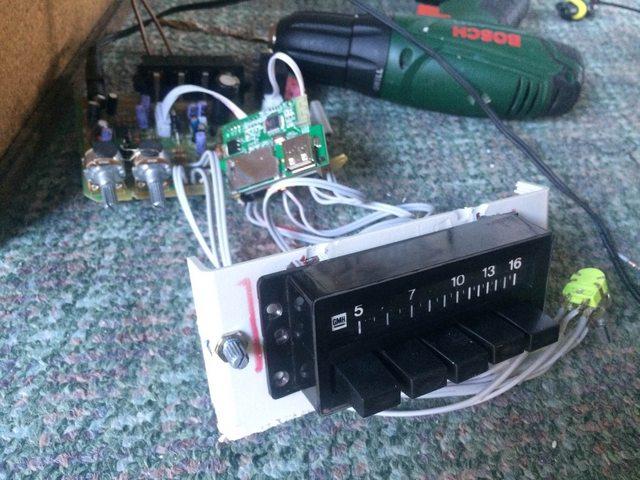
Mounting the fascia and old buttons:
Mounting on aux dash, not quite finished, needs bits aligning and a general tidy up, but almost there:
Master
SupporterThat looks great, well done! What did it originally come out of? Make sure you show us when it's in the vehicle
Fossicker
SupporterthanksOriginally Posted by Ben_Burdett

It was originally in the series 3 when I bought it, poorly mounted.. and no speakers, not even sure where they would have been. It was originally fitted out as a camper at the back so I suspect the speakers were back there.
Master
SupporterI reckon it's an original holden kingswood radio guessing by the General Motors logo
ChatterBox
SupporterIn a previous life I used to collect old valve radios , in terms of fitting a new radio into an old one for better functionality , that's one of the best conversions I've seen. Well done.
Cheers,
D
1957 88 Petrol (Chumlee)
1960 88 Petrol (Darwin)
1975 88 Diesel (Mutley)
Fossicker
SupporterQuiet few weeks, but a bit more progress today:
Starting to fit in dash (awaiting new gauges):
Also, radio fascia and knobs missing:
Finally got around to cleaning the roof at the rear, a load neater. Also fitted the interior ceiling lamp.
Currently just a switch on the new dash, also I added a fade-out circuit, so when I get around to adding door switches, after closing the light will stay on a few seconds, then fade out (luxury!).
Also mounted fire extinguisher, and new rear view mirror, also another view of dash:
That's it for the moment, next up will probably be adding new gauges and door switches.
Fossicker
SupporterIt's been a while, but a bit more work, going through boxes of parts, mostly cosmetic changes...
cleaned/repainting steering wheel, looking a bit tidier:
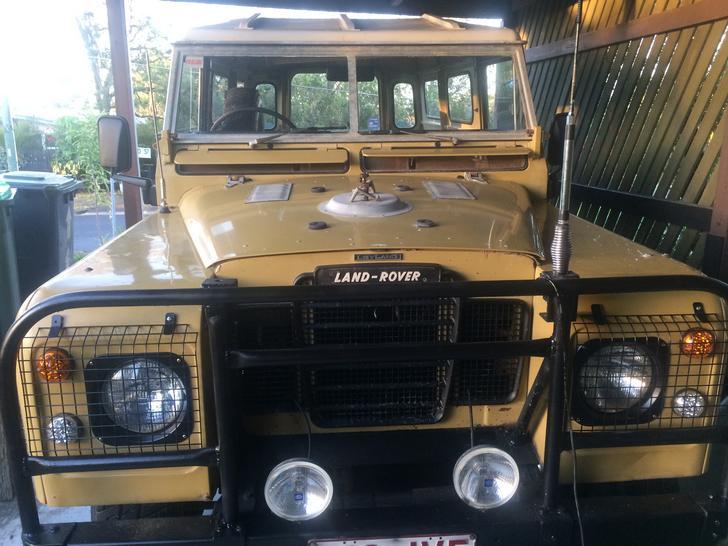
What it looked like a few days ago at the front:
despite this being painted somewhat recently, paint has started to chip, poor priming I'm assuming:
Primed & repainted bars.., painted light surrounds black, added light grills, starting to fit UHF:
Looks a bit like something from remlr now:
Fossicker
SupporterA few more updates.. cosmetic mostly, as usual..
I mounted a Francis spotlight I've had a while..
Decided to match the camino gold paint, rather than the original green..
Pretty pleased with it, just hoping the mounting location is legal.. (can't find any reason why it wouldn't be)
Also a small bit of paint touch up on the worst area, before I get around to doing a proper paint job:
Bit of priming then:
Not too bad, considering it's factory and not matched..
Fossicker
SupporterReally productive weekend:
Decided to continue with the painting and, after maybe 15hrs work:
Used acrylic for the base coat (Camino gold, dulon 12137) and clear on top.. not buffed yet, but not sure I need to.
Classic cream Dulux metal shield premium for the top.
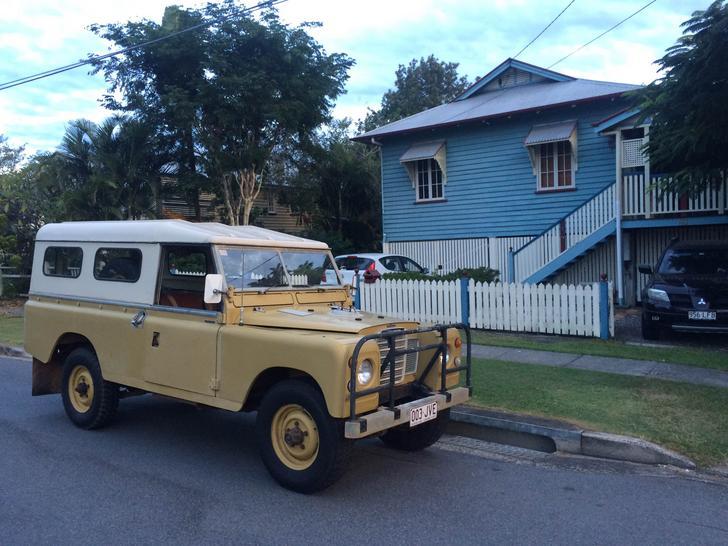
When I bought it earlier this year for comparison:
Just a few bits of overspray to clean up, mostly on seals which I am due to replace anyhow.. Also keen to paint the wheels.. will probably go for cream, though I believe they're meant to be silver in AU..
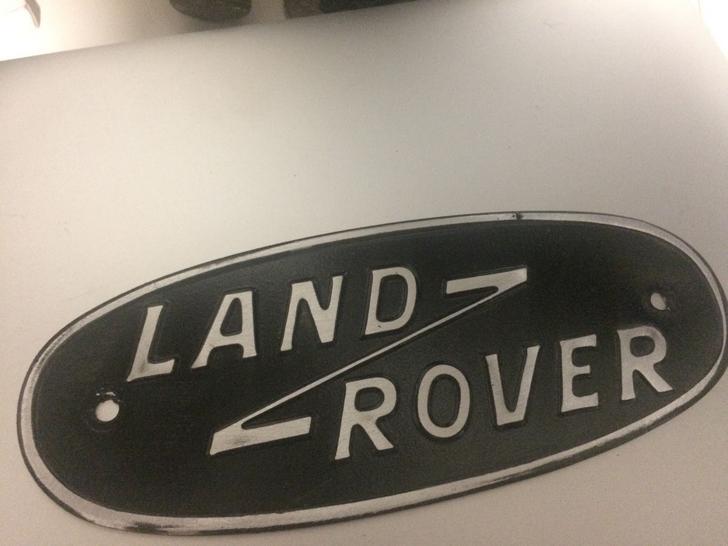
Also repainted the badge, found this funny.. you can read Rover in the dirt:
painted + sanded:
YarnMaster
Mate - looking great!!
88 Perentie FFR - Club Rego
93 Discovery 1 200 Tdi - Club Rego
03 130 Td5 Single Cab
06 Discovery 3 Petrol
22 Defender 90 - Full rego
 Posting Permissions
| Search AULRO.com ONLY! |
Search All the Web! |
|---|
|
|
|


Bookmarks