-
20th December 2011, 04:41 PM
#61
All I did was start my ex army 6 cyclinder, do it once a month, it just sits in the garage until the clutch sticks to the fly wheel, then I take it for a drive to the servo and back home again, has used about 5 tanks of fuel in the last 16 years, all original.
-
29th December 2011, 08:49 AM
#62
Fitted new tie rod ends and made a drop down bracket for the steering damper so the winch drive will fit") . Took her for a drive with the door tops off
. Took her for a drive with the door tops off Nice!
Nice!
-
29th December 2011, 09:12 AM
#63
New universals on front driveshaft.
-
5th January 2012, 09:36 PM
#64
Pulled apart the front springs, cleaned, painted and refitted them with new bushes. Boy those chassis bushes are a bitch to replace I feel like I'm a better person for surviving the experience. Next job is to do it all again with the rear springs, I'm ready for it this time
-
7th January 2012, 08:59 PM
#65
Mucked about with the new tyres - have sourced a set of straight D1 rims I will use (my Series 2a rims appear to be bent  )
)
Took 5 Sunraysia rims with big fat stuffed tyres still on them to the dump. (The rims were pretty stuffed, too - the only use they had left in them was a home for the redback colonies that have been calling them home).
Removed the drivers side manifold for inspection - that was not an easy task but I needed it out to read the casting mark on it:
1. to replace it because I have found a hole in it
2. if I can't find a replacement, get it welded.
I'll need to get a set of exhaust manifold gaskets - it hasn't got any 
I'm told that was common when they first came out of the factory but I cannot believe a 1973 253 is that straight any more...
-
13th January 2012, 07:14 PM
#66
replaced clutch master and slave
new brake line
another front diff center
new front wheel bearings seals and runners
fun and games!
-
13th January 2012, 07:24 PM
#67
Changed the General Grabber tyres for correct Olympic Steeltrek tyres.
 You won't find me on: faceplant; Scipe; Infragam; LumpedIn; ShapCnat or Twitting. I'm just not that interesting.
-
13th January 2012, 08:32 PM
#68
Tyres and rims came together today. They look - er - like D1 rims on a series LR. Silverstone AT tyres.
Exhaust manifold got repaired - I couldn't find a replacement one anywhere. There were 4 cracks and a hole in it. I only saw 1 crack and the hole. When the other 3 cracks were pointed out they were obvious
So, I'll be searching further afield for replacement manifolds. I am told the repair will work but I would like to have 'spares'... just in case.
-
25th February 2012, 02:51 PM
#69
Her birthday was nearly a month ago and all she had was a hand crank and a stomp on each pedal to prevent seizing, and a promise to get back into the rebuild asap. Alas money has been wasted on the registered Landy that would have been better spent on the Series, but thems the breaks.
Today I connected the freshly charged battery, checked fluids, gave the starter a whirl and bingo she was alive again. Up and down the driveway a few times, running like a sewing machine. So parked her on the nature strip for a thorough wash inside and out.
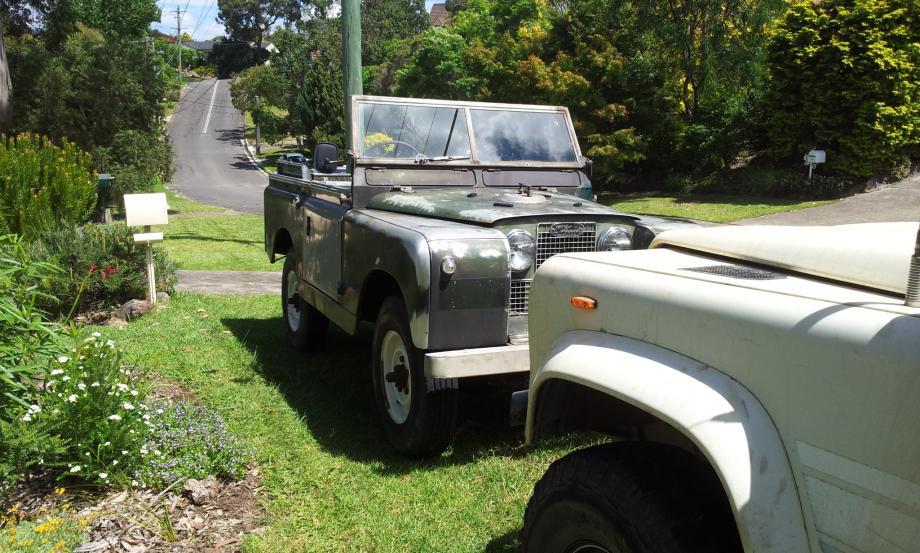
Also the first time I have had both Landies in the same photo!
-
27th February 2012, 03:48 PM
#70
What I did today
I had a big weekend working on various jobs... They included:
* Paint inside drivers door
* Remove 4 x existing tread strips (drill out pop rivets) from ute tray
* Sand 4 x existing tread strips
* Clean 4 x existing tread strips.
* Paint 4 x existing tread strips (clear coat)
* Sand/Clean/Paint - Radiator Cap (clear coat)
* Sand/Clean Bonnet bracket
* Bonnet - reinstall 4 x rubber strips
* Re-Fit bonnet (with new bonnet retaining clip)
* Install bonnet protection strip
* Install Radiator, cowling, support bracket, all hoses (top/middle/bottom)
* Install Drivers Door (new hinge kit, grease, cut/fit new lock, sand/paint brackets, adjust).
* Install Passenger Door (new hinge kit, grease, cut/fit new lock, sand/paint brackets, adjust)
* Refit drivers rear U-Bolts.
* Make 1 x tread strip for top of tray
* Clean Gal on underside of ute capping.
* Clean spare wheel bracket.
* Assemble/Install Drivers Vent
That's what I can remember anyway!
The Grey Ghost
 Posting Permissions
- You may not post new threads
- You may not post replies
- You may not post attachments
- You may not edit your posts
-
Forum Rules
Search AULRO.com ONLY!
|
Search All the Web!
|


 Reply With Quote
 Master
Bookmarks