

 Reply With Quote
Excellent bit of advice , had to make a tool up though as not sure who you did it with just a small screw driver - thanks for the post .

 ChatterBox
Most of you will probably already know how to do this, but I thought I;d post it anyway. The last time I replaced an Alternator was on my XY Falcon and it was a bit more straight forward.
First, disconnect the battery and remove the main plastic engine cover. Replace the oil filler cap so nothing falls down the filler neck.
Then remove the air intake pipe that runs along the top of the radiator. It's just a matter of undoing the hose clamp at the Air filter box end and then undoing the two screws that fix the pipe to the top radiator cover; and then puylling the pipe away.
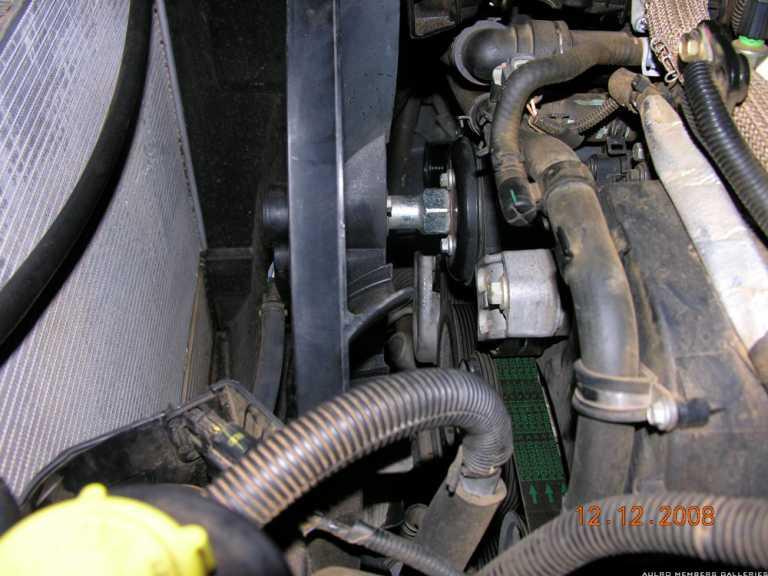
The top radiator cover then just pulls away.
This exposes the fan. Undo the electrical connector at the plug at the radiator cowling.
You will need to hold the fan drive in place whilst you undo the large nut in oder to remove the fan. This is a Left Hand thread, so it undoes by turning in a Clockwise direction.
LR has a 'Special Tool' to hold the fan drive in place, but I just turned the drive until two of the small screws were uppermost then wedged a small screwdriver under on and across the top to stop it moving. One firm pull with an adjustable spanner and the nut came loose straight away. I believe the nut is 36mm. I'll probably make my own special tool like some others have.
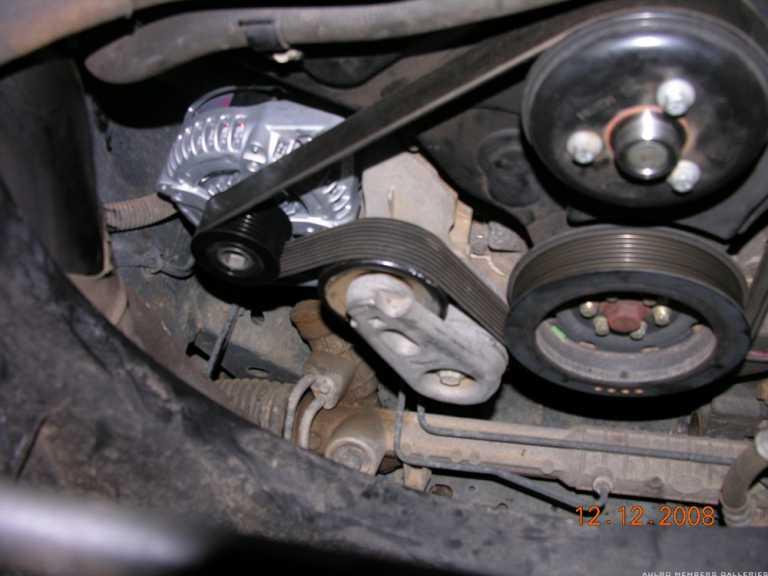
Next you come to the 'Accessory Drive Belt'.
This is easy to remove. You will notice the tensioner at the bottom left near the alternator. There is a sqaure slot on the tensioner into which fits a 3/8" square drive. Just turn anti-clockwise and the tensioner is moved away to slacken the belt and off it comes.
I had a new belt ready to go, but did a full inspection of the current belt and found that after 139,000km it was not showing any signs of fatigue, so left it on and put the new one away as a spare.
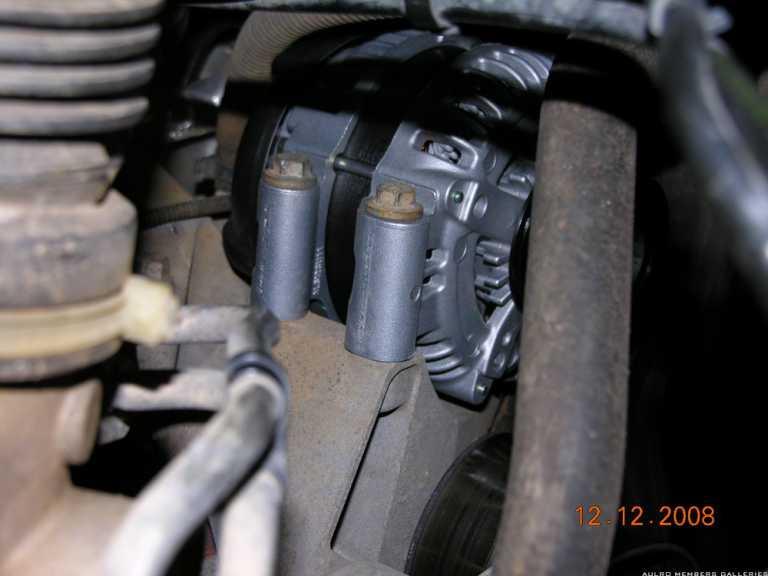
Then it's just a matter of removing the alternator. Firstly reach over the left top and you'll see a red cover. Under this is a 13mm nut connecting a wire which is the generator harness. Remove this nut first and remove the wire, then move onto the three mounting bolts.
One bolt is visible at the front, but the other two are down the left hand side and best accessed by removing the small plastic guard behind the bumper. I also removed the small metal radiator guard between the bumper and the main sump guard (but that was mostly to retrieve the spanner I dropped!). The only issue with removing the plastic guard is the stupid plastic clips that hold it on may need to be replaced.
Again, the mounting bolts are 13mm and easy to remove. Once removed, pull the alternator forward and up and disconnect the main electrical connector at the rear. Then pull it out.
Installation is simply the reverse. The torque for the mounting bolts is 47Nm. The nut on generator harness on the top left has a torque of 10Nm, but there was no way I was going to get one of my torque wrenches in there so I did it up 'just tight' . If you over tighten this one you can damage the alternator (and at $800 a pop that's not an idea I wanted to contemplate).
Last edited by Jamo; 15th December 2008 at 12:23 AM. Reason: Adding stuff
Excellent bit of advice , had to make a tool up though as not sure who you did it with just a small screw driver - thanks for the post .
Fossicker
Many thanks for this advice. I am sure mine needs replacing and I am just trying to source one in Australia a a decent priceRegards Brian
Wizard
SupporterGreat post, thanks very much
Swaggie
Also,that clip that holds a coolant hose in place,on the right of the pic,make sure it is tight,if it comes loose the hose will rub on the AC pulley.
Mine was loose and the hose was within 1 mm of touching the pulley.
The new roll control hydraulic pump under the alternator makes it hard to remove the alternator. Remove the hydraulic pump bolts and move the pump carefully forward to sit against the fan cowl. You may have to remove the steering rack bolts (2 bolts). Turn the steering left slightly which will move the rack to the right to give enough clearance to get the rear hydraulic pump bolt out. Then you can get at the alternator mounting bolts but you will find that you can't get to the alternator connector by removing the heat shield in the wheel well behind the height sensor as suggested in some manuals. You will find the output cable will be too tight to move it forward enough to undo the connector nut. To get more length, remove the cable from the starter connector. There is a cable support that you may need to remove which is held by two very difficult bolts (8mm spanner). You may have to remove the rubber hose from the turbo input pipe to clear the alternator when moving it forward and up and out.
Don't forget to replace the steering rack bolts and the starter connector when you have the alternator and hydraulic pump back in position.
Swaggie
Eric, have you encountered a failed alternator on a 3.0? If so, what was the lead-up to the failure and do you know what failed?
MY21.5 L405 D350 Vogue SE with 19s. Produce LLAMS for LR/RR, Jeep GC/Dodge Ram
VK2HFG and APRS W1 digi, RTK base station using LoRa
 Posting Permissions
| Search AULRO.com ONLY! |
Search All the Web! |
|---|
|
|
|
Bookmarks