Page 1 of 15 12311 ... LastLast
Results 1 to 10 of 144

Thread: Budget 4BD1 turbo install

  1. #1
    Join Date
    Aug 2006
    Location
    WA
    Posts
    13,786
    Total Downloaded
    0

    Budget 4BD1 turbo install

    In case anyone is interested, I thought I would post up some pics etc of my turbo install.

    The patient. A 1987 110 county, factory fitted 4BD1, with 340000km on the clock. (engine VGC).

    I wanted a reliable, well engineered setup, but, being a bit of a tightar$e, wanted to spend as little as possible.

    I am almost ashamed to post these pics after the work of art that Rijidij posted. However, I will say that I have always been more interested in function than form... (well that's my excuse anyway...)

    Before I go any further I must say a HUGE thankyou to:
    Adam (agrojnr) - for the all the perfectly lasercut flanges
    Dougal - for drawing/designing the T2-T3 adaptor

    First thing I did, was track down a turbo from an S14 Silvia (SR20DET). This is a hybrid T28/T25 turbo, exactly the same as the GT2560R, except that the S14 turbo has a journal bearing rather than a ball bearing. It should have a fairly quick spool up, and quite good flow.
    The specs are:
    Compressor: T-28, 60 trim 60mm BCI-1 compressor in T-04B housing
    Turbine: T-25, 62 trim 53.8mm 0.64 A/R turbine housing.

    The turbo was 2nd hand from Ebay. About $320 by the time it got to WA, and came with all pipework, elbows, gaskets, and even a silvia exhaust manifold. (most of those bits I ended up not being able to use)...

    After purchasing the (silvia) turbo, I felt a strange compulsion to wear my pants 6" lower, and speak in text speak lolz. Fortunately, it soon wore off...

    I was going to make my own manifold, but then I found this one:


    A genuine 4BD1T (Garrett) manifold. About $320 from ISUZU! (they sell it cheaper than anywhere else I have found).

  2. #2
    Join Date
    Aug 2006
    Location
    WA
    Posts
    13,786
    Total Downloaded
    0
    The only problem is that for some strange reason, the genuine turbo/manifold has a T3 flange. My turbo has a T2 flange.

    Thanks to Dougal and Agrojnr, (and LOTS of drilling and tapping by yours truly), a solution was found...

    Part 1 of the adaptor:


    Part 2 of the adaptor:


    The copper stuff is VHT high temp copper gasket cement. An excellent product which I used instead of gaskets in most cases.

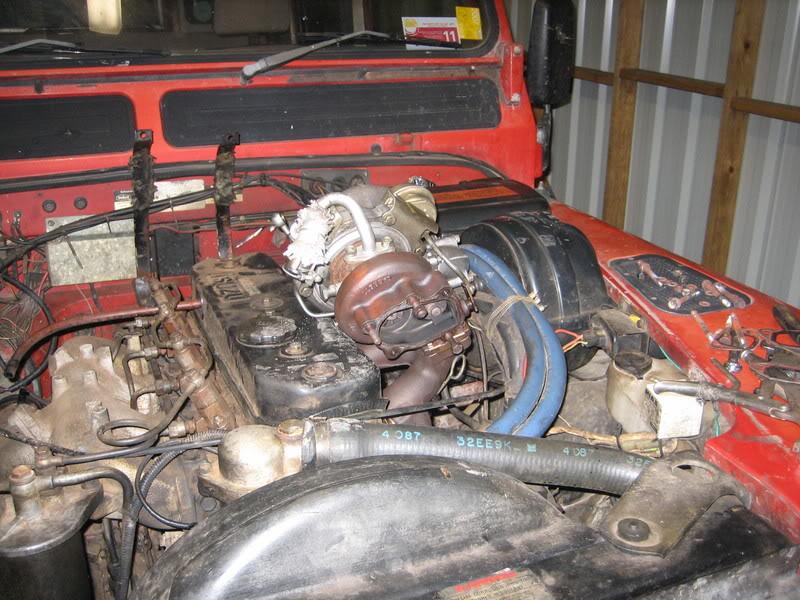
    And - manifold fitted - note the brass plug. I drilled and tapped manifold to 1/4" BSPT so I could fit an EGT probe.

    and before you say it, YES, I know my engine is FILTHY!

  3. #3
    Join Date
    Aug 2006
    Location
    WA
    Posts
    13,786
    Total Downloaded
    0
    I was trying to keep the factory AC initially, and I came within 10 mm or so of being able to do it... Unfortunately in the end it wasn't possible. So I will be building a better system. There isn't much space in there...


    The next step was to tap in an oil drain for the turbo. This needs to be able to flow quite a bit of oil. I chose to use the cover over the top of the oil pump drive, which just conveniently happens to be directly below the turbo oil drain. However the breather connection is (inconveniently) in the way...


    If you look closely, you can see that a line through the bolt centres of the cover do not pass through the middle. Remember that...

    First I ground away some material, and drilled and tapped to 1/4" BSPT.


    Then I brazed in a barb fitting.


    Then I did some creative modification , because I hadn't noticed the point above... However, I think this way is actually better - the drain would have fouled the breather the other way.

  4. #4
    Join Date
    Aug 2006
    Location
    WA
    Posts
    13,786
    Total Downloaded
    0
    It was necessary to rotate the housings, which meant that it was also necessary to modify the wastegate actuator bracket:


    However I later needed to rotate the compressor housing further to clear the bonnet...

    More pics etc. to follow soon.

  5. #5
    Join Date
    Sep 2007
    Location
    Kiwiland
    Posts
    7,246
    Total Downloaded
    0
    Excellent work, I'm happy to see that adapter works too.

    That breather plate could just unbolt and move to the front camshaft inspection hole if you needed it to. Your oil pump drive cover is also very different to my 4BD1T, mine is simply a steel plate, not the deep casting that yours is.

  6. #6
    Join Date
    Jan 1970
    Location
    Yinnar South, Vic
    Posts
    9,943
    Total Downloaded
    0
    Good to see some pics

  7. #7
    Join Date
    Aug 2006
    Location
    WA
    Posts
    13,786
    Total Downloaded
    0
    Quote Originally Posted by Dougal View Post
    Excellent work, I'm happy to see that adapter works too.

    That breather plate could just unbolt and move to the front camshaft inspection hole if you needed it to...
    Thanks Dougal. I did think about moving it, but that may make access even more difficult...

    I only got it back from the exhaust shop yesterday - took them 1.5 weeks!!! but it is a very nicely made 3" mandrel bent exhaust, and squeezing one in in a 110 isn't easy...

    Only problem is, the +ve cable to the starter shorted on the exhaust on the way to work this morning...


    Hard to see, but the cable is horizontal, just above the chassis rail, and the exhaust is at about a 50deg angle.

    I didn't even notice it was close to it, would have moved/secured it when I did all the other hoses/cables.

  8. #8
    Join Date
    Aug 2006
    Location
    WA
    Posts
    13,786
    Total Downloaded
    0
    Needed to cut and shut the breather. I will leave a more detailed description of this in the Provent fitting thread I started.


    And to T-in the 8 mm rocker cover breather:

  9. #9
    Join Date
    Aug 2006
    Location
    WA
    Posts
    13,786
    Total Downloaded
    0
    The rest was just plumbing, and welding pipe to flanges... Didn't take many pics...

    Rijidij posted how to mod the air cleaner, I did the same, only I brazed a plate on instead of riveting.

    Turbo compressor inlet:


    The crossover pipe is the only major PITA. There is about 1.5" of clearance between the tappet cover and the bonnet ribs. I didn't want to mod the bonnet, so it took a while to get the crossover pipe done. (I also tried to buy one, but none of the wreckers in Perth had a 4BD1T. The turbo outlet is 2" and the 4BD1 air inlet is 2.5".

    The crossover pipe is only temporary. I will be making a new/improved version when I fit a wta intercooler (coming soon).


    The original breaather connection to the inlet makes a handy place to attach the pressure line to the wastegate actuator:


    There is isn't much space under there...


    Not a lot of room up here either...

    The breather lines are only temporary, I think I will be moving them down lower, further away from the exhaust. I will probably fabricate a neater actuator bracket as well. That was a rush job fabbed up in-situ, when I realised I needed to rotate the compressor housing more (I originally planned to have it pointing close to vertical, as I had an alloy 90 deg. outlet. Bonnet clearance wouldn't allow it though.

    Apart from the exhaust, the only other expensive bit was the braided hose and T fittings, to connect the turbo oil feed to the oil feed for the vacuum pump. This was about $120 from Pirtek. Edit, and no that isn't an oil leak, I had disconnected and reattached the oil feed just before the pic was taken. Apart from that, just hoses, hose clamps, etc...

    I still need to fit the boost and EGT guages (when they arrive). Then I can turn up the fuelling

    However, I had tweaked the fuelling slightly before (when it was NA). It already seems to have a fair bit more go.

    As mentioned, I will also be building an intercooler. Watch this space...

  10. #10
    Join Date
    Sep 2007
    Location
    Kiwiland
    Posts
    7,246
    Total Downloaded
    0
    So, how does it go?

Page 1 of 15 12311 ... LastLast

Bookmarks

Bookmarks

Posting Permissions

  • You may not post new threads
  • You may not post replies
  • You may not post attachments
  • You may not edit your posts
  •  
Search AULRO.com ONLY!
Search All the Web!