

 Reply With Quote
Bloody hell that is so nicely built. I want one!
Good work.

 Master
Hi all,
Just wanted to give you a heads up on a 300Tdi air compressor that was fitted up this weekend.
It is a prototype (but is already running on a 300Tdi Disco) so although I am the guinea pig in a Defender it has been successfully tested already.
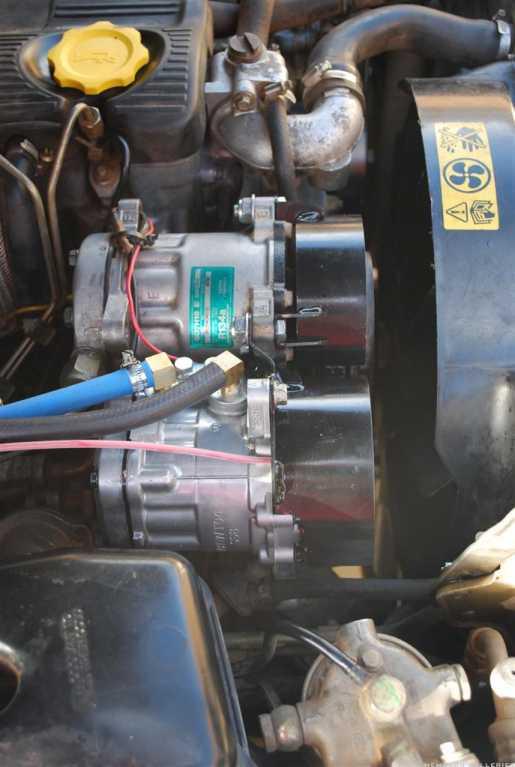
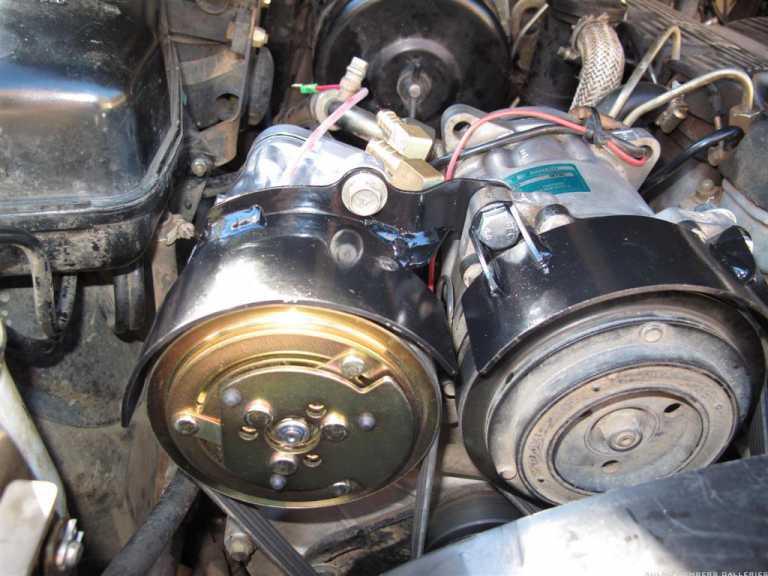
What's different from the existing 300Tdi Disco setup is the A/C mounting bracket that incorporates another A/C unit converted to being just an air compressor.
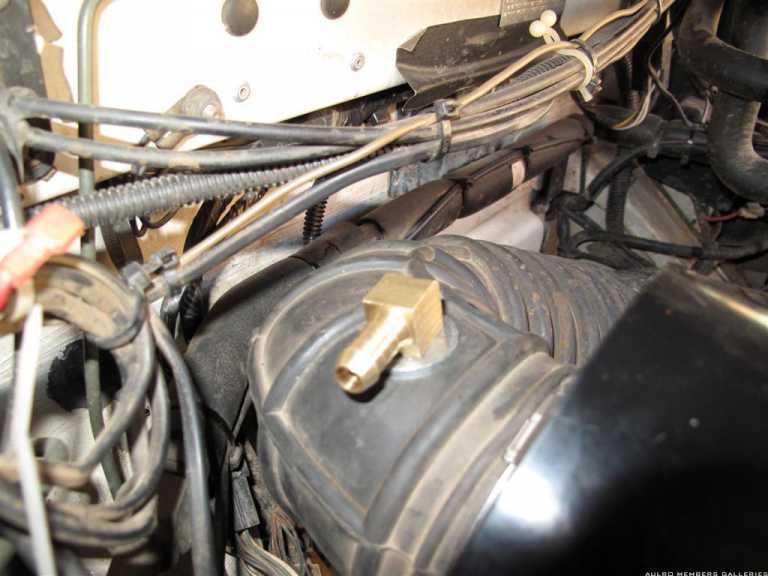
It takes air from the air inlet pipe post air cleaner (although it could come from the the oil separator can on the rocker cover to automatically oil it) Instead this is going to have an electrical timer fitted so that I can just grease/oil it after running the unit for the desired length of time, currently going to run it for 5 hours between lubrication.
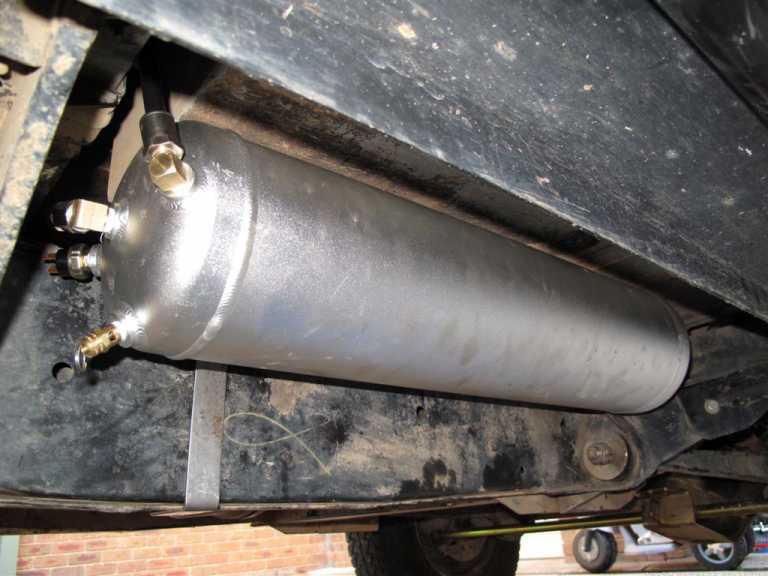
I have fitted up a 15 litre aluminium tank under the driver attaching it to the chassis using some steel brackets made up to clamp it. (I did not want to weld or drill holes into the chassis).
What is really great is that it pretty much leaves the Defender stock standard except for running a longer 4Pk belt to cater for the extra run around the new air compressor pulley and having to straighten the scissor bonnet stay.
Initial testing has been pretty good, airing up my tyres (235/85/16) from 15Psi to 50Psi averaging about 2 minutes just at idle. This used to take me over 35minutes with the older style AR@ unit that was fitted to my truck. So this really is a step up! I intend to rerun the test at 1500rpm.
It has taken a fair amount of work from a number of people with the majority being Steve, "Madana" who has meticulously designed the new A/C & air compressor bracket as well as source the A/C unit that fits so well and "BrendanB" who lent a hand drilling, tapping fitting etc.
As this was the first installation it took a little bit more time and we found better ways to do things but overall it looks pretty tidy and should go the distance.
To test it out a trip to little desert and big desert (VIC) has been organised for this coming weekend. This will give me the opportunity to air down and up regularly testing not only the air compressor but the advantages of running different pressures etc for different terrain. This would generally be avoided because of the time it takes just to air back up.
Here are the pictures for those interested.
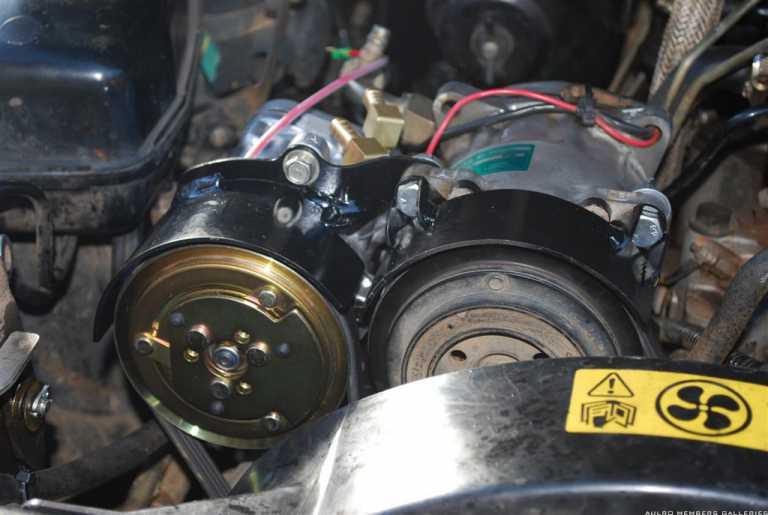
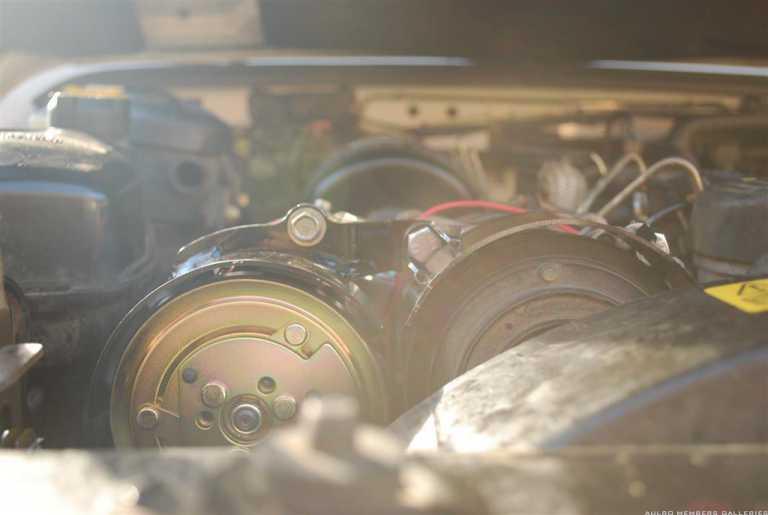
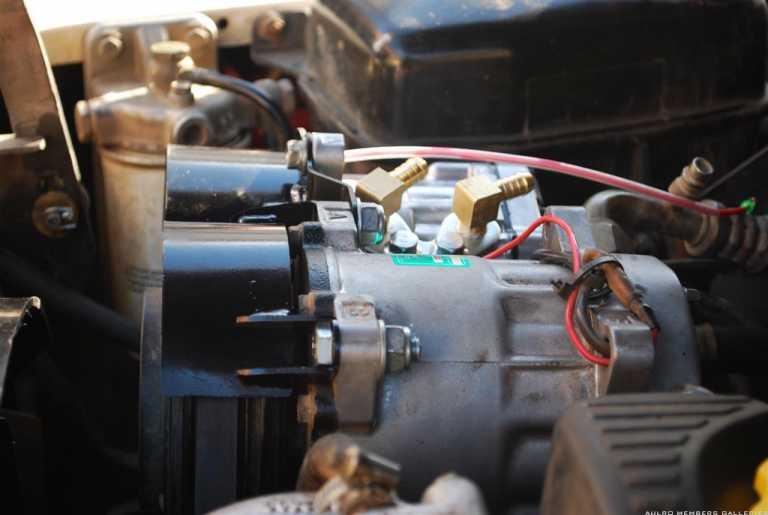
Compressor next to A/C Unit.
It's a tight fit but there is still room to undo the A/C bolts if needed.
The air compressor is the same height as the A/C unit so as not to foul the bonnet lining.
The scissor bonnet stay has been straightened and folds down between the water reservoir (before anyone says replace it, I carry a spare one with me! And have a water alarm) and the air compressor guard.
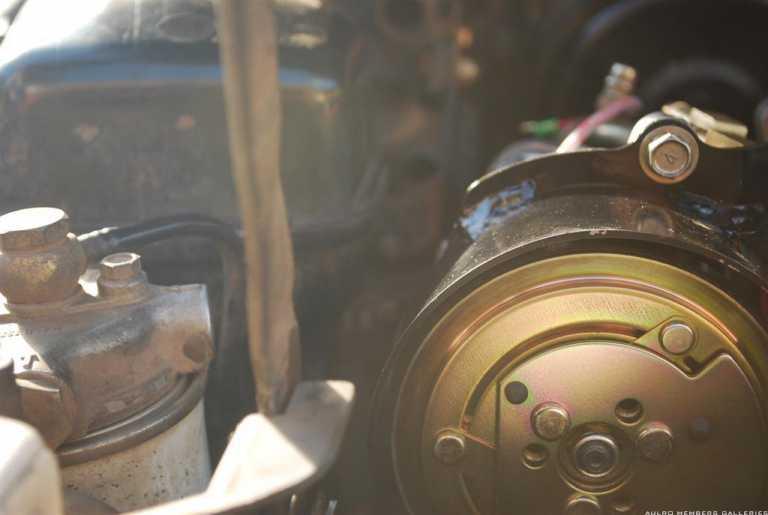
New guards made up so that the bolts are held captive.
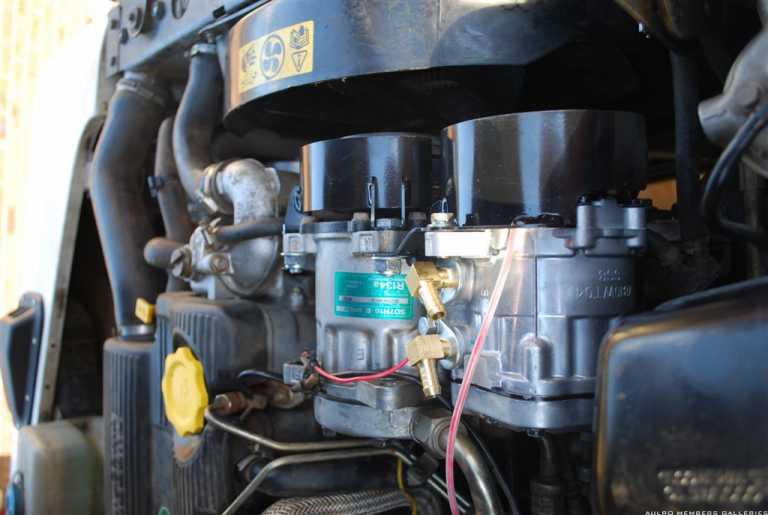
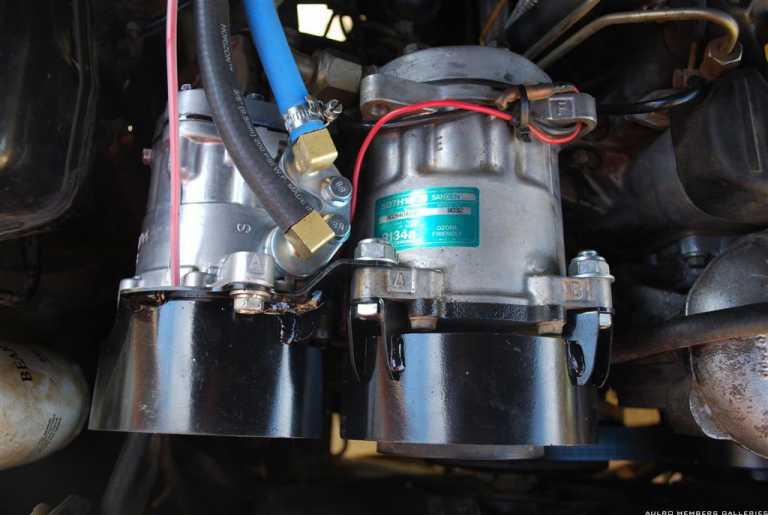
Top view of both compressors. Very neat in my opinion.
Another side on shot.
Air compressor air inlet.
Using standard tensioner with longer 4Pk belt. In the event the belt breaks you can bypass the air compressor and use standard belt. Of course carry a spare so you don't miss out on having continuous air.
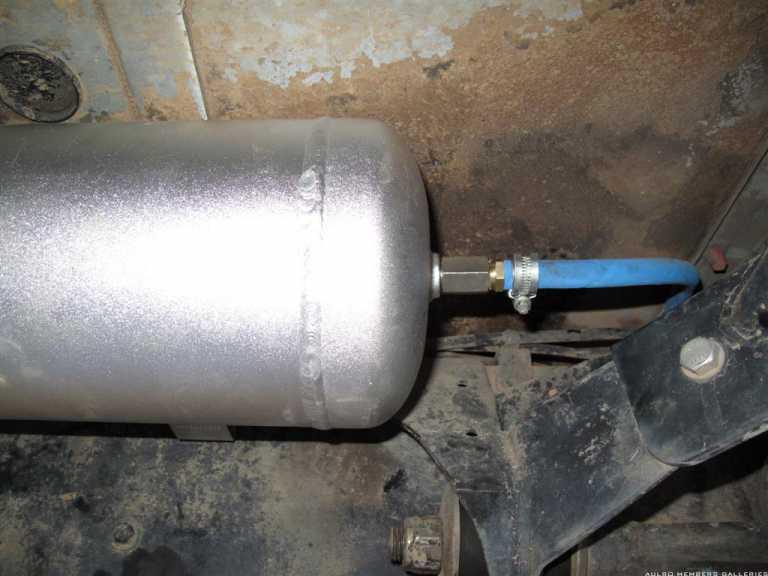
Air from compressor coming into front of 15 litre tank. High pressure and high temp hose used! It also has a one way valve.
Tank is neatly tucked up under chassis. Outlets are for pressure switch and blow off valve.
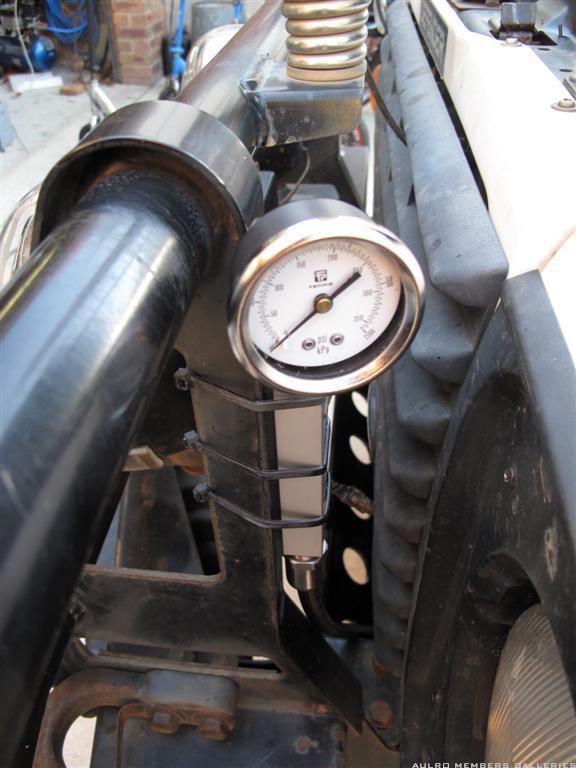
This is the only part that has not been mounted to my satisfaction. I need a long length drill bit so for the moment this will have to do until I make it more permanent. On the other side of the pressure guage are the quick fit outlets.
This project has been in the back up my mind for ages so to finally have it installed and working is fantastic.
I will give a follow up report post the trip but feel free to make any comments or suggestions.
The intention is that the compressor, new bracket and belt will be made available from Steve (Madana) after testing. With possibly a full kit down the track.
Thanks again to Steve and Brendan for helping me fit it to my truck.
YarnMaster
Bloody hell that is so nicely built
Good work
TopicToaster
Great looking job. I currently have a tank mounted like yours under the drivers seat. Currently using an electric compressor, it takes a little while longer and your upgrade is well executed, makes me want to give it a go.
What is the AC/Air compressor off? What is the part number for the longer belt?
Fossicker
The compressor is a generic swing type compressor, it is also a brand new unit as they are easier to source as brand new units. The drive belt is a modified 6pk belt as you are not able to get the same length belt in the 4PK version. I have set up 2 old compressors and made a trimming jig for the belt which trims them perfectly. My 300TDI disco has a hand modified belt which is running perfectly and has been doing so for the last 10,000+ Kms
Master
You definitely could do it. The only really time consuming part is the engineering involved in the A/C mounting bracket. It's taken more than a few attempts fine tuning it. "Madana" (Steve) will be making it available after final testing.Originally Posted by slug_burner

I am not exactly sure but it is supposedly on some smaller European cars, and has come in from Asia. I think the belt is fitted to an Audi.
Master
Glad you like it.
Steve will be able to help you out!
YarnMaster
SubscriberSo how do we get hold of this newly designed A/C bracket ?and how much?
YarnMaster
SupporterVery tidy.
What supports the base / back of the new compressor, the front gaurd bracket picks up one mounting bolt but have you extended the base plate off the Al front cover outwards to make a base for the new compressor? Are there any flexing issues?
One comment would be lose the scissor stay... I also thought I could bend around things (aircompressor, provent). On a rough road it will move sideways and then catch underneath the shiny new compressor and then you will have lotsa fun opening the bonnet! Trust me those scissors cause pain when they get stuck!
Just pull the thing off and either replace with struts (as seen on this site)
or be lazy and prop the bonnet with a piece of pipe when open.
Otherwise I like the look of it! I just pulled all the A/C junk out and wind down the windows. Once you have belt driven air you can never go back to 12V! What rating pressure are you running?
Steve
Master
The new bracket includes mounts for the new air compressor. I don't expect there to be any flex as the mount is made out of 8mm plate steel, laser cut to shape. The air compressor is bolted using the base mounts.
The guard could be extended or include a lip to ensure the scissor stay can't get caught. Me preference is the straight bonnet stay from the front wheel mounted kit.
The pressure switch is a 110psi on 135psi off. I could run it at 150psi but I originally set it up for an electric pump. Will play it by ear for the moment.
YarnMaster
SupporterYeah I figured the new comp would be base plate mounted... I hope the 8mm is gussetted. There is a fair loaded pressure from the 4pk and if both compressors are engaged I can see a fair force applied to the mounts, plus 300tdi vibes!!!!
I have a 150psi switch but find the 4pk starts to slip just before it cuts out. Will be replacing the old compressor this week and will play around with pressures but Im thinking I will have to go back to a 135psi switch... one thing is for sure my old rattle gun boogies at near on 150psi!!!!
Regards,
S
 Posting Permissions
| Search AULRO.com ONLY! |
Search All the Web! |
|---|
|
|
|
Bookmarks