

 Reply With Quote
I think you will find the Michelins are the same diameter, even a tad bigger than your Simexs.Originally Posted by 101 Ron


 YarnMaster
Gav did you notice any real differences in the gearing ????? with the bigger rubber.
My 101 has taller transfercase gears too.
LordRover
SupporterI think you will find the Michelins are the same diameter, even a tad bigger than your Simexs.
REMLR 243
2007 Range Rover Sport TDV6
1977 FC 101
1976 Jaguar XJ12C
1973 Haflinger AP700
1971 Jaguar V12 E-Type Series 3 Roadster
1957 Series 1 88"
1957 Series 1 88" Station Wagon
Super Moderator & CA manager
SubscriberI think the gearing felt very similar. I found pulling away in second to be similar to mine when I don't have the trailer on.
If you need to contact me please email homestarrunnerau@gmail.com - thanks - Gav.
Super Moderator & CA manager
SubscriberJust about got all the bits for the next project on Chucky - endless air.
I already had stashed away a York style AC compressor from the old 3.5 that came out of the Rangie. It is a big sucker with its own sump and oil supply, so perfect for this application. It was sill pumping the AC up in no time in the Rangie when I ripped it out, so no probs there. I also have all the mounts, pullys and belts to bolt it straight onto the 101's engine. I'll have to move the alternator from its current position, but I have the 55 amp Bosch unit and mounts from the old engine too. May even stick the power steering pump on at the same time, but leave the belt off - ready to go for the power steering conversion then.
I got an old workshop compressor that had a stuffed manifold on it today, and salvaged the tank and pressure switch/unloader. It is a 24 ltr tank in good nick.
Just have to work out where to stick the tank - I have a couple of options here though, so no biggy. I was thinking of putting the pressure switch somewhere out of the way so it doesn't get wet or dirty. Thinking of mounting it in the battery box or something like that.
Just got to grab some fittings and stick it all in. Thinking of mounting an air fitting in each of the little boxes behind the rear wheels, and I can keep an air hose in there too.
Once it is all in I can stick a big arse air horn up the front like Ron has got.
Cheers - Babs.
If you need to contact me please email homestarrunnerau@gmail.com - thanks - Gav.
YarnMaster
Gav, did you get a look at what I had done ?
The tank, one way valve, pressure switch, drain valve and everything else you could think of came from a cheapo portable 12 volt aircompressor with 12lt tank.
I took off the 12volt compressor and used it on something else.
I used the tank gear on the 101 using the pressure switch from the tank to operate the A/C compressor clutch.
I was able to fit the tank between the front chassis rails just behind the front bumper in front of the radiator.
I read the tank pressure from the standard gauge that came with the tank though the front grill of the 101.
The air outlet is also thought the front grill and the quick release fitting sits very well in the mesh of the grill.
My air horn and solenoid is also mounted with the air tank.
The whole lot comes out as a unit with only a few pop rivets holding the whole thing in place.
The system has been working without trouble for years.
I should add I run between 110 to 150 psi in the tank so a small micro spray paint gun air pressure regulator/water separater is also mounted on the tank for the ARB diff locker which needs a clean 90 psi.
Its compact and uses room in the front of the 101 which is normally wasted and causes not access issue to any other part of the vehicle.
YarnMaster
I found it easy to have the one outlet at the front of the 101 and carry a seven mtr hose of small light design that stores well with the spare wheel behind the drive and access it thought the spare wheel door on the drivers side.
The seven mtr hose is long enough to pump up the trailers tyres and anyone else tyres around me.
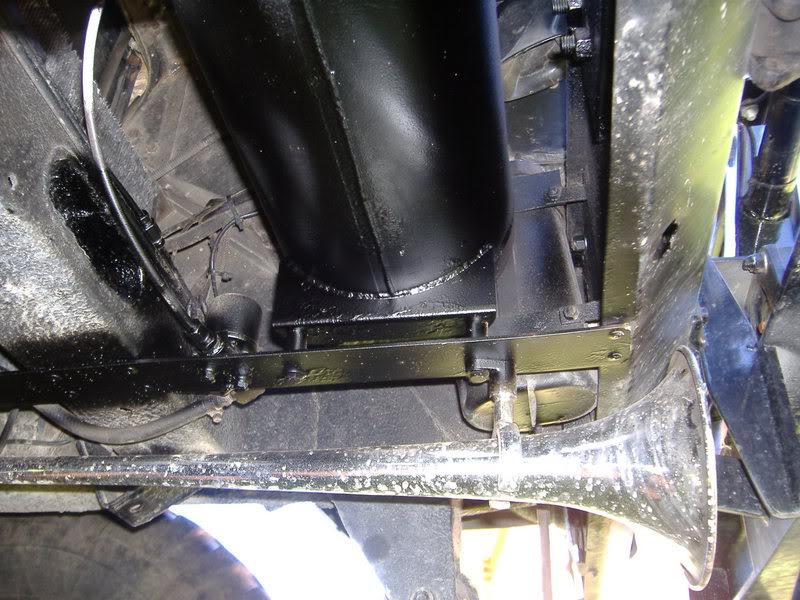
this pick is the tank being fitted.
You can see the flat plate on top of the tank where the 12 volt compressor that came with the tank was removed.
This pic show the mounting arrangement and the horn.
YarnMaster
my crank handle still works and a short hose extension is run though to the front grill to a quick release fitting.
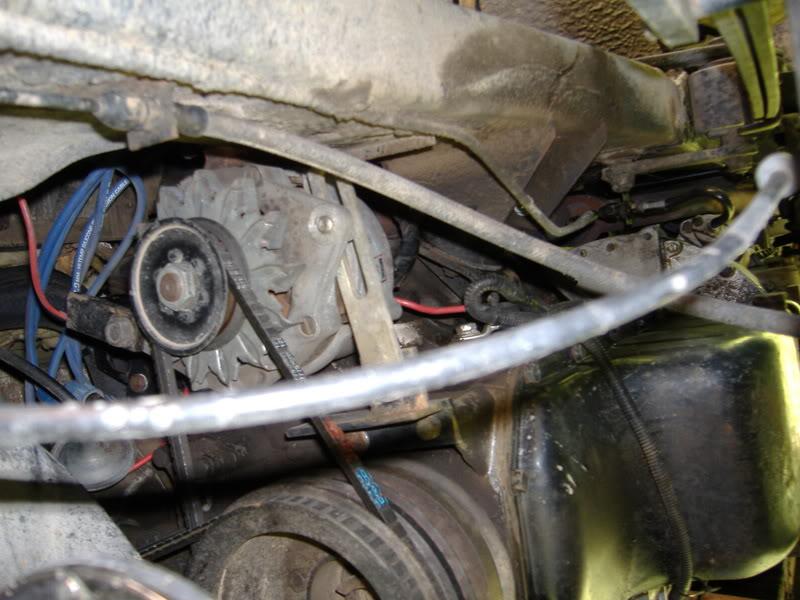
These pics show my A/C compressor arrangement.
I used a Nippondenso piston compressor with oil sump like the York, but it is smaller and more compact.
I fitted a small dip stick and filler plug to top up the compressor easily if needed.
New altenator location
YarnMaster
The air intake for the compressor is plumbed into the carby intake pipes so it gets filtered and dry air.
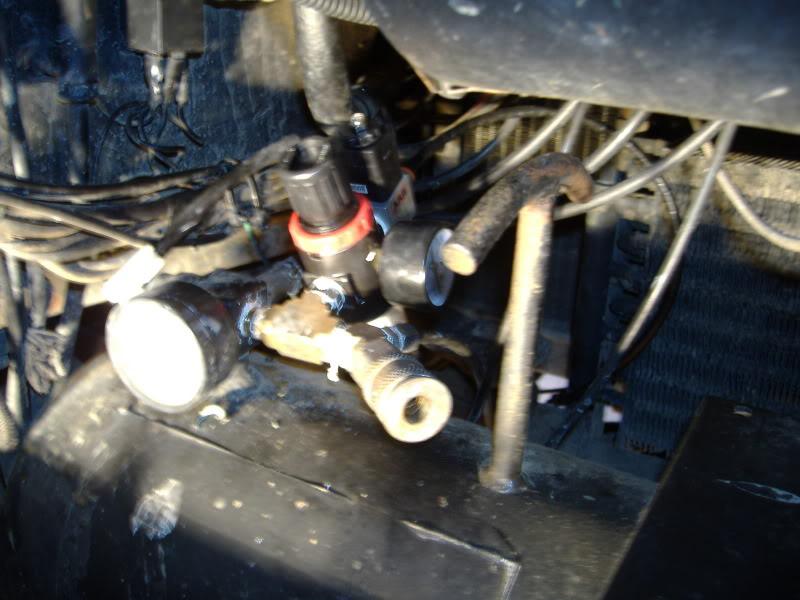
In the following Two pics you can see a micro pressure regular/ water trap has been added for the ARB air locker with its activation solenoid.
YarnMaster
If you look very carefully you can just see the small quick release fitting sitting just though one of the mesh holes in the grill, just in the centre and under the cross bar of the bull bar.
The release fitting is still small enough to slide out of the grill easily for quick removal of the grill for topping up the overflow tank and cleaning the radiator etc.
YarnMaster
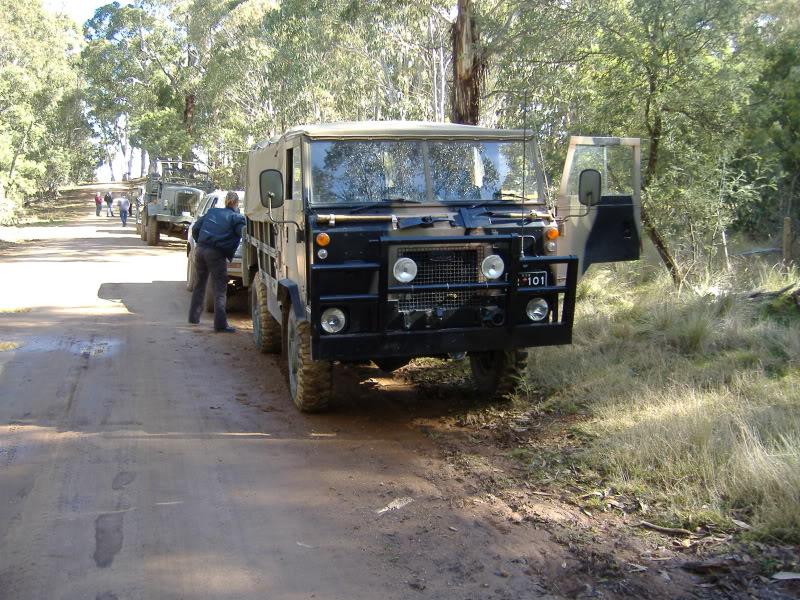
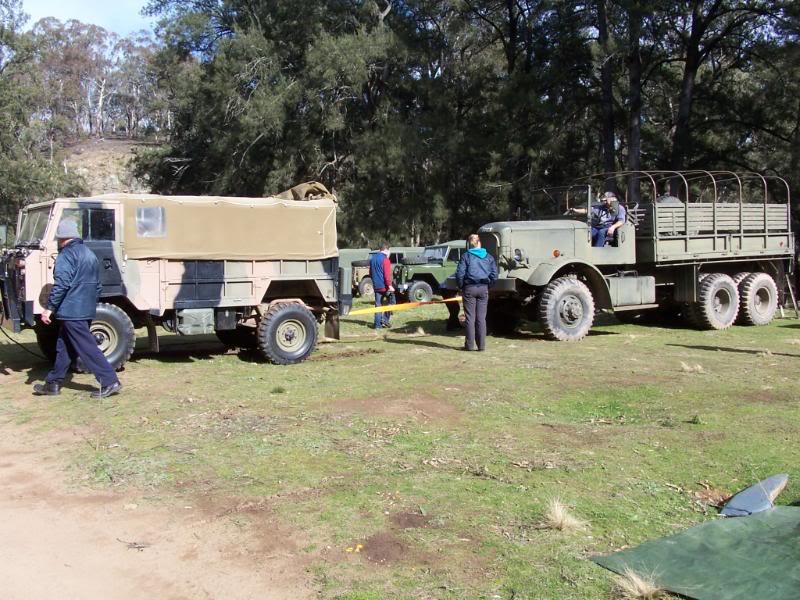
In this you can just spot the air hose running from the very front of the 101 to the truck behind.
( the 101 was used to build up air for the truck so it could release its brakes and be tow started.)
 Posting Permissions
| Search AULRO.com ONLY! |
Search All the Web! |
|---|
|
|
|
")


Bookmarks