

 Reply With Quote
Very Interesting!Originally Posted by Benny_IIA

So the AUS spec pumas have a longer nose? Therefore the NON AC that allisport make will fit?

 Master
Thanks Chook, I didn't take any pictures of mine installed.
Did another 400kms this weekend - mostly on bitumen but plenty of dirt and some decent climbs too - I'm still loving the freed-up feeling of it and the better noise form the turbo spooling up.
Master
Very Interesting!
So the AUS spec pumas have a longer nose? Therefore the NON AC that allisport make will fit?
Master
SupporterWould that include TD5's ? I'm about to order one for my 2001 130 TD5, be nice to get the extra width.
ForumSage
I would not fit the non A/C intercooler into an A/C Td5
just me, but I think that 20mm gap is important, esp for cleaning the muck out.
I think the A/C intercooler is such a huge improvement over standard you'd hardly notice an extra 20mm anyway,
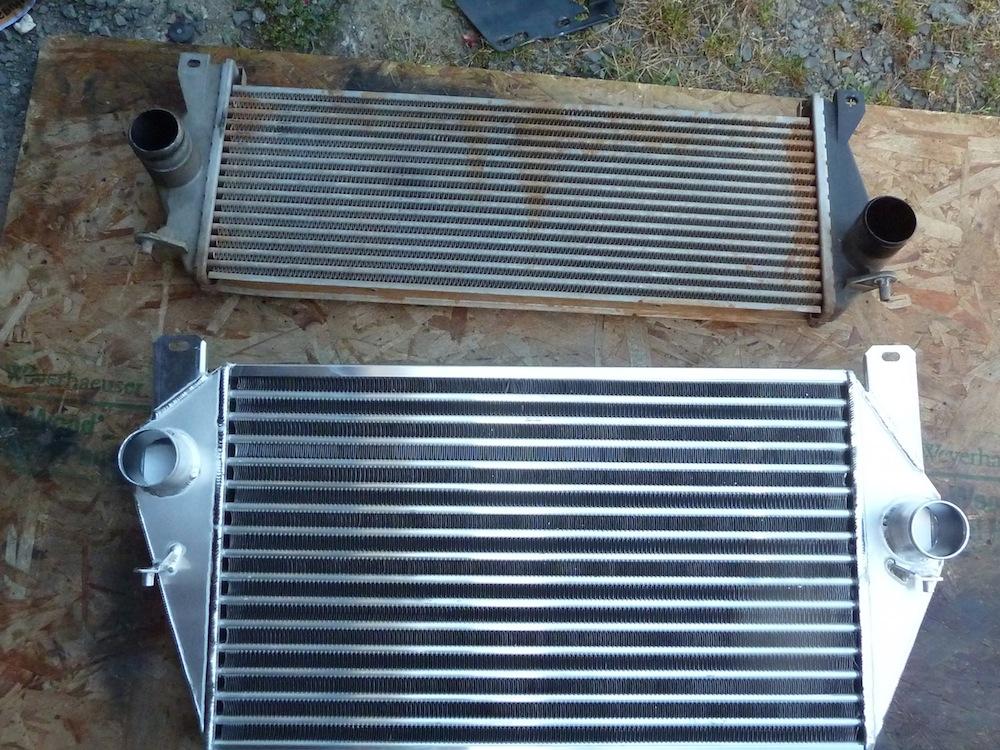
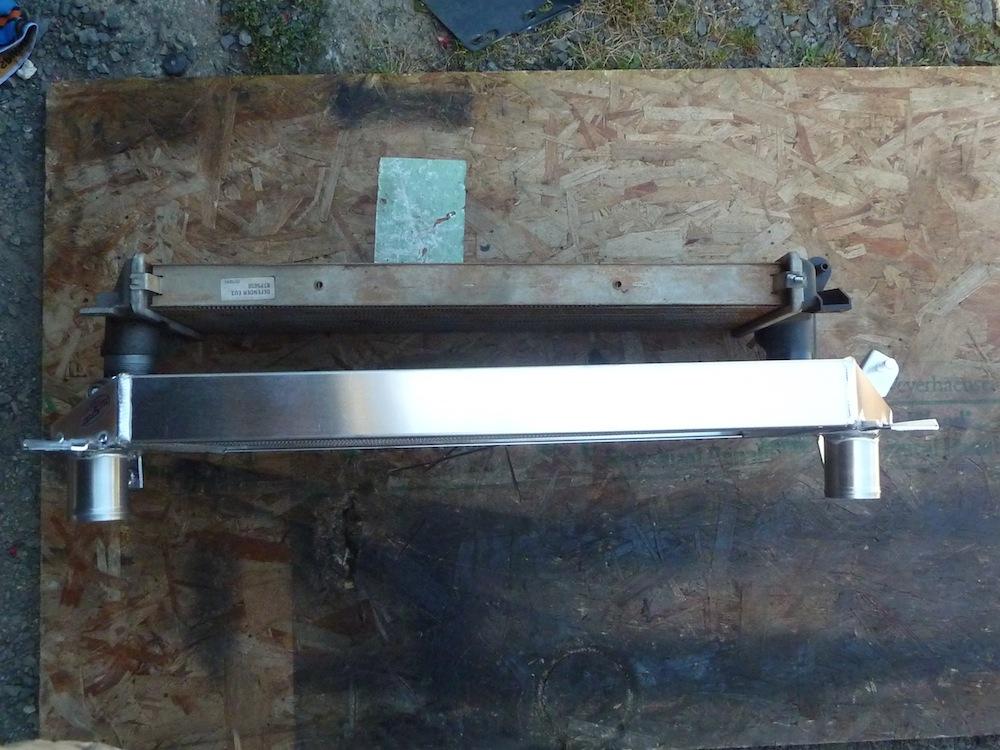
some pics of mine, orig Td5 EU3 compared with Allisport
Wizard
yep, fits fine still a decent gap between cooler and ac con
Master
I fitted mine tonight, and I can confirm that it does fit upside down.

Master
SubscriberMade a start on installing mine yesterday and what a mongrel of a job it is turning out to be.
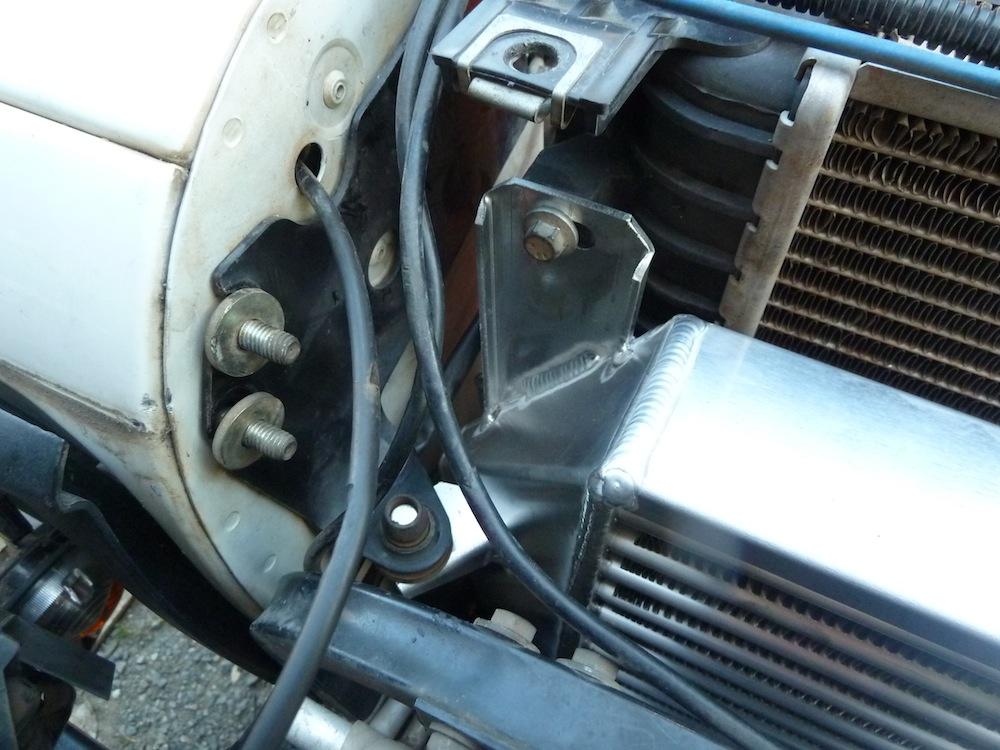
Firstly, for others yet to attempt a DIY, the driver's side bracket from photos 4&5 above also holds your bonnet stay, so make sure you have something rigged to stand in for it.
Secondly, are you guys sure you don't need to remove the fan and A/C gear from in front of the intercooler in order to fit the new one? I can't get my replacement to sit right.
And finally, how the HELL do you get the hoses back on? On the driver's side in particular there's barely enough room for your fingers let alone your forearm to allow enough force.
Everyone else on here seems to find this an easy job, so what am I doing wrong?
YarnMaster
SubscriberThere's another job i will contract out, im too old & inflexible for this stuff, (and possibly fat)
By all means get a Defender. If you get a good one, you'll be happy. If you get a bad one, you'll become a philosopher.
apologies to Socrates
Clancy MY15 110 Defender
Clancy's gone to Queensland Rovering, and we don't know where he are
Master
It isn't a walk in the park, but it is definitely DIYable.
I removed the bonnet completely, which made accessing the inner workings easier.
I didn't have to remove any of the AC stuff either, but I did unbolt it fomr memory, just to allow some movement.
As for the hoses, they are quote hard to do!
I just put them into a bucket of hot water to soften them up, and eventually got them on, after lots of swearing.
You can undo the fan shroud to make more room, just bend it out of the way.
It does require a fair bit of agility and hand/arm strength, as well as being able to hold your tongue in the right position whilst swearing.
Good luck!
Wizard
SubscriberI got my friendly local indie mechanic to do mine. And so glad I did too.
The feller is built like schwartznegger was in his heyday and he still had real issues moving some of the parts about. The studs that you need to remove to get the top bonnet latch plate off (lock a couple of nuts onto the stud and turn) was a total PITA!
Neil
(Really shouldn't be a...) Grumpy old fart!
MY2025.5 110 D250 S MHEV (L663)
In Memoriam:
MY2013 110 TDCi DCPU purchased new from Land Rover Malaysia in May 2013.
...traded in for the above L663 in December 2025.
Nulla tenaci invia est via
 Posting Permissions
| Search AULRO.com ONLY! |
Search All the Web! |
|---|
|
|
|

Bookmarks