


 Reply With Quote
Very nice! A recipe for the Land Rover cookbook. Are the pictures of one you prepared earlier?

 Moderator
I was sitting on the veranda the other day pondering some of the big questions in life and found my attention drawn to the front of the Defender. It's not the first time that the niggling concern about lack of front recovery points has invaded my thoughts.
So I hatched a plan and here is the recipe:
Ingredients:
2 x 10,000 lb recovery hooks (the type you can get from any good 4wd store)
2 x 3/8" UNF bolts, grade 5 or 8, 5 1/2" length. Zinc plated. Appropriate washers and nylock nuts
1 ARB bull bar to match:
1 09 MY Defender (or similar)
Method: (for one side)
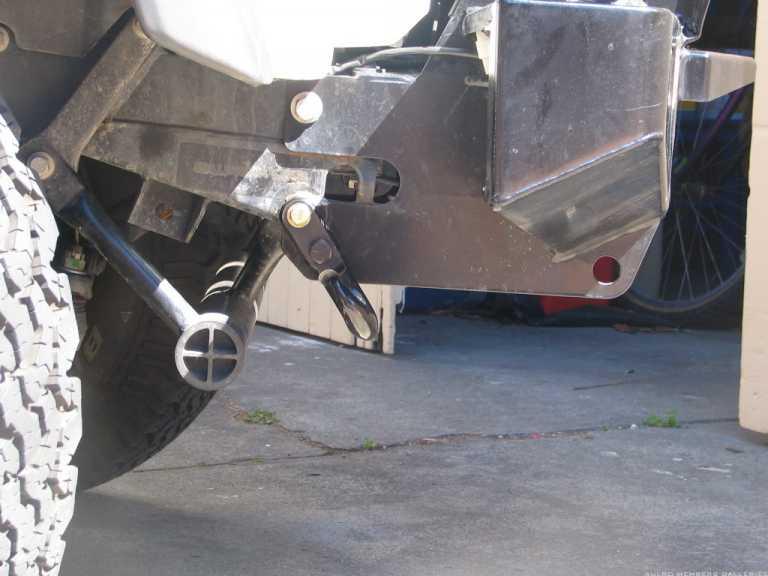
Remove the bolt (the bottom bolt in the before photo) that runs through the chassis, steering protector existing recovery ring and of course the bull bar. This existing hole has a crush tube.
Before photo:
Discard the recovery ring.
Discard one of the 1/2" bolts that comes with the hook
Bolt the hook to the outside of the bull bar with the 5 1/2" bolt. Tighten sufficiently to still allow the hook to rotate.
Mark the location of the hole for the second bolt that came with the hook. This will bolt through the web of the bull bar section that mounts to the chassis. Be careful when locating the hole for the second bolt that there is room for the washer and nut below the chassis rail.
Drill the hole and paint.
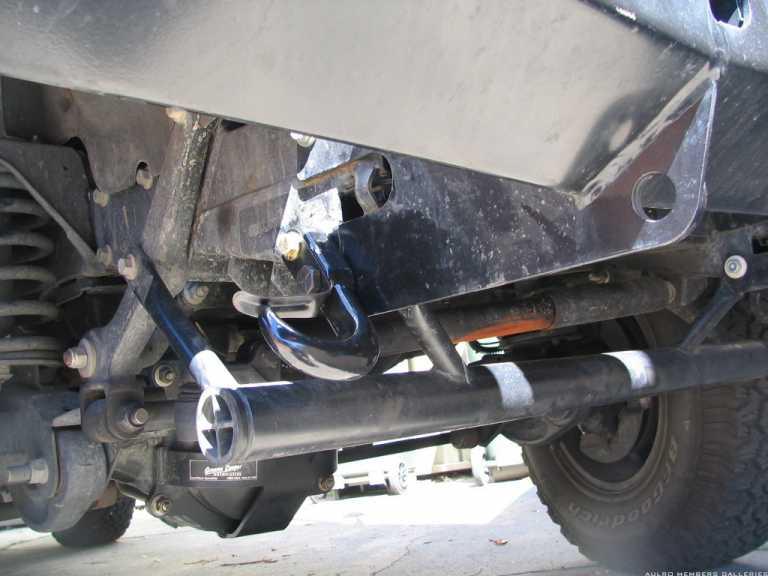
Rotate the hook into position for the second bolt, insert bolt and tighten both nuts.
Outside view:
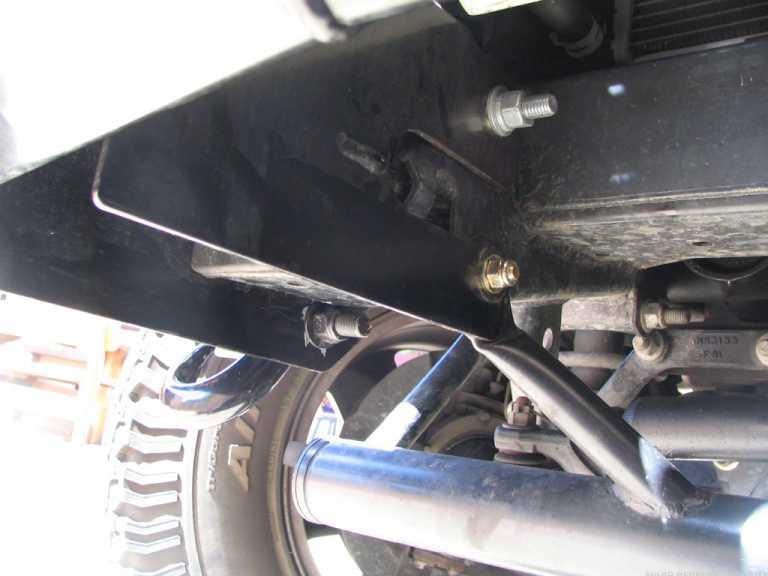
View from the inside of the chassis rail The bottom bolt fixed is through the web of the bull bar. The top bolt through the chassis rail.
Repeat for the other side.
As usual the necessary disclaimers are applied to this as it hasn't been tested under working conditions. Copy and use at your own risk.
And of course comments welcome")
Mahn England
DEFENDER 110 D300 SE '23 (the S M E G)
Ex DEFENDER 110 wagon '08 (the Kelvinator)
http://www.aulro.com/afvb/members-rides/105691-one_iotas-110-inch-kelvinator.html
Ex 300Tdi Disco:
Volumetric Genius
Very nice! A recipe for the Land Rover cookbook. Are the pictures of one you prepared earlier?
2007 Defender 110
2017 Mercedes Benz C Class. Cabriolet
1993 BMW R100LT
2024 Triumph Bonneville T120 Black
YarnMaster
Hi,
thanks for the posting and the photos, it is some thing I am pondering my self.
A few questions if I may.
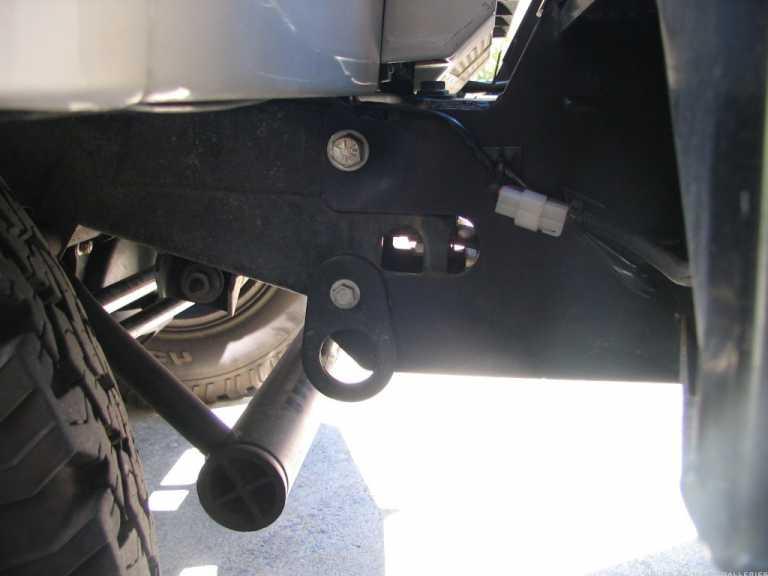
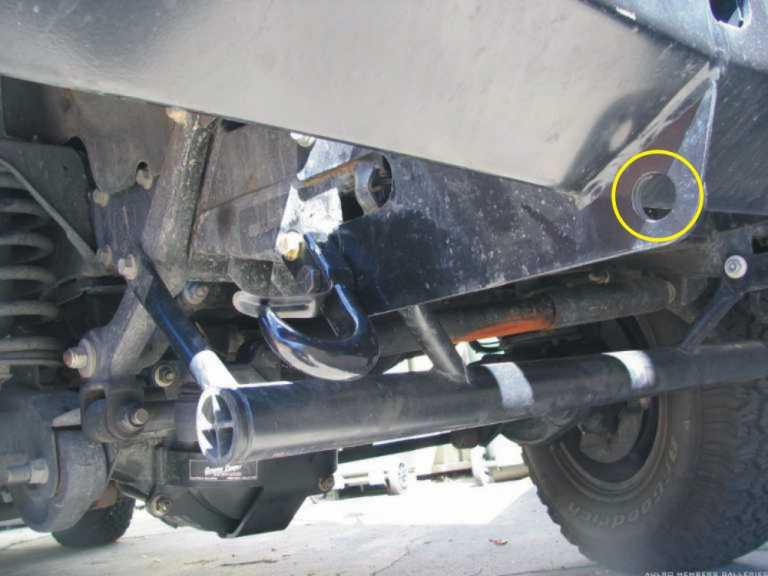
Is the hole (ringed in yellow) promoted as shackle attachment point at all?
I like the idea of the hook putting the load directly on the chassis, but is it possible to mount a hook with out the extra point provided by drilling the bull bar?
cheers
Master
Nice install - looks solid as!
Ideally you would want the hook pointing straight in the direction of the load from the snatch/tow rope. ie horizontal. By the looks of your setup you have done the best thats possible without drilling a hole through the chassis rail.
Did you install this on both the left and right side of the vehicle?
Steve.
Moderator
Hi austastar,Originally Posted by austastar

There have been conflicting reports about the strength and suitablity of those existing points. My gut feeling is that under load particularly any lateral force/moment they would bend. Also I have an aversion to using shackles unless there is no other way.So the idea putting shackles through those holes makes my skin creep. I think those points are suited for stowing the winch cable hook
The hooks allow me to use a bridle strap without shackles fed through the fairlead hole in the Bull Bar (I dont' contemplate installing a winch). The bridle strap is fed through the snatch or towing strap eye again without a shackle attachment.
Fixing the hooks horizontally could be achieved by using one bolt but that "halves" the connection to the vehicle and again I'm not comfortable with that. Alternatively you could drill through the chassis for the second fixing but the chassis looks a little complicated in that area.
Mahn England
DEFENDER 110 D300 SE '23 (the S M E G)
Ex DEFENDER 110 wagon '08 (the Kelvinator)
http://www.aulro.com/afvb/members-rides/105691-one_iotas-110-inch-kelvinator.html
Ex 300Tdi Disco:
Moderator
Yes both sides as explained above
Mahn England
DEFENDER 110 D300 SE '23 (the S M E G)
Ex DEFENDER 110 wagon '08 (the Kelvinator)
http://www.aulro.com/afvb/members-rides/105691-one_iotas-110-inch-kelvinator.html
Ex 300Tdi Disco:
Swaggie
On my county I found that while the holes in the dumb iron are only 3/8", the diameter of the crush tube is larger than 1/2". So I drilled the holes in the chassis and the bullbar out to 0.5"
The MOD Father
Bored with plain black steering dampers?
"How long since you've visited The Good Oil?"
'93 V8 Rossi
'97 to '07. sold.
'01 V8 D2
'06 to 10. written off.
'03 4.6 V8 HSE D2a with Tornado ECM
'10 to '21
'16.5 RRS SDV8
'21 to Infinity and Beyond!
1988 Isuzu Bus. V10 15L NA Diesel
Home is where you park it..
[IMG][/IMG]
Swaggie
I think you will find that is rust...
The MOD Father

"How long since you've visited The Good Oil?"
'93 V8 Rossi
'97 to '07. sold.
'01 V8 D2
'06 to 10. written off.
'03 4.6 V8 HSE D2a with Tornado ECM
'10 to '21
'16.5 RRS SDV8
'21 to Infinity and Beyond!
1988 Isuzu Bus. V10 15L NA Diesel
Home is where you park it..
[IMG]
 Posting Permissions
| Search AULRO.com ONLY! |
Search All the Web! |
|---|
|
|
|


Bookmarks