-
26th April 2009, 10:50 PM
#1
-
27th April 2009, 12:50 PM
#2
Looking good. I've had my pole in the shed for about 5 months now and still haven't got around to fitting the thing. Can I ask how you fitted it to the wheel carrier? Did you just drill holes and put bolts through?
Cheers
Hendrik
-
27th April 2009, 12:54 PM
#3
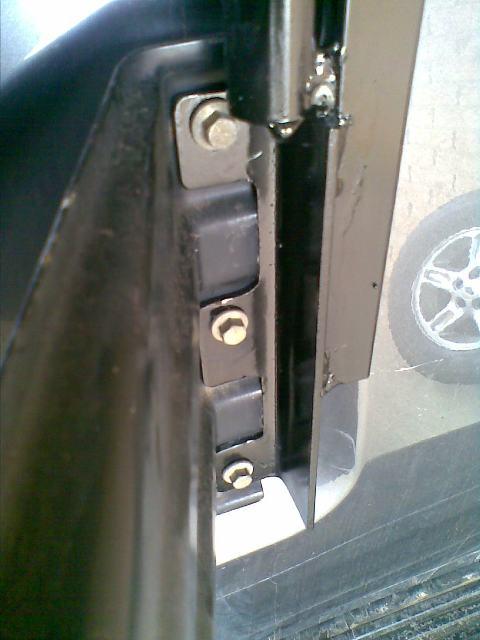
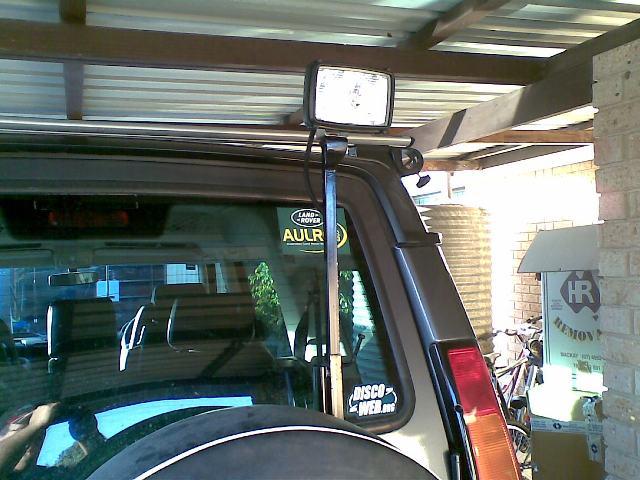
Hendrik, if you look in the first pic you can see the piece of duragal angle that I notched out. It bolts to the spare wheel carrier using the existing bolts. I'll take the spare off and get some better pics if you like.
-
27th April 2009, 01:14 PM
#4
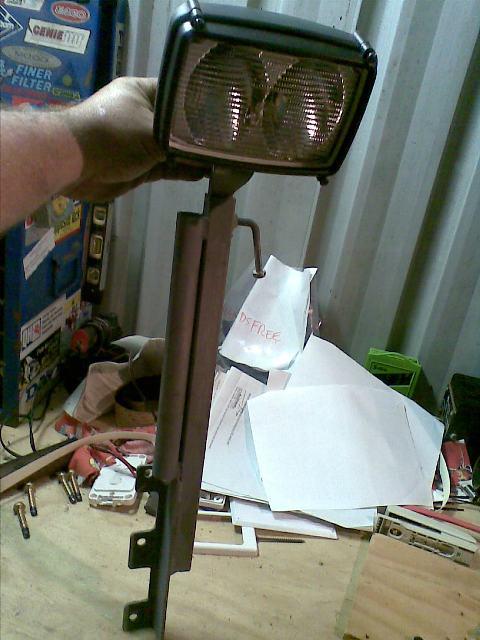
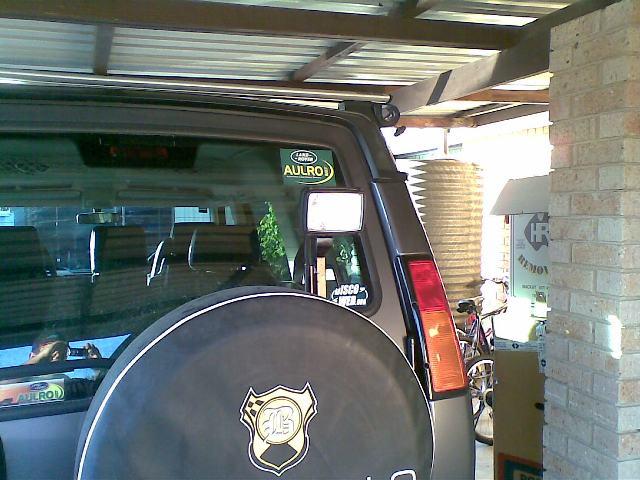
Pics as promised

Took about 2 hrs from go to whoa to fab, next one will be a bit more improved.
There is not alot of clearance between it and the tyre, when I go wider I may have to cut some spacers on the cnc plasma to space the wheel of the carrier a bit.
I thought about mounting an on/off switch on the pole though I would prefer the security of switching it from the cab.
Wiring will be run through the grommet for the windscreen washer then through the rubber tubing between the body and door.
-
27th April 2009, 06:24 PM
#5
Wow that is a really neat attachment there. I was just going to drill holes in the wheel carrier and use U-bolts but seeing that now I might change my design. How did you wire up the light, is there excess wire hanging when the light is at the bottom. I was thinking of using "pigs tail" wiring so it can extend when the pole is fully extended.
-
27th April 2009, 07:53 PM
#6
Wiring???...oh yeah, my pet hate!
I have some spiral cable that is a neat fit in the 20nb extra light gal pipe that is stitched to the side of the RHS upright, so it will be pretty much the same as the kaymar item.
Ill hook it up via a modified cruise control switch on the dash
-
27th April 2009, 10:17 PM
#7
That is a very nice job sir!!  I do like the way its adjustable to. I have an SD roof rack so the work light mount was already there, but If I had no roof rack,
I think you have come up with just about the best solution without drilling into the body of the vehicle imo.") and if you "marketed" it, Im sure it would be very popular !!......I know my friend will def take a GOOD look at this...
and if you "marketed" it, Im sure it would be very popular !!......I know my friend will def take a GOOD look at this...
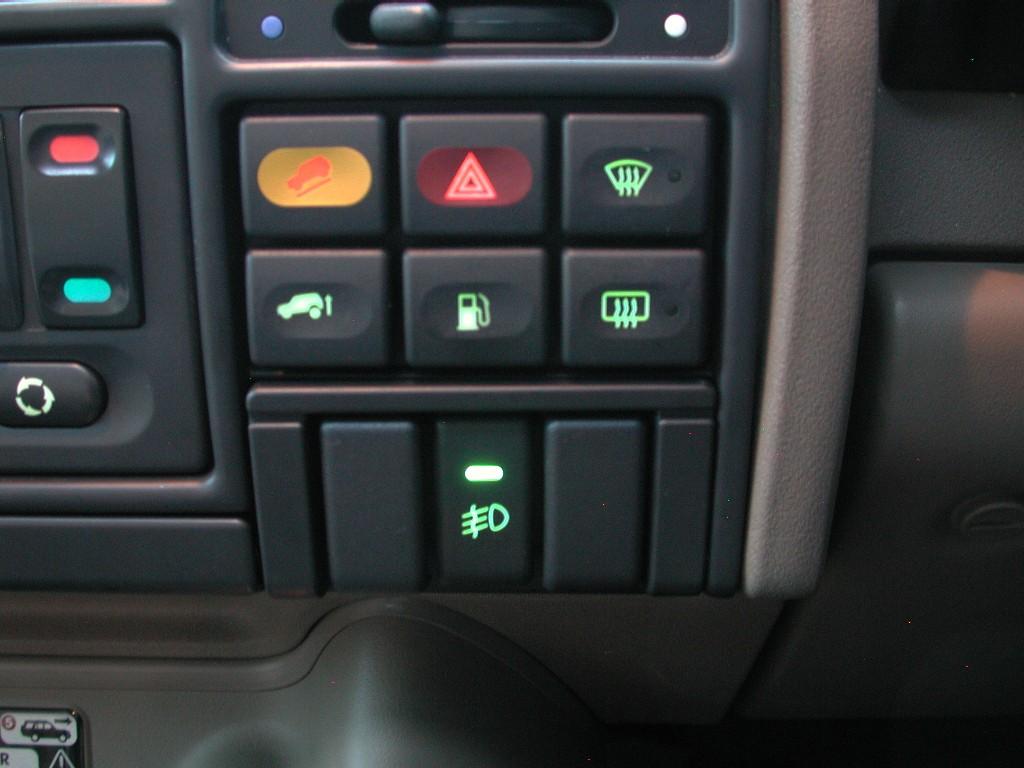
As far as a switch goes, I mounted one in the light to, that way if your "out" of the vehicle it can be easily turned on or off, but also have a "master" in the cab to to stop "illegal" use. I used a D1 carrier assy and front fog switch inplace of the Ashtray as the binnacle is already full lol...
-
27th April 2009, 10:38 PM
#8
Thanks Urban!...better not try marketing it in this thread though lol
Have only just logged off your website getting info on the wiring etc etc etc, the wife is about to loose her coin tray!
Getting the time do do some of these projects is the hardest bit...with running a steel fabrication shop all day the last thing I want to do sometimes is go BACK into work, though the end product is rewarding, as is being able to share the ideas.
-
28th April 2009, 08:01 AM
#9
Hi Nealo
Can I ask where you sourced the coil shaped wire, I've asked around at a few places but most people don't know what I'm taking about. I would also put the switch where urban put them, looks good i think. As far as the coin tray is concerned, just ditch the ash tray and slide the coin tray in there. I find the coil tray really for times that I really need money, because I left my wallet at home
Keep up the good work, would love to see pics when it's all done with the wiring etc.
Cheers
Hendrik
-
6th May 2009, 08:07 PM
#10
where do you get them stickers. im new to aulro.
 Posting Permissions
- You may not post new threads
- You may not post replies
- You may not post attachments
- You may not edit your posts
-
Forum Rules
Search AULRO.com ONLY!
|
Search All the Web!
|


 Reply With Quote
 Master
Bookmarks