

 Reply With Quote
G'day everyone,
It looks as though I will need at least one wheel and possibly two. Does anyone have a 19 inch wheel - or two - they want to sell I'm interested. I'd also consider a full set.
Please pm me if you can help.
Thanks,
Willem

 Master
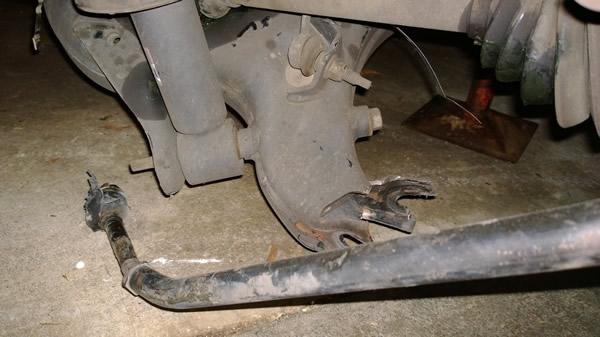
Some pics of the damage:
The lower control arm. That must have been some force to have ripped it completely off the hub like that!
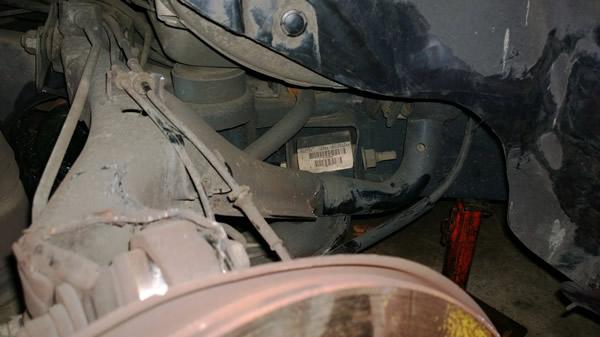
The upper control arm. Quite badly bent. I had to cut it to allow the bolt to come out because the tension had jammed the bolt.
There's a fair bit of work ahead but we are under way.
Willem
Master
G'day everyone,
It looks as though I will need at least one wheel and possibly two. Does anyone have a 19 inch wheel - or two - they want to sell I'm interested. I'd also consider a full set.
Please pm me if you can help.
Thanks,
Willem
Master
Done. Picked up a set from a local tyre place complete with Continental tyres. They had been traded on some 22 inch rims!Originally Posted by willem

It gives me a bit of peace of mind knowing the wheels have not been stressed as the ones on the car have.
Willem
A Keeper of the TGO
Good luck with the re-build. Hope there are no nasty surprises. Keep the pics coming.
Cheers,
Sean
“Only two things are infinite, the universe and human stupidity, and I'm not sure about the former.” - Albert Einstein
Master
Does anyone have any expertise in removing the inner CV joint from the diff? Apparently it is held in by a circlip and requires a hefty shove with a couple of jemmy bars to get it off. but I can't find a spot to get a purchase to achieve that. Any ideas?
Thanks
Willem
Master
Thanks for the encouragement, SBD4. There have been a few surprises, both positive and negative. But overall I am very happy!
I will add some more pics as I get time.
Willem
Master
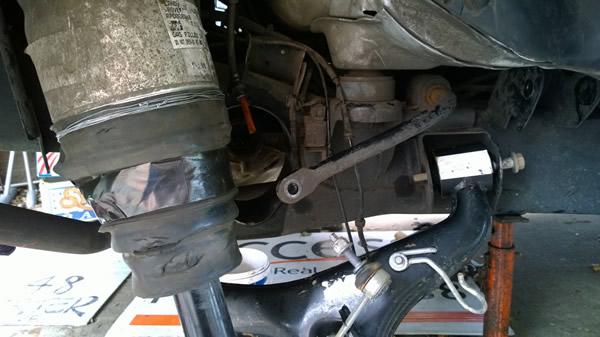
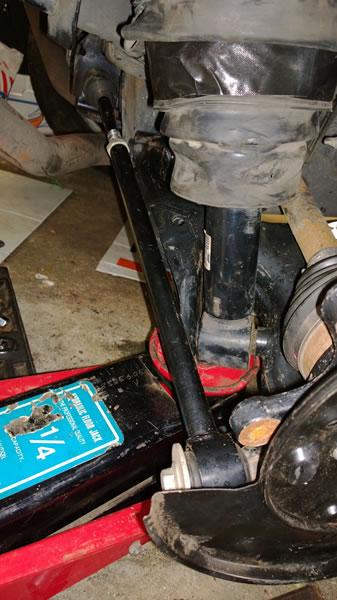
Well, the repair is progressing steadily.
In this pic you can see that all the broken parts have been removed and the new lower control arm has been put into position. Also visible is the air spring/ shock absorber strut. It had a minor ding in the aluminium casing around the air spring, and the dust jacket was torn. The dust jacket was re-attached with the time honoured but effective tie wire!
The bracket for the stabiliser bar had been distorted. This was straightened by heating with an oxy acetylene torch and hitting it with a hammer and dolly, while another hammer was held behind it by my son. It was then painted with a rust resistant black paint:
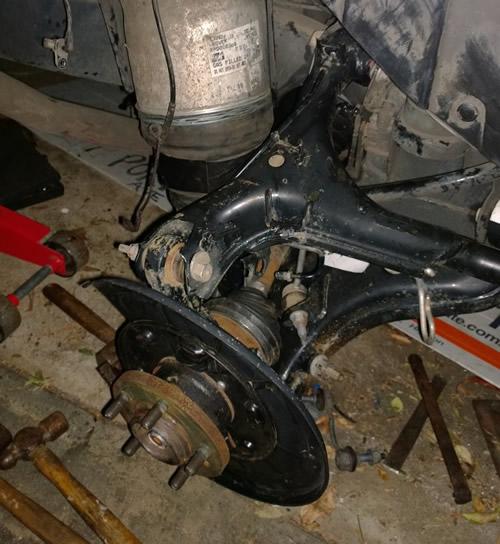
The upper and lower control arms, the driveshaft, the knuckle and the hub were all re-installed. This was all pretty straightforward.
So we're winning! Just takes time and money.
Master
Further still. The stabiliser bar installed. Everything is now fitted and torqued up. Now waiting for the rotor and caliper. I need the right tool to do this job.
Next step is to install the brake rotor and park brake mechanism, and bleed the system. The park brake cable is broken so I'll have to get a new one ... at $1100!
But we are progressing!
Willem
Master
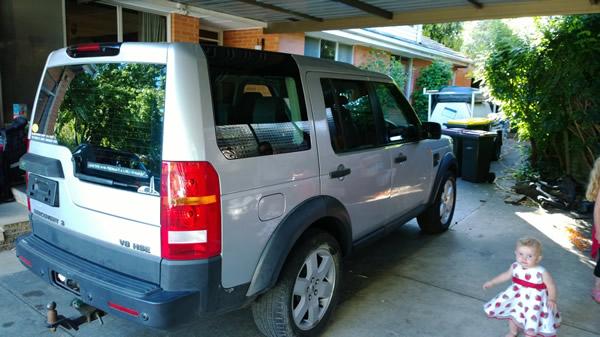
Well, it's done!
Yesterday it went through the VIV inspection without any worries, and today the RWC. So it's all done. All that remains is the rego on Monday, but that's a formality.
It's looking a little better!
Right now I'm a happy camper.
Willem
Master
Fantastic work Willem
It would be interesting to know what you paid and what it owes you. Barring the work you did yourself, have you got a handle of how far in front you are?
LPJ
 Posting Permissions
| Search AULRO.com ONLY! |
Search All the Web! |
|---|
|
|
|


")
Bookmarks