Page 2 of 2 FirstFirst 12
Results 11 to 18 of 18

Thread: Traxide installation questions

  1. #11
    LRD414's Avatar
    LRD414 is offline Super Moderator Subscriber
    Join Date
    Oct 2014
    Location
    Brisbane
    Posts
    3,737
    Total Downloaded
    0
    Quote Originally Posted by Bradmc View Post
    The rear panel leading to the Jack was pretty easy after I unscrewed the seat belt and the top screw hidden behind a cover plate.
    Brad, could you take a photo of what you mean here with the hidden screw and seat belt. That's a different method to the Traxide instructions and sounds like something worth knowing for other times there's a need to get behind that rear panel (already done my Traxide).

    Thanks,
    Scott
    D4 TDV6 MY14 with Llams, Tuffant Wheels, Traxide DBS, APT sliders & protection plates, Prospeed Winch Mount w/ Carbon 12K, Mitch Hitch & Drifta Drawers
    Link to my D4 Build Thread
    D3 2005 V8 Petrol
    Ex '77 RRC 2 door. Long gone but not forgotten.

  2. #12
    Join Date
    Mar 2015
    Location
    Engadine
    Posts
    272
    Total Downloaded
    0
    Quote Originally Posted by LRD414 View Post
    Brad, could you take a photo of what you mean here with the hidden screw and seat belt. That's a different method to the Traxide instructions and sounds like something worth knowing for other times there's a need to get behind that rear panel (already done my Traxide).

    Thanks,
    Scott
    Hi Scott,
    Removing the panel is not necessary to install the rear cable however instructions on how to remove it can be found here:

    [ame="http://www.disco3.co.uk/gallery/albums/userpics/11468/Rear%20Quarter%20Trim%20Panel%20Removal.pdf"]http://www.disco3.co.uk/gallery/albums/userpics/11468/Rear%20Quarter%20Trim%20Panel%20Removal.pdf[/ame]

    These are sourced from Bluetooth Exchange

    Clicking on the Land Rover Discovery picture takes you to a photo of the car with the panel removed.
    Oztourer

    MY05 TDV6 HSE, Buckingham Blue
    Front Runner Slimline II roofrack and rear ladder, Safari Snorkle, Mitch Hitch, Traxide D3-DU, Bushman Fridge, Icom IC-440N UHF, Hema HN7, Tyredog TPMS, GVIF and reversing camera

  3. #13
    Join Date
    Jan 1970
    Location
    Queensland
    Posts
    7,904
    Total Downloaded
    0
    Hi Folks and I do need to change the installation instructions for the later model D4s.

    With earlier D4s and all D3s, you can simply tuck the 6B&S heavy duty cable up under the plastic wheel arch on the seat side.

    But there is a bodywork ridge in later moder D4s that means a short section of the cable can not be hidden but this is not visible.

    because of the huge volume of orders, I have not been able to do any installations on a D4 for a few years now.

    But I did do an install on an RRS a few weeks back and found that there is sufficient gap between the door metalwork and the plastic wheel arch, to be able to thread the 6B&S over the wheel arch.

    You need to remove the door seal rubber all the way up to the top of the wheel arch to get access to the gap.

    Once the door seal is removed, the cable is easily threaded through in behind the side panel in the cargo area.

    There is no need to remove this panel as access to the cable is simply done via the Jack Compartment Door.

    Hope this helps and door I don't have photos as yet.

  4. #14
    Join Date
    Feb 2014
    Location
    Sydney
    Posts
    96
    Total Downloaded
    0
    Quote Originally Posted by LRD414 View Post
    Brad, could you take a photo of what you mean here with the hidden screw and seat belt. That's a different method to the Traxide instructions and sounds like something worth knowing for other times there's a need to get behind that rear panel (already done my Traxide).

    Thanks,
    Scott
    Hi Scott,

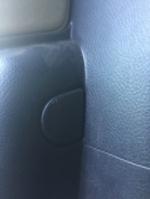
    This is the tab i mentioned (on my 2014 D4). Lift the tab and undo the screw and the seatbelt anchor as per the diagram above (i did not remove the tailgate cable as per the diagram); plus pull the door seal rubber away. This then will give you plenty of room to run the cable. I managed to hide the cable up and over the wheel arch by doing this.

    Plus the time it took me to remove the two fasteners and running the cable was less frustrating for me then to try and run a wire through and try and fish the cable through (i did start to do that but was getting a bit frustrated).

    While the panel was loose i was able to pull it away from the rear (tailgate) to get access to install another 12v accessory point, and run the cables across the rear to the other side to access the other 12v accessory point.


    I got home a touch late, so i could only manage this pic in the light that was available. The tab is just near the rear drive side seatbelt.

    Cheers
    Brad

  5. #15
    Join Date
    Feb 2014
    Location
    NSW
    Posts
    192
    Total Downloaded
    0

    Traxide installation questions

    I didn't find it necessary at all to remove the headlight - couldn't see what advantage it would have given

    Definitely add split tube to any cables running under the tray, and even those in the rear jack compartment could benefit.

    The firewall hole wasn't a drama, and the sill panels were fine if you follow Tims instructions to the letter.

    The biggest challenge was running the cable under the b-pillar, as there are so many tiny wires (easy to snag/damage) wound into a huge loom at the base of the pillar - I think the above posts may have somewhat resolved that though.

  6. #16
    Join Date
    Feb 2013
    Location
    Wamuran, Qld
    Posts
    786
    Total Downloaded
    0
    Firewall hole was the most difficult for me.
    Really needed 2 elbows on the one arm to get at it.

    Ron
    Ron

    2013 D4 SDV6 SE

  7. #17
    Join Date
    Feb 2004
    Location
    Williams West Aust
    Posts
    20,998
    Total Downloaded
    0
    Was easy peasy for me,done similar in the past.
    Send a piece of soft fencing wire thru first,enough to get a good grab on in the pedal area.Then cut the pull thru wire off and tape the wires to be pulled thru to the fence wire.When pulling a bulk wire pull thru like in a Traxide install step the wires along the pull thru so you arent pulling everything at once
    Andrew
    DISCOVERY IS TO BE DISOWNED
    Midlife Crisis.Im going to get stuck into mine early and ENJOY it.
    Snow White MY14 TDV6 D4
    Alotta Fagina MY14 CAT 12M Motor Grader
    2003 Stacer 525 Sea Master Sport
    I made the 1 millionth AULRO post

  8. #18
    Join Date
    Sep 2014
    Location
    Bathurst, NSW
    Posts
    231
    Total Downloaded
    0
    Quote Originally Posted by LandyAndy View Post
    Trevor.
    Have you got Tims fitting instructions???
    Guessing you have,if not give him a yell,he emails a PDF,EVERYTHING is on there,and its as easy as he makes it sound.
    Andrew

    Hi Andrew
    Yes I have Tim's instructions. All seems pretty good. I appreciate Brad's comments about removing the panel near the seat belt mount. I aim to keep things as unobtrusive as possible and SWMBO would not like a bit a cable showing out the side of the rear wheel arch cover.

    Now to figure out how to make the roof rack unobtrusive.

    Still waiting for the Traxide kit to arrive. Apparently Tim's under the pump at the moment but should be here next week I'm guessing. He sounds a very friendly and helpful guy over the phone.

    Trevor

Page 2 of 2 FirstFirst 12

Tags for this Thread

Bookmarks

Bookmarks

Posting Permissions

  • You may not post new threads
  • You may not post replies
  • You may not post attachments
  • You may not edit your posts
  •  
Search AULRO.com ONLY!
Search All the Web!