


 Reply With Quote
Wanna sell me a standard towbar Erich? as I have a standard rear tank, so clearance is not an issue")

 ChatterBox
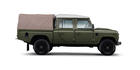
I splashed out today and bought a new fuel tank - a 'Long Ranger' from ARB. I figured it is way easier installing a long range tank with the body removed.
I don't plan of making an inspection hole in the rear floor as I did in our previous Defender, as there is no fuel pump to worry about.
The tank capacity has dropped 7 litres to 120 litres as compared to the TD5 Defender long range tank.
The first job before installation was to rust proof it with KBS rust sealant. I didn't like grey anyhow. Also shown in the pic are new sway bar mounts.
Below is a pic of the fuel gauge, most Puma owners will never see this, hopefully. The gauge reading as measured is 324 ohms empty and 8 ohms full.
A note of warning to anyone looking at fitting these, the Hayman Reese R2490 nor the stardard Land Rover tow bar are compatible when installing this tank. I am going to install the tow bar on the right in the pic, which is from an earlier Defender I just happen to have. A few small mods required. I am not sure about the rear step. I think it will fit, but this will probably not finish going back onto the car.
Erich
OldBushie
Wanna sell me a standard towbar Erich? as I have a standard rear tank, so clearance is not an issue
ChatterBox
PM sent,
Erich
Admin
mmmmm Erich its going to be another extremely well built vehicle.
I'm not sure if I have missed it somewhere I know you said that you were colour coding flares and mirrors etc..But are you keeping the stornaway grey? or are you going a lighter colour like your TD5
Our Land Rover does not leak oil! it just marks its territory.......
ChatterBox
We will keep the Stornaway grey colour Lou. We have sort of got used to the colour now and we quite like it.
Cheers, Erich
ChatterBox
Installed the fuel tank yesterday, quite straight forward. I ran the tank breather towards the front of the car, it will end up somewhere around the left side inner guard
.
Next, connected lots of bits to the engine, chassis etc such as fuel cooler, tail shafts, ………
Then I lowered the body back onto the chassis. I had to trim some of the heat insulation as it interfered with the chassis.
Now to align everything and then reconnect cables, brake lines, ……
The back of the body in this corner is too close to the chassis. Alignment can take some time.
Erich
YarnMaster
SubscriberHi Erich , the "stornaway" grey color is a nice color.Originally Posted by Bundalene


ChatterBox
The repair is moving on slowly as we are quite time poor presently. Much of the engine wiring has now been re-connected.
A lot of time is spent on detail, such as welding the screws through the firewall onto a plate so they can be easily removed / replaced, Also strapping all earths back to a central point, rather than trlying on the chassis for the earth path.
From this
To this
I spent some time straightening the air conditioning condenser as this a very expensive item to replace. The condenser didn’t leak but was a bit twisted in the accident.
Erich
Swaggie
I notice Erich that you seem to be spending as much time fixing things that the factory should have done in the first place as fixing the accident damage.
ChatterBox
I think the workmanship by Land Rover on the Puma is excellent and by far the best Defender I have worked on.
I am a bit fussy about a lot of things and probably go over the top, but I have the oportunity of preparing this vehicle the way I want it.
Land Rover have made great improvements in the quality of fittings used, such as nuts, bolts, clips, .... on this vehicle as compared to previous ones. Also things such as rust proofing, the firewall on this car was full of cavity wax, the fact that I added more is probably neither here nor there.
I am probably pointing our some of the short comings IMHO but at the end of the day these may never be a problem to 99.9% of Puma owners.
I am preparing a vehicle which we hope to see us for a few years, trying to make it as comfortable and bullet proof as possible.
Like Scott's comment in an earlier post that I may miss out on the "Defender experience" with this vehicle
Erich
 Posting Permissions
| Search AULRO.com ONLY! |
Search All the Web! |
|---|
|
|
|


Bookmarks