Page 3 of 14 FirstFirst 1234513 ... LastLast
Results 21 to 30 of 134

Thread: LT95 rebuild for beginners

  1. #21
    Bearman's Avatar
    Bearman is offline TopicToaster Gold Subscriber
    Join Date
    Jun 2006
    Location
    Hay Point
    Posts
    4,043
    Total Downloaded
    0
    You can fix this by cutting a suitable shim from steel shim material and fitting behind the layshaft race or cone. Must admit I haven't seen one yet that a commercially available shim wouldn't fix. What brand of bearing are you using Steve. Maybe there is some difference in the width of the bearing.
    Cheers......Brian
    1985 110 V8 County
    1998 110 Perentie GS Cargo 6X6 ARN 202516 (Brutus)

  2. #22
    Join Date
    Sep 2008
    Location
    Geelong, VIC
    Posts
    4,442
    Total Downloaded
    0
    Quote Originally Posted by Bearman View Post
    You can fix this by cutting a suitable shim from steel shim material and fitting behind the layshaft race or cone. Must admit I haven't seen one yet that a commercially available shim wouldn't fix. What brand of bearing are you using Steve. Maybe there is some difference in the width of the bearing.
    They are genuine Timken bearings.

    Original shim thickness when I took it apart was 2.45mm, so pretty close to max available.

    I'm wondering whether its an issue with non-genuine gaskets being a little thicker. Maybe I just need to make some from slightly thinner material to achieve the same result.

    Steve

  3. #23
    Bearman's Avatar
    Bearman is offline TopicToaster Gold Subscriber
    Join Date
    Jun 2006
    Location
    Hay Point
    Posts
    4,043
    Total Downloaded
    0
    Quote Originally Posted by steveG View Post
    They are genuine Timken bearings.

    Original shim thickness when I took it apart was 2.45mm, so pretty close to max available.

    I'm wondering whether its an issue with non-genuine gaskets being a little thicker. Maybe I just need to make some from slightly thinner material to achieve the same result.

    Steve
    Definitely a problem with non genuine gasket sets. They are thicker. Only use genuine ones. You will have trouble with the preload on the centre diff as well with the non genuine ones. For about $30 more it's money well spent.
    Cheers......Brian
    1985 110 V8 County
    1998 110 Perentie GS Cargo 6X6 ARN 202516 (Brutus)

  4. #24
    Join Date
    Sep 2008
    Location
    Geelong, VIC
    Posts
    4,442
    Total Downloaded
    0
    Quote Originally Posted by Bearman View Post
    Definitely a problem with non genuine gasket sets. They are thicker. Only use genuine ones. You will have trouble with the preload on the centre diff as well with the non genuine ones. For about $30 more it's money well spent.
    Picked up some genuine gaskets today for the front plate to case, and front plate to front cover (foot).
    As you said, they are thinner than the aftermarket ones. Genuine are 0.25mm, and the aftermarket ones I had are 0.41mm.

    Re-checked the preload with the 2 genuine gaskets fitted, and as I expected its a little high (~4.5kg) since its approx 0.06 thicker than the aftermarket gasket and temporary glossy paper combination.
    Now I just have to track down a 2.375mm shim...

    Steve

  5. #25
    Join Date
    Sep 2008
    Location
    Geelong, VIC
    Posts
    4,442
    Total Downloaded
    0

    Center Diff

    The next assembly that can be completed and put aside for later is the center diff.

    Bearman has already pointed out that the bolts in these are prone to coming loose.
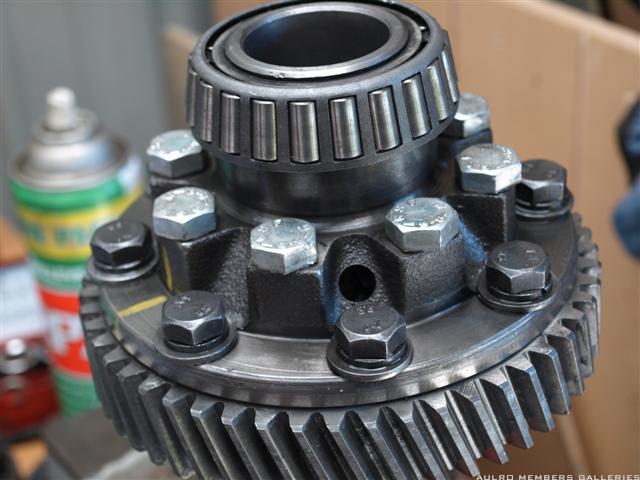
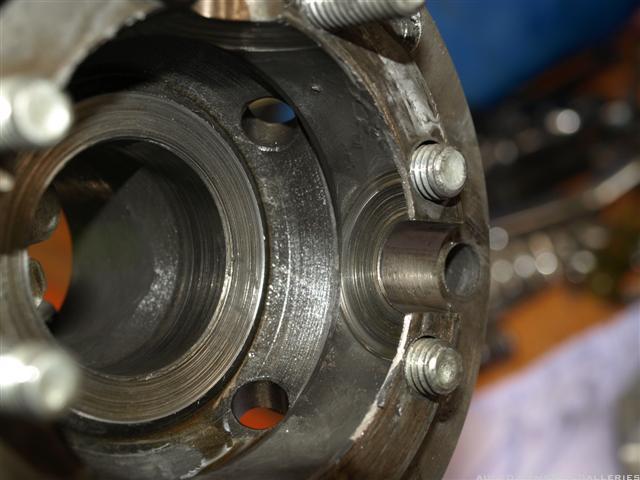
    Here is the diff out of my good (ex Stage1-V8) gearbox. You can see the bolt in the middle has almost loosened to the point where the spring washer has uncompressed fully. It wasn't the only bolt that was loose.


    And here is one from a Stage1 Isuzu. The case and rear output housing have damage similar to the photo Bearman posted earlier where the bolts have previously come out and hit the casing. Its been reassembled with new bolts and non-standard washers in a past life:


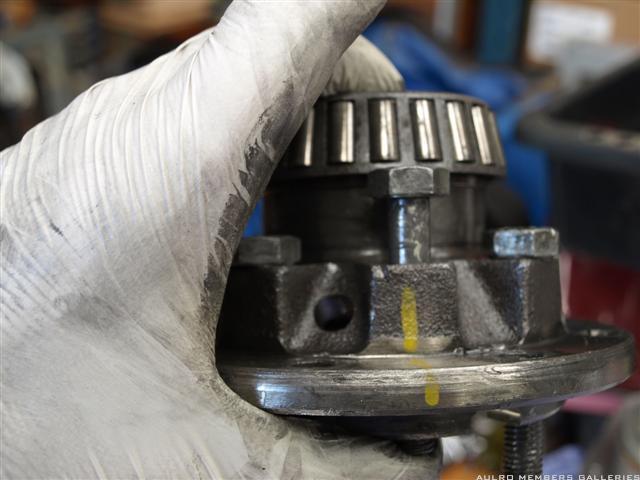
    Not the best photo angle, but notice that the bolts that hold the 2 halves together don't come out past the bearing, so make sure you've got them all in before you press on a new bearing.


    Before disassembling, mark the relationship between the low range gear and both halves of the diff. They only go together in one position so you cant get it wrong, but will save time when it comes to putting it back together.

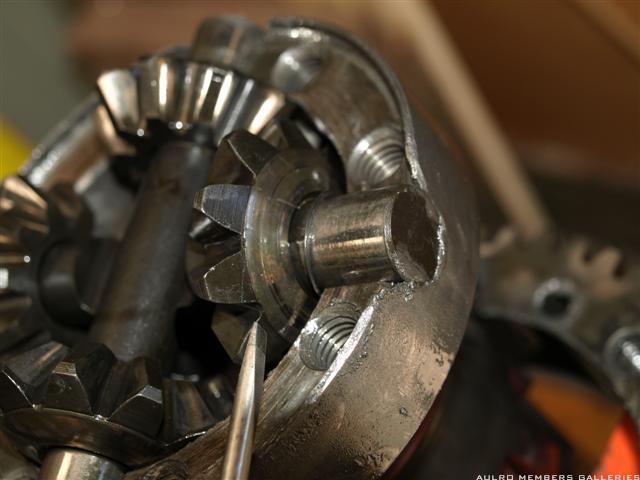
    Here you can see the spider and drive gears once its taken apart:
    There should be a thrust washer between each spider gear and housing (where the screwdriver is pointing), but the only thing that remains of them in this diff is a small ring that you can see sitting on a slight angle on the shaft.


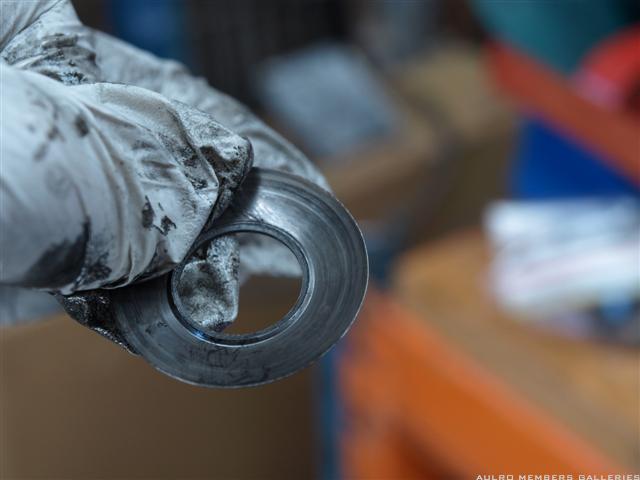
    Heres a thrust washer that came out of my other diff:


    The spider gears have been running against the housing for a while and you can also see where the drive gear has worn into the rear of the housing:


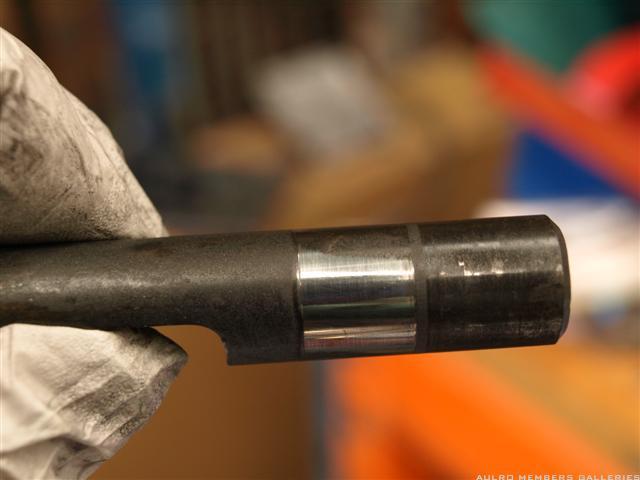
    Check for wear on the cross shafts, and on the gear teeth. I cant find any limits in the manual relating to shaft wear, so hopefully someone more experienced can give some guidance as to what is OK to re-assemble and at what point you need to replace them.


    There seems to be 2 part numbers for thrust washers. The RRC listing shows P/N 556633, but I've seen elsewhere reference to using FRC6968.
    Can anyone clarify whether they are interchangeable, superceded etc:


    Steve

  6. #26
    Bearman's Avatar
    Bearman is offline TopicToaster Gold Subscriber
    Join Date
    Jun 2006
    Location
    Hay Point
    Posts
    4,043
    Total Downloaded
    0
    The crosspin should be replaced if there is any wear at all as this shows up as a lip where the planetary gear runs and allows movement between the gears. The later ones have a crosshatch pattern on the shaft to allow oil to get under the gear and minimise wear. Part number is FRC9030.
    Both those numbers are correct for side gear (planetary) thrust washers. I think the first is of steel whereas the latter is brass. Like yours I have sometimes found the brass ones to be non existent when I have dismantled the centre diff. The sun gears (drive gears) also should have a fibre or brass thrust washer under them. These are of varying thickness to obtain the correct preload in the diff. Any wear or slack here relates to a rattle in the transfer case at low speed under power. Also the later type centre diffs have a replacable brass insert under the sun gear.
    Cheers......Brian
    1985 110 V8 County
    1998 110 Perentie GS Cargo 6X6 ARN 202516 (Brutus)

  7. #27
    Join Date
    Sep 2008
    Location
    Geelong, VIC
    Posts
    4,442
    Total Downloaded
    0
    The RRC parts manual doesn't have any listing for those drive gear shims. Is there a listing somewhere? There's also no mention in the manual of setting the preload in the diff itself (only the bearing preload).
    Is there a published procedure somewhere?

    Neither of mine had any shims under the drive gears. Should there always be shims?

    Steve

  8. #28
    Bearman's Avatar
    Bearman is offline TopicToaster Gold Subscriber
    Join Date
    Jun 2006
    Location
    Hay Point
    Posts
    4,043
    Total Downloaded
    0
    Quote Originally Posted by steveG View Post
    The RRC parts manual doesn't have any listing for those drive gear shims. Is there a listing somewhere? There's also no mention in the manual of setting the preload in the diff itself (only the bearing preload).
    Is there a published procedure somewhere?

    Neither of mine had any shims under the drive gears. Should there always be shims?

    Steve
    The shims come in a range of sizes from 1.05mm to 1.45mm in 0.10mm increments and basically you increase size until all freeplay is removed. It's a bit of mucking around and time consuming as you have to insert the shafts/gears/thrust washers, bolt it up (only use half the bolts) and check for freeplay by inserting both shafts into the centre diff and rotating against each other. Using a rattle gun makes it a lot quicker. It should feel firm but NOT tight. Here's a list of the part numbers for the shims
    FRC9845........1.05mm
    FRC9847........1.15mm
    FRC9849........1.25mm
    FRC9851........1.35mm
    FRC6964........1.45mm
    BY the way.......Great tutorial Steve
    Cheers......Brian
    1985 110 V8 County
    1998 110 Perentie GS Cargo 6X6 ARN 202516 (Brutus)

  9. #29
    Bearman's Avatar
    Bearman is offline TopicToaster Gold Subscriber
    Join Date
    Jun 2006
    Location
    Hay Point
    Posts
    4,043
    Total Downloaded
    0
    Quote Originally Posted by steveG View Post
    Picked up some genuine gaskets today for the front plate to case, and front plate to front cover (foot).
    As you said, they are thinner than the aftermarket ones. Genuine are 0.25mm, and the aftermarket ones I had are 0.41mm.

    Re-checked the preload with the 2 genuine gaskets fitted, and as I expected its a little high (~4.5kg) since its approx 0.06 thicker than the aftermarket gasket and temporary glossy paper combination.
    Now I just have to track down a 2.375mm shim...

    Steve
    Part number is FRC3658
    Cheers......Brian
    1985 110 V8 County
    1998 110 Perentie GS Cargo 6X6 ARN 202516 (Brutus)

  10. #30
    Join Date
    Sep 2008
    Location
    Geelong, VIC
    Posts
    4,442
    Total Downloaded
    0
    Thanks for the P/N's and kind words.

    I've actually ordered a set of each type of the spider gear thrusts as I they were cheap and I wasn't sure which ones I needed.
    Do you prefer one type over the other?

    Looking up the part numbers in Google, I get the impression that the LT95 center diff and the LT230 one use a lot of the same parts. Is it just the center gears etc that are common, or is the whole assy the same.

    Steve

Page 3 of 14 FirstFirst 1234513 ... LastLast

Bookmarks

Bookmarks

Posting Permissions

  • You may not post new threads
  • You may not post replies
  • You may not post attachments
  • You may not edit your posts
  •  
Search AULRO.com ONLY!
Search All the Web!