


 Reply With Quote
Thanks Erich,, I'm on my phone now, so will check it properly when I get home :-)
Cheers Marcus

 ChatterBox
This post has been resubmitted due to photos disappearing from the previous post
________________________________________
The following is a brief outline of the installation of a pair of sill tanks into a Defender, using the original fill point for both tanks. There is a pump on each tank to transfer diesel to the main tank. Total fuel capacity is now 187 litres (assuming 70l for the main tank) giving a comfortable range of in excess of 1200kms towing our boat. We have used these for quite a few kms and all works well.
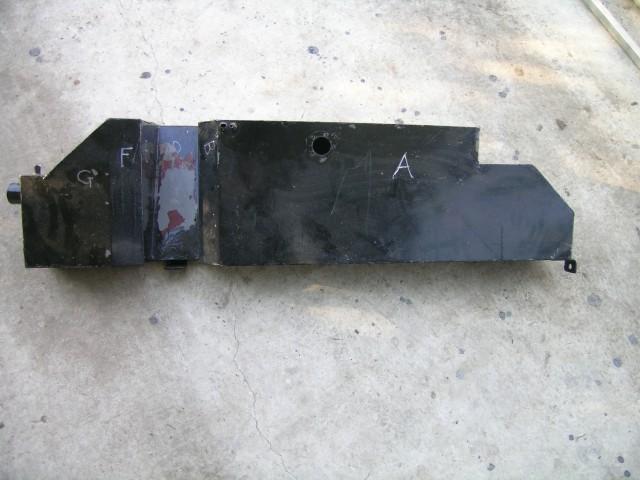
I purchased the right tank on Ebay - I believe it is out of a TDi Defender. I had to relocate the fill point about 20mm lower to clear the TD5 chassis outrigger. Also replaced the breathers, fuel gauge and outlet. Finally the tank was coated internally with POR15 tank sealer. This tank holds 65 litres usable.
Right tank
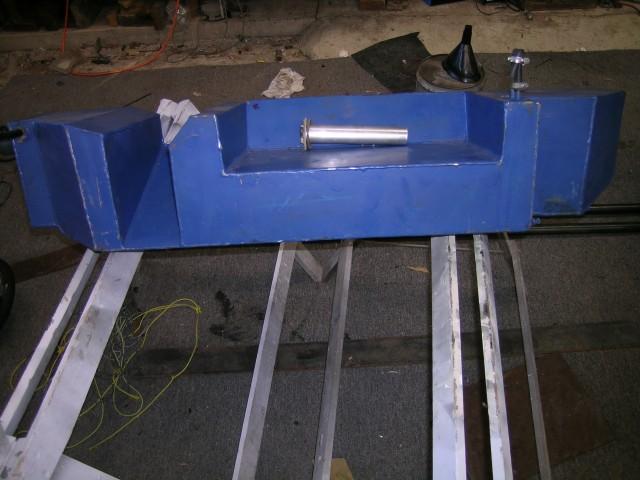
The left tank was manufactured using the right tank as a template (thanks to Andrew) The top was adapted to clear the battery box. Finally the tank was coated internally with POR15 tank sealer. This tank holds 42 litres usable.
Left tank
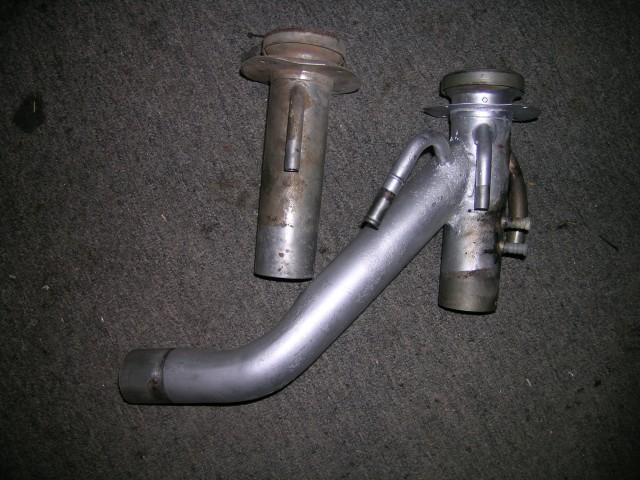
I replaced the original TD5 plastic fuel filler with an earlier metal fuel filler. This required the enlarging of the hole through the body as the filler is slightly larger. The filler was modified to accept another fill point for the front tanks, also 2 breather positions and 2 fuel points to transfer fuel from the sill tanks. On the left in the photo below, is a standard filler. On the right is the modified filler.
It is possible to fill the front tanks separately to the rear tanks - by inserting the fuel bowser nozzle into the forward facing pipe. All the breathing from the tank is outside this area
Fuel filler
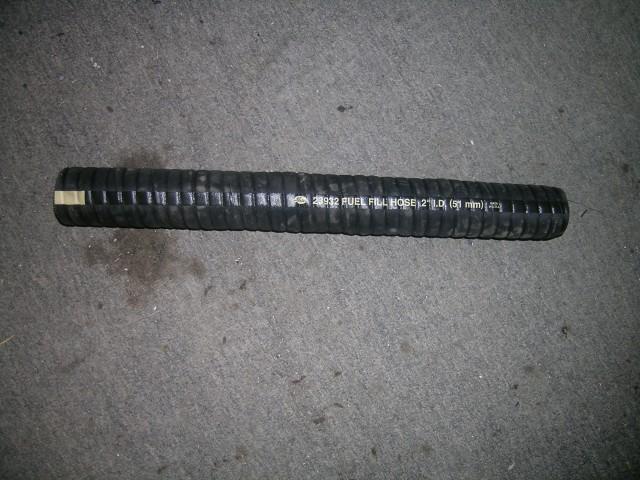
This flexible line was used in a number of places - it was quite difficult and expensive to source.
50mm flexible fuel line
The fuel filler after connecting - all good quality fuel grade lines. Breather 1/2 inch, pressure 8mm and fill 50mm
Connected fuel filler
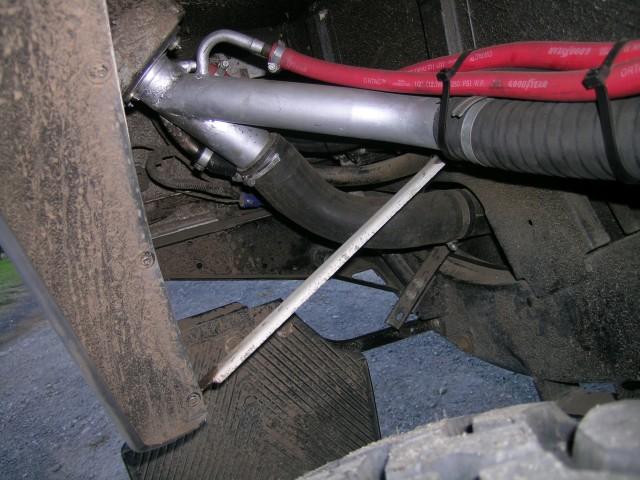
The left tank is accessed through a pipe just above the chassis with a home made TEE piece. All rigid pipe is exhaust pipe, mig welded as required. There are 2 breather points at the high point of each tank. A breather from each tank is run all the way back to the fill point.
TEE piece across the car
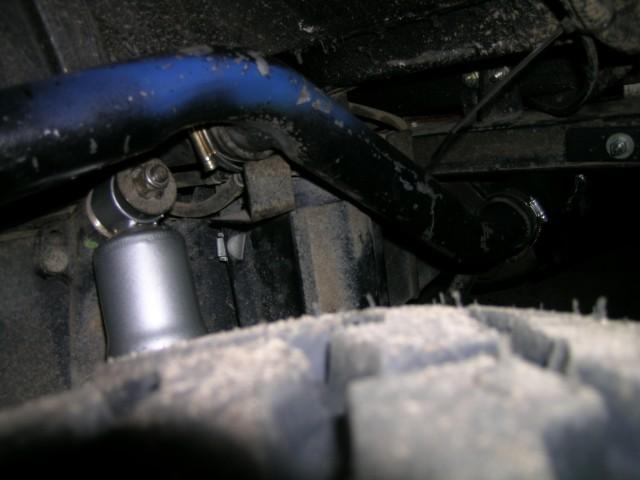
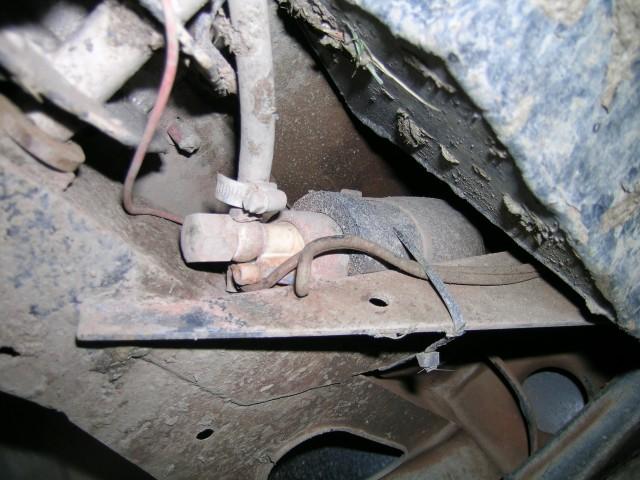
The outlets are facing forward tucked up above and protected by the chassis out riggers. These were kept as low as possible to maximise the available fuel in the tank
Tank fuel outlet prior to pump
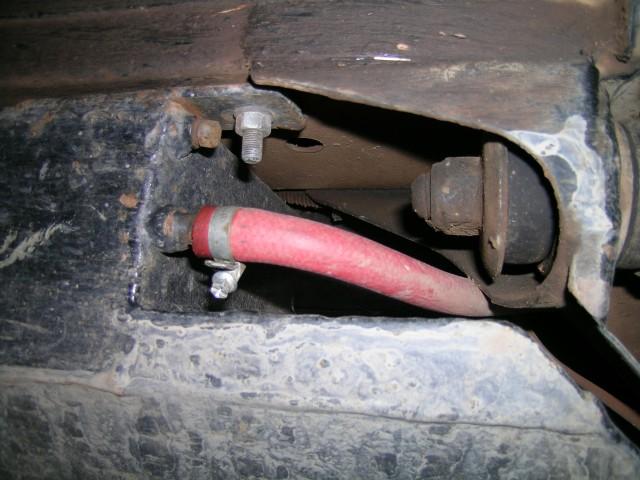
The fuel pumps are probably the wrong type for the application but they work well. They are actually pressure pumps. I have connected the suction line with 12mm (1/2 inch) line and the outlet with 8mm line
Fuel pump
Fuel transfer is done from the dash by the 2 switches at the upper left of the dash. The left switch transfers fuel from the left tank and the right from the right tank. A have yet to install a digital readout for the 2 tanks . It takes about 20 minutes to empty each front tank.
Dash switches
I sourced the fuel line from a local company RP Wallis, and I am pretty sure it is a 'GATES' product. At the time it was around $80 for a 90cm length. It is a fuel grade spiral wire hose - semi flexible.
As for the red hoses, I ran a separate hose from each tank back to the top of the filler neck. There are 2 breathers at the top of each tank, joined by a 'Tee' connector. The 'Tee' fittings are screwed to the underside of the cabin floor - a point slightly higher than the tanks and then they basically followed the filler lines back. I ran the breather in 1/2 inch to allow high flow filling. The set-up works very well.
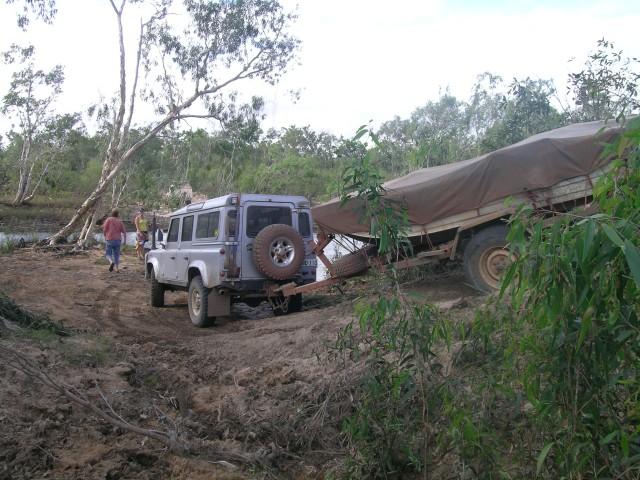
Tanks all tucked away allowing us to get to quite remote spots
Erich
OldBushie
Thanks Erich,, I'm on my phone now, so will check it properly when I get home :-)
Cheers Marcus
Master
SubscriberThanks. Looks great
 Posting Permissions
| Search AULRO.com ONLY! |
Search All the Web! |
|---|
|
|
|
Bookmarks