
 Wizard
OK last year I bought a 99 D2 as I liked the updated interior, ACE and traction control (well sometimes) and V8s were cheap. One of the set up jobs was to activate the CDL but I refused to pay hundreds of dollars for second hand or after market parts to do this – there had to be a simple solution.
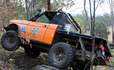
My first set up was a simple bracket bolted to the transfer case slotted activation bolt with a flat bar lever and bent handle that ran from the transfer case across the top of the chassis rail and ended just under the door/floor on the drivers side. See thumb nail below that shows the lever fitted to a transfer case from a D1 sitting on the floor (I took the leaver out today to recover the bracket and take the pics). Having a spare transfer case I must admit made the process easier as I could test on the floor. I could even test the size and shape of the hole in the bracket to bolt on (as I drilled and filed out the slot to be able to bolt to the D2 transfer case).
The only problem was that the CDL was activated by getting out of the car while it was running and pulling the leaver (running so as to fool the traction control sensor as not yet cut the necessary wire (but have the instructions now to do so).
I looked at many other options including choke cables, a D1 leaver etc. I learnt from the choke cable that it would flex too much to be able to push the transfer leaver back – pull ok but not push. It occurred to me that marine control cables MIGHT be stiff enough to do the job so I bought one on Saturday and made up the following:
(1) I used the same bracket to bolt onto the activation spigot on the transfer case as I had made before (i.e. flat sided slot bent up to clear the other bolts)
(2) A 13 ft marine control cable – long enough to go from the transfer case to chassis rail then loop up through the hole for the shock and in through the fire wall to end under the dash where a bonnet release WOULD be if it were on the right side of the car
(3) The marine cable has a slot to retain it so I had to make fittings for both ends to retain it – see thumb nail for the transfer end – working on the under dash end – this will be a pin though a bit of box section. Pics of this will follow.
(4) The bracket to hold the cable at the transfer end bolts into two holes on the side of the transfer case – see thumbnail
(5) On the transfer end of the cable I have a 5mm (as the control cable has 5mm thread) threaded ball joint (available from any Bolt shop and some bearing shops) – this allows the end to flex and rotate a little so it will not bind.
(6) On the drivers end I had bolted on a cut down handle from an old tap. Others my have other suggestions but I had some old taps sitting around and I figured with two of the bars of the ‘X” cut off it would make a nice smooth handle for free. And I need to make two of these as one is for my Son’s Rangie that ahs the same problem and I have two taps so can make x2.
The thumbnails below show the old bar leaver then different parts for the new cables and a mock up installed and tested on the old transfer case that I have (sitting waiting to go into the Rangie Ute project).
Cost?
Tap and other bits – lying around so free
Steel bar $2
Ball Joint $13.50
Control Cable $37
Hope this is useful for someone - I sure would have appreciated it when I started out.
89 Orange Rangie UTE - our play thing - sadly now sold
75 Rangie/Series/Hybrid/LS3 - Bumblebee with a sting!!!!
2018 RRS - The new touring vehicle - replaces 2012 RRS
Wizard
And here are some more pictures
89 Orange Rangie UTE - our play thing - sadly now sold
75 Rangie/Series/Hybrid/LS3 - Bumblebee with a sting!!!!
2018 RRS - The new touring vehicle - replaces 2012 RRS
 Posting Permissions
| Search AULRO.com ONLY! |
Search All the Web! |
|---|
|
|
|


 Reply With Quote
Bookmarks