


 Reply With Quote
Nice Job. I have to do a similar job to my series 1 and will do something similar.
Cheers
Peter

 Master
Subscriber
Master
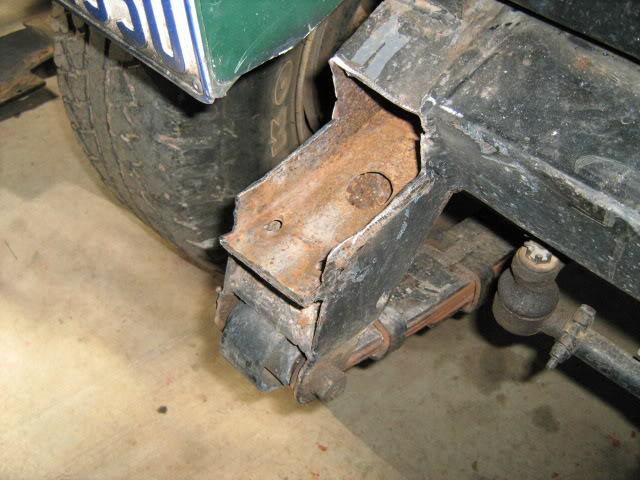
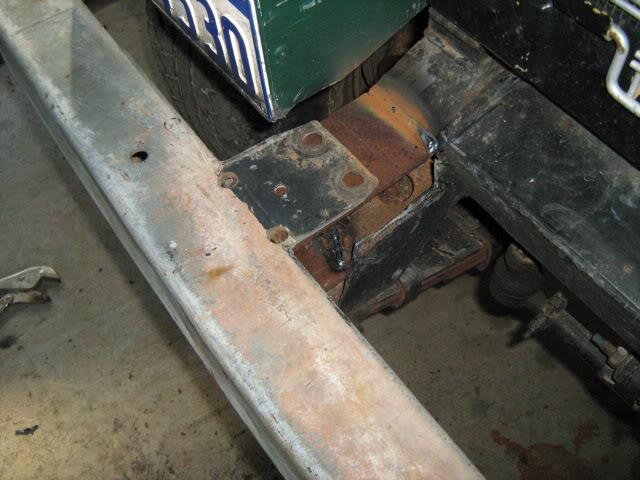
SubscriberHad to repair the rusted chassis ends on my old girl and thought I'd better share. I've been putting it off since I've owned her, reason being the bolts were welded to the bumper and the nuts rounded off, so I had to cut it off. This is what is what I've started with, rust removed back to good metal.
75mm flat bar is what you need. The bar I used is over the top thick but it's what I had lying around. I also have to extend the chassis on mine out a bit as the bumper brackets were shortened to get off.
I put the first piece, cut to length underneath;
then cut another piece for the end 75mm squared;
Then cut a piece for the top;
Then weld the top and bottom onto the chassis with the end piece loose, sitting inbetween;
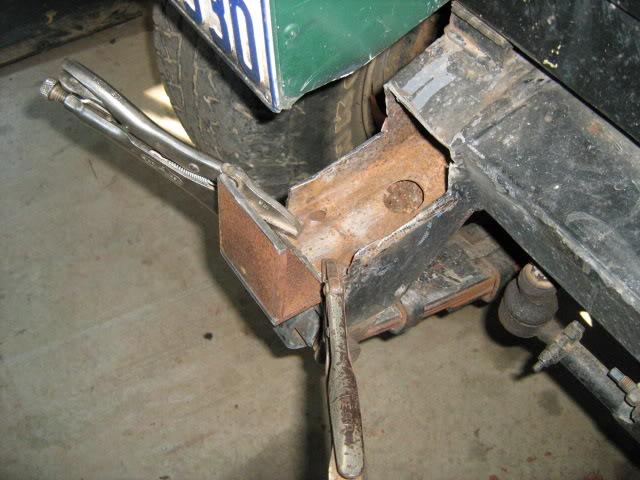
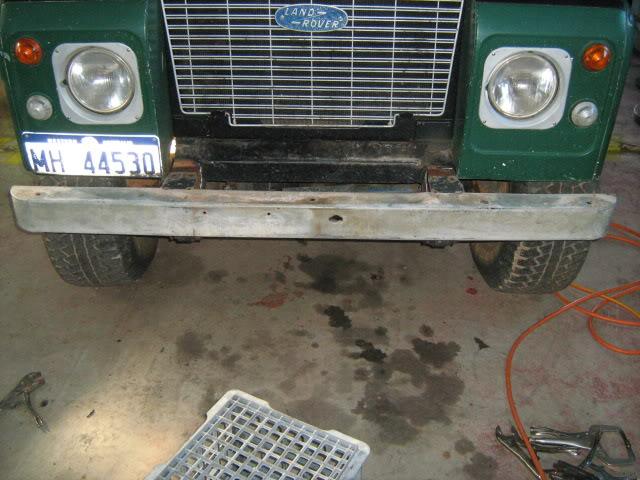
Put your bumper on and mark the bolt holes. I've used an original one for effect;
Drill your bolt holes to size. Then cut 4 lengths of pipe that fit inbetween the top and bottom bolt holes. Make sure your bolts fit thru the pipe. This will stop the bolts crushing the chassis when tightening. Put the end piece in possition and weld (tac) pipes in place;
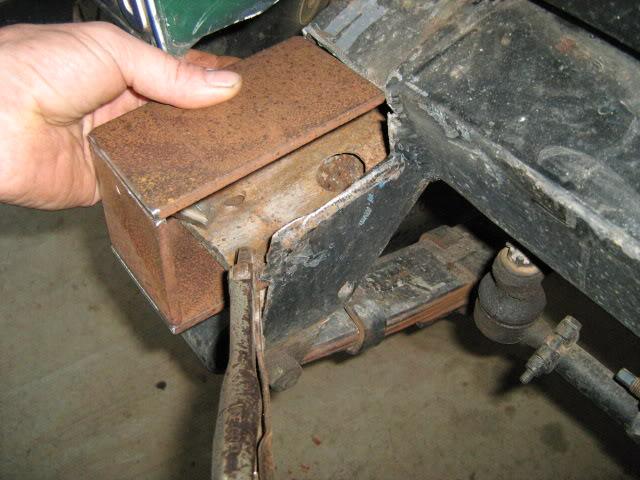
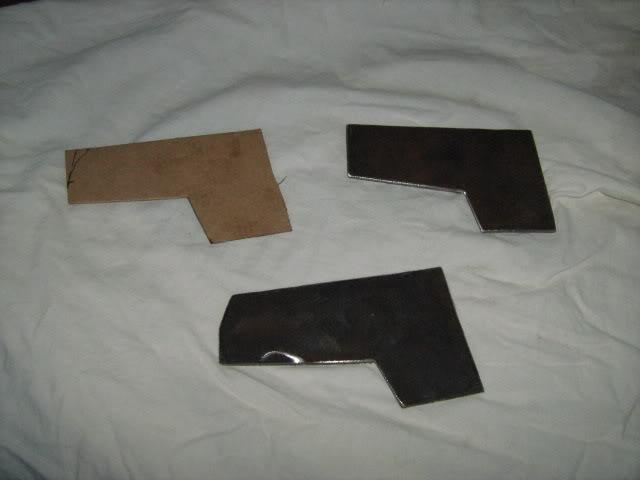
Now make a template of all four side pieces, with thin card board. Mark them out onto your steel and cut out, (I used an angle grinder);
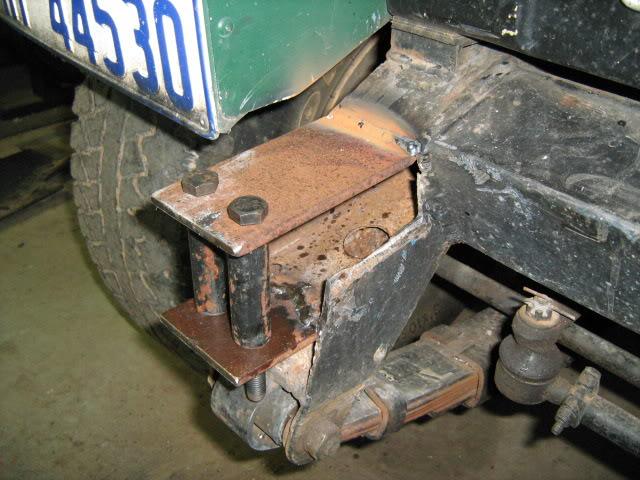
Put them in possition and weld up;
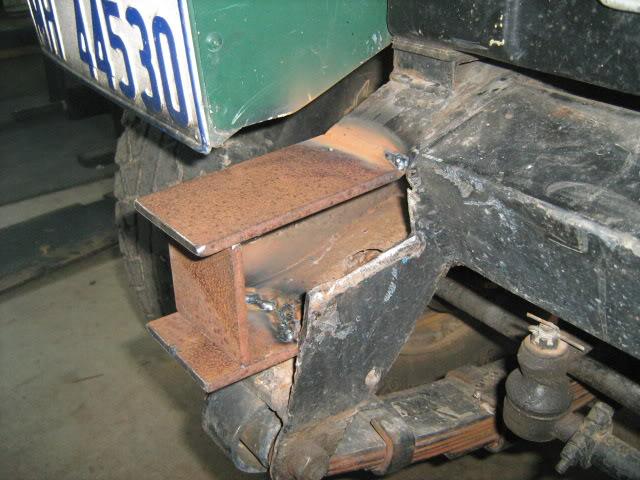
I brushed on some underbody shutz but the finish depends on your welding and fabricating skill,(and beer consumed).
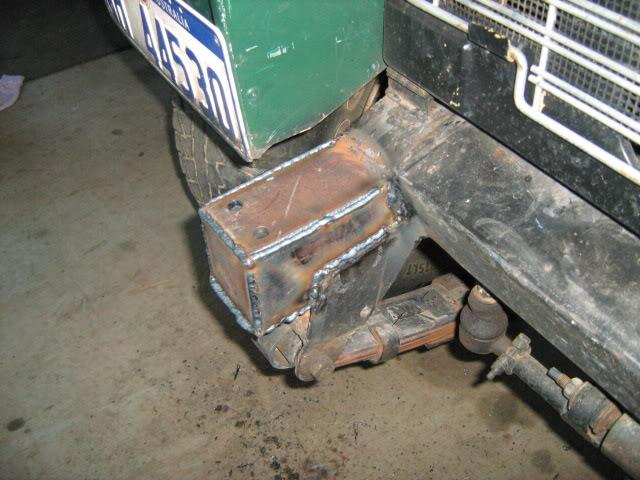
Here's the finished job ready to trail blaze;
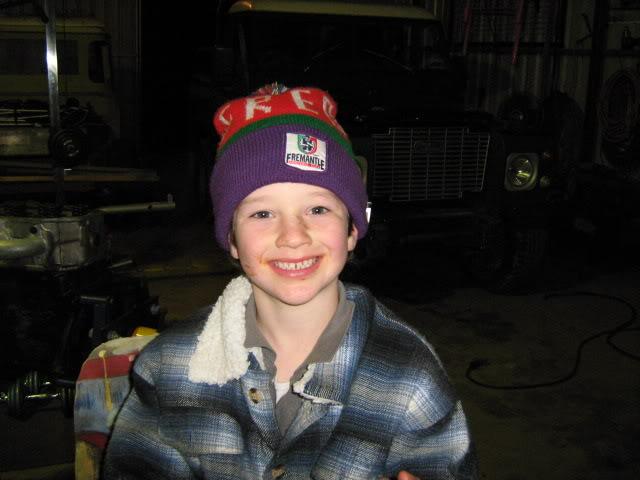
And here's the apprentice ready to trail blaze, "c'mon dad it's only midnight";
Fossicker
Nice Job. I have to do a similar job to my series 1 and will do something similar.
Cheers
Peter
Wizard
nice neater than mine thos bolts are *****s arnt they
Master
Subscriberyep the original bolts are pure english
 Posting Permissions
| Search AULRO.com ONLY! |
Search All the Web! |
|---|
|
|
|
Bookmarks