Page 15 of 23 FirstFirst ... 51314151617 ... LastLast
Results 141 to 150 of 226

Thread: Expedition Home-build - AU to IE

  1. #141
    Join Date
    Jan 2009
    Location
    On the road around Australia
    Posts
    900
    Total Downloaded
    0
    Quote Originally Posted by agrojnr View Post
    Its on it way to ya

    I just got all the wiring for mine so I may need ya help soon but I have to finish off my weling first

    Adam
    Yep, it came in yesterday morning, and is now sitting on the workbench, waiting to be put in. Again, my thanks.

  2. #142
    Join Date
    Jan 2009
    Location
    On the road around Australia
    Posts
    900
    Total Downloaded
    0
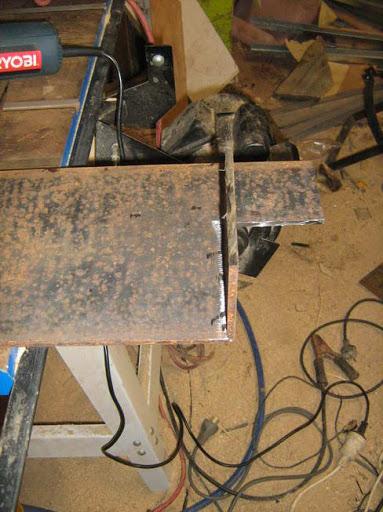
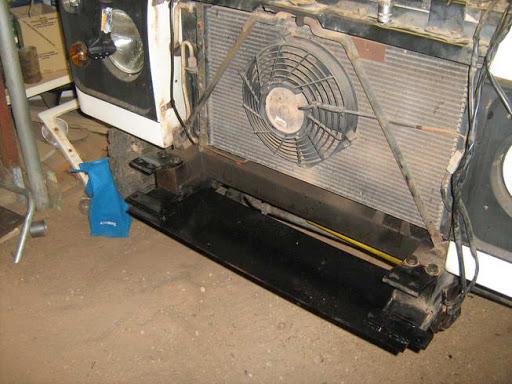
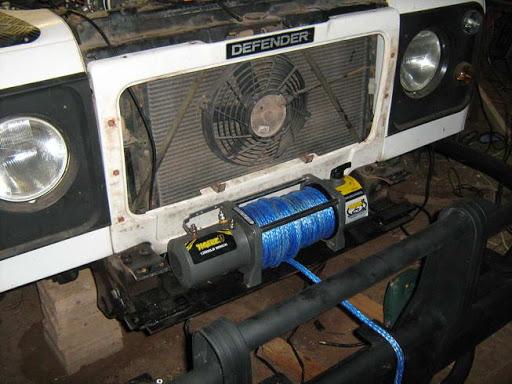
    I'm still playing catch-up with posting about the work I've done on the Defender so far, but seeing as there have been a few threads lately on mounting a winch, my own included, I decided to post a little bit out of order in terms of the work I've done, and post on how to mount a low mount winch in terms of building your own cradle, etc.

    The fundamental problem with mounting a winch on the front of a Defender is the room that you have to play with. The usual workaround is to put an ARB or equivalent bar on the front of your deefer - they come reinforced to take the strain of winching, and have a cavity the size of a phone box behind the bar what will take pretty much any winch on the market. But not all of us have $2000 to spare for a new front bar, or are concerned about the additional weight on the front of the vehicle.

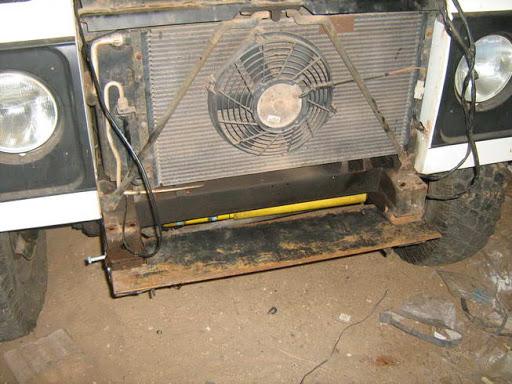
    You can squeeze a winch in between the chassis rails, but there are a couple of limiting factors to take into account, and only a select few winches will fit in this location.

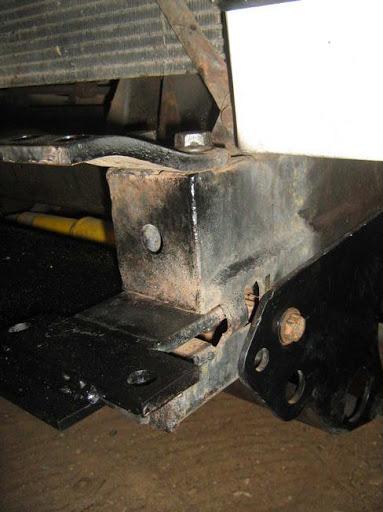
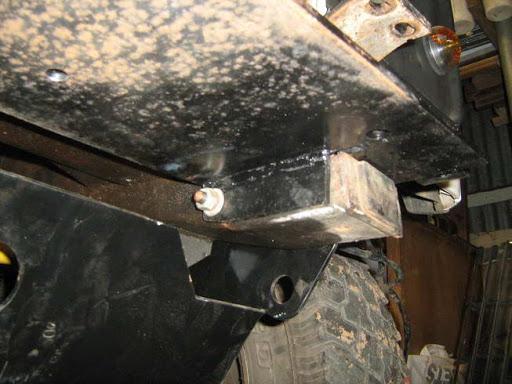
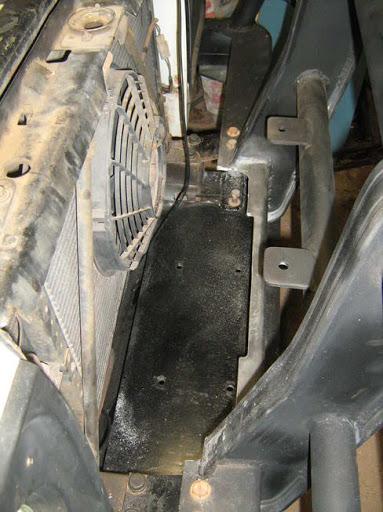
    1. Distance from chassis rail to chassis rail is 610mm, give or take a few mm. That doesn't mean that you can fit a 600mm winch, as the motor is generally bigger than the gearbox. In other words, yoru winch has to be a maximum 305mm from the centre of the winch spool to the outer edge of the motor.

    2. You have about 200mm from the front of the rails into the radiator before you have to start cutting the grille, front panel, etc.

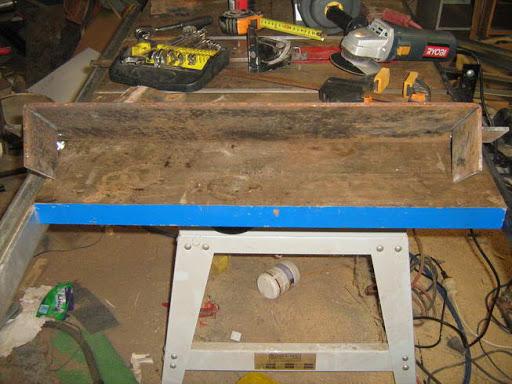
    I had an M10000 Warn winch lying about, and tried every combination of fitting it without success. I had considered mounting a winch cradle forward of the bumper, but (a) they look like a bodge job, (b) they have an adverse effect on your approach angle, and (c) are inherently weaker due to being mounted so far forward. Welding to my bumper was out of the question as it was an alloy bumber, butthis may be worth considering if you already have a heavy duty steel bar.

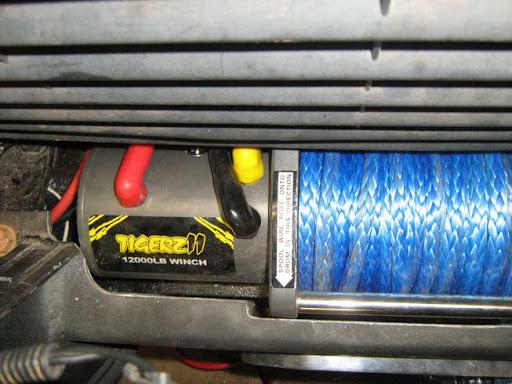
    In the end, and after much reviewing, measuring and comparing, I bit the bullet and put the Warn up on eBay, and bought a Tigerz 12,000lb winch. There are a number of sub $1,000 winches on the market,some good, some bad,but after comparing some of the entry level winches (Ironman, Tigerz, TMAX, Magnum etc) in terms of build quality, guarantee, availability of parts,and most importantly, experienceof people who have actually bought them and used them in anger, The Tigerz winch came up on top. 3 year guarantee, waterproofed solenoids, plasma rope, and many satisfied customers from what I could see. I'm not going to argue that if I could afford a Warn or Premier winch, that I wouldn't buy one, but I simply couldn't justify spending $2,000 plus on a competion winch for just basic winching duties which may only come about every so often. And apparently the Tigerz winches are made in China by the same company that make Warn winches, the difference being that Warn winches are assembled in Mexico and Tigerz11 are assembled in the factory that makes them.

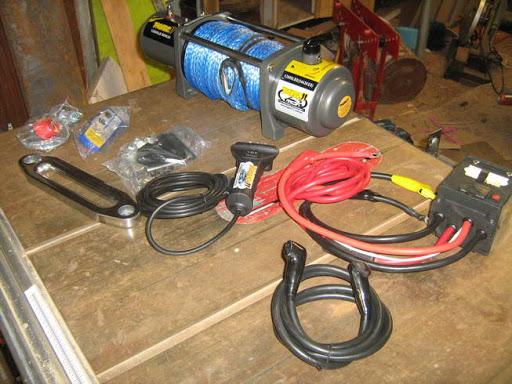
    What you get in the box:


    - 12,000lb Winch with plasma rope
    - Hand controller
    - radio control
    - sealed solenoid, prewired with positive feed, and motor feeds
    - negative feed
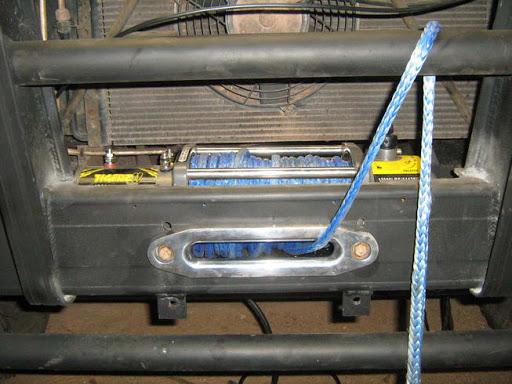
    - Stainless steel hawser.
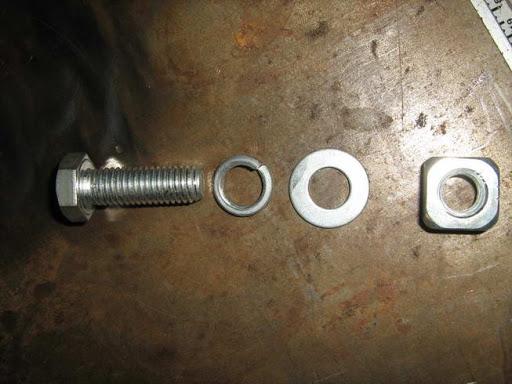
    - bolts and mounting brackets for the solenoid box.

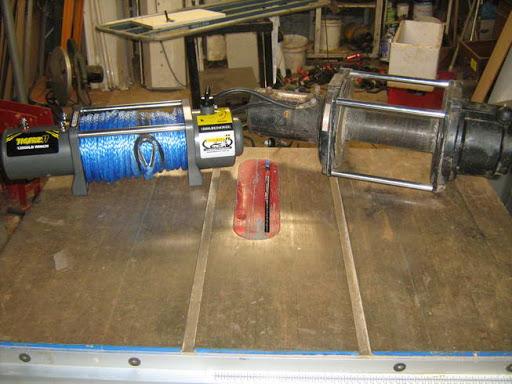
    12,000lb Tigerz winch side by side with a 10,000lb Warn - there was no way the Warn would fit in the same space.


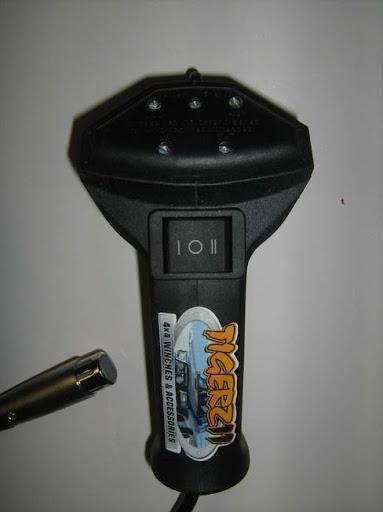
    As someone else pointed out, Tigerz release winches like Microsoft release software - somethignchanges with every release. The newest ones have a redesigned hand controller, remote control and sealed solenoids. The chinese seem to take the approach that the more stickers and flashing lights you add, the better However, other than the radio control, which looks like it came from a kids toy, and thankfully can be easily replaced, the compaonents all seem robust, and of good quality. The revised hand controller switch gear makes you feel like you are flying an F-14, but seems solid, and comes with a built in battery indicator, and LED's to tell you which way you were winching (as if your Defender disappearing back down the hole wasn't enough of a visual indicator).


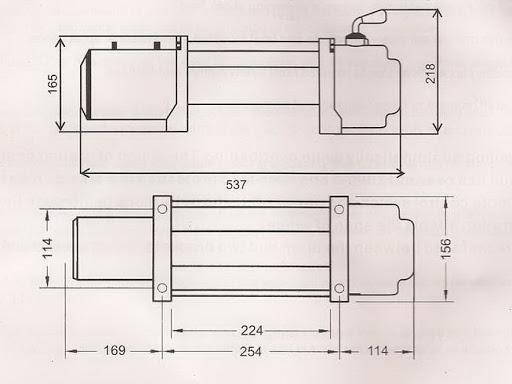
    The winch dimensions, in full. I had serious trouble in getting an accurate set of measurements for the Tigerz winches - the same winch measured from 560mm to 620mm end to end depending on what you read. I've checked these with a measuring tape -they're good If you are mounting a winch between the chassis rails, regardless of manufacturer, these are the dimensions that you will have to work within.


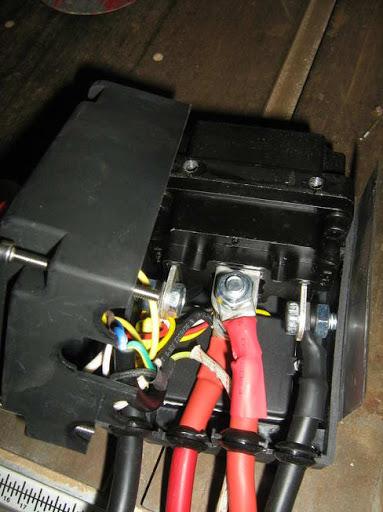
    I opened up the solenoid box to take a peek. The solenoid itself is waterproof, and the box is water resistant, by the looks - cables aregrometted, tight seal around the box, superior to Warn's offerings in my opinion.


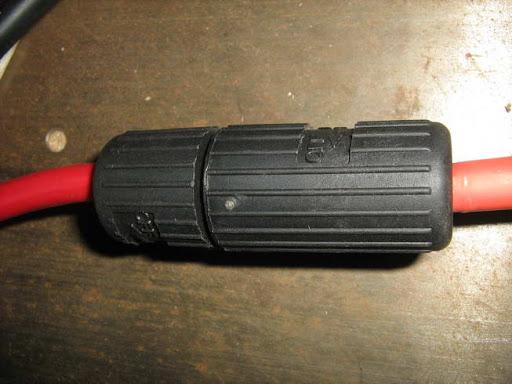
    The positive feed has a built in kill switch. In theory a great idea - I've seen a mate make a mad dash for the battery box whenh is bumper was getting winched into his shorted out winch - in practice, will it be a problem? It remains to be seen...


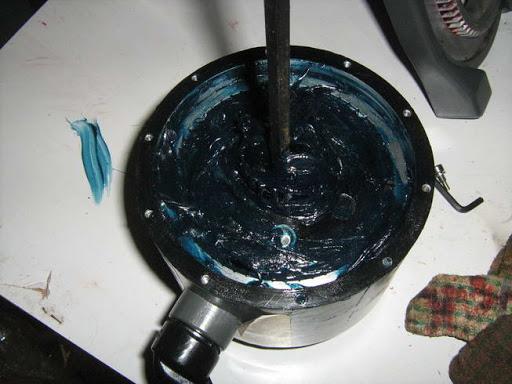
    The one unanimous recommendation I did read regarding entry level winches was to replace the factory grease with something of a higher quality, so...

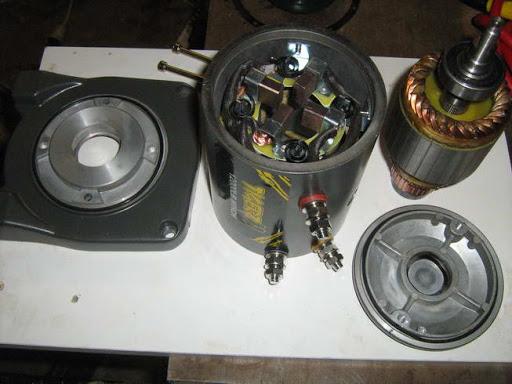
    HOW TO STRIP DOWN A TIGERZ WINCH

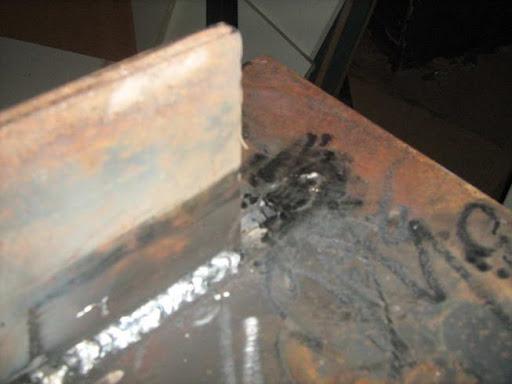
    As with most winches, the gearbox, motor and winch spool separate by unbolting the crossmembers that straddle the winch spool.

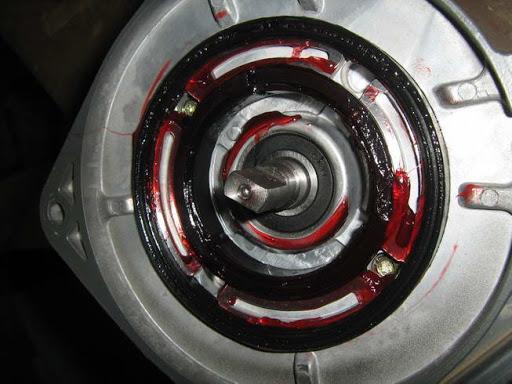
    Motor side, with twin rubber seals to keep water and dirt on the outside.


    Same with the gearbox side (inner seal still attached to the winch spool).


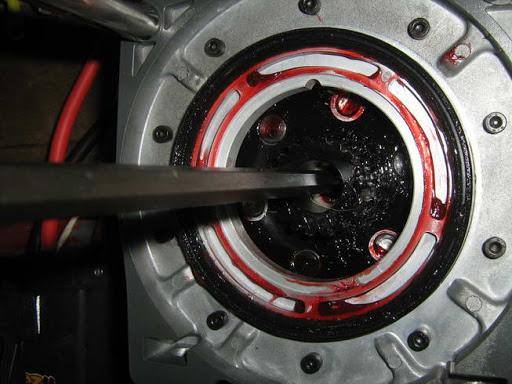
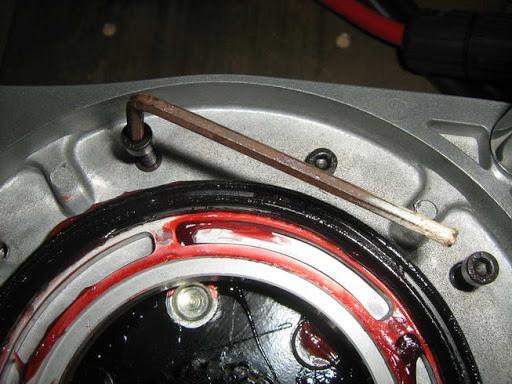
    First, let's take a look at the gearbox, and regrease it. Ten bolts around the circumference of the housing....


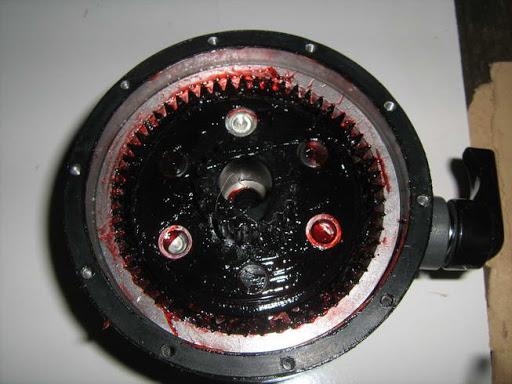
    ...and we get to take a peek inside.


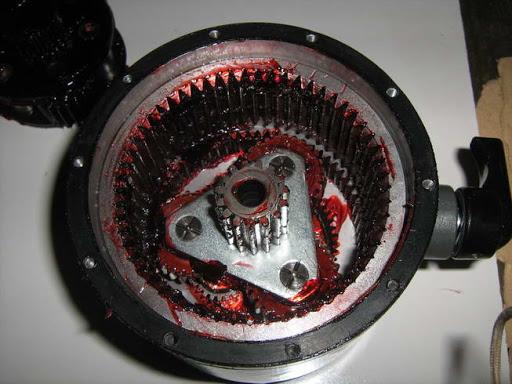
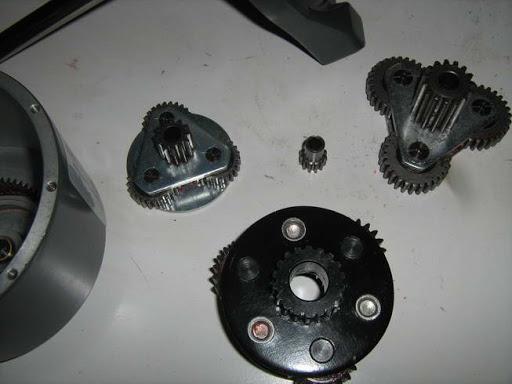
    Planetary gear setup is standard

    I've read a lot of posts where people have been happy with the factory grease, in terms of both quality and quantity. Me, I thought that what was in the gearbox had the same look and feel as kids cough syrup, and there simply wasn't enough of it.


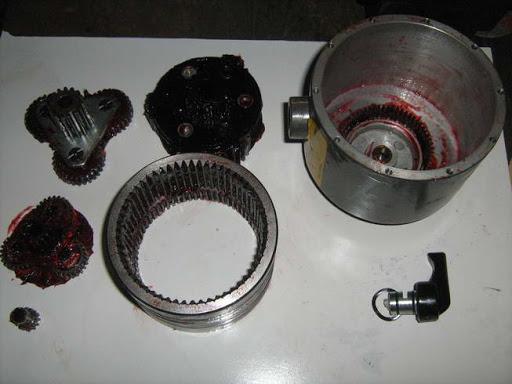
    Planetary gearbox completely disassembled. It's worth noting that I haven't removed any grease from the gears at this stage - what you see is what you get. On the plus side though, the lack of grease is the only problem I have found. All gears and mounts seem to be very well manufactured, materials seem to be kosher, construction is solid, so on and so forth. Certainly better than some of the cheap winches I have seen the insides of in the past.


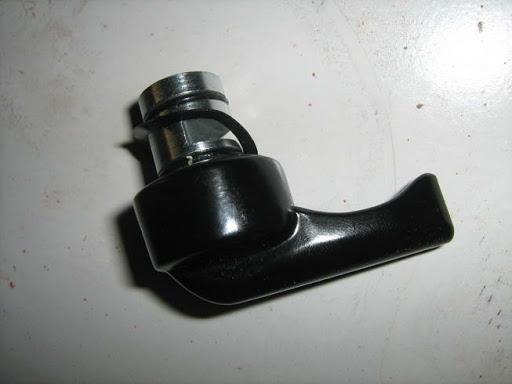
    The clutch lever - probably the only point of water ingress that I can imagine. Even then, the lever comes with two rubber seals, plus a film of grease should keep out almost everything.


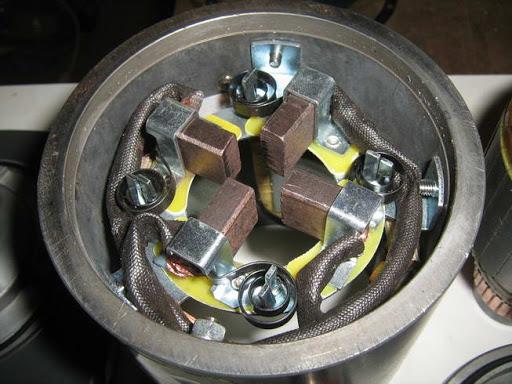
    A quick look inside the motor housing while we're at it...


    Again, materials and engineering seem to be top notch. Motor insides seem very similar to a Warn equivalent....


    Time to put it back together...


    Repacked, with good quality marine grade grease -and plenty of it


    Putting it back together is, surprise surprise, the reverse of the stripdown process.

  3. #143
    Join Date
    Oct 2008
    Location
    Northern Melb.
    Posts
    343
    Total Downloaded
    0
    Yet another super post!

    Well done on detailed winch strip and regrease. I think everyone who buys a winch should take the time to do it. Good to see the seals and build quality as well.

    You will love the wireless controller, so much easier than plug in one!

  4. #144
    Join Date
    Jan 2009
    Location
    On the road around Australia
    Posts
    900
    Total Downloaded
    0
    BUILDING A WINCH MOUNT

    Now that I had a winch that would actually fit, it was time to mount it. Some genius in the past had actually mounted a winch directly to the alloy bar, the soft alloy being held to the rest of the Defender by four bolts - I'd hate to have seen the consequences if he had to use it in anger.

    Here's what I had to work with. I planned on using the existing four vertical bolts and two horizontal bolts to mount the winch cradle to the chassis. I've seen an example where someone welded a plate straight to the chassis rails! Not sure if that would even be legal....


    Rather than replacing the existing bumper mounts, I planned on incorporating the mounts into the winch cradle. The bolts will act as extra reinforcement, rather than depending solely on welds.


    5mm steel plate is the minimum that you need to make a winch cradle capable of taking the stresses of winching.


    Rather than try to explain how I planned to mount it, the following pictures will tell a better story. Where I planned to fold the sheet, I cut a couple of mm into the sheet to make folding easier.


    Due to philco's steering guard, 'm bolting my winch plate to the inside of the chassis rails.


    Two tongues sit on the rails themselves, where the existing bumper mounts sit.


    All the folds welded up (please excuse the welding)


    Lower bumper mounts are welded to the winch plate. As mentioned earlier, the bolts for both chassis and bumper will give additional strength.


    Now you can begin to get an idea of how it comes together. The lower bumper mounts, now welded to the winch cradle, sit back in their original location.


    Now to test fit the winch,and drill out the mounting bolts. Bolt pattern for the tigerz is the same as for Warn, and many other winches - 114x254 centre to centre. One of the few places where the Tigerz seems to fall short is the provided mounting bolts - they don't seem to be high tensile, and I wouldn't trust them not to sheer under stress. I'll be replacing them with a high tensile equivalent.


    And it fits! Thankfully without having to cut any body panels so far.


    Alloy bumper mounted up.

    http://lh5.ggpht.com/_qHyUcFQAWi4/TB...no/IMG_038.JPG

    Cutouts were made in the bumper to accommodate the winch. Corners are rounded to prevent stress fractures.


    Winch bolted in place, and hawser bolted to the bumper. As you can see, it looks tidy, without being obtrusive.


    Wiring these things in is where the Tigerz setup comes into its own. The solenoid comes prewired and sealed - it's just a matter of finding a place to put it. One of the few places where Tigerz have dropped the ball is the brackets they provide to attach to the crossbars on the winch. They don't fit tight, and bring the solenoid box close enough to the cable that if it happens to bunch up, it can rub on the control box or tear it off completely. It also makes it difficult to check/clean your cable. I'd like to have installed it under the bonnet, but the amount of space and length of cables provided didn't facilitate that, so I mounted mine on the inside of the bumper. It's protected from both the elements and from prying hands, yet still easy for me to pug in the winch controller. Some people hide the controller completely, and depend solely on the wireless controller. ME, I like to have the option.


    The motor end doesn't get any easier, even for those not comfortable with wiring. Red wire to red terminal, black wire to black terminal, yellow wire to yellow terminal.


  5. #145
    Join Date
    Jan 2009
    Location
    On the road around Australia
    Posts
    900
    Total Downloaded
    0
    Next Tutorial: mounting a second spare. I'm looking for some suggestions as to mounting a second spare wheel. I have a spare wheel carrier on the back to take the stock spare, but I'll be carrying a second in more isolated areas. I have considered options such as mounting it on the bonnet, and after chatting with scott_oz, a bonnet mount would be easy to manufacture, but am concerned as to whether it will block my view out the windscreen, mounting it on the roofrack, but that takes up much needed roofspace, etc. I had originally considered building a dual wheel carrier, but time is beginning to get critical. So any opinions, insights, experiences, etc would be most welcome.

  6. #146
    Join Date
    Jan 1970
    Location
    Tassie/Perth
    Posts
    1,454
    Total Downloaded
    0
    If it's a standard size tyre - mount it on the bonnet.

    If it's bigger - make a dual wheel carrier.

  7. #147
    Join Date
    Aug 2006
    Location
    WA
    Posts
    13,786
    Total Downloaded
    0
    Quote Originally Posted by mike_ie View Post
    Next Tutorial: mounting a second spare. I'm looking for some suggestions as to mounting a second spare wheel. I have a spare wheel carrier on the back to take the stock spare, but I'll be carrying a second in more isolated areas. I have considered options such as mounting it on the bonnet, and after chatting with scott_oz, a bonnet mount would be easy to manufacture, but am concerned as to whether it will block my view out the windscreen, mounting it on the roofrack, but that takes up much needed roofspace, etc. I had originally considered building a dual wheel carrier, but time is beginning to get critical. So any opinions, insights, experiences, etc would be most welcome.
    I carry a 2nd spare TYRE (no rim), ratchet strapped to the 1st spare on the rear carrier. Saves weight, and 5 minutes with a couple of tyre levers will have it fitted to a rim. I have done this before on a few trips and it has worked well.

  8. #148
    miky Guest
    I agree with just carrying some tyres without rims. You can put them just about anywhere even on the front of the bull-bar. The weight is in the rims.

    Never figured it out when I see people with the spare on the back (or underneath) and two more full wheels on the roof etc. Have people lost the skills in changing a tyre?

  9. #149
    Join Date
    Aug 2007
    Location
    gold coast
    Posts
    626
    Total Downloaded
    0
    some people have never gained the skills, like me I bought a tyre pliers kit and practiced on a couple of spare rims removing the tyre just for fun a few months ago, not really a fun exercise.

  10. #150
    Zute Guest
    The mag wheel rim from a disco can be very difficult to fit and remove a tire from. But the rim is fairly lite though.

Page 15 of 23 FirstFirst ... 51314151617 ... LastLast

Bookmarks

Bookmarks

Posting Permissions

  • You may not post new threads
  • You may not post replies
  • You may not post attachments
  • You may not edit your posts
  •  
Search AULRO.com ONLY!
Search All the Web!