


 Reply With Quote
And if you make it to New Zealand i know a few people there you could stay with too . . . .

 Wizard
When you get to tassie if ya go near Launcestion pop in and say hi to my olds if you like
Adam
Master
And if you make it to New Zealand i know a few people there you could stay with too . . . .
Master
It's been a week since my last shower or shave - I'd probably get shot on the front lawnOriginally Posted by agrojnr


Wizard
Nah he would proberly just hose you off first
Adam
Master
Any more pics mike ie? I realy look forward to these everyday...
geck
Wizard
Legendary posts mate I feel inspired to do the second stage of the 130 now, great informative posts.
Could I inquire where you got the foam insulation for the interior roof from?
What was the product name ?
and would you think that having marine carpet glued directly to that would that be sufficient or would you perceive long term it to adopt Land Rover headlining separation ?
Thanks For all your posts bud, regards Andy
Master
Soooo... it's been a while
Apologies for the Grand Canyon sized gap in posting an update, but the "couple of week long test drive" is now in it's third month. Basically once I got on the road, I didn't see much point in turning back, as there is just so much to see here. And finding an internet connection to upload photos in, say, Oodnadata... well lets just say that the odds are not good. But if youc an bear with me, and the delays, I'm still typing up what I've done to the Defender, with photos, and I'll be uploading whenever I hit civilisation, or Darwin, whichever comes first
If I recall correctly, last time I posted, I was about to start on kitting out the back of the Defender to make it somewhat liveable in, and I guess the benefit of posting now is that I have had three months expereince of it, can can tell you the pros and cons of some of the choices I made.
One of my first criterium was that I wanted to be able to cook in the back of the Defender, even in the most rudimentary form. I've long been a fan of cooking on the tailgate, or the bonnet, or whatever flat surface thats available, but on a wet and miserable day, nothing beats being able to crawl in the back, turn on the stove, and cook a quick meal, or brew a cup of tea. It's a decision that I came to appreciate very quickly in Tassie, I can tell you.
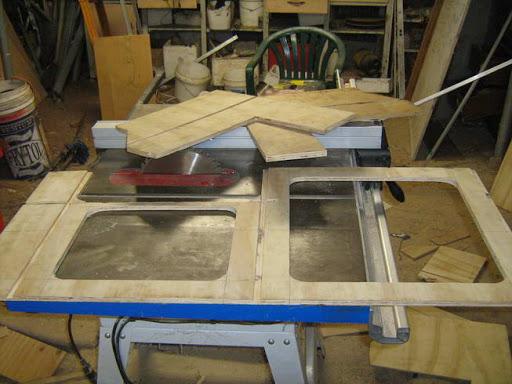
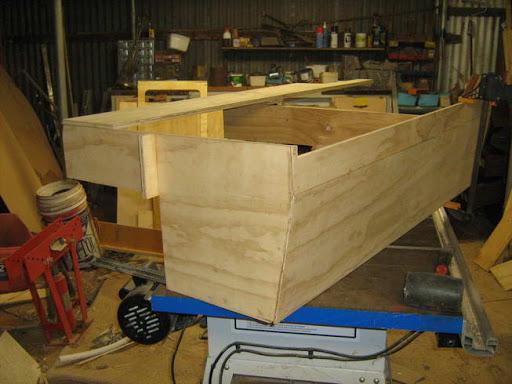
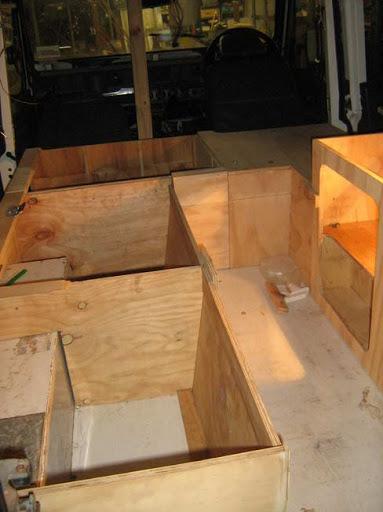
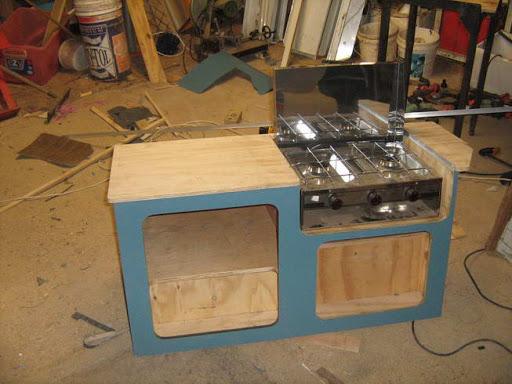
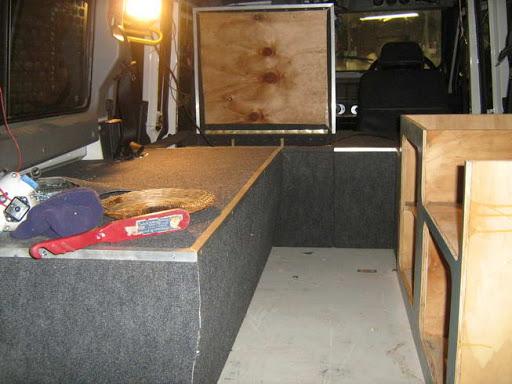
The material of choice was plywood, mainly due to a lack of any sheetbending or decent welding tools. I've seen people use 3/4 inch, sometimes even 1 inch ply for making bed bases and such, but (in my opinion), if it's braced properly and the load is distributed evenly, then 1/2" ply is more than adequate. Rather than give measurements and diagrams, I'll post photos of various stages of construction, and you can figure it out for yourself.
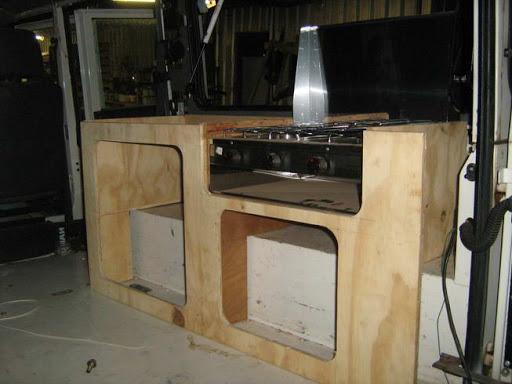
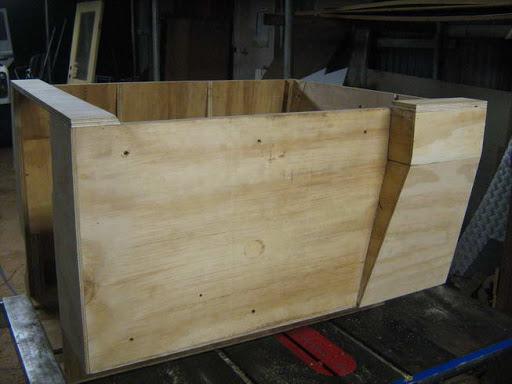
The fornt of the kitchen unit, as seen from the rear. If you have a tablesaw, then rebate everything - it adds an unbelievable amount of support. Upper left, the stove location, lower left and right, storage. Rounded corners look better, and are far more forgiving on the shins, knees, or anythign else that happens to hit them.
The next images will give a better idea of how it looks...
With stove in place:
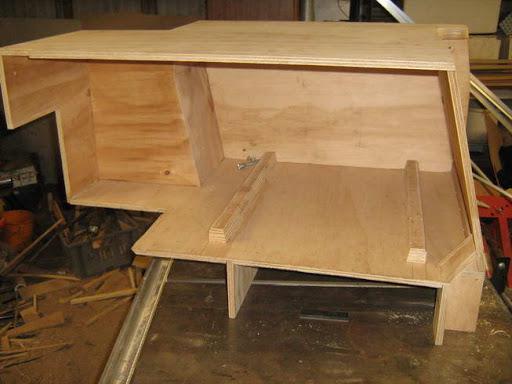
On the opposite side, seating and storage.
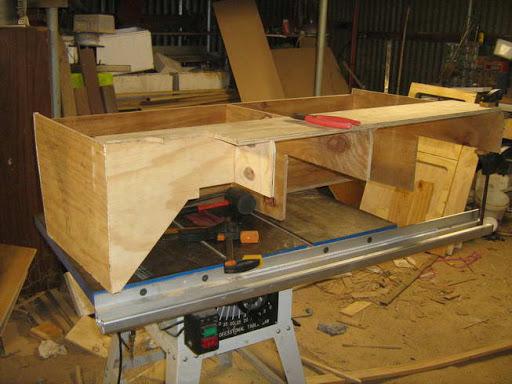
Construction is pretty straightforward - a main front panel, side panels and a middle panel to add more support, and divide up the storage space.
From the side, you'll see that the storage box is pitched inwards as it approaches the ground. This maximises storage, while still giving your feet room to move when sitting in the back. PRobably not necessary, but I figured, why not. In hindsight it does add quite a bit more comfort.
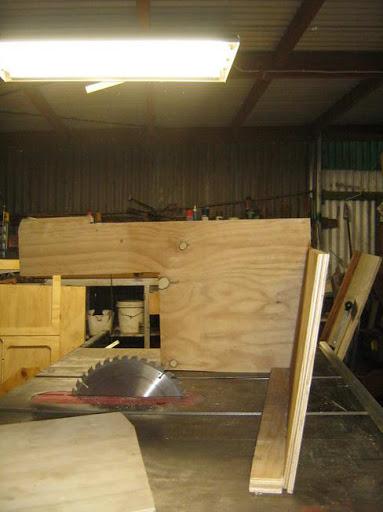
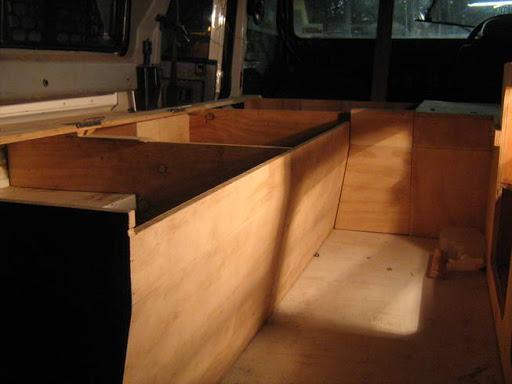
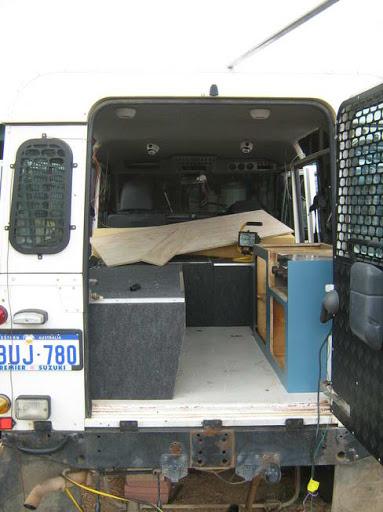
Getting closer to completion. The top section of the front panel is nw in place. Originally I had planned for the bed section to hinge out, hence the notch, but I later scrapped that idea for being too complicated. The extra bed section can be pulled out of storage whenever it's needed.

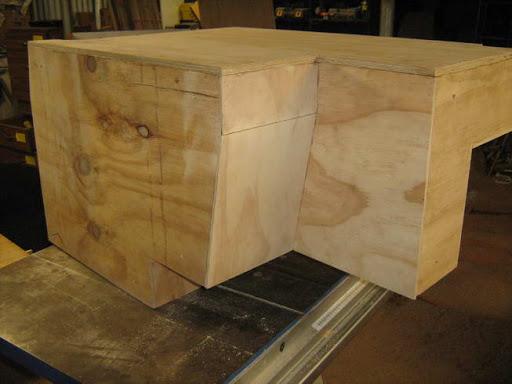
Things get a little complex as it gets to the rear door....
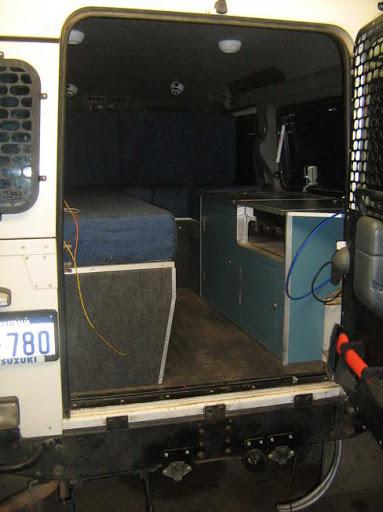
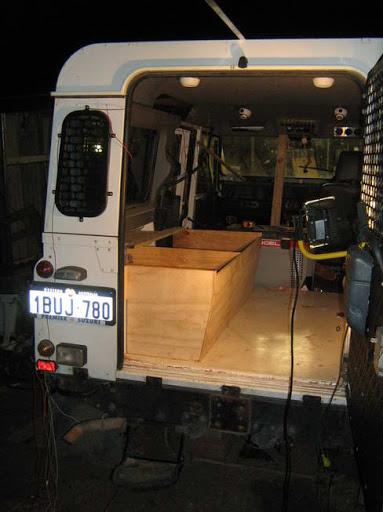
Looks a bit better in the back of the Defender:
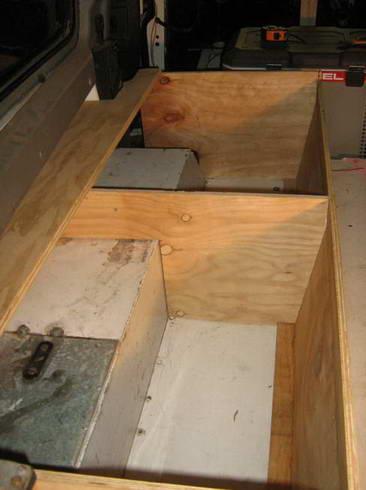
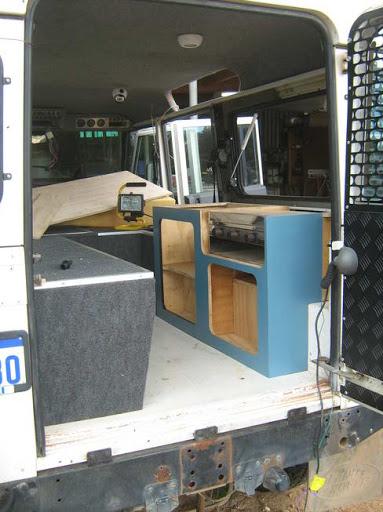
The fridge section, which sits behind the passenger seat, in what was formerly the rear passenger footwell. Again, you can figure out the basic idea from the photos, all joints are rebated for strength - the two grooves in the floor are for the feet of the fridge, and stops it from sliding around. Food can be stored in the area to the right of the fridge.
With the lid on...
Lots of funny angles, I know. But the entire setup is designed to be modular, and easily removed. If I pick up some work in another country, I may need a work truck...
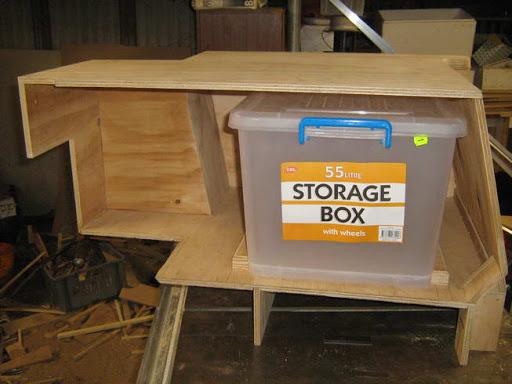
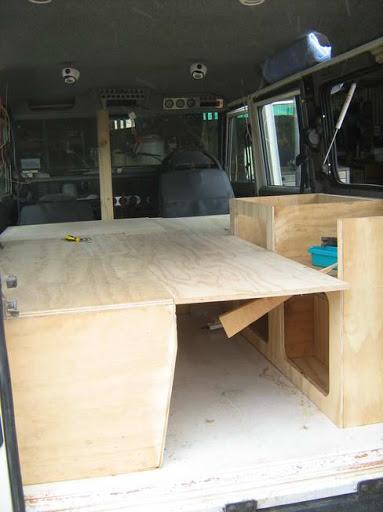
Last but not least, storage behind the drivers seat. Again, the cuts and angles make sense when it's in place. The recess and angled side on the right allows the drivers seat to go back as far as possible - I need the legroom.
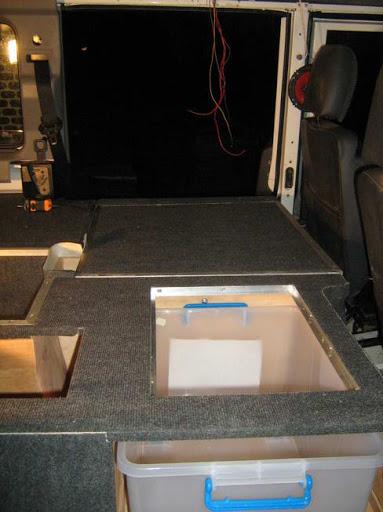
The runners on the bottom take a 55 litre storage box snugly. The box can be accessed either through the rear passender door, or through a hatch yet to be cut in the top.
From the other side...
Confused enough yet??Ok, this is how it fits together...
Clockwise from left: Main seating and storage, Fridge and food storage, 55l storage, kitchen. Each module, once unbolted, can be lifted out. Stripdown from start to finish takes less than 10 minutes.
Now all the angles begin to make sense.
With the additional bed section temporarily in place:
Now, time to make it look a bit better....
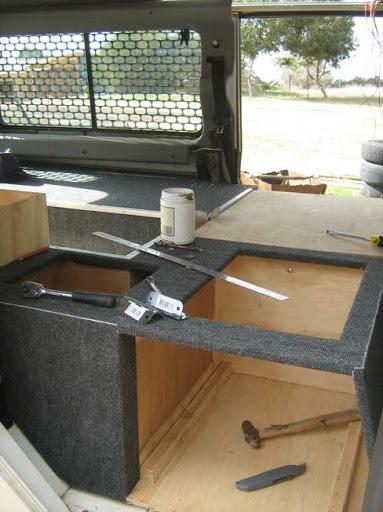
First, laminate the kitchen...
Then marine carpet the rest.
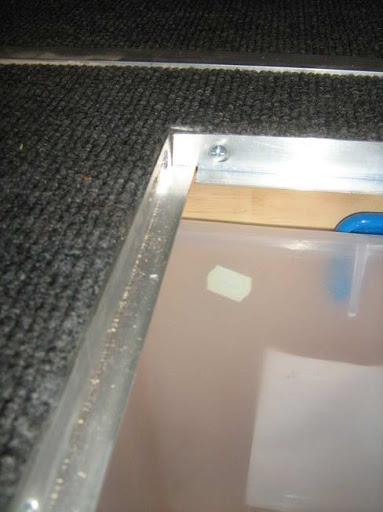
Aluminium beading provides a lip for the hatches to sit into...
...and aluminium angle on the remaining edges makes for a hardwearing interior.
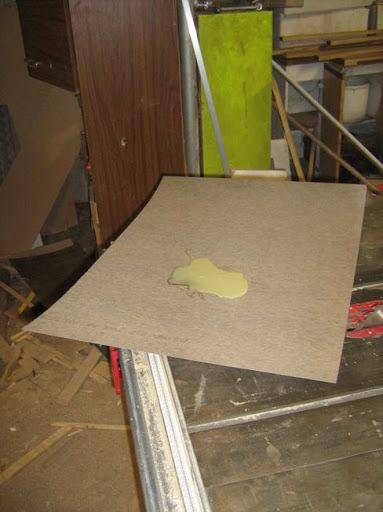
Once I was happy with the fit, I rubber insulated the floor, before fitting for good.
And no, I didn't sew the cushions myself
Master
The foam came from Clarke Rubber - not sure of a brand name. It's their standard fare, costs about $80 a sheet if I recall correctly.
I don't know. My own opinion is that the weight of the carpet would either cause it to separate from the foam, or cause the foam to peel off the roof. It's surprisingly hard to get a decent adhesive for foam, I found. I have heard of people having good results skipping on the insulation, and glueing carpet directly to the roof metal. It's all about personal choice really.and would you think that having marine carpet glued directly to that would that be sufficient or would you perceive long term it to adopt Land Rover headlining separation ?
Master
I suppose I should let people know where I am right now. After a month and a bit in Tasmania, I came back to Adelaide via the Great Ocean Road (beautiful place), and started making my way up the centre of Australia. I have to say, I've fallen in love with the red centre, particularly the Northern Territory. After quite a while meandering up the Oodnadata track, up to Uluru, The Olgas, Kings Canyon and so on, I arrived in sweltering Darwin yesterday. I'll be easy to spot if any of you live here - I'm the Irish Mick that's wandering the streets, dripping in sweat.
Has anything gone wrong so far? Sure, but overall, nothing too serious. One of the guide pulleys for the aircon crapped its bearings outside of Glen Helen, taking the aircon and fanbelt with it. Suttons kindly supplied me with a fanbelt, but the serpentine guide pully is chipped (from a previous encounter with something hard it seems), and I'm reluctant to put it back on lest it shreads the belt again. So I'm in Darwin... with no aircon....
Also found yesterday that one of the universal joints (transfer case side) in the front propshaft is knackered. I've taken out the propshaft completely, but I need some information:
1. Can the UJ be replaced on it's own, or do I need to replace the entire shaft? The UJ looks like it can be popped out, but need to know for sure.
2. seeing as I'm now driving on the rear wheels only, I obviously have the diff lock engaged? Will I cause any damage to anything if I'm just driving the rear wheels??
3. Where can I get a replacement universal joint for the propshaft, if it can be replaced? More importantly, how much is it going to cost me? Or better still, does anyone have one sitting in the shed? Funds aren't great, but if anyone has one at a reasonable price, I'd gratefully take it off their hands.
Not to sound like a phone in radio show here, but seeing as internet is sporadic, if anyone can answer my questions, a text to 043 363 1109 would be greatly appreciated.
Finally, this trip has always been about meeting people. So in the spirit of that, if anyone wants to see a mud encrusted Defender with a few toys added, drop me a text at the above number. My route is taking me from Darwin down to Katherine, across to Cairns, up the old Telegraph Trail and back down, then down the east coast. There's always a beer or three in the esky
Master
**** mikie, not too long ago i was in townsville, but hey bugger..... very interesting read.
geckos
 Posting Permissions
| Search AULRO.com ONLY! |
Search All the Web! |
|---|
|
AULRO.com Copyright 2001 - 2025 Independently Owned and Operated by Dave Blears Computing - DavecandoIT - AULRO.com LAND ROVER and its logo are the registered trademarks of Land Rover. Land Rover is not affiliated with AULRO.com. |
|
")


Bookmarks