Page 4 of 79 FirstFirst ... 234561454 ... LastLast
Results 31 to 40 of 784

Thread: My 1955 86" rebuild.

  1. #31
    Join Date
    Jan 1970
    Location
    Irymple, Victoria, Australia
    Posts
    2,902
    Total Downloaded
    0
    Quote Originally Posted by wrinklearthur View Post
    I have been eyeing off another set of Sidchrome Whitworth sockets on Gumtree,
    but I wonder if they are any less worn than the set I have been using for Fourty five years .

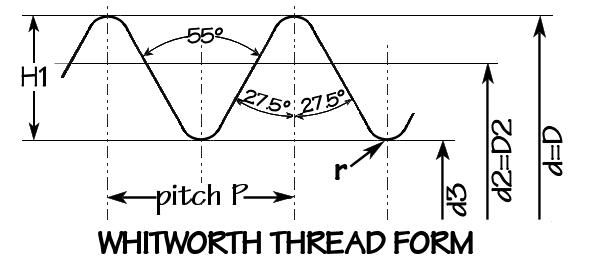
    Here's a nice set of tables to put on the workshop wall.

    Take the file into a printing place and get them to enlarge and print onto some card then laminate.

    http://www.gerardsgarage.com/support...ing_Tables.pdf

    .


    .
    Arthur, recently I was in NZ and purchased Whitworth sockets from Hayes Store in Invercargil. The sockets are made by Kokon which I believe to be good quality. They had them in sets but as I only wanted sockets themselves I purchased loose ones, a set of 3/8 drive and a set of 1/12 inch drive. Hayes had a huge range of tools and a full assortment of Whitworth sockets, impacts, long, etc. The price wasn't too bad and the exchange range at the time softened the blow a little more!

    Cheers, Mick.
    1974 S3 88 Holden 186.
    1971 S2A 88
    1971 S2A 109 6 cyl. tray back.
    1964 S2A 88 "Starfire Four" engine!
    1972 S3 88 x 2
    1959 S2 88 ARN 111-014
    1959 S2 88 ARN 111-556
    1988 Perentie 110 FFR ARN 48-728 steering now KLR PAS!
    REMLR 88
    1969 BSA Bantam B175

  2. #32
    Join Date
    Jan 1970
    Location
    Cessnock NSW
    Posts
    4,990
    Total Downloaded
    0
    A very windy day today cold in the shade, but progress has been made my Series 1 has been released from being locked in and is now in a position to be loaded onto a trailer tomorrow afternoon
    http://i659.photobucket.com/albums/u...psa59ddc38.jpg
    I have taken all the loose sundry items out so they don't get lost in transit.
    Back home I have stripped the bonnet of all it's paint etc, removed the spare wheel mount, knocked out 1 rivet by mistake, should have had my glasses on
    http://i659.photobucket.com/albums/u...psd5cd74aa.jpg
    attention turned to the one piece floor, and started to strip paint off it,
    http://i659.photobucket.com/albums/u...ps96213b65.jpg
    hopefully have the floor finished by mid week, cheers Dennis

  3. #33
    Join Date
    Jan 1970
    Location
    Cessnock NSW
    Posts
    4,990
    Total Downloaded
    0

    It's here at last!

    Well many thanks to my mate Gordon for helping out yesterday and to John T, John T Snr and Ian for arranging to meet me at home @1400hrs, across town we went, assessed the situation and had it loaded on the trailer in less than 5 minutes, 20 minutes later we were back home with, my wife asked what's wrong (because we were so quick), Op Rubic's Cube swung into action 4 vehicle movements later and the Series 1 was under cover, all way too easy
    http://i659.photobucket.com/albums/u...psb2171a9a.jpg
    it looks like it has been there forever.
    While the party were here they also wanted to look over the fleet, anyway good afternoon, job done in a flash Thanks very much, cheers Dennis
    ps forgot to thank John's Mum as it was her V8 Disco that towed the trailer,,.

  4. #34
    LandroverScott Guest
    Looking right at home Dennis, but where do the TAC plates get mounted? and the NATO plug? and the pintle hook? and ......Lol

    cheers
    Scott

  5. #35
    Join Date
    Aug 2008
    Location
    latrobe valley victoria
    Posts
    898
    Total Downloaded
    0
    You're actually inspiring me to do my body ... Same crappy paint job story.. Guess ill start on the original engine first though and enjoy driving it this spring/ summer ... Dangerous thing inspiration lol
    Cheers mark
    2002 defender 110 , 1955 86 inch

  6. #36
    Join Date
    Jan 1970
    Location
    Cessnock NSW
    Posts
    4,990
    Total Downloaded
    0

    Stripping paint

    After a 4hr short shift due to staff shortages, I came home changed and off to Sandgate dropping off 3 Carburettors
    http://i659.photobucket.com/albums/u...pseed4b20a.jpg
    I did identify the one that was for repair, telling them that if any parts of the other 2 were of any use etc, but did ask them to let me know if the nominated carby was U/S.
    Then the run around trying to locate a flat panel beaters dolly, no luck anywhere, so home we went.
    Stripping paint was the order of the afternoon, so I have started to dismantle the vehicle in stages, starting with the seatbox
    http://i659.photobucket.com/albums/u...psa94e8a0a.jpg
    you can see why I need to strip all the paint off everything, multiple layers ++
    approx 1 hour to strip this panel
    http://i659.photobucket.com/albums/u...ps2d6badfa.jpg
    the section in the middle has also been done this afternoon, the toolbox cover will get done tomorrow after I get home from the swap meet at the local showground.
    Last week I managed to strip the entire floor section, both sides, here it is as I just got started
    http://i659.photobucket.com/albums/u...ps96213b65.jpg
    I wanted to check the door gaps on both sides before I get too far and either remove the tub or the bulkhead, the gap looks too wide to me, it's approx 20mm on both sides
    http://i659.photobucket.com/albums/u...ps7863b528.jpg
    anyway enough rambling for one evening LOL cheers Dennis
    ps I must sya Thanks to 'Klonk' for putting me onto paint stripper from bunnings, it works well, cheaper to buy it in a 4lt can as well,,.

  7. #37
    Join Date
    Dec 2006
    Location
    Narrogin WA
    Posts
    3,092
    Total Downloaded
    0
    Quote Originally Posted by Dinty View Post
    Then the run around trying to locate a flat panel beaters dolly, no luck anywhere...
    What about a piece of 20mm plate Dennis? Radius the edges so that you don't raise dings,

    Cheers Charlie

  8. #38
    Join Date
    Jan 1970
    Location
    Cessnock NSW
    Posts
    4,990
    Total Downloaded
    0

    Moving right along.

    Well after almost 4 hours at the swap meet this morning, not a lot of Series Land Rover gear for sale, did meet a chap that I had met previously at the 'Expo' last year, he had some Series bits but all to suit 80", I did somebody a favour, they were going around in circles trying to find a park, I directed them to my 110 and that solved their problem.
    After a quick lunch I set about removing the seatbox for assesment, it has extra bits riveted on and I don't know why?? look at the G/box case, it had been bead blasted along with T/case,
    http://i659.photobucket.com/albums/u...ps571f65bc.jpg,
    it didn't take long to see why extra bits had been riveted on, there were a few cracks in the seatbox base, nothing that cannot fixed I hope
    http://i659.photobucket.com/albums/u...psc8b78408.jpg
    one split is around 4" in length, the other two are fractures
    http://i659.photobucket.com/albums/u...ps7de7ab64.jpg
    you can see the extra bits across the front also along each side as well, there are no splits cracks on those sides
    http://i659.photobucket.com/albums/u...ps54dc9fda.jpg
    I have started to paint strip the seatbox as well, most of the underside has been done, but I ran out of battery (camera) and more importantly daylight, work tomorrow 0430hrs wake up anyway cheers Dennis

  9. #39
    Join Date
    Feb 2010
    Location
    lismore
    Posts
    189
    Total Downloaded
    0
    what colour is this? do you have a paint code and distributor for it?

  10. #40
    Join Date
    May 2011
    Location
    Roaming
    Posts
    93
    Total Downloaded
    0
    Looking good, excited to watch it progress.

Page 4 of 79 FirstFirst ... 234561454 ... LastLast

Bookmarks

Bookmarks

Posting Permissions

  • You may not post new threads
  • You may not post replies
  • You may not post attachments
  • You may not edit your posts
  •  
Search AULRO.com ONLY!
Search All the Web!