

 Reply With Quote
Also has anyone used the rocky mountains ones, mine are the original felt ones i think. These look good.
Replacing Land Rover rear side windows or seals

 ChatterBox
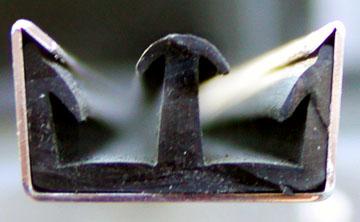
I need to replace both the channel's that the window in my Series 111, 109 slides in !? Any one got a how to article and where to order the parts cheaply from ?!
Thx
Matt.
EDIT; does this apply to mine ? http://www.lrfaq.org/Series/FAQ.S.window_channels.html
Just need to find all the replacement parts now, any help would be great, have to do both sides.
ChatterBox
Also has anyone used the rocky mountains ones, mine are the original felt ones i think. These look good.
Replacing Land Rover rear side windows or seals
AT REST
Havnt seen those ones matbor but gary at clr on ebay has original style felt at good prices as does LVS and ALL 4x4 not hard to fit just do one pc at a time and a straight swap if you have new door tops then you may need to trim to fit as some new tops are not quite the same size as originals
PS: dont forget to cut the holes for the window locks like some one I know who shall remain namless
ForumSage
Also, I'd saturate the door top channel with Penetrol before putting the Bailey channel in.
Its one of the worst corrosion traps.
Fossicker
SupporterMatt, Universal Engineers Supplies
see my reply with links at:
http://www.aulro.com/afvb/series-3/1...-doortops.html
They have a Victorian outlet also.
Cheers
Lakey
ChatterBox
Cool, thx.Originally Posted by Lakey

ChatterBox
with acknowlegements:
Window Channel Replacement
By Karin Sindir (Mendo_Recce & SCLC)
and some additions by John Hess (LROA)
This is my version of a procedure to replace the window channels on the doors. The exactdetails may vary for your vehicle, but this will give you a pretty good idea. Disclaimer: The following procedure is only as good as my memory serves and is based on my1974 Series III 88". [and my series II 88, JH] [I have added a few lines of text in hopes to make things doubly clear and to show a slightly different way to approach the problem--John Hess, jfhess@dcn.davis.ca.us] Window channels & associated hardware: Note: These parts are obtainable from your favorite LR vendors. To do each door: 1-vertical channel (336454), 1-top channel (336451), 1-bottom channel (347488), rubber stop (330162), rubber wiper strip (330660), glazing putty (RN has some flat ribbon type & 3M makes some which is obtainable through body shops) or urethane based sealant. Karen used glazing putty but I was advised by Kelly Minnick that urethane would be more likely (almost guaranteed, in fact) not to leak. Rubber strip between door top and bottom (RTC611) Numbers in parentheses are Land Rover part numbers taken from my parts book. They should prove useful even when buying non-LR after market versions. However, I urge you to double check with your supplier when ordering. Miscellaneous Parts: Note: These parts are obtainable from your favorite hardware store. #6 counter sunk head machine screws 5/8" and 1/2" long, galvanized steel or stainless steel, 1box of 100 of each length (cost effective, plus you'll have spares). Note: Screws with counter sunk heads must be used. Coal or pan head screws will cause the window glass to bind. Note 2: Countersunk screws are not used to hold the fixed glass retaining strip. I used phillips head stainless steel. Drill bits: Screw extractor for the above, and/or combination drill/countersink , 7/64" cobalt alloy bit or similar hardened bits (you'll be drilling a lot of holes) Tools:
Supplies:
- Screw drivers, assorted straight edge, #2 Phillips screw driver in particular is useful for installation
- Drill
- Needle-nose pliers, tin snips
- Tape measure or ruler
- Mallet
Optional: Case of beer or other soothing beverage DOOR WINDOW PROCEDURE:
- White-out Correction Fluid
- Rubbing alcohol (ISOPROPANOL) - also good for tired arm muscles after doing this job.
- Patience, and understanding spouse and/or friends
Note from JH: The passenger side window in Stubby was so moss encrusted, we could only open it an inch. Nevertheless, with a hammer driven, hand held impact screwdriver, I was able to remove all the window channel retaining screws without resorting to violence, drills, Dremel tools or explosives. When everything was done, the new window seals keep the windows from rattling, but also keep us from closing the windows enough to use the window locks. I have tried pushing and pushing but still can't get the windows to shut enough so that the locks can shut. We removed the window locks for painting and used exactly the same holes to mount the window locks back on the vehicle. I am not sure if I got the same locks on the same door top, but they look identical to me. That's it! Now work out the cramps in your fingers from torquing screws so you can hoist the celebratory pint !
- The easiest way to install new window channels is with the door tops off the vehicle. The door top is held onto the door bottom by two bolts that protrude from the top and down into the bottom. Removing the inner door panels you will see the nuts that need to be loosened to remove the door top. Do so.
- Dig out the bottom channel with a small straight screwdriver to uncover the screws and remove them. Repeat for the vertical channel.
- Note: Removing these may be as simple as unscrewing them, but more likely you will need a screw extractor drill bit or combination drill/countersink bit to pull them out or chew them up. A needle nose pliers may assist you in getting out the remains.TIP: Don't despair, if you can't get the entire screw out, you can just leave the remainder in (as long as nothing protrudes) and just drill a new hole with the 7/64" size bit.
- Removing the sliding glass is easy, just remove the vertical and the bottom channels and
- lift out the sliding glass.
- 4.Next, remove the top channel screws and the channel, the bump stop, and the retaining metal strip for the fixed glass.
- 5.Carefully pry out the fixed glass. Remove the residue of glazing putty from where the fixed glass was removed and clean the places where the channels will go.
- Wash the glass in soap and water, scrape any off residue with a razor blade or use rubbing alcohol.
TIP from JH: keep all the old pieces and use them to A: show you how the new pieces should fit and where, and B: show you where the screw holes are. I was lucky in that I didn't have to drill any new holes in the door top. With the old and new pieces side by side, upside down, I "eyeballed" where the old piece had a hole and used whiteout to mark where I needed a corresponding hole in the new weather stripping. I then turned the new weather stripping over and drilled the hole from the inside of the channel to the outside. I either have good hand eye coordination or very good luck; I consistently drilled through the white out mark. With the holes drilled and the arrangement of the pieces worked out, trial fitting is in order.- Install strips of glazing putty on the top, bottom, and front of the area on the door where the fixed glass was located. You may have to double up or thin down the putty to make the glass fit properly.
- (alternate) Lay out the new parts (with holes drilled) and identify how the lower channel/fixed glass/filler strip all fit together. Some screws go through the filler strip and the window channel in places. Trial fit the new parts with the fixed window glass in the frame. Check the fit of the metal strip that holds the fixed glass in position; Is there a big gap between it and the glass or is the fit pretty snug? The answer will dictate how much sealer you will need to apply. You don't want the window rattling around, do you? With the glass in place, make some marks on the door top frame (to mark where to apply sealer). Try installing screws to see if all your holes line up. If everything is OK, then take apart the upper and lower horizontal window channels and remove the fixed glass. Apply a bead of Urethane based window sealer to the inside of the frame where the fixed glass will go. Too much will squeeze out and necessitate cleanup. Aim for a smooth, uninterrupted bead.
- Press the fixed glass into the putty making sure the seal is good all the way around, then install the metal retainer strip, and don't worry about putty residue on the window or any irregularities in the putty at this point.
- Measure the locations of the screw holes and mark them on the new window channels.
TIP: White-out correction fluid worked for me. [Very good tip. In fact, go to an office supply/art store and get a pen with white-out in it. Very handy to have around.]- Drill the new holes using the 7/64" drill bit.TIP: It is best to lay the channel on top of a piece of wood and even better if someone can hold it for you too.
- Install the vertical channel using the 1/2" long screws, and bottom horizontal window channel using the 5/8" long screws. Note from JH: I installed the vertical channel last.
- Install the rubber wiper strip on the sliding glass and secure with the metal retainer strip.TIP: A mallet works best to push down the metal strip and it helps to have someone hold one end while you work on the other end.
- With your screw driver and 1/2" screws ready, place the outer pane of glass in the top
- channel, then position the pane in the lower horizontal channel and carefully slide the
- window and upper channel in place.
- Slide the glass to the middle and install a couple of screws to hold the channel in place, then install the remainder of the screws. Slide the glass pane back and forth lifting up and pushing down slightly to see if it is contacting any screw heads, then torque down any offending screws.
- Don't forget to reinstall the bump stop.
- Using a razor blade, remove any putty residue on the glass. Fill in any areas which need more putty and smooth using a straight edge screw driver.
- Since you removed the door top, it would be a good idea to replace the rubber strip that goes between the top and bottom. This is held on with pop rivets but I think weatherstrip adhesive would be fine. Tip for alignment: The rubber strip protrudes into the cab of the vehicle and doesn't really show much from the outside.
Wizard
Hey Matt, give Jim a call in Melbourne on 03 8804 0000 and he can send you some for $22.00 a set, he sent some up for "Operation Smeg" 2 weeks ago. The only problem I had was the window lock pin hole had to be cut in( which wouldnt be a problem for your S2). Other than that they work well. He also has a lot of other gear at a lot cheaper prices too.
Cheers Ian
ChatterBox
S3, 109. cutting the hole wont be a problem. Will give him a buzz.
Thx Ian.
 Posting Permissions
| Search AULRO.com ONLY! |
Search All the Web! |
|---|
|
|
|

Bookmarks