

 Reply With Quote
Just received a set of flares from paddocks took only 4 days from order to door in the blue mountains. Have you cut the guards to give more clearance?

 ChatterBox
I have a rod of polyurethane which I am going to par off as spacers. When I fitted mine it really looks like it needs different size spacers at different positions to let them sit evenly.
Trimming the lip might do the trick as well. I will have a bit of time to think about it as my replacements are not arriving until March.
Fossicker
Just received a set of flares from paddocks took only 4 days from order to door in the blue mountains. Have you cut the guards to give more clearance?
ChatterBox
SubscriberI have a 2" lift and am running 35's without cutting the guards.Originally Posted by Wal Rat

I suggest you put spacers between the flares and the body,otherwise you will run into the same problems,and the screws and plastic surround will pull through the plastic when you tighten it up fully.
Wayne
Fossicker
ChatterBox
Subscriber
Just looking at the way you have attached your flares,it looks like you have not tightened the screws right down till the plastic flange touches the body,as I can still see part of the screw between the plastic and body.Will be interesting to see if they work their way loose.I think that both Nugget and myself have tightened the screws down till the plastic flange on the flare touches the body,for added support.
Looks like you just need some tyres to put on those rims now,to make use of the flares
Wayne
Fossicker
I tightened the screws down so the guards are very firm but first I coated the screws with Duralac a Anti corrosive jointing compound. It inhibits
electrolytic corrosion between dissimilar metals.The screws wont work loose and the holes won't get bigger due to corrosion.
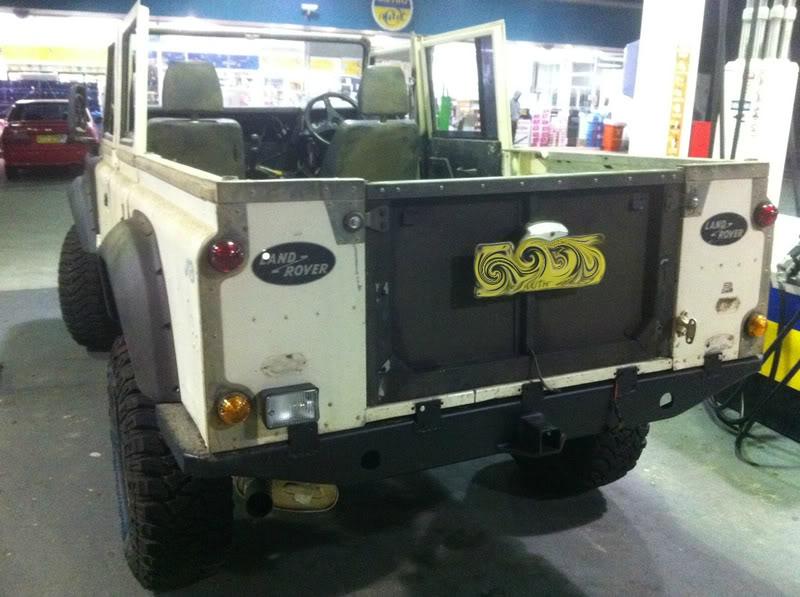
I needed the guards even for the smaller tyres as the amount of offset on the rims so to increase the articulation.[IMG]file:///C:/Users/Anne/Pictures/anew/2011-03-08/002sm.jpg[/IMG]
ChatterBox
Replacements have arrived. Will fit them up using spacers and see how we go.
Fossicker
I fitted some to my 90 couple of years ago. I had all the same issues described above when I fitted them. I hace Simex JT2 33". I haven't cut the panels yet as I don't have the balls.
I used black M8 allen head bolts with washers and nyloc nuts. I didn't do them up so tight it pulled the bolted part of the guard onto the panel, just enough to get the lip to touch the panel. With the nyloc they never came undone or loose.
I didn't use the plastic/rubber trim, I think it looks better without.
The upper three bolts on the rear into the interior isn't good, but after 2 years it is irrelevant.
Also my fuel filler is in the lower panel and the rear guard laps over the filler looking not too flash.
I have been considering plugging the gap in the filler with checker plate, but it would probably look dumb.
Also, I have been considering putting a bead of black mastic inside to seal the gap betwen guard and panel. If I could get it neat on the outside I think it would hide the little gaps between the guard and panel (which are probably due to bent panel as much as wonky guard).
The guards lasted great, until a few weeks ago I drove over a fallen tree and a branch came up with the wheel and ripped both guards off on the passenger side. Both of them had the bolts pulled through the plastic.
I have tried to re-build the plastic. I tried to get ABS cement, but couldn't find any. If you can get it apparently you can slowly build up the plastic and re-drill it. Somebody told me the clear pvc cement you use to join pvc drainage pipes is the same as ABS cement. So I tried to use that. I also tried to add some fibreglass mat to further strengthen it. Also got told if you buy ABS plastic sheet you can dissolve it in acetone and m,ake a putty up to then use to rebuild the plastic.
In the end my repair worked in a bodged sense. The guards are back on and all good - but I reckon will not last so I ordered a new set of guards. I looked at another type with different mounting holes, but with the panels now drilled I thought I would stick with the ones I got (same as photos above).
With the new ones I reckon a packer between the bolt and panel behind the guard is the way to go (as suggested above), use M8 allen head bolts (google 'pro-bolt' - but they are cheaper elsewhere - try motorbike fairing shops) with washer and nyloc nuts - and get some bar work to protect the guards from sticks being thrown upwards.
Also the first set I drilled the bolt holes. I think I may melt the second set with a soldering iron or hot nail or rod the right size. The drilling seemed to twist the plastic and make any thin spots even weaker. I think melting the holes will stop this and also prevent any little rips or tears that could start a rip or crack.
ForumSage
SubscriberI don't understand them making a flare of this quality, considering how inexpensive it would be to use enough plastic ro make the flare with sufficient strength.
L322 tdv8 poverty pack - wow
Perentie 110 wagon ARN 49-107 (probably selling) turbo, p/steer, RFSV front axle/trutrack, HF, gullwing windows, double jerrys etc.
Perentie 110 wagon ARN 48-699 another project
Track Trailer ARN 200-117
REMLR # 137
ChatterBox
SupporterI just baught some of these terrafirma flares at the expo yesterday, had a look at them last night and they are rubbish. The top line is badly warped between each screw hole and the overall feel of them is crap, i baught them already packaged and now i wish i had opened them when i did, i only looked at some already on a truck of the people from where i baught them.
I also have some other flares on my county, i dont know the brand etc and they are about 4 years old now but they look way better then the terrafirma ones by far, does anyone know where i can find some of these? Nugge_t did you ever get yours sorted out?
Heres a pic of the county flares.
 Posting Permissions
| Search AULRO.com ONLY! |
Search All the Web! |
|---|
|
|
|
Bookmarks