

 Reply With Quote
I thought so too.
It's probably at the expense of the aux battery charge, but such is life.

That's pretty good.
 TopicToaster
Subscriber
TopicToaster
SubscriberI thought so too.
It's probably at the expense of the aux battery charge, but such is life.
-Mitch
'El Burro' 2012 Defender 90.
TopicToaster
SubscriberDid another mod today. Actually, more of a 'tweak'...
This is an ease of maintenance / ease of use mod.
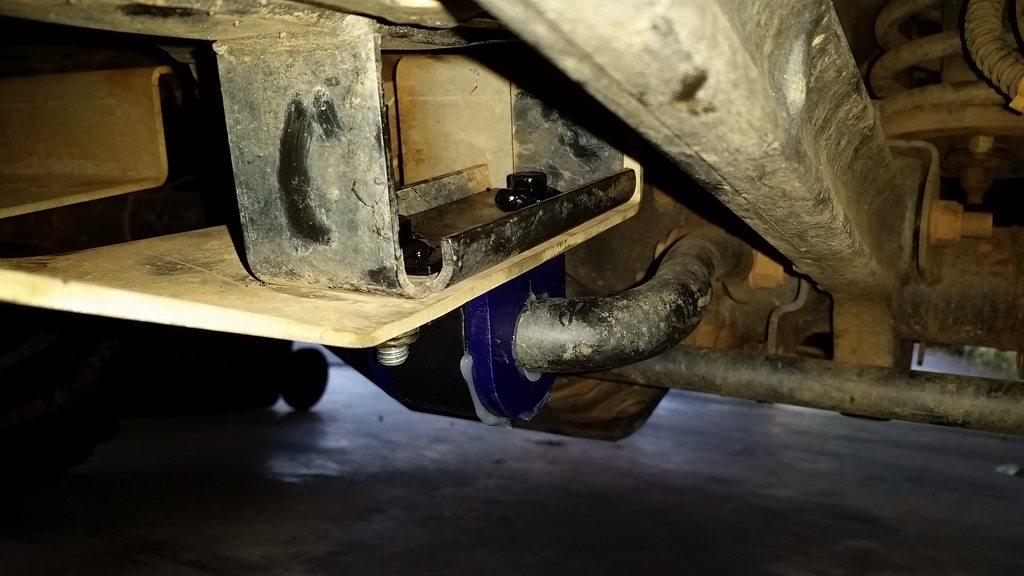
I run a fuel cooler guard that was part of a small run of parts made by pete simpson on this forum. It's essentially a 5mm thick slab of aluminium that is cut to mount to the trans crossmember at the rear, and the front anti-roll bar mounting 'hangers' at the front. It's a great bit of gear. Here I am showing it off:
As great as it is, it tends to trap a bit of crud between the crossmember and the alloy plate. No biggie, I just remove it every 6 months or so and give it a wash, and will give it a bit of paint / rust converter if it ever needs it.
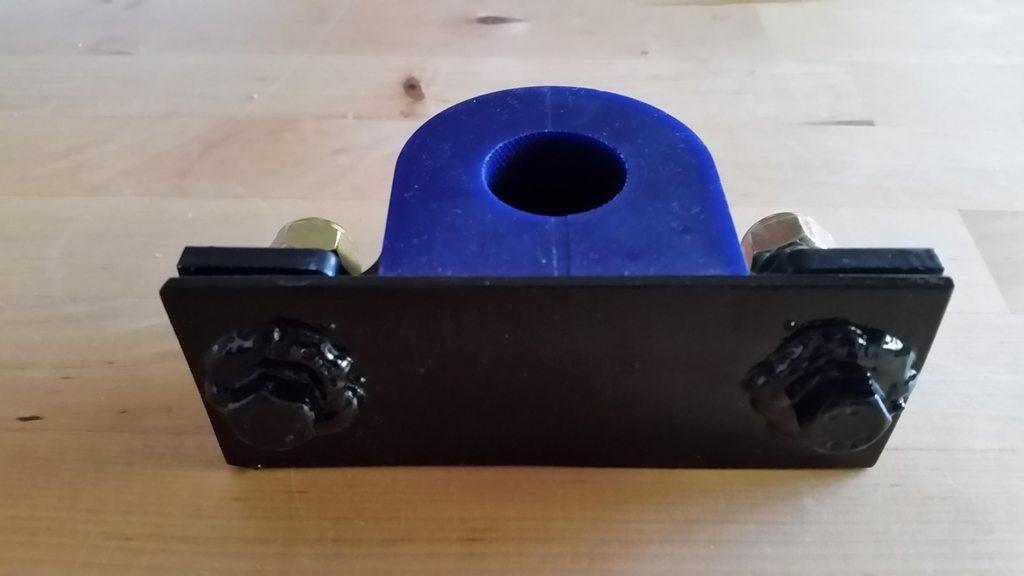
But LR engineering makes what should be a simple job, just that little bit more challenging. A 2 spanner job, where it should only take 1. The issue is the bolts in the anti-roll bar bracket need a 13mm offset ring spanner on the top to hold it, while a 15mm is used underneath. The design is such that the folded steel u-shaped hanger cannot be easily accessed with a simple open/ring spanner. Plus the M10x1.5 nyloc nuts the whole assembly uses means there is no easy way out. "There has to be a better way"
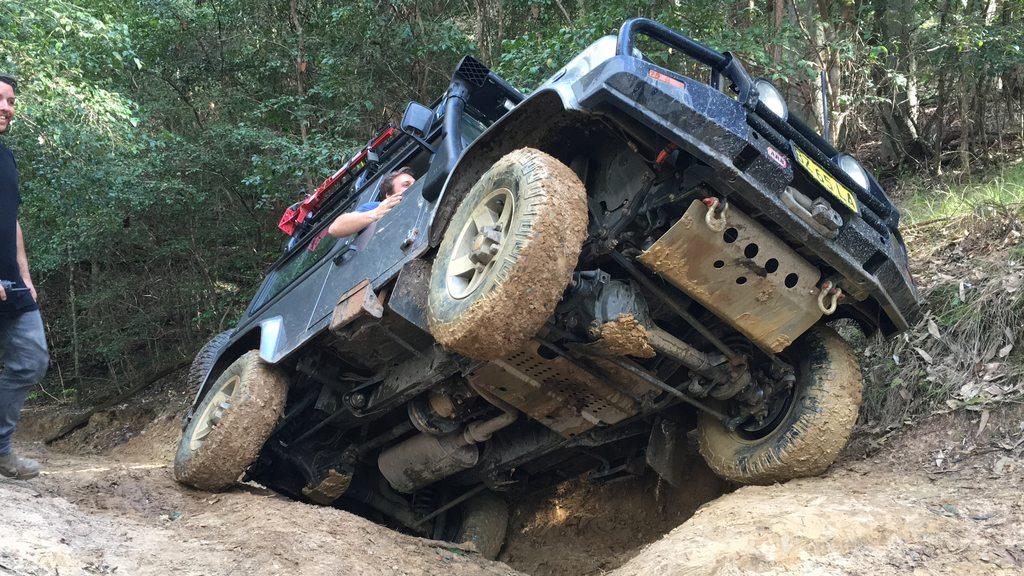
This idea was triggered by this incident, which required a new anti roll bar bush and carrier:
So I jumped on the gargler and got some parts from SW Macintyre and some superpro bushes from bursons, and got to work.
Armed with a brain full of half-baked ideas, I cut some steel in my lunch break, and fired up the mig for a bit of poorly executed welding.
Gave it a bit of paint at Andy130's place tagging along with the painting cycle of his rebuild. It's a Upol product I believe, a rust converting primer, followed by a brushed on top coat.
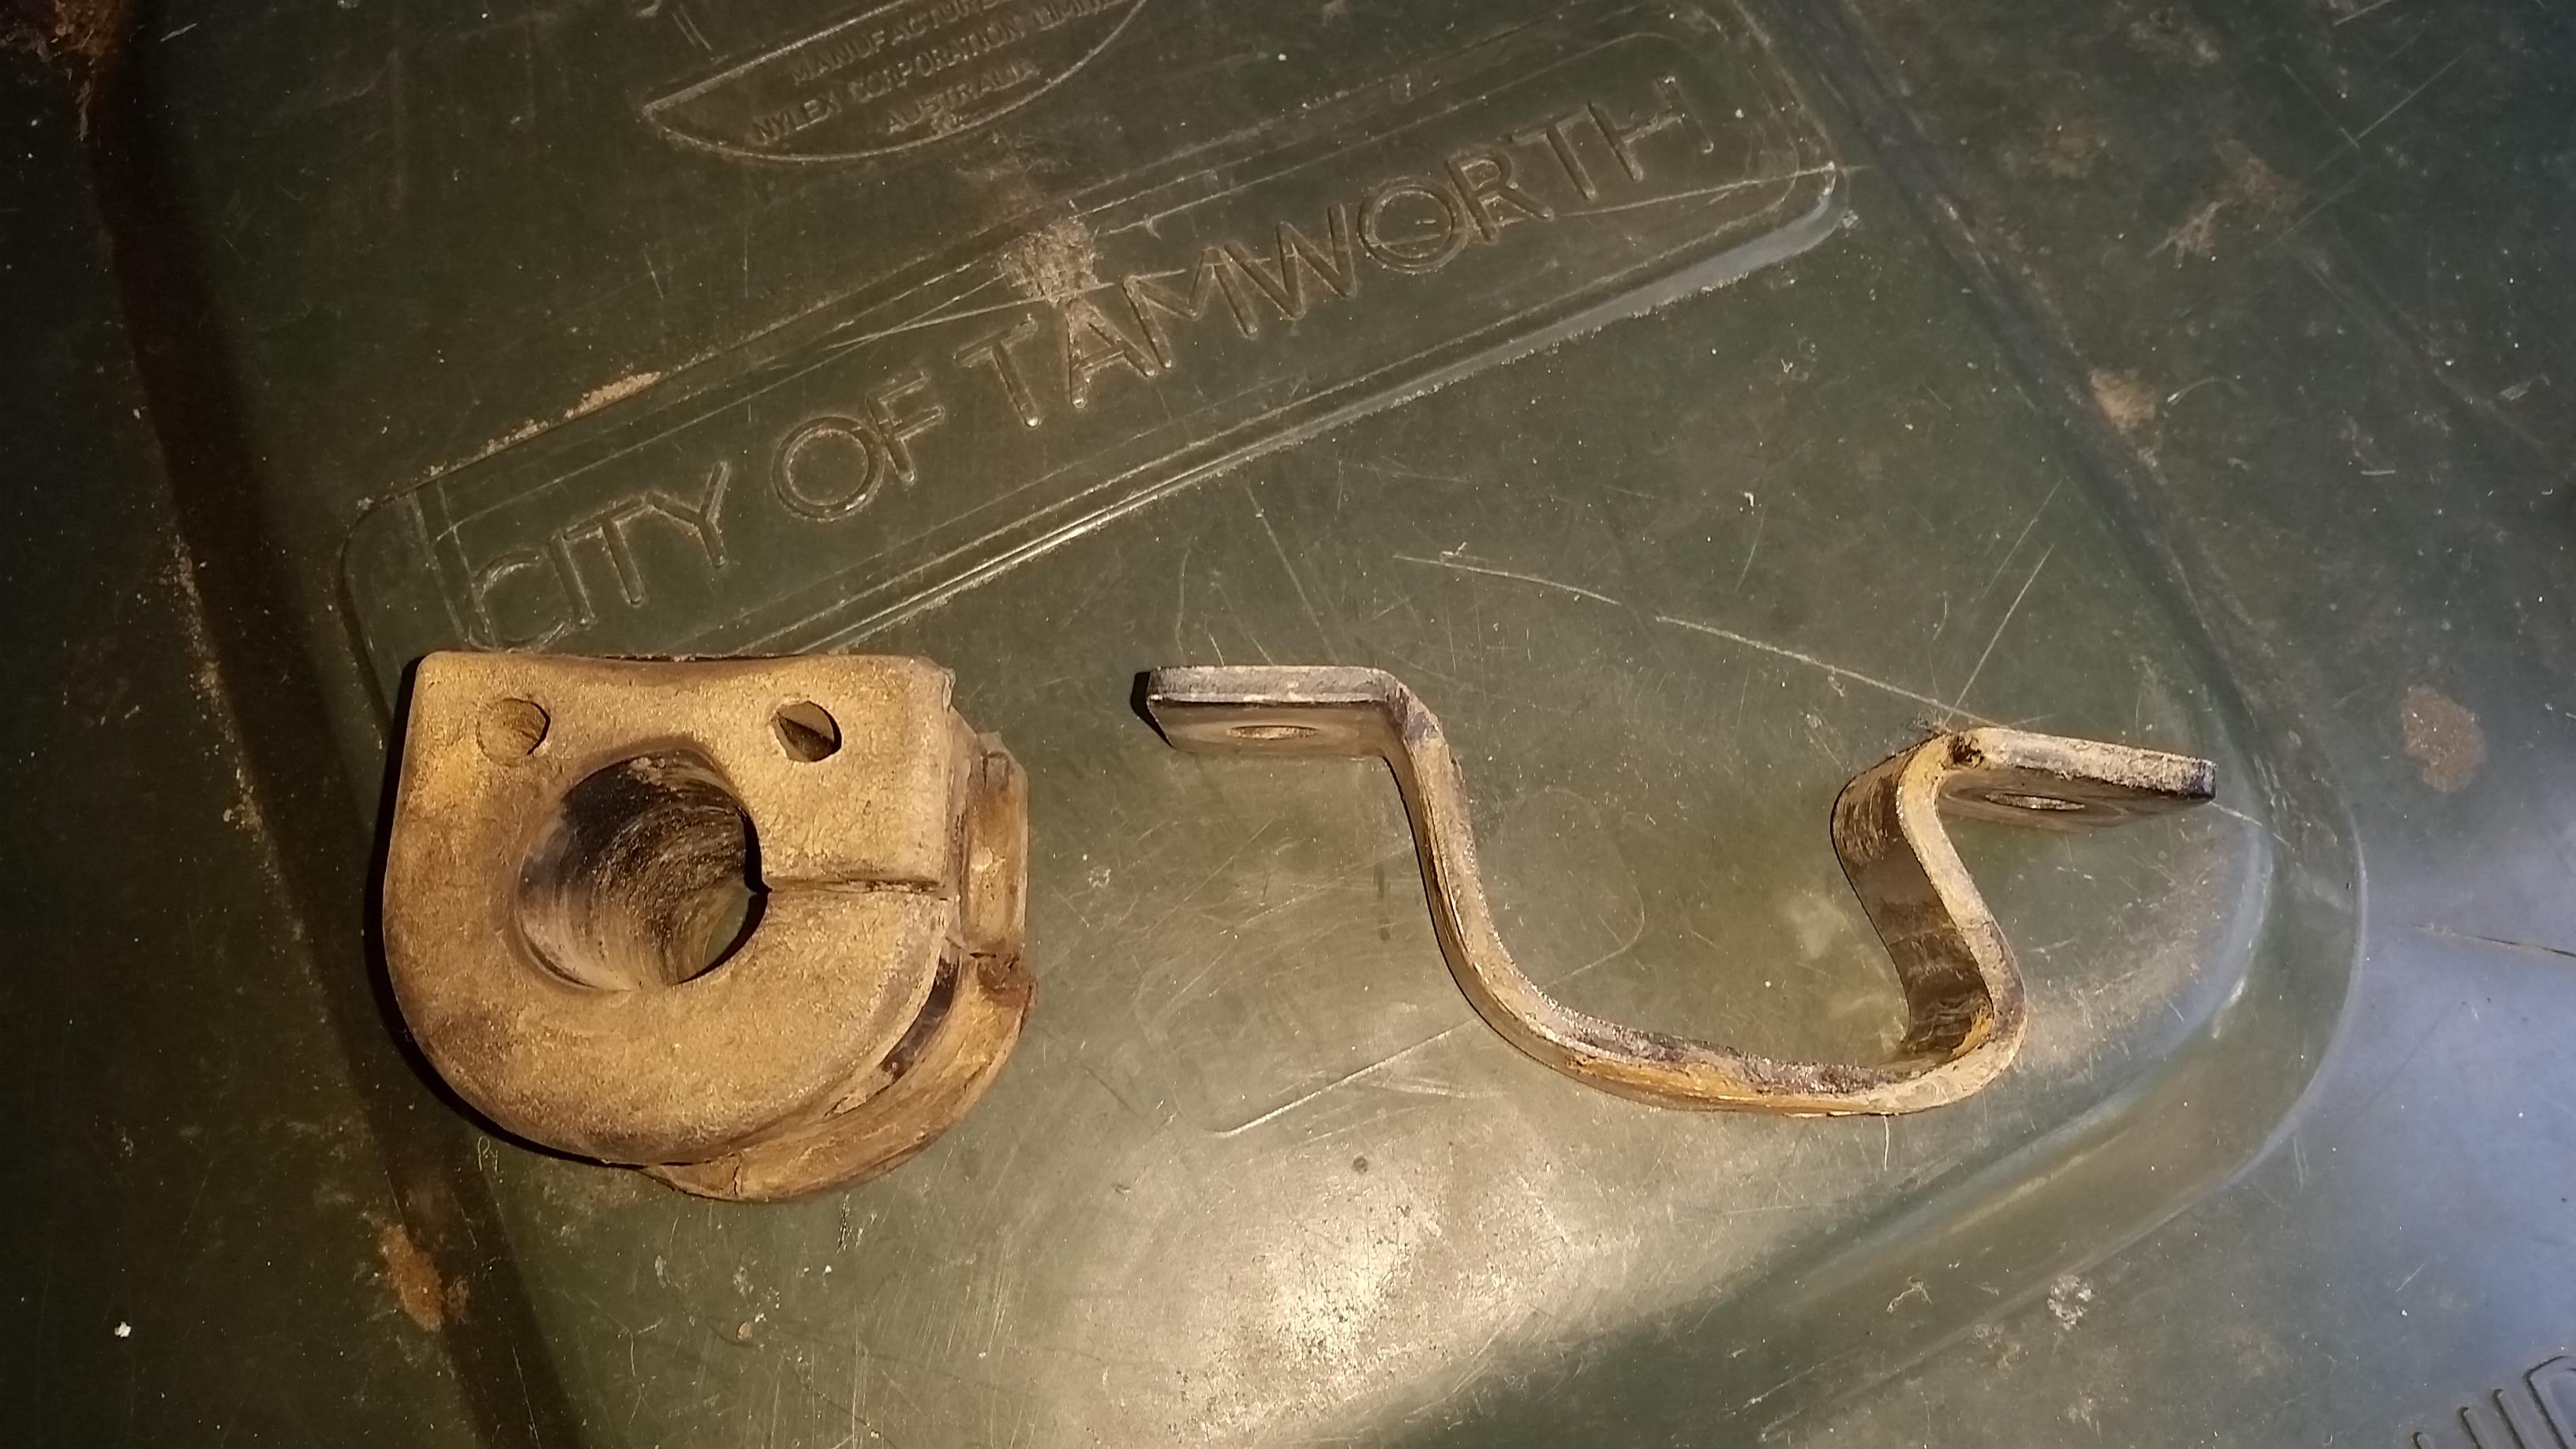
Ready fior install. Old Vs new
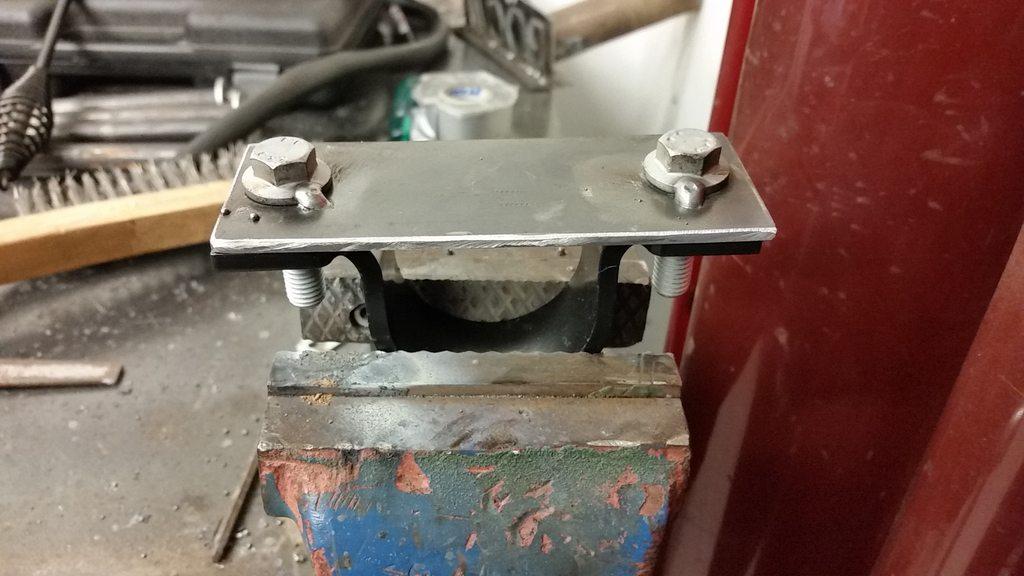
Doneski.
For those a bit slow on the uptake, this little mod makes this a 1 spanner job.
With the fuel cooler guard / skid plate I have, access is not the greatest with the radius arms in the way. So it's a bit of a time saver. Plus a good little weekend project.
For anyone playing along at home, the dimensions of the steel plate are approx 45mmx145mm (same dimensions as the bush carrier). There needs to be a bit of accuracy in placing the bolt holes and welding, but this is easily overcome by welding while the carrier is attached to the plate. I spaced the carrier out to the extremity of the bolt while welding to ensure they were aligned over their whole length.
-Mitch
'El Burro' 2012 Defender 90.
TopicToaster
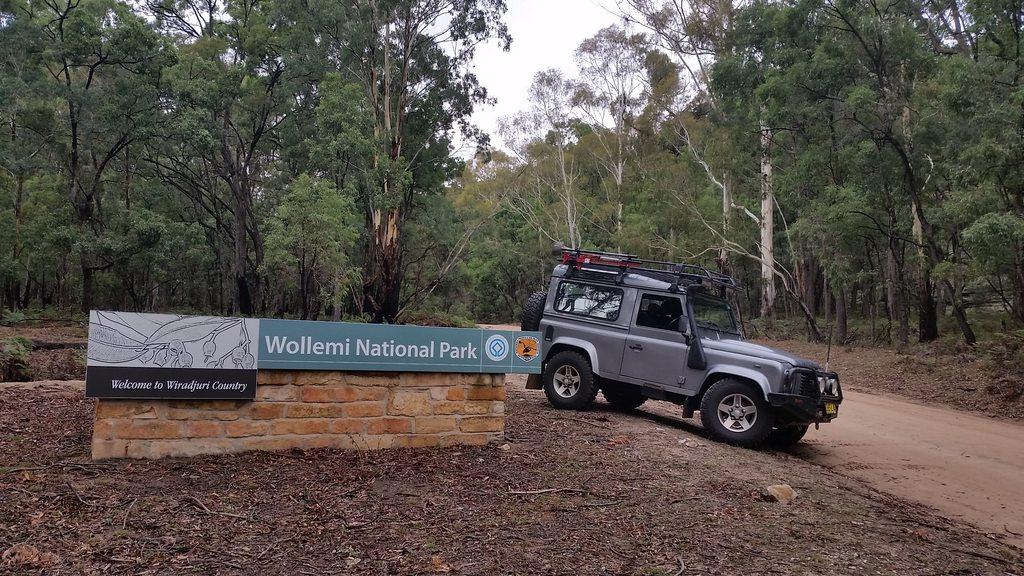
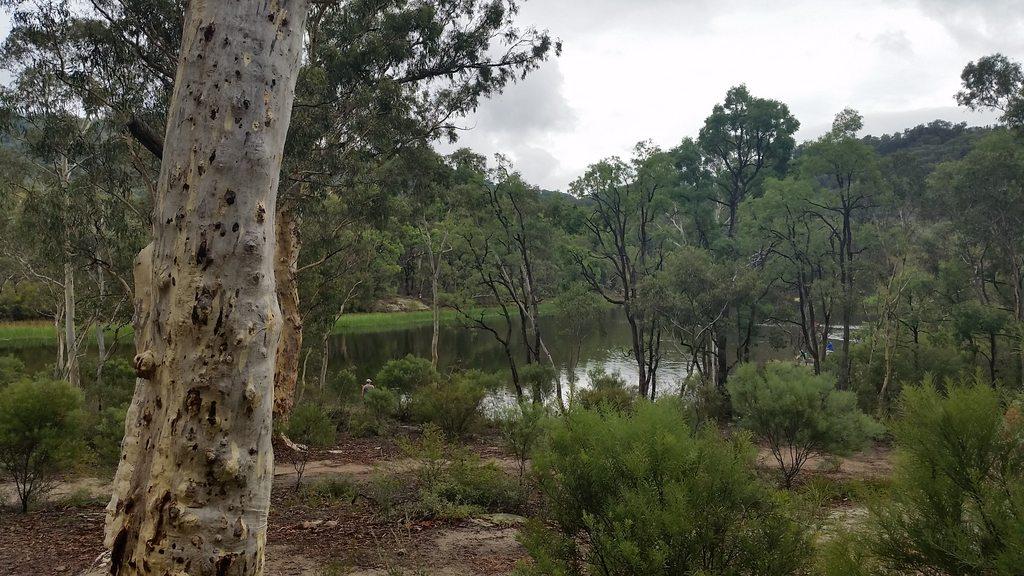
SubscriberHad a Boy's weekend (bucks party) at Dunns Swamp, a nice little place in the Wollemi NP, East of Rylstone NSW.
Google Maps
Had a good drive down, saw first hand the damage of the fires that ravaged the towns around Casillis NSW a few weeks back...
Had a very nice pie at the Merriwaa bakery, and can highly recommend.
Visited Mudgee for the first time ever, I'll have to go back with m'lady for some vineyard tours etc (thinly veiled excuse for a drink, I know...)
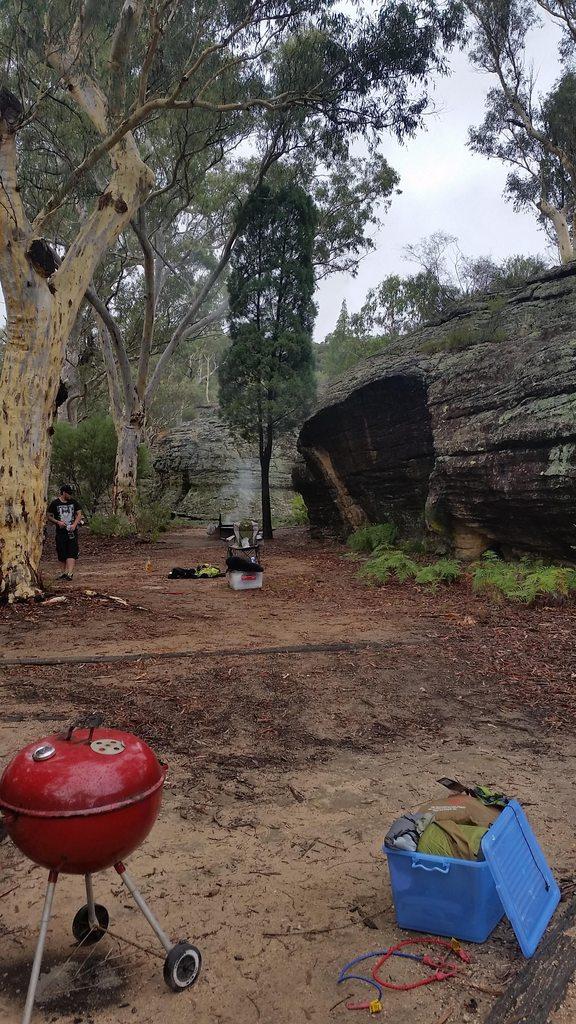
It was my first time there, and I was pleasantly surprised with how nice a spot it was... even if we did invade the place with 20 smelly blokes and 20 cartons of beer...
Plenty of walking, fishing and lots of spacious camp sites both drive-in and walk-in, amongst the rocky outcrops of the camping area. Camping was 6 clams per adult per night. Standard NPWS rate.
The weather was overcast, and light rain pretty much the whole time we were there. I suffered a soggy sleeping bag, and my akubra has taken on an unfortunate shape after getting a tad wet.
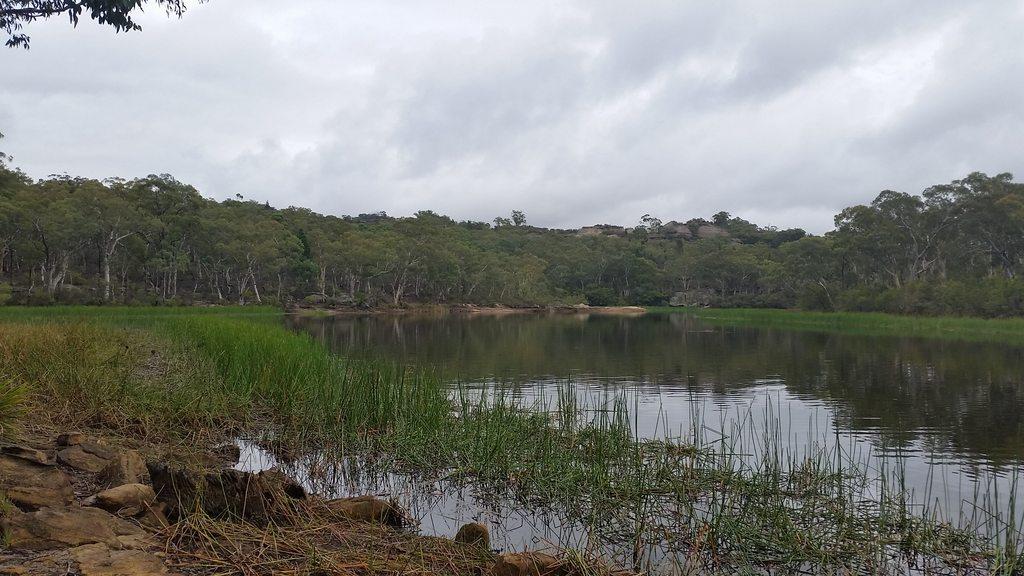
Anyway, let the pics do the talking:
The Park:
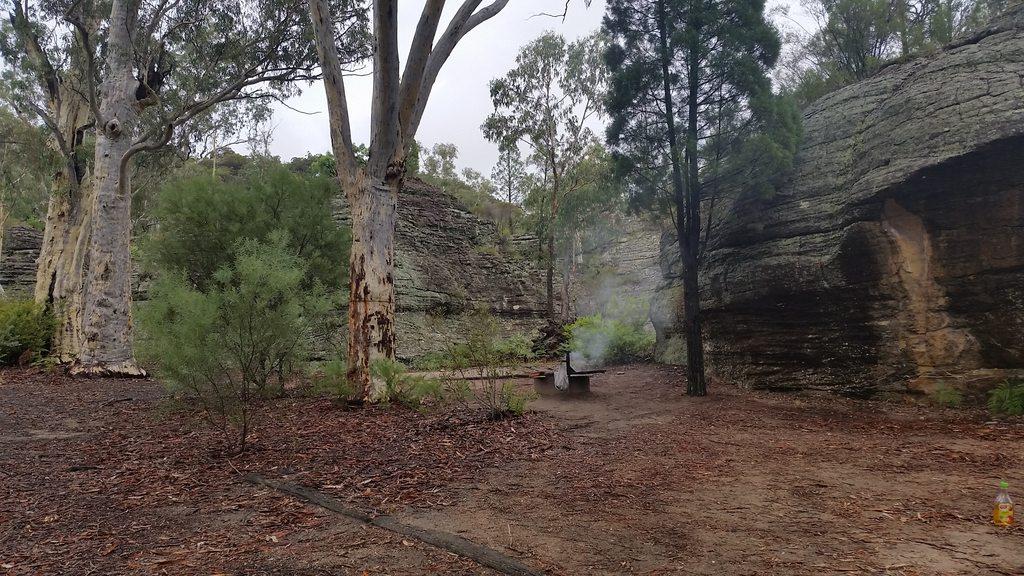
Camp site for the night (the next morning)
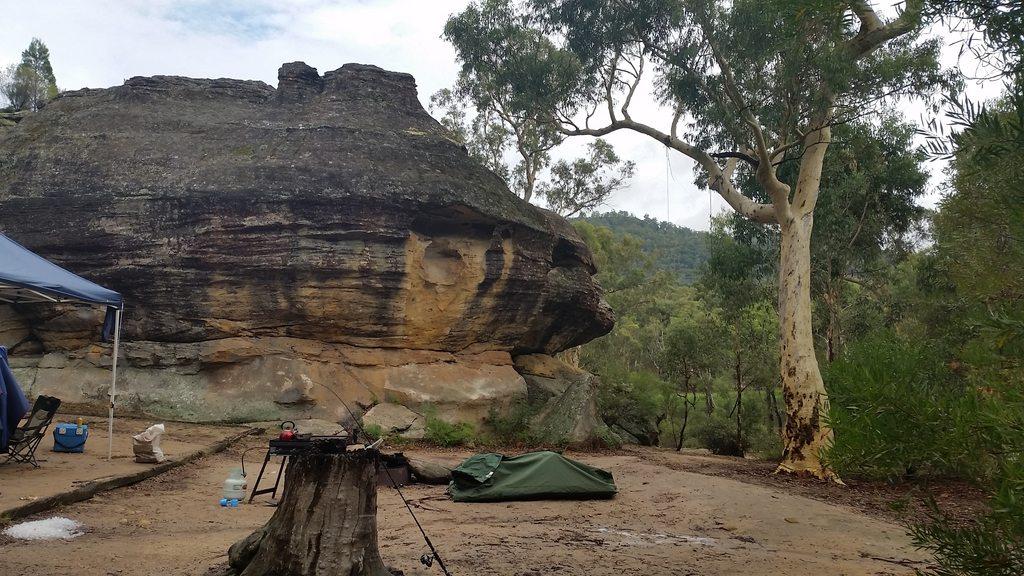
Party posse HQ:
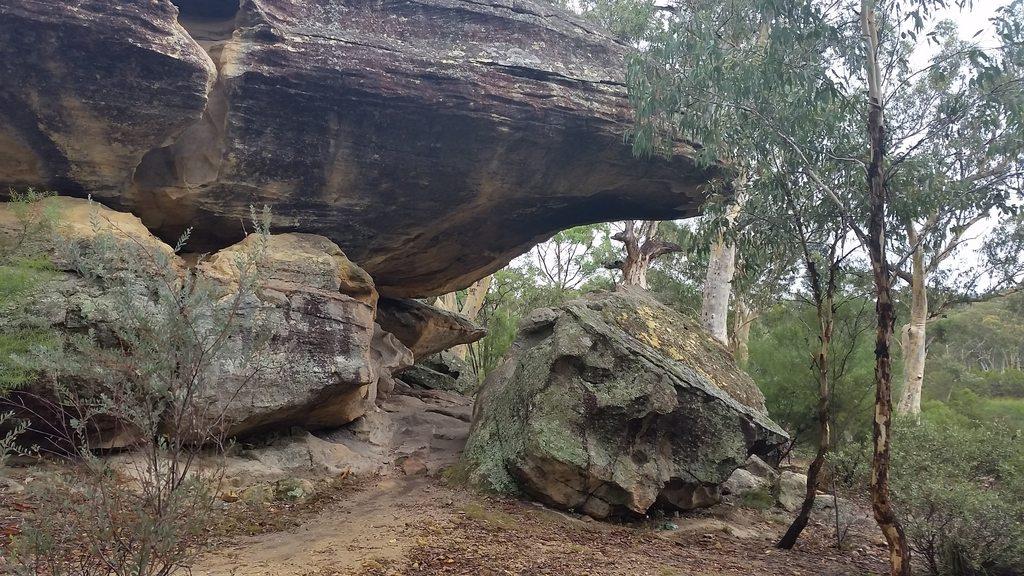
The rave-cave
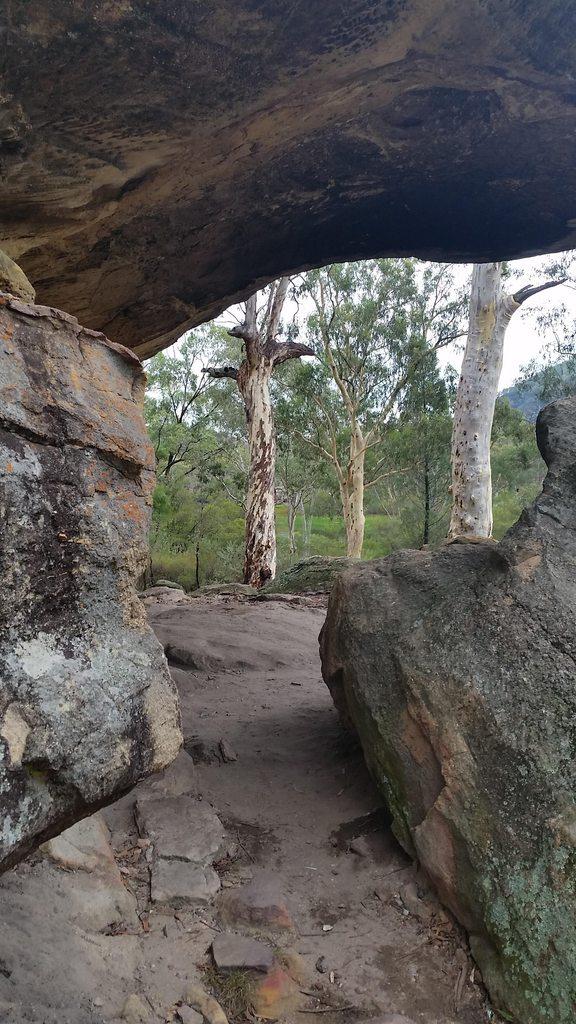
View from the rave-cave
In the tradition of the indigenous inhabitants from years gone by, the Rave Cave (under new management) hosted the wildest bucks party discotheque the NP has seen since 1896.
Many a drink was consumed, along with music of a moderate volume, into the wee hours of the morning. The only problem experienced was an unfortunate incident when one of the blokes stubbed his thonged toe at approx 2am, ejecting a very loud 'statement of discontent' across the otherwise silent campsite. Rave-Cave security promptly showed the patron to their swag, after administering the appropriate form of liquid first aid (bootleg butterscotch schnapps).
The waterway. Nice swimming and good fishing too, I'm told (I'm a terrible fisherman)
In other news, have been trying to track down a squeak in the landy. Happens when turning the wheels, and the engine is labouring on idle (A time of a bit of engine rattling and relatively low noise). There is a slight metallic squeak.
I think I found it. Paint must have rubbed off on the diff guard mounts, as it's not making contact on the pumpkin anywhere I can see. Sprayed it with some WD-40, and will disassemble at a later date to check it out.
Booze Revooz:
Can't stomach a drink after the massive weekend. I think I'll have a water and detox until at least 5pm tomorrow...
-Mitch
'El Burro' 2012 Defender 90.
TopicToaster
Great post Toxic, & great pics.
Thanks, Pickles.
TopicToaster
SubscriberI'm working my way thu some maintenance on the mule which is a bit of a mix between the A and B service, just a general bit of love for the old girl before the long and dusty road to Melrose in April. It should be anoter good event.
What I've seen is either a hallmark LR QC shining thru as a beacon of British engineering, or I've got some problems which may be starting to show up... YOU Decide
After changing the oil a month or so back, I got stuck into procuring the fluids and other parts for the Diffs, T Case and Gearbox.
The LR Maintenance check sheet 'recommends' the following service intervals:
Gearbox oil to be replaced at 200,000 km.
Transfer Case oil to be replaced at 80,000 km.
Axle oil (F/R) to be replaced at 80,000 km (Presumably final drive / diff oil).
After reading this, Bollocks said I. I think I'll change these a little more regularly than that, thankyou very much...
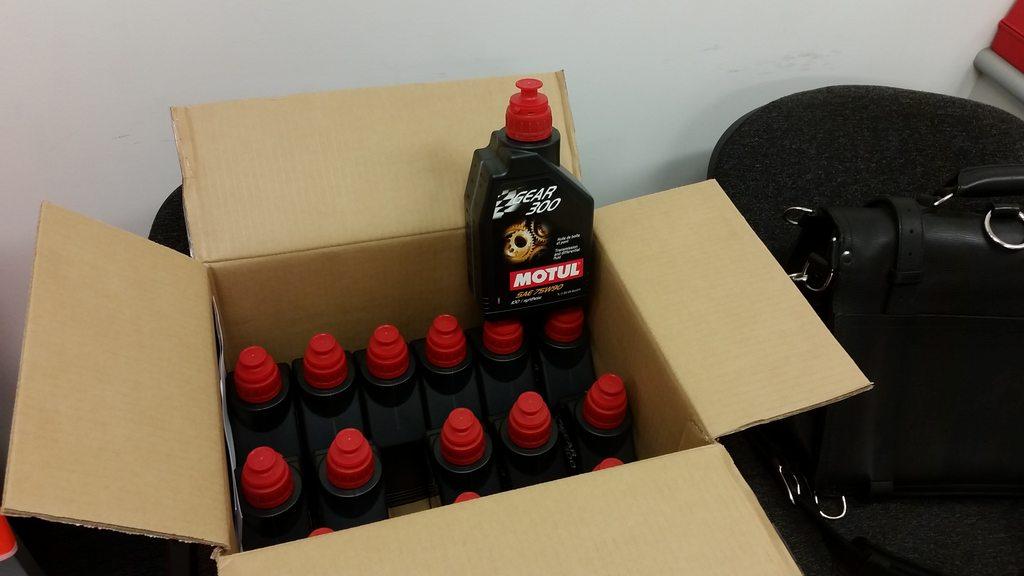
I did some reading on a suitable oil for the diffs, gearbox and T-Case, and made the decision to stick with Motul Gear 300 75W90 Gear oil as a suitable option for all 3 compartments. Big shout out to the participants of This thread for their valued input on this discussion.
So after some discussions, Andy130 and I pooled resources and did a mini group buy of oil via a very good online vendor- clickable Automotive, where the motul oil was procured for $32 per litre, with a capped shipping price of 10 bucks.
Winning.jpeg
I must say, getting new oil is like the car-guy equivalent of getting a new pair of sneakers, or a sick new t-shart, or something like that. Love them feels.
I'm going to babble on a bit below, but if you stop here, I won't judge you!
One take home message though, is that any puma owners out there who are on the fence about doing a home service job yourselves, please reconsider, and read on below to find out more. It's not as hard as you might think.
Changing Diff oil:
After chasing down the weird noise I found in a post above, I removed the diff bash guard to narrow it down to the diff itself, or the guard. I Believe it was jut some metal-on metal squeaking from the top support plate of the diff guard, which should disappear when I reinstall it. I was thankful it wasn't the diff!
Puma diffs have both a fill and a drain port which uses a 1/2 square drive fitting. Spare a thought for the Jeepers out there who only have a fill port, and have to remove the diff cover to drain their fluids!
I opted to buy some magnetic drain sump plugs for the diffs, as the Puma (from what I've read, and confirmed from what my vehicle had), DO NOT have the magnetic Diff sump plugs like their older brothers.
I neglected to get a pic, but the Part number you want to source for your magnetic plugs is LR PN TYB500120. These are easily sourced online or from your favourite parts supplier, or even the dealership.
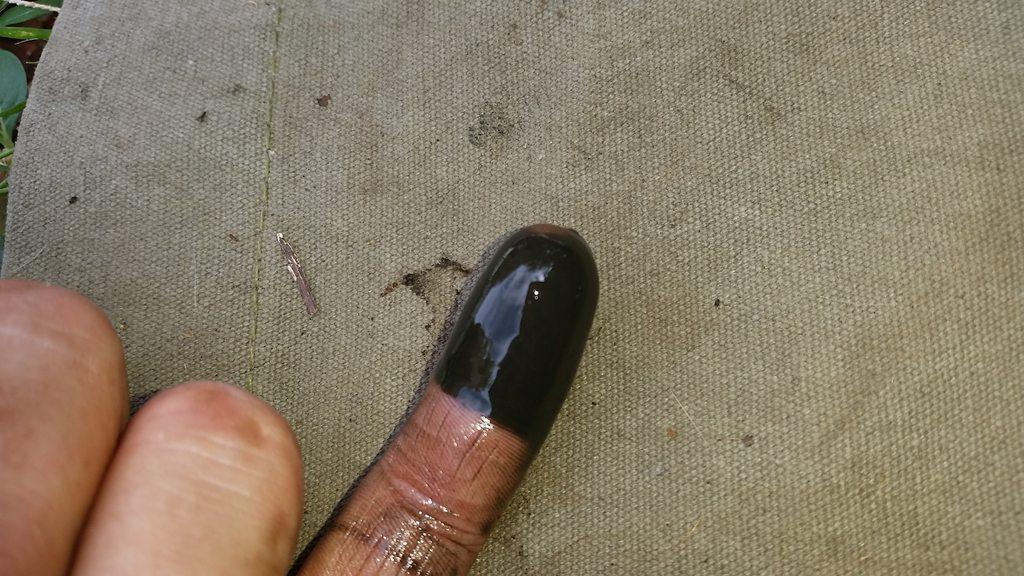
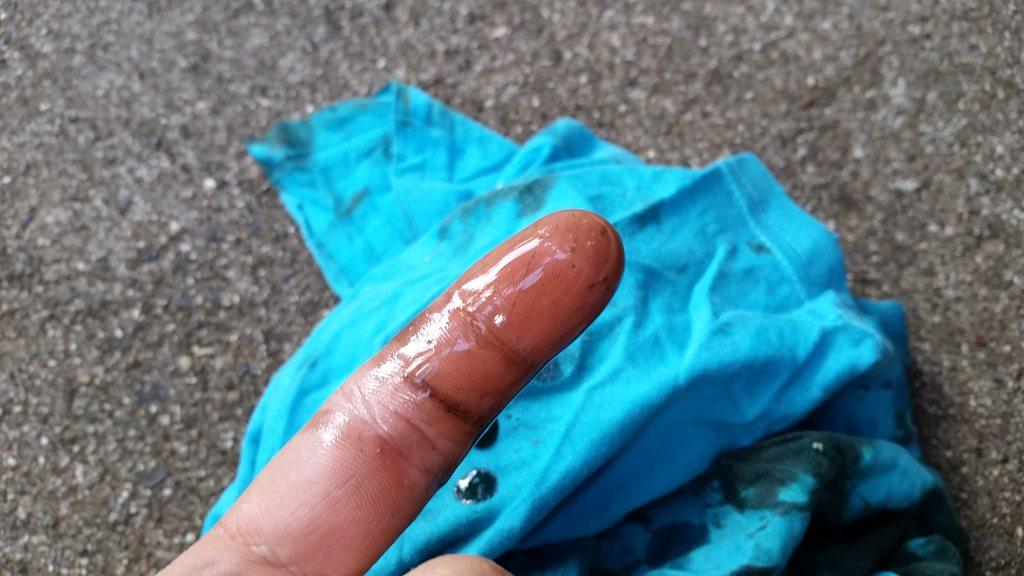
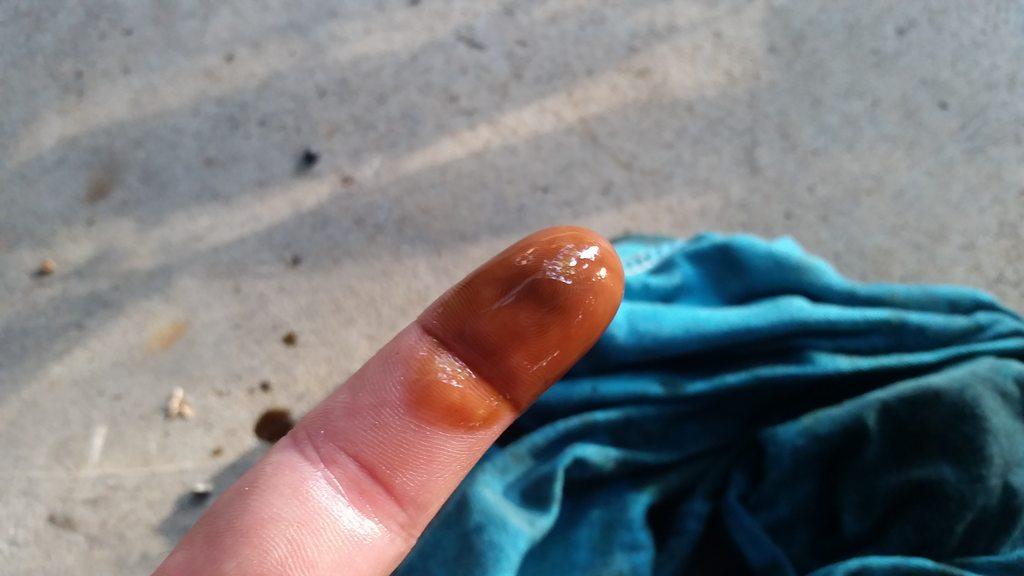
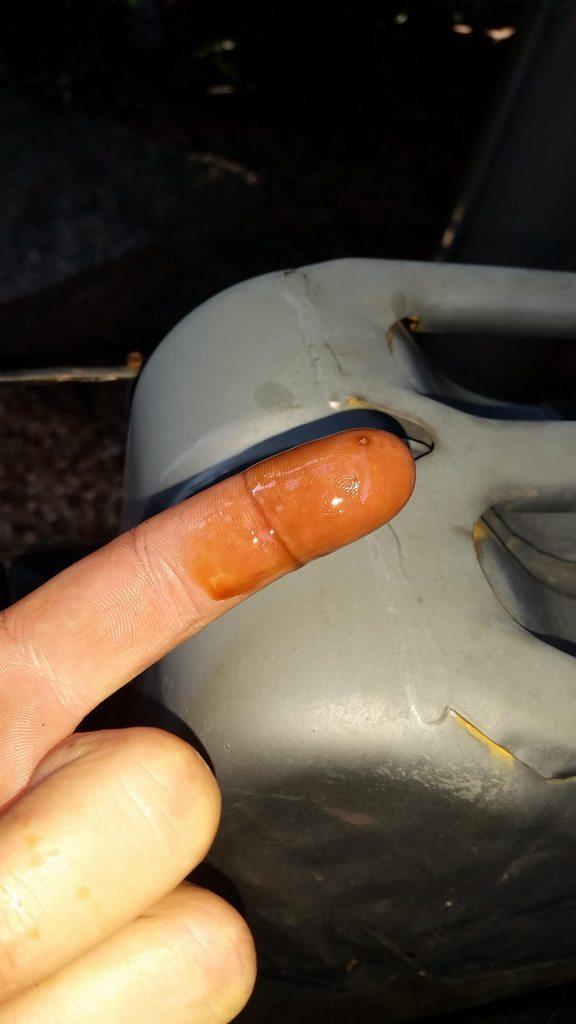
As part of the noise tracking process, I inspected front diff oil levels and found it to be of a reasonable fuild level, but a bit of an 'off' colour:
The rear diff oil was much nicer to look at...
From what I'd read, the front diff depletes the oil at a faster rate than the rear. I didn't really expect such a marked difference though.
This pretty much cementedmy belief that I'll change all fluids out and have a known good starting point for future changes.
While I can't substantiate my case, I seem to recall the last B service I specifically requested a 'change' of all the fluids, but it seems they were only inspected, as the condition shows, and also the drain plug had never been undone by the looks of it (solid set thread sealant, and no signs of EVER having a socket used on it as per the paint condition inside). Live and learn. On the plus side, if it's FUBAR in 10,000 at my next oil service, I'll know I have a bigger problem than a simple lack of maintenance. Golden rule- know your vehicle intimately.
Transfer Case oil change:
After the diffs, I moved to the T case- the LT230Q in my case. This also good a solid dose of the Motul Gear 300 gear oil.
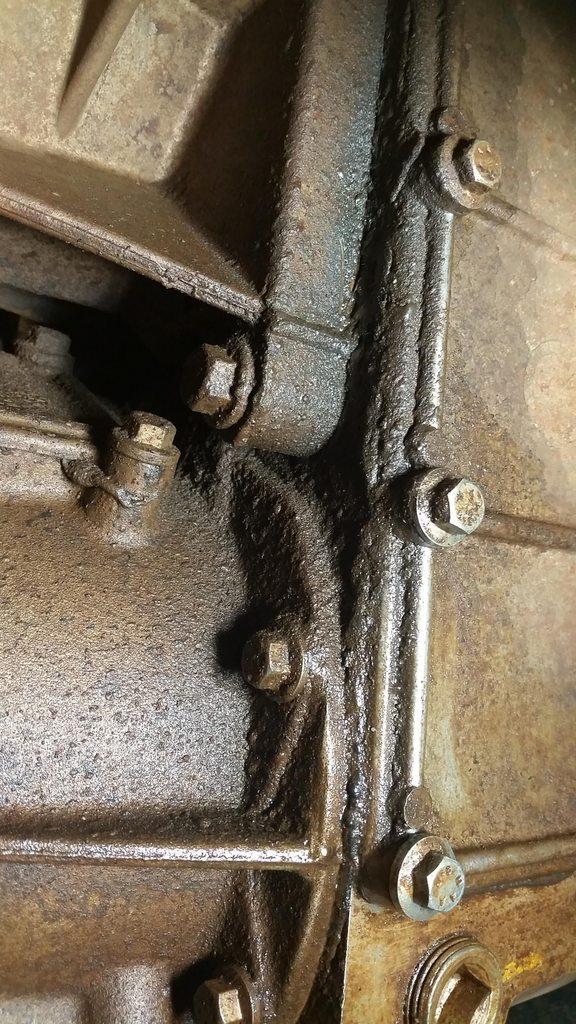
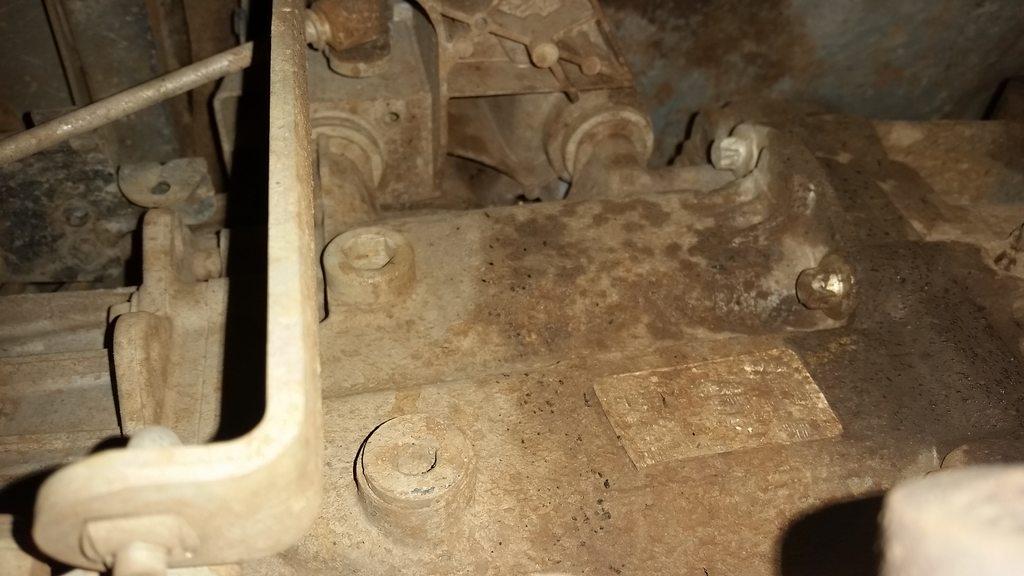
While pokling around under there, I noticed a bit of Land Rover Character shining thru.
The flat plate on the right is the inspection plate which holds the gearset behind.
The top piece is the MT82 gearbox (I think this might be where the intermediate shaft lives?)
And the bottom part is where the front driveshaft connects to (front output).
The astute amongst you might think it's a bit oily. I'd be inclined to agree.
Before this pic, I wiped off a drip of oil which had accumulated on the bottom bolt head, just near the drain plug at the bottom of that shot. It hadn't returned after 5 days idle... so I don't think it's a 'major' leak.
Furthermore, the T case oil level was fine- when I released the fill plug, the oil flowed out in a thin, steady stream (although the car was on a slight incline- maybe 1-2 degrees).
PRO TIP- I found a 1/2" wobble bar extension is a good fit for removing the fill plug on the LT230, as it sits partially obstructed by the hand brake drum assembly.
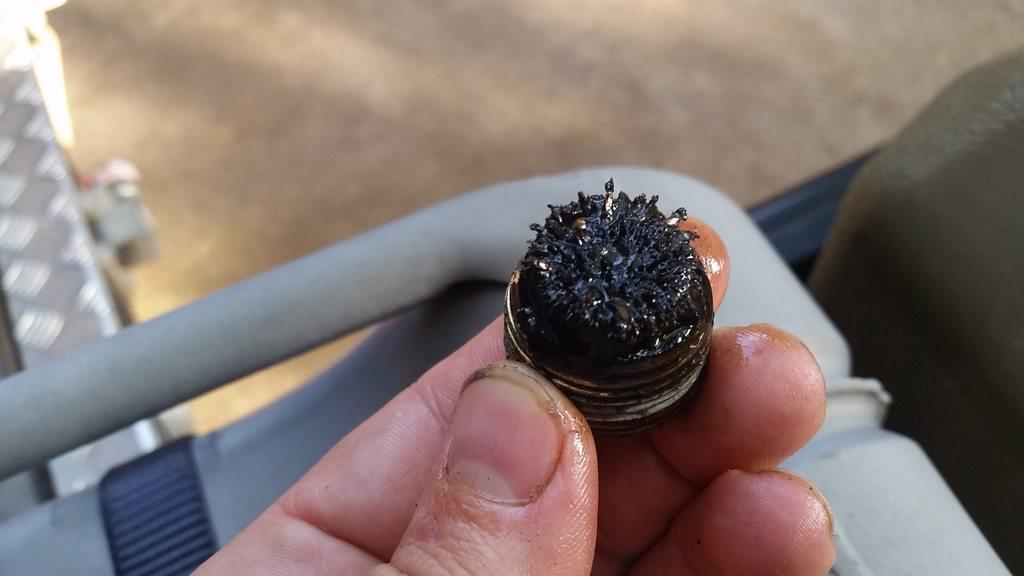
Upon draining, sump plug was a bit rough...
Specs all <1mm.
If I were to think of a time that this might have happened, I did have a bit of a moment once when the CDL dropped out on a bit of a rough climb, and I uncerimoniusly whacked it back into CDL with the T case showing its discontent with a bit of a grinding noise...IT happens
Drained Oil condition was visually OK
Short story is this got a 2.3L dose of Gear oil and the factory magnetic sump plug was reinstalled.. I'll degrease the 'box and monitor the leak location and fluid level.
Gearbox oil change:
I'll get around to the MT82 gearbox drain/fill thru the week. I hope I don't find anything crazy there...
For this I'll need a allen head, M8 IIRC, and this will take the same oil. No need to dismantle anything crazy to get to the fill or drain points, although the fill point is up and around the exhaust and drive shaft, so will be a bit tricky.
If my spidey sense is cooperating today, I believe the fill point for the MT82 is the lower port right near the elbow linkage below:
On the topic of T-case oil leaks...
I'm not sure if it is sourcing from the intermediate shaft. From what I've read, this lives up in the gap of the space pictured above, and can oftentimes wear out- as it is sealed with an O ring seated in soft aluminium. Ashcroft and some of the australian guys install a steel sleeve to reduce wear. There is the tell-take sign of oil crud and dirt around a round shaft looking thing, but it is not dripping wet...
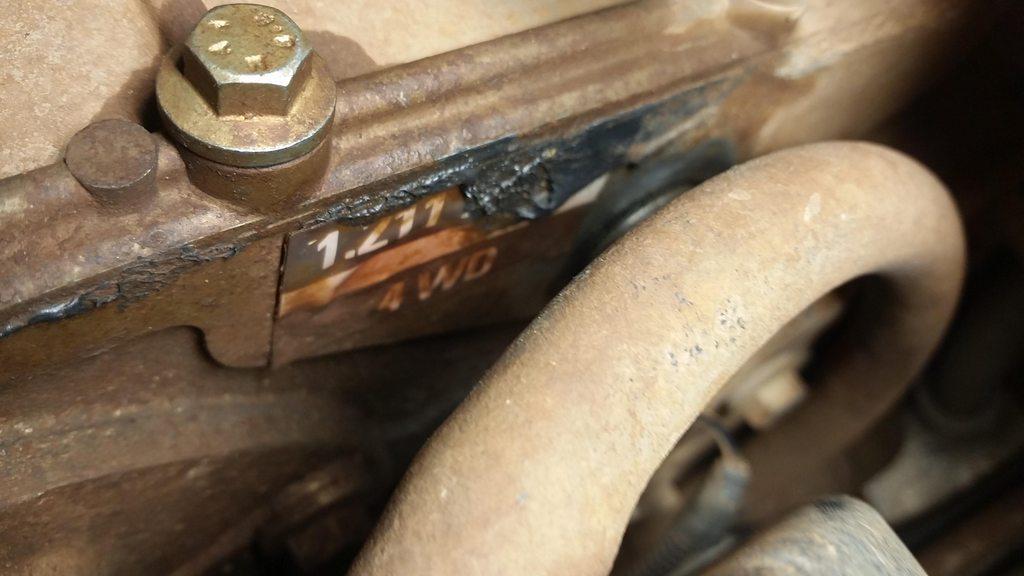
I also noticed that there was some non-factory looking silicone on the inspection plate cover:
If the time comes to investigate this further, It'll be a box out job, I'll get it sleeved, install an Ashcroft ATB centre diff, and do the input shaft too... Hopefully bomb-proof it for the future.
Untill next time, work hard, and be good to your mother...
-Mitch
'El Burro' 2012 Defender 90.
TopicToaster
SubscriberI've been doing some prep for the drive to Melrose.
Finished off the MT82 gearbox oil change this afternoon.
Not difficult in the slightest. I give this job 3/10 spanners- slightly harder than changing windscreen wipers.
Tools required:
2.2L of a gear oil of your preferred flavour (I used Motul Gear 300 75W90 synthetic oil)
Drip tray suitable for approx 2.2L
M8 allen key, or inhex socket
Tom Thumb pump for pumping the oil in (or equivalent- More below)
A rag for cleaning the dirt off the plugs before removal, and clean-up of drips after
Torque wrench, or calibrated bicep for the fil/drain plugs
Steps to success
- Undo fill plug first with M8 allen key. This is a right hand thread, so lefty-loosy!
- Position the drip tray under the drain plug. This is just offset to the rear of the gearbox X-member under the car.
- Undo drain plug with M8 allen key. I used a cut bottle as a disposable funnel to direct the oil into the drip tray a bit easier. Prevents splashback.
- Let drain for 5 minutes or so. Being a 75w90 oil, it's pretty fluid at normal temps. If you like burns, warm the car and gearbox up first. The exhaust is great for that gnarly forearm scar you've always wanted!
- Wipe excess oil and reinstall Drain plug. Torque to 50nM if you desire. I think of this as equivalent to a solid single-handed tug on a standard 300mm 1/2" ratchet handle
- Using the tom thumb oil pump or similar, fill gearbox to 2.2L capacity. This is not an 'overflow' fill. Be careful not to get any dirt or mud into the gearbox when inserting the filler hook into the fill hole.
- Once full, insert fill plug and torque to 35nM. You'll need a ratcheting style torque wrench with a 150mm extension and a 8mm inhex to get to it. A ball-end inhex would be even easier. I just tightened it until it was snug. Ain't nobody got time fo' dat.
Oil condition after the draining
At least it wasn't shiny. I've had that with my 300zx once...
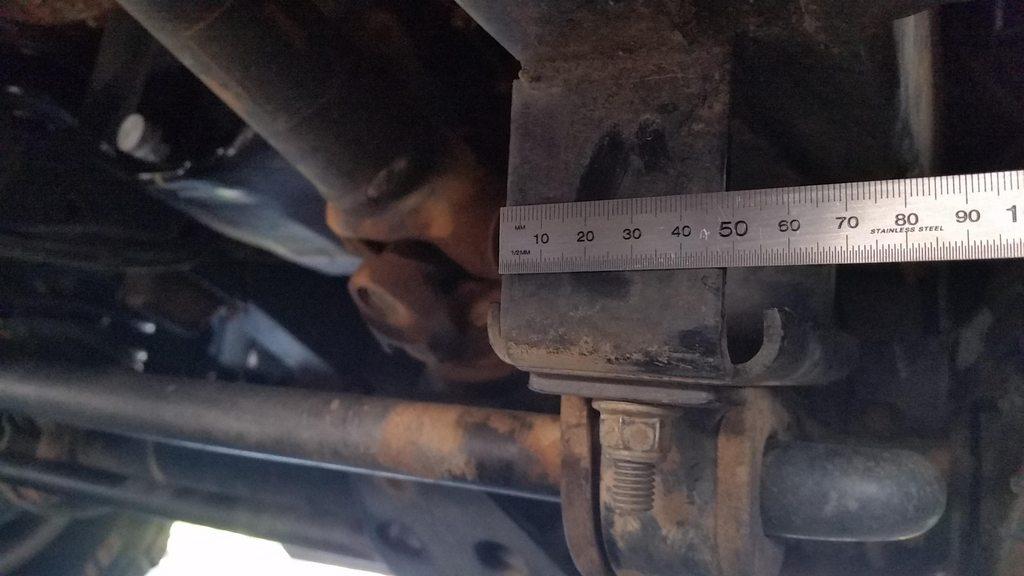
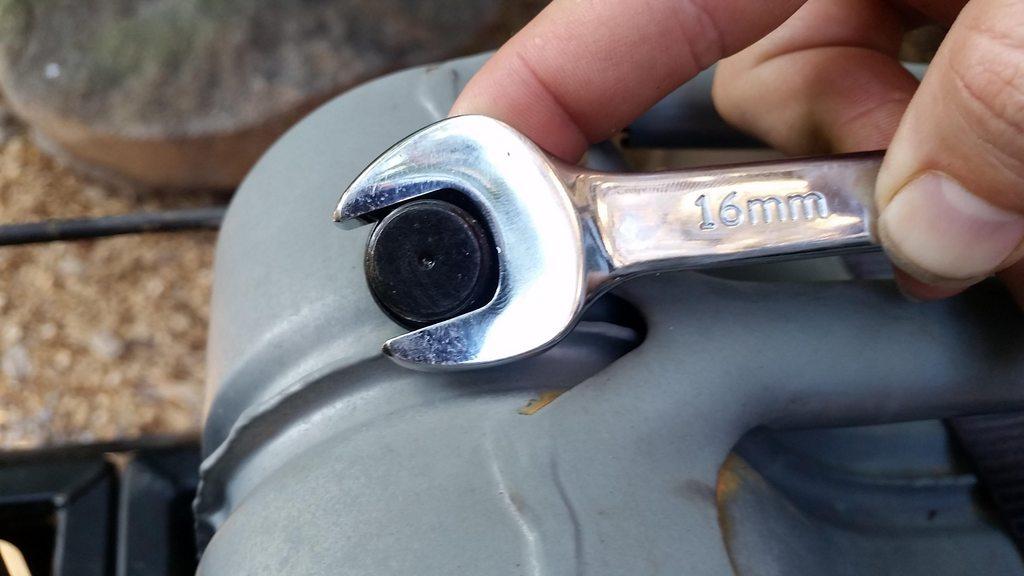
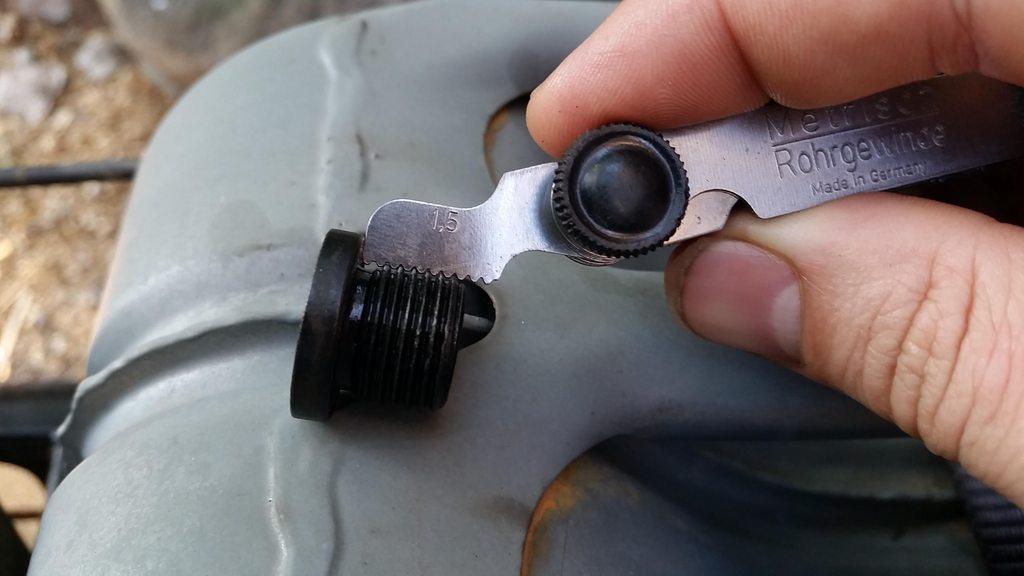
MT82 sump plug thread dimensions
(Also applies to the fill plug thread dimensions- they are both the same)
The MT82 drain plug on the Defender uses a M8 Allen key. The thread is M16x1.5. This was a crude measurement as you can see below, but being a german 'box, I'm guessing it's metric and not some other imperial thread equivalent (5/8"17 TPI or some such crap)
As mentioned above, the MT82 service fill is 2.2L.
Alternative to tom thumb style oil pump
In the past, I've had successusing a sturdy bottle, a length of poly dip tube, and an air source (compressor, worst case, a foot pump) to create a makeshift oil pump. In the lid, drill 2 holes- one that is a snug fit for the tube you are using, the second big enough to put a air gun rubber cone fitting in. Dip hose into oil, pressurize the air space in the top, being careful not to explode the bottle, and fill away. It works in a pinch, but these small tom thumb pumps are about 30 bucks these days, so not really worth the hassle!
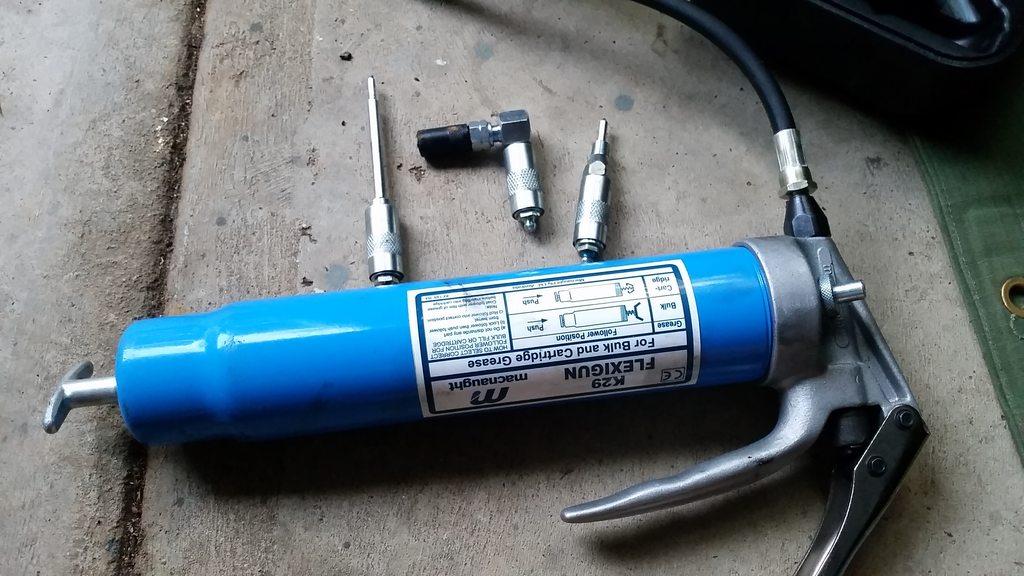
Greasin' my shaft
I also took the opportunity to grease the prop shafts. It was probably the first time where I didn't have much drama getting the connections on. I must say though, the long pinpoint coupler is great. Right angle job holds it's own too.
Haven't found a use for the short coupler yet... it seems a little to fat on the tip to couple properly with the uni joint zerk fittings.
I usually fill until it starts coming out of the joint, then wipe up the excess.
Some questions:
Is it possible to over-grease these fittings?
Is there any other grease points on the puma other than the drive shafts?
Does the prop shaft slip joint need grease? Ie use a grease needle to fill the rubber boot up? (Forgive my lame questions)
In other news, got the pink slip on the Zed done yesterday. How this thing keeps getting registered I don't know... So lock up your daughters, the Z will be on the prowl once more, racing unsuspecting excels up to 50km/h along Peel street. Pimpin' ain't easy. Other upcoming Z maintenance will include a timing belt kit, need to rebuild the Power steering pump, also need to put bigger 740CC injectors in it to stop it leaning out on boost... I've got some upgraded cams, valve springs and adjustable intake/exhaust cam gears to go on too... but not sure if I'll push that envelope just yet... I'm not too confident tuning and I'm not keen on grenading the motor in the Z out of my own incompetence.
-Mitch
'El Burro' 2012 Defender 90.
Loud Mouthed Rat Bag
Answer to first question: Your method is the same as mine for unis, splines and ball joints etc. It's alway worked for me.
I once over greased a brand new set of wheel bearings. It was back to SKF a few days later for another set. I was young and stupid then.
There's a "Z" sitting on my Brother's front yard. Every time I see it, The idea comes to mind that I should put it on a traitor and drag it to Tamworth.
Cheers, Billy.
Keeping it simple is complicated.
TopicToaster
SubscriberI've spent the past 6 days at the Tuff Dog Tuff Truck Challenge, held in Milbrodale in the Hunter Valley. The event is held on a private property which has been used for 13 or so years for both the tuff truck challenge, the King of the hunter offroad race, and a few other events.
This event is a 4wd competition for highly modified vehicles which retain 600mm of original chassis, and retain the look of the donor vehicle in side and front profiles. With such broad rules regarding modifications outside of this, there are some wild rigs.
A few months ago a mate of mine requested my help as a stage official for a track. Him and his father were asked to rebuild/re-design a track named Mini Wirraba- a small, technical track which has 2 tight 90 degree bends, 1x 5 foot drop-off, 1 off camber (45 degree) bend and a devilish climb off this camber up a rock ledge across the top of the 90 point gate, which is a near vertical climb with a breakover angle on the tip that will bring even the most serious vehicle unstuck. It's a wild track, with just the right amount of technical driving needed to get thru, while still having the elements that the punters want to to see (big climbs, potential vehicle carnage and extreme angles).
The event was a non speed event, where drivers pass thru point 'gates' to win up to 100 points on the track, while having points deducted for the use of rear steer, reversing, hitting gate or marker posts across the track. My job in the whole lot was to run around the have eyes on the parts of the vehicle the other stage officials couldn't see. All in all it was a hoot, and would 100% do it again, whether I get the opportunity to continue on as a stage official, or work as event staff or pit crew for one of the teams (there are LOTS of breakages!).
Anyway, I'll appease the masses with a landy pic, then get onto what I think is the good stuff
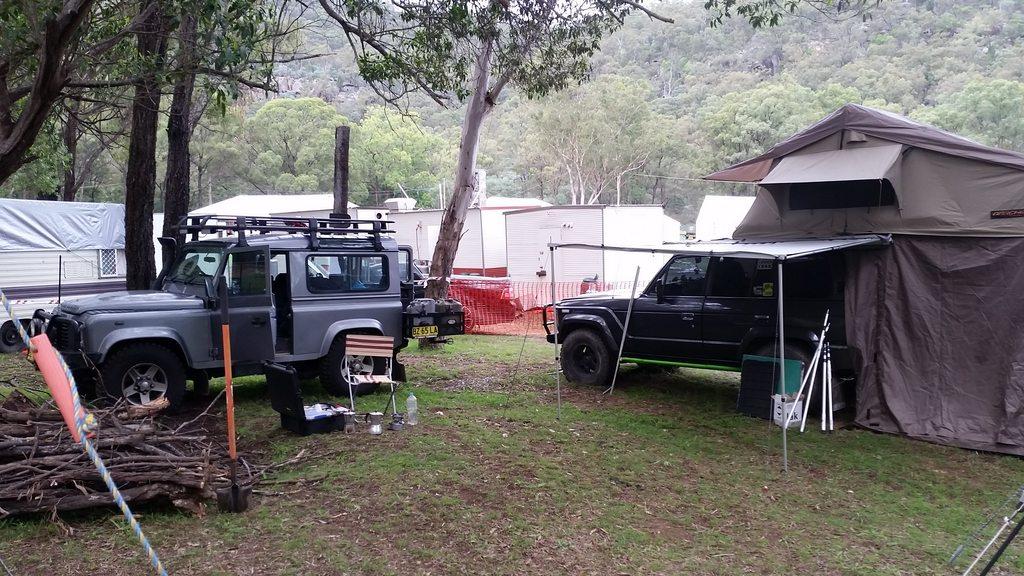
Rolled into camp wednesday night as the event was still being set up.
We were right in the middle of the action, just beside the catering vans. Setup the swag, and unpacked a few boxes from the mule.
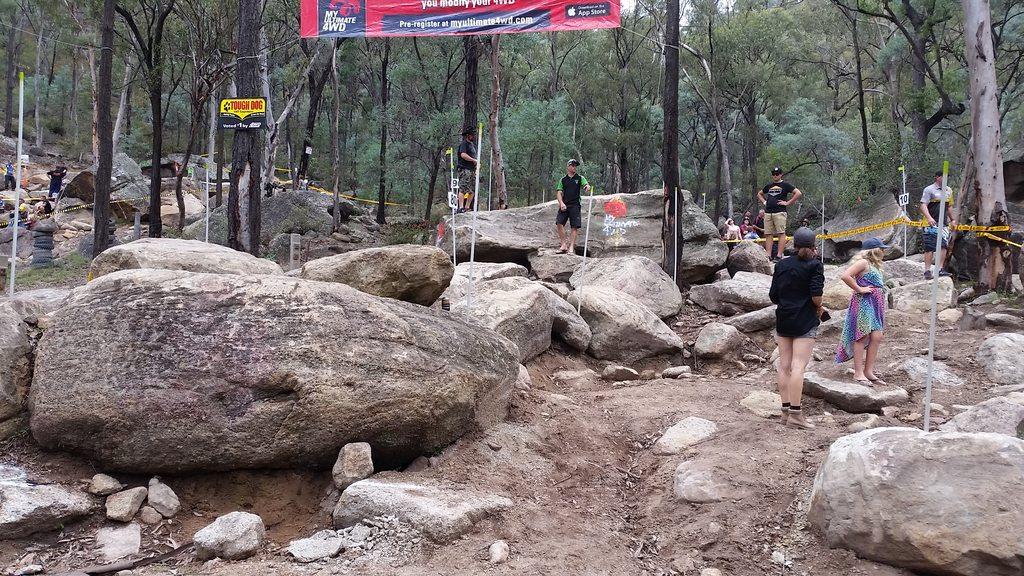
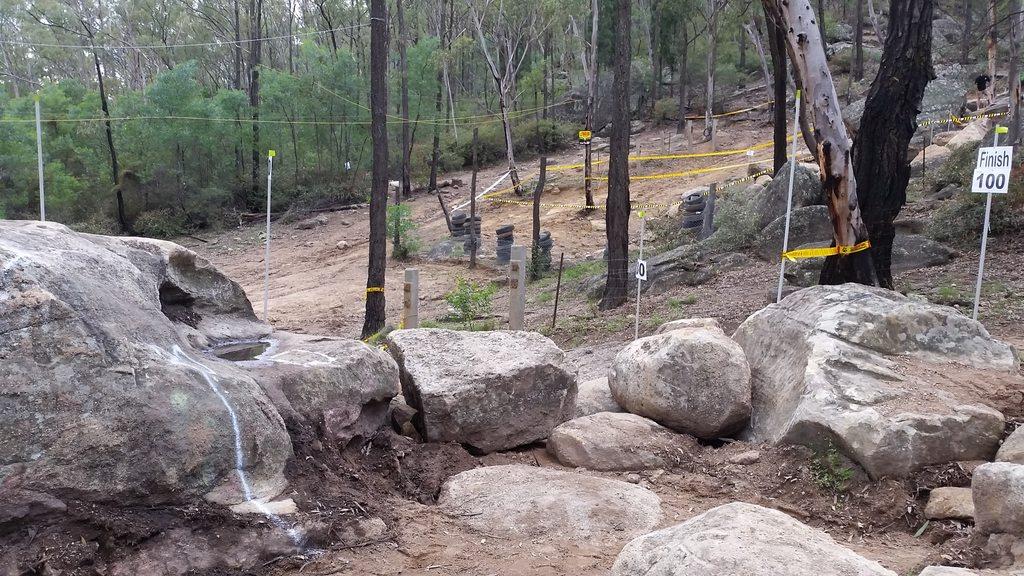
This was our track, as viewed from the bottom of the hill near the start gate.
Vehicles would drive up the hill to the 10 point gate, then behind the big Rock with the sign marking on it.
Competitors would drive around to the 20 point gate, then drive over these two boulders which mark the 30 point gate
(the track also intersects here- the finish line is on the RHS, and the other side of the big boulder climb is seen on the left).
This is looking down the line of the 30-40-50 gates. Some big boulders to climb and a very tight bend which only the 4wheel steer rigs (or vehicles with rear disconnect) could manage to navigate without a reverse penalty.
By the end of the day, this was all chewed out with quite a lot of wheel spin from rigs with 42"+ tyres.
The 50 point gate was a 5 foot drop off at the end of the line.
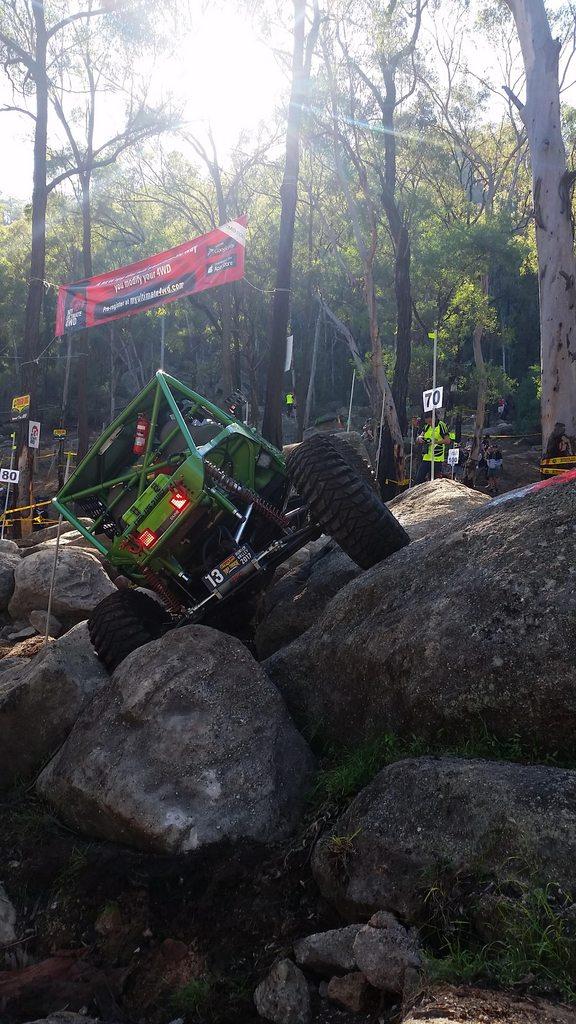
The 60-70 point gate was a rock garden section with a massive off-camber side angle to negotiate around a marker pin that forced competitors to ride that rock high.
Some people also took some interesting lines thru these gates, dropping some wheels in some very precarious spots
After this gate, the 80-90-100 gates were up and over the top of the rock face. A great spectacle for the crowds to hear and see some of the cars attempting this near vertical climb after being unsettled thru an off-camber gate and climbing a sharp 90 degree turn.
That's about the basic layout of the track. Next post will be more pics and videos with some of the rigs!
-Mitch
'El Burro' 2012 Defender 90.
TopicToaster
SubscriberSome short videos I managed to capture throughout the event.
This was our 50 point gate. An interesting drop off which was a piece of cake for most cars, but a little more sketchy for the shorter rigs like the suzuki variants.
This video shows the level of engineering in some of the builds.
Front disconnect allows the drive to be cut from the front wheels, allowing the brakes to be applied, and the rear end driven to skid steer the vehicle into the right position. Coupled with 4 wheel hydraulic steering, these vehicles can drive through some very tight obstacles with great precision. You can also see the level of articulation in this vehicle. Incredible.
-Mitch
'El Burro' 2012 Defender 90.
 Posting Permissions
| Search AULRO.com ONLY! |
Search All the Web! |
|---|
|
|
|


Bookmarks