Pulled the trigger on these recaros last night. Remanufactured. Specialist M. Mine will be exactly like the ones in the picture with cloth center and leather surrounds. I won't have the Land Rover emblem. I will have recaro in black on one of the ribs. 8 weeks away.
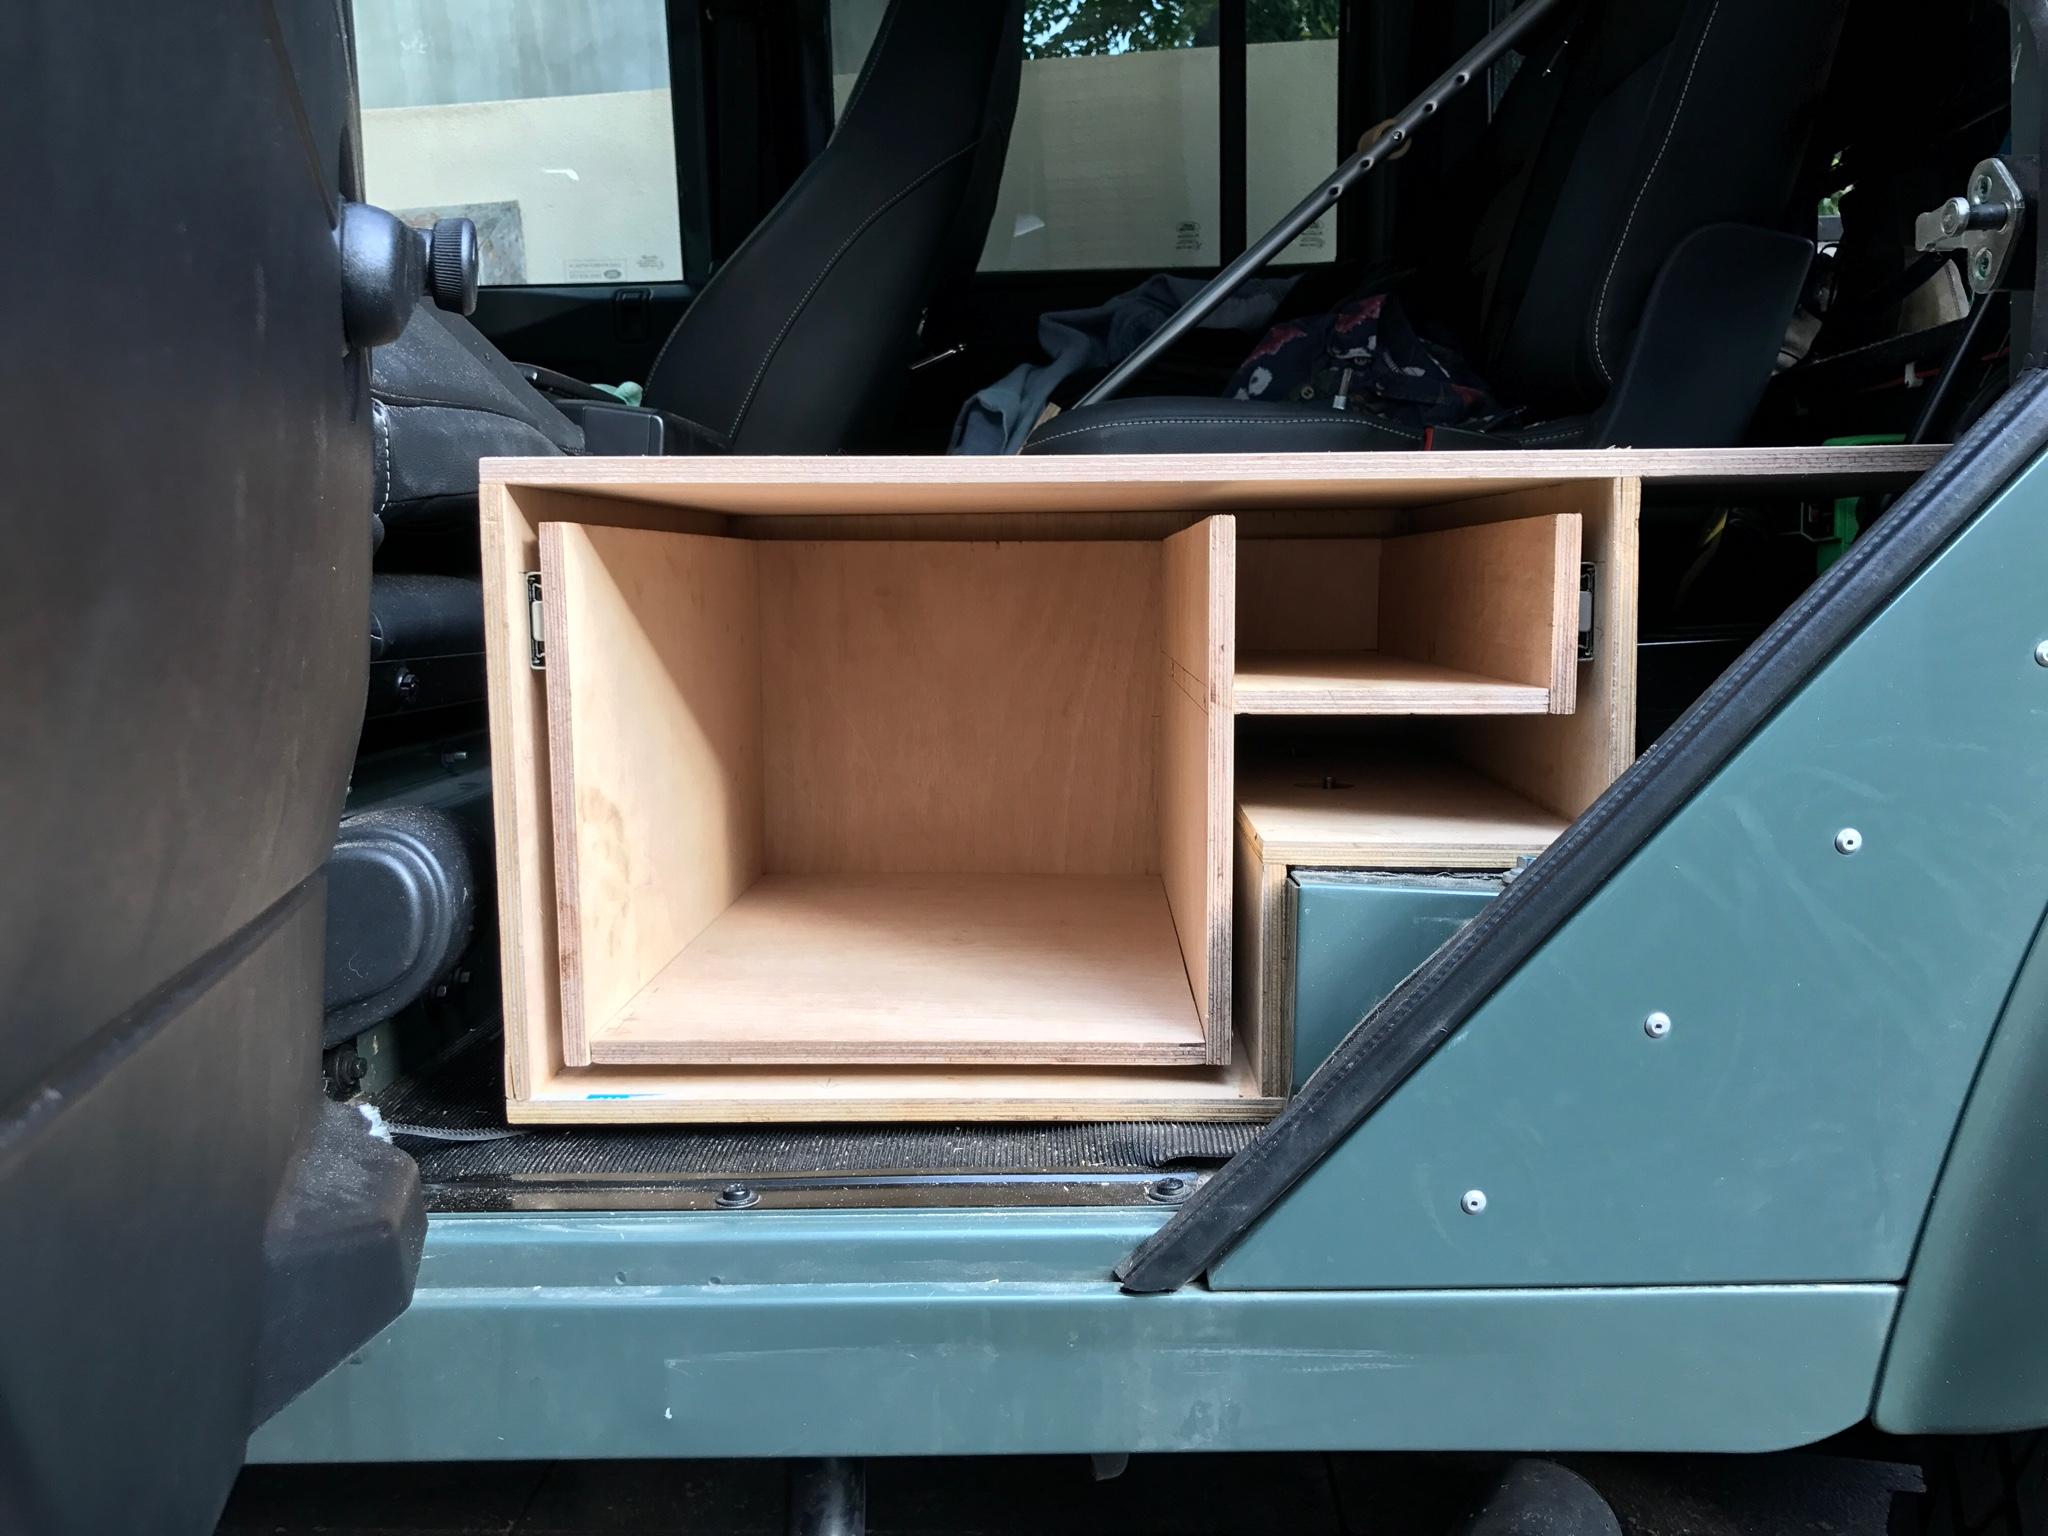
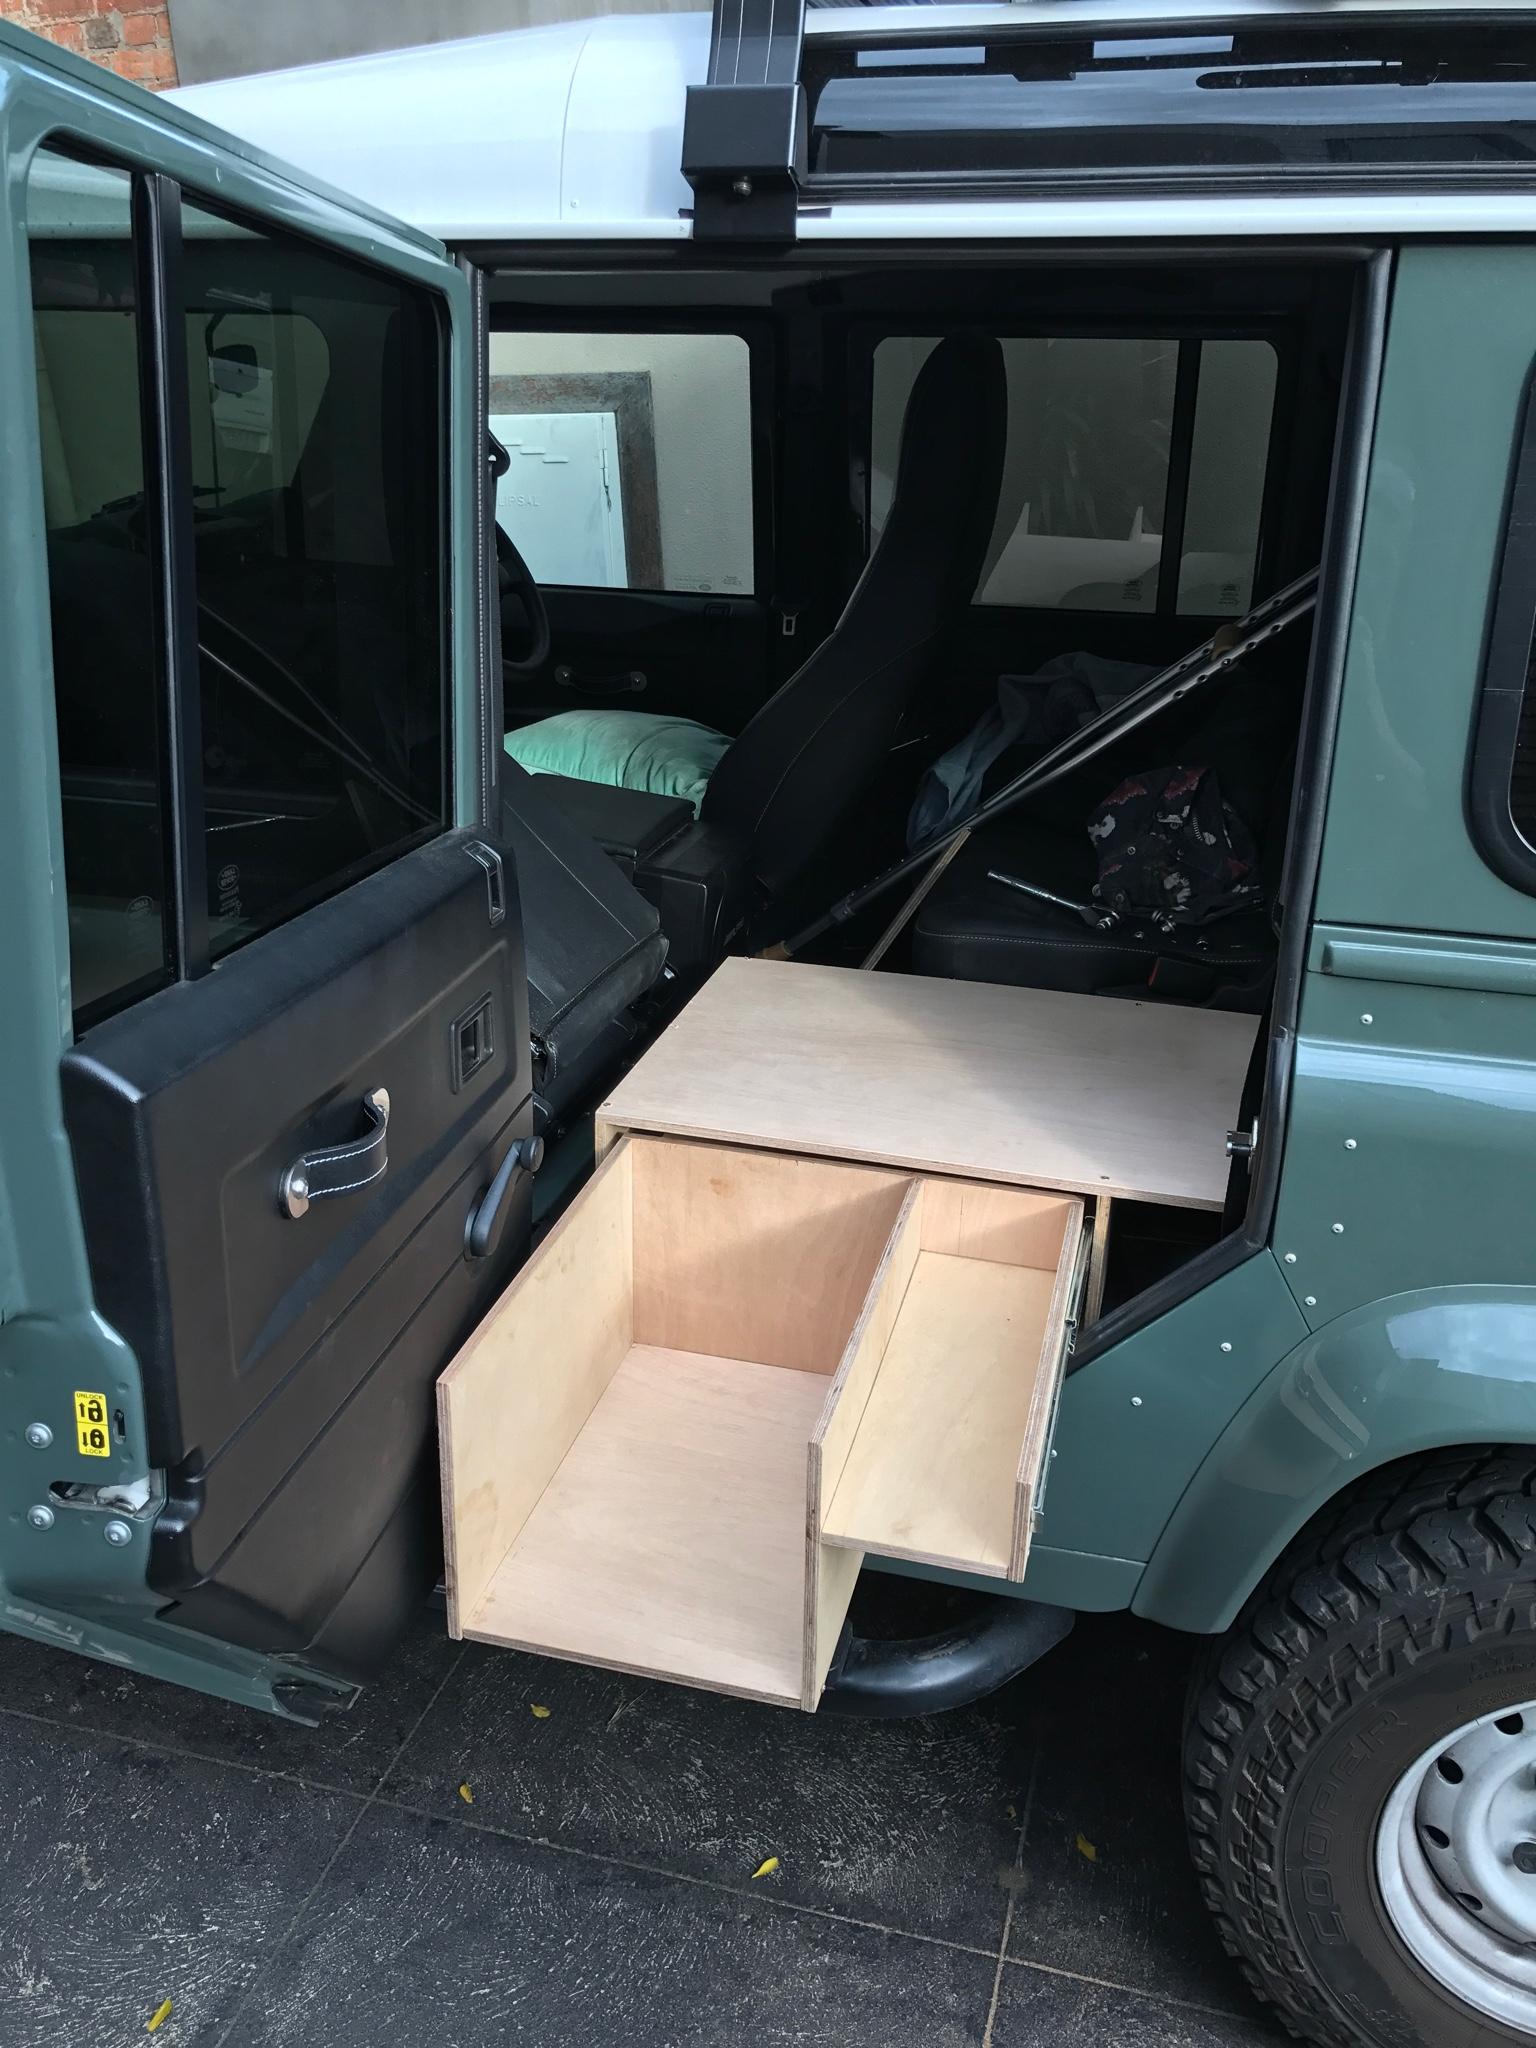
I got most of the way through building a fridge platform and drawer in place of the passenger side rear seat. The 40 of the 60/40 split. The plan is to use the larger part of the drawer for food and the smaller part for cutlery etc
I'll be finishing it with black paint and marine carpet to match the Drifta drawers I have in the rear
Got the word today... My dual cab has been cleaned to AQIS satisfaction (only cost me $286) and released from both quarantine and customs. Will be trucked from Port Kembla to a workshop in Sydney for the compliance plate and rego on Wednesday!
Wooohooo.... so close now!
In case you all forget what it looks like....image.jpg
Neil (Really shouldn't be a...) Grumpy old fart!
MY2013 2.2l TDCi Dual Cab Ute Nulla tenaci invia est via
Dave, (?) not trying to shoot you down in any way, and please don't take this the wrong way, but, would it be more beneficial to have the rear slider on the "main" box section as opposed to on the cutlery part? Just thinking that food items can get rather heavy, and the strain may be a bit much for that section. (??).
Yeah I know what you mean Chops. I decided to go ahead with the easiest possible solution first. I'm going to add a few more supports under the cutlery part and with the front on it'll be a pretty strong box. Have left a 13mm gap on the side of the main box between the carcass so can install a runner there if needed.
Can't recall any specific instance, but it does cop it's fair share of pedal buried to the floor off-road, and has been on 33's since it was almost brand new.
Here's one of my shed ornaments,
The metal has reached its yield point and can't spring back anymore, these are the ones that snap on the kerb at the servo and you wonder why.
I took to the seat box this weekend just gone and mounted the air compressor in next to the battery. Should be a lot easier to use and it free's up some storage room in the deep cycle battery box in the rear. Cut a template out of cardboard, ( used the back of an old calendar) cut black colourbond sheet to suit, folded a feather edge for strength . Cut out the seat box lining, cut down the template 10mm all round and marked it onto the seat box, cut with a grinder, cleaned the hole with a file and lined it with some 7mm pinch weld I had lying around. fitted hinges to the new door and fitted the key lock. riveted the hinges to the seat box, then put some 3mm foam tape to seal it. Then glued the original seat box lining to the colourbond for effect. Removed the wheel chock and fitted the compressor in its place, ran the air hose around the battery. Just have to fit a new on/off switch somewhere just inside the door and leave the original one switched on. Pretty happy with the outcome


 Reply With Quote
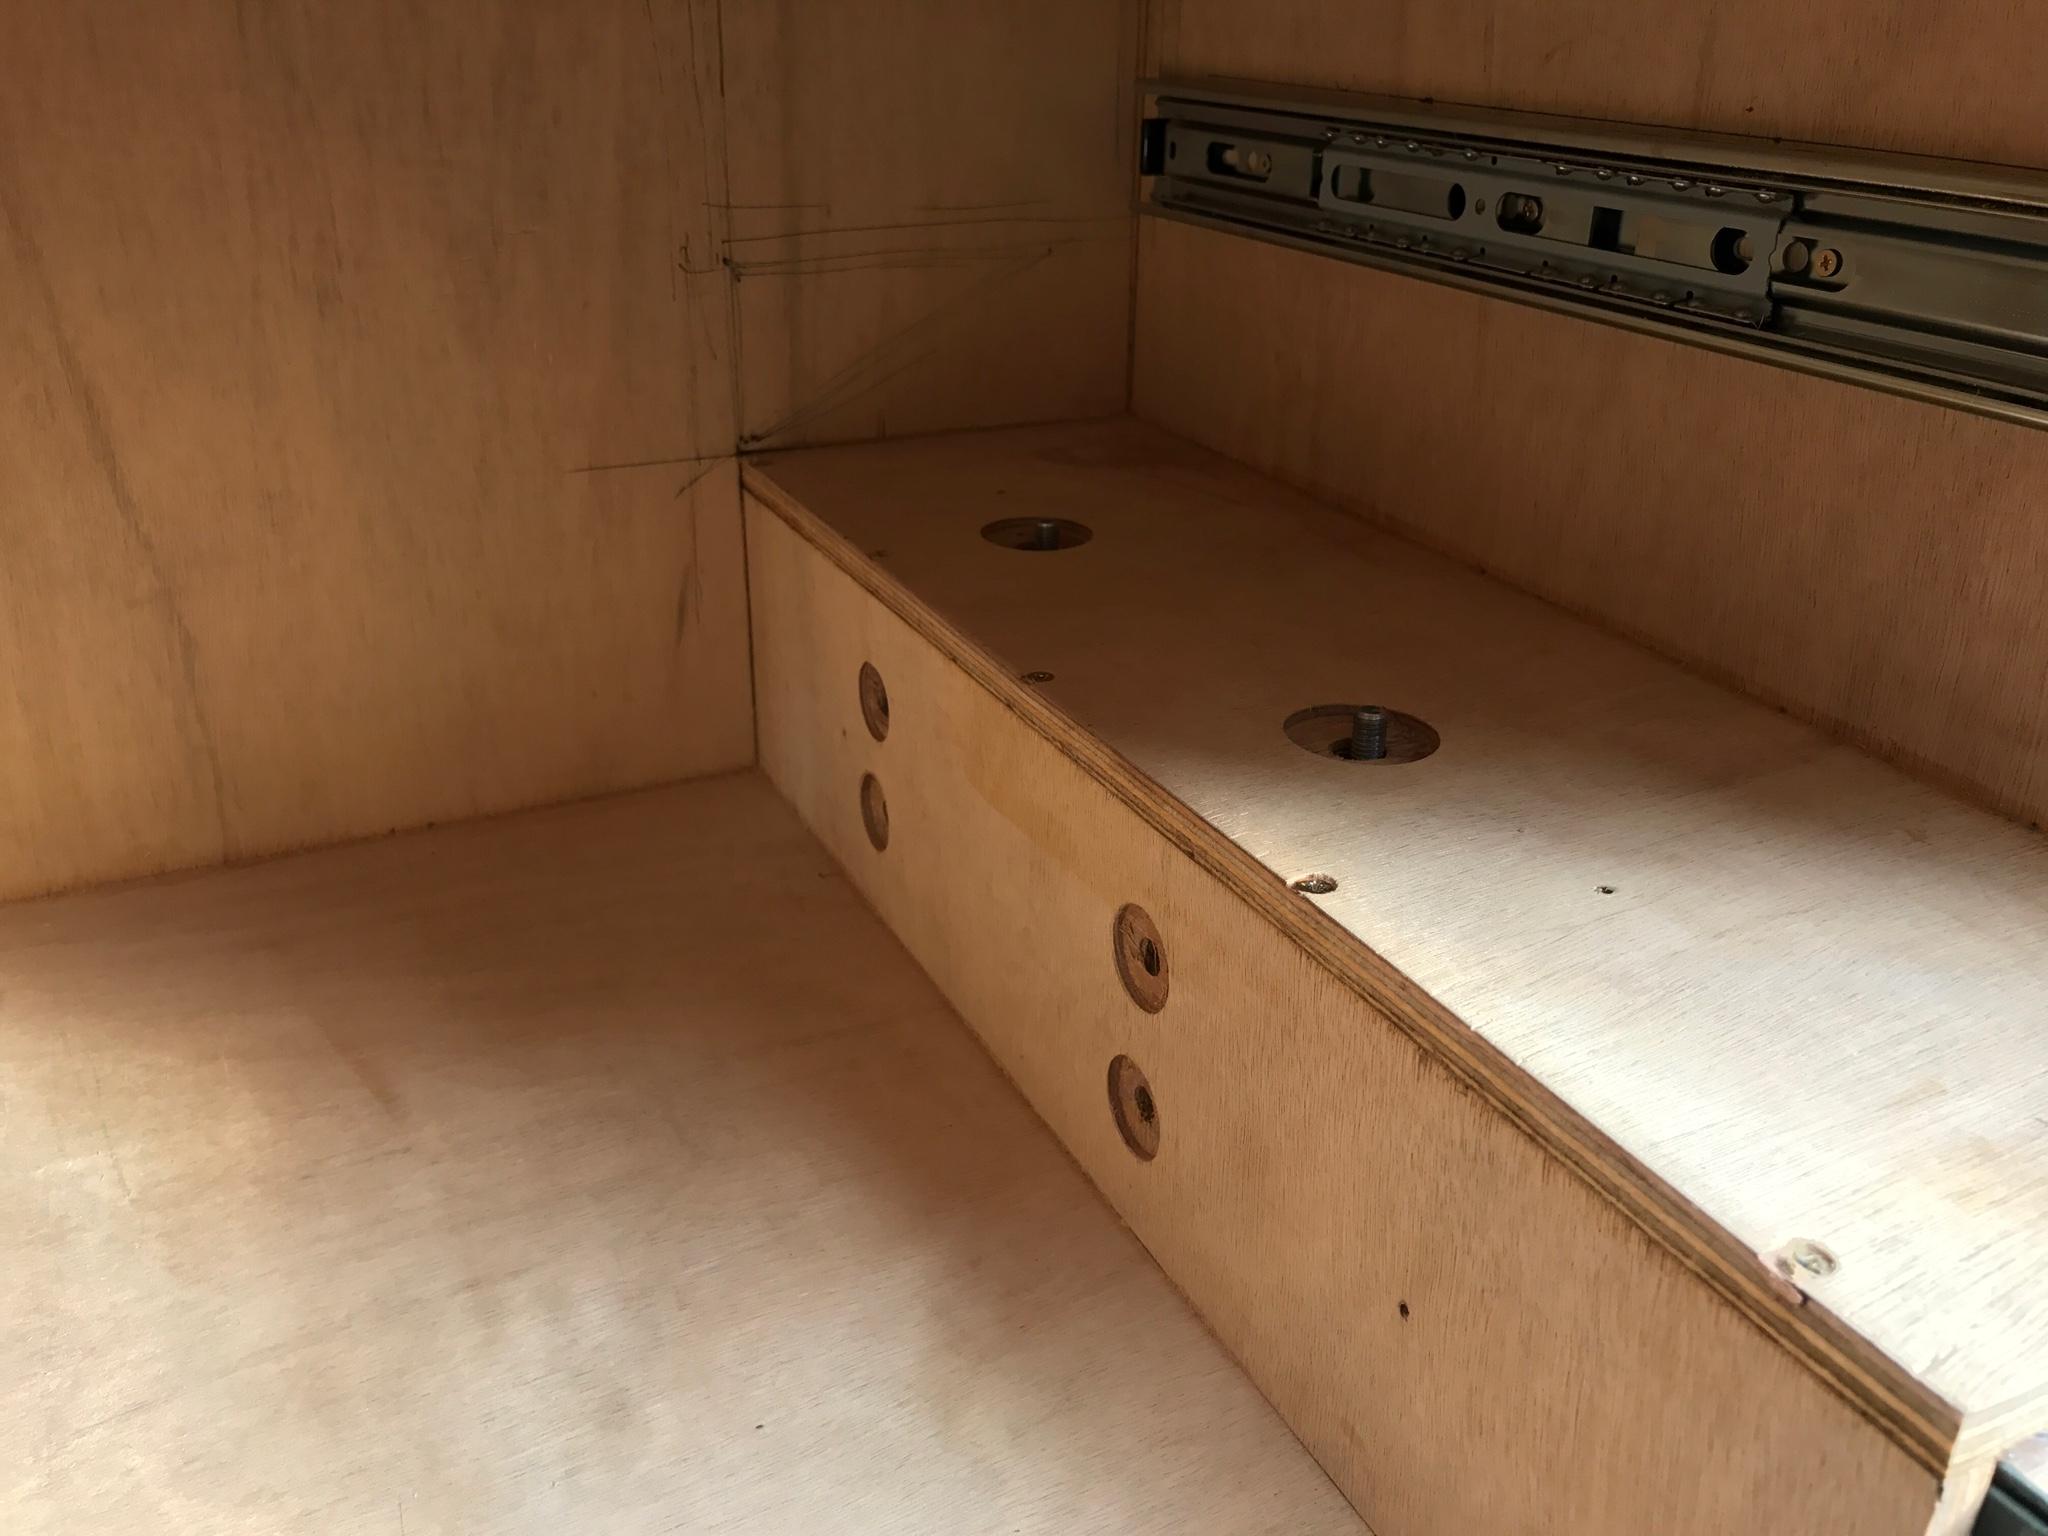


Bookmarks