

 Reply With Quote
Well after 30 minutes of playing around...
... I discovered I need a new round bastard.
Haven't put the tape against the holes, but it looks about 15mm differenceMy old file is a little to worn for the task.
Thanks for the heads up")

 Master
dm_ts5...
Let me know how it goes... I'm interested to know if my car is out of whack or the kits aren't that good.
Oh and I forgot to mention when fitting the very top bracket... the destructions say to screw the 2 bits togeather and then position them. its much easier to just bolt the bracket to the roof/gutter area, then get the top half of the barrier in position, and THEN attach the top supports.
They also needed a little moding but only a mm or two.
Craig
OldBushie
Well after 30 minutes of playing around...
... I discovered I need a new round bastard.
Haven't put the tape against the holes, but it looks about 15mm difference
Thanks for the heads up
MY15 Discovery 4 SE SDV6
Past: 97 D1 Tdi, 03 D2a Td5, 08 Kimberley Kamper, 08 Defender 110 TDCi, 99 Defender 110 300Tdi[/SIZE]
OldBushie
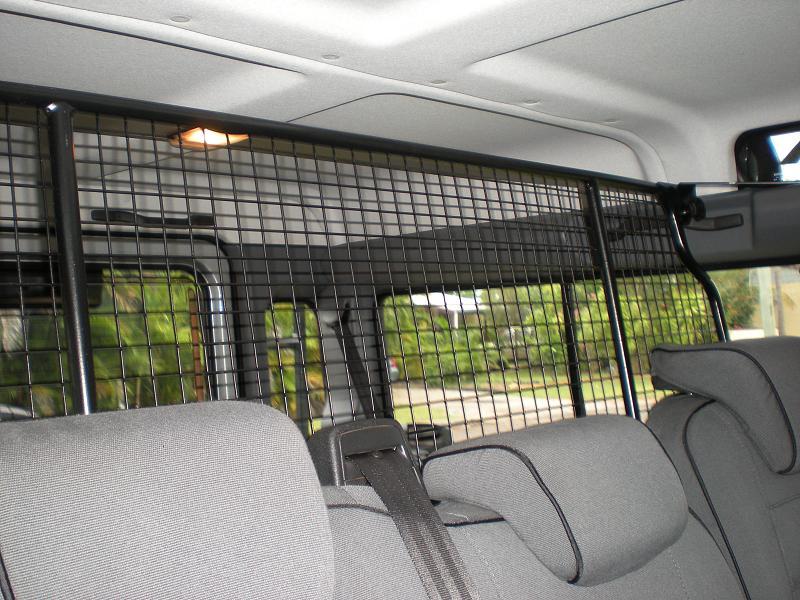
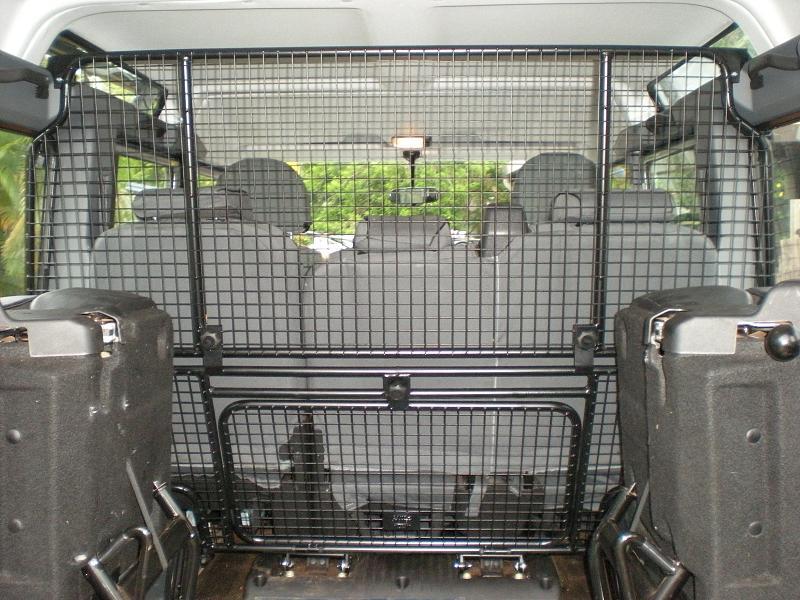
Here's my installation story. The barrier is all in and secure
Like Craig I found the barrier to be approximately 15mm too wide for the lower brackets. This necessitated elongating the 2 mounting holes in each bracket so they could be moved outwards. My old 1/4 round bastard file was not up to it so of to THE hardware store, luckily they had ONE in stock for a measily $26.
OK problem resolved, lick of black paint all good
That's the bottom half installed. Now to pull out the panel plugs and mount the brackets at the top (near the alpine windows). Instructions show 2 bolts, yep they are there but both are into captive nuts, the diagram shows one captive, one with a loose nut - cool that will make it easier... Famous last words! On the RH side both of these bolts stripped their thread undoing them, they weren't even tight and I suspect were only held in by a thread or two. So off I go to get a couple of M6 bolts from the bolt bucket and see if I have an M6 tap. Didn't have an M6 tap, THE hardware store fortunately had ONE M6 tap left in stock for $16.95.
Re-tap holes and 2 new bolts and the bracket is mounted. The LH side bolts came out and went back in without an issue. Now to put the top section in place. Not overly hard, but again alignment issues. This became a 2 person job. Loosen everything off and fiddle with top brackets, all's good.
The barrier isn't as strongly made as a Milford but will certainly stop cargo coming forward. Also it's in 3 pieces. The top section, bottom section and a hinged window in the bottom section to allow long cargo to be pushed through. However the set catches can no longer be folded flat as the barrier is now in the way. It will be a chore to remove and put back in if I ever have to. The good thing is there are no new holes in the vehicle as everywhere it mounts is an existing point.
It is like it as designed for a previous model. The instructions updated for the Puma whilst the barrier hasn't been checked for fitting.
Seats are coming out soon.
Last edited by dmdigital; 5th February 2009 at 09:38 PM. Reason: Added pictures, spelling
MY15 Discovery 4 SE SDV6
Past: 97 D1 Tdi, 03 D2a Td5, 08 Kimberley Kamper, 08 Defender 110 TDCi, 99 Defender 110 300Tdi[/SIZE]
Wizard
SupporterGlad its all sorted Derek - sounds like even the new Defenders are as wonky as the older ones. At least they're consistent!
If anyone else wants one sending over whilst our pound is on its ****, let me know.
Regards,
Jon
Regards,
Jon
OldBushie
Thanks Jon and thanks for the assistance in sourcing and shipping this from the UK.
MY15 Discovery 4 SE SDV6
Past: 97 D1 Tdi, 03 D2a Td5, 08 Kimberley Kamper, 08 Defender 110 TDCi, 99 Defender 110 300Tdi[/SIZE]
Admin
to say that two cars had to have the holes elongated by 15mm I would say the cars are straight and the brackets are made wrongOriginally Posted by Yorkshire_Jon

")
Our Land Rover does not leak oil! it just marks its territory.......
OldBushie
The two brackets are definitely a manufacturing issue I believe. As for the rest of it...
MY15 Discovery 4 SE SDV6
Past: 97 D1 Tdi, 03 D2a Td5, 08 Kimberley Kamper, 08 Defender 110 TDCi, 99 Defender 110 300Tdi[/SIZE]
 Posting Permissions
| Search AULRO.com ONLY! |
Search All the Web! |
|---|
|
|
|

Bookmarks