-
22nd August 2009, 01:12 PM
#1
TM2 -where to mount the display?
I'm looking at fitting a TM2 EngineWatchdog, but can't decide where to fit the display unit.
Any suggestions/photos?
-
22nd August 2009, 01:29 PM
#2
Is that the one with the square face, or the oblong one?
I've got a square one sitting in a box here, but can't decide on a good place to fit it.
-
22nd August 2009, 01:35 PM
#3
I think you've got the EMS one. Mine's a TM2 ENGINE WATCHDOG TM2, Engine Overheating Alarm, Gauge & Sensor.
I think I', just gonna mount it underneath the stereo on the original dash mount... for now. Might have a rethink if I get a Mudpod or something.
-
22nd August 2009, 06:40 PM
#4
Ended up mounting it under the factory stereo dashpod, using velcro dots as a temporary solution.
-
10th September 2009, 10:57 AM
#5
Did mine recently together with 2 x heavy duty outlets and 2 x analog volt gauges. I have 2003 110.
Volt gauge pic 1b.jpg
Volt gauge pic 3b.jpg
For those interested I got the volt gauges ($17.50 ea ") ) from here
) from here
RGB Electronics (Australia)
They are connected directly (so on all the time) to the AUX and Main battery, I believe the current draw is about 5 - 8mA? Maybe less. They were also the smaller size I was after most of the gauges are 52mm. I will also be painting the screws enamel black...wish it was easier to get black screws.
The 12v sockets from a caravan supplies shop.
For the volt gauges I just used speaker wire with inline glass fuse (100mA) and piggybacked negative from one of the new power outlets. Used cheapy hole-saw (the blue set from bunnings) that was the perfect size.
The 2 power outlets I wired direct to battery with inline blade fuse (20A) and they share the same negative. Used hole saw and cleaned up with file.
The TM2 power is piggybacked off the original ciggy lighter (as most have done). Made a rough L-shaped bracket to secure bracket to the top of the TM2 unit (note: remove the 4 rubber bungs and remove the 4 screws to check that u dont put a screw into important bits, you need short,small screw) then fix bracket to the 2 screws just below the stereo. I have found
this installation to be quite strong and robust.
Everything seems to fit in there quite well . I should have got all the goodies at the same time though to save me pulling the dash apart 4-5 times. But loved every minute.
Last edited by Kelly928; 10th September 2009 at 11:00 AM.
Reason: Incorrect current rating on fuse
-
10th September 2009, 04:58 PM
#6
I stuck mine on the right hand side of the steering wheel.......
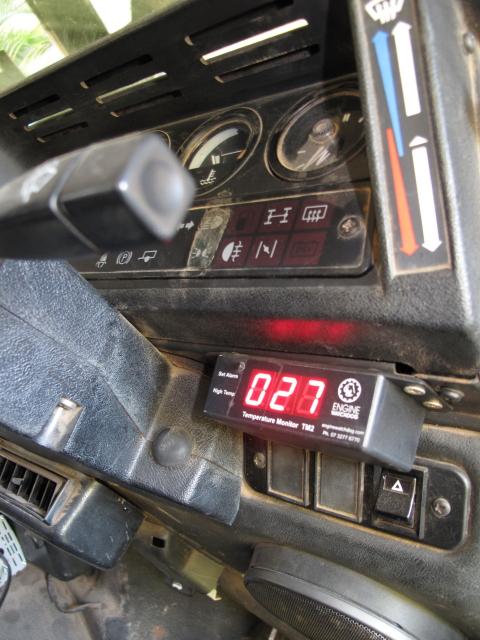
Direct access to the dash for power and firewall penetration to get the sensor lead to the engine - mounted the sensor under a bolt on the thermostat housing.
The red LCD display is very bright and I hate having lots of bright lights in my cab when I'm driving at night, so I actually put a little bit of black electrical tape over the first digit of the display (always has the "zero" lit - bit pointless 'till your temp exeeds 100).
Just out of curiosty what sort of temps do you guys get? Mine averages about 85 but got up to 97 climbing the range with the truck loaded for camping and towing the dirtbike on a trailer.
 Posting Permissions
- You may not post new threads
- You may not post replies
- You may not post attachments
- You may not edit your posts
-
Forum Rules
Search AULRO.com ONLY!
|
Search All the Web!
|


 Reply With Quote
 Moderator
Bookmarks