Page 2 of 3 FirstFirst 123 LastLast
Results 11 to 20 of 24

Thread: Installed central locking into my 1993 Defender

  1. #11
    Join Date
    Jan 2009
    Location
    Samford
    Posts
    704
    Total Downloaded
    0

    Additional info and pics

    Firstly thanks for Mark for sowing the seed. I've just installed central locking into my 1995 130 dual cab and found his pictures very useful .

    I've taken a few more shots and though I'd add some more detail about wiring and the little issues I encountered.

    The kit I used was "Steelmate" which is readily available from Jaycar for about $40 (for 4 doors). It appears very similar to the kit Mark used, although there looks to be a couple of slight differences. The main one is that I think the actuators are a bit fatter. This meant that if I just mounted the front door ones as detailed in Mark's shots, the window would hit it when wound down. So, I cut the mounting hole down:


    Before mounting it I had to bend the mounting area outwards slightly otherwise bottom of the actuator angles towards the window, again fouling it when wound down:


    .... and it ends up mounting up like this. You can see the actuator now sticks out slightly from under the inner door panel. The mounting bracket/strip needs to have a slight curve bent into it over it's full length:


    I routed the wiring straight upwards from the actuator, around the window channel and across the top horizontal door channel. I figure it's more likely to stay away from water there, and less likely to hinder the drain holes in the bottom of the door.


    I used 7mm split tubing in areas where there is the potential for rubbing.


    To get the wiring out of the door, I filed a U-shaped hole into the front edge of the door card.


    And ended up with this (again, 7mm split conduit):


    From here the wiring simply goes in between the dash and the firewall and runs along with the rest of the wiring to the centre (behind the radio) where it then goes down to the fuse box where I, as Mark did, mounted the control unit. I had good earth on the fuse block bracket, so terminated the earth wire under the bolt holding the unit itself. The fuse block bracket has two M4 nuts welded on (for what?) so I just screwed an M4 bolt into one of them. I got the +12V feed from the wire to the number one fuse, which is for the hazard flashers (so not switched through the ignition).


    In the shot above you can see the blue and green wires for the rear doors exiting through left side oval grommet in the firewall. This grommet was already punctured on my vehicle for the electric brake control wiring harness.

    I then routed these wires along through the transmission tunnel past the battery box and split it in line with the B-pillars.


    The wiring then goes into the hole in the bottom of the B-pillars.


    I haven't quite finished the back doors yet so I'll post up more pics when done .


    James.

  2. #12
    Join Date
    Jan 2009
    Location
    Samford
    Posts
    704
    Total Downloaded
    0

    Back doors done

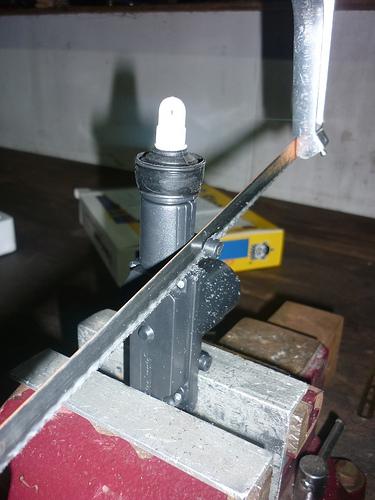
    Ok - the back doors are complete. I mounted the actuator as Mark did in the first post, so I haven't bothered with detail of that.

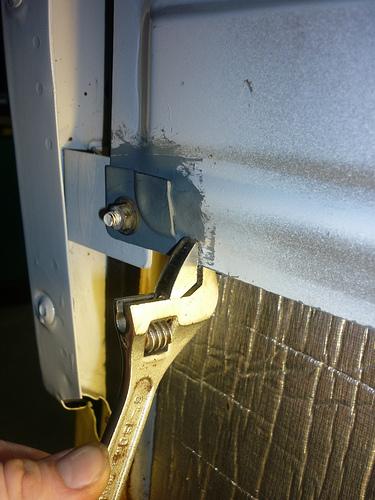
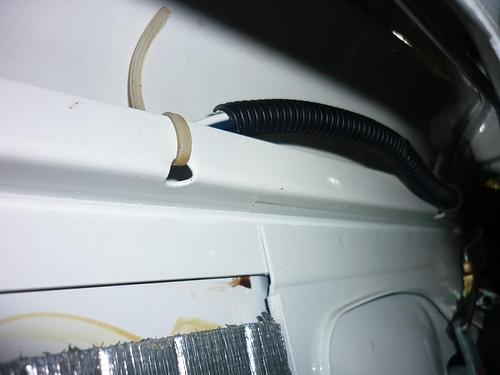
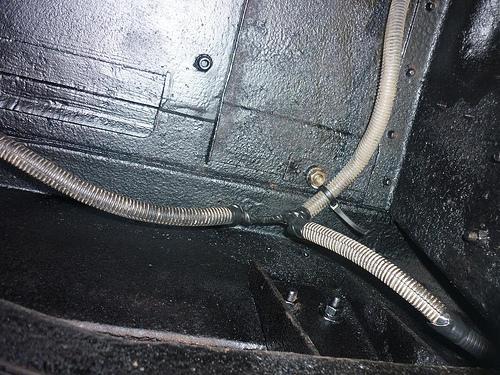
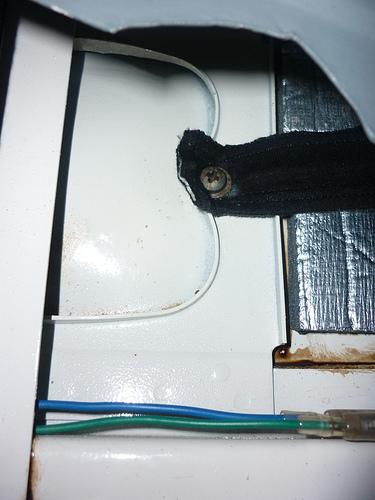
    To get the wiring out of the B-pillar I made use of one of the two holes already there. These are about in line with the best place to route the wiring into the door, where it can run between the frame and the window channel. I used a grommet that was a very snug fit around the conduit, to ensure it didn't pull out (the reason will become clear). I also put a blanking grommet into the second hole whilst at it .


    Next, things get a bit weird so bear with me. I grabbed a pair of my wife's old underpants and cut the waist elastic out of them. I attached this to the end of the conduit that is inside the door with contact adhesive and a couple of cable ties.


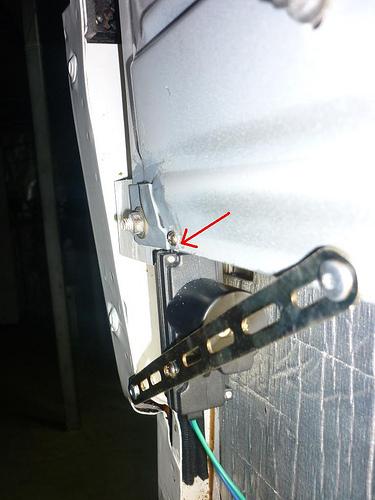
    I then fed the elastic and wiring back into the door, tensioned the elastic slightly and fastened the other end of the elastic under the front bolt for the external door handle.


    This means The wiring and conduit will be pulled into the door when it is closed, rather than folding up between the B-pillar and the door frame, leading to potential wire breakages. You could use a metal spring in place of the elastic, but I didn't have any. I know the elastic will eventually perish, but having virtually no tension on it with the door closed will prolong it's life. A fine metal spring is always going rust, so it's much of a muchness in my humble opinion.

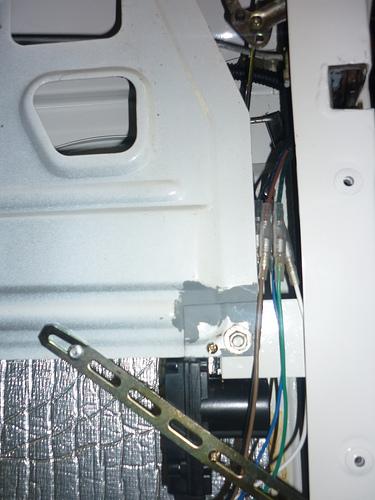
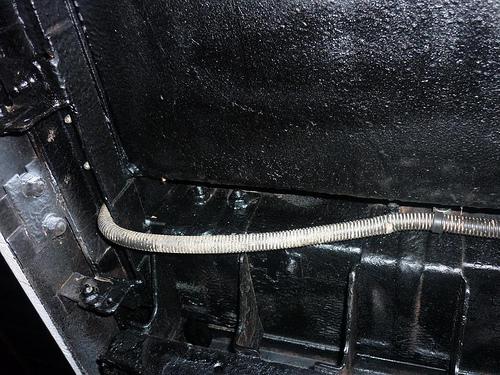
    I located the wiring across the top of the middle door frame member and held it in place with a self adhesive cable tie mount to stop it falling into the path of the window.

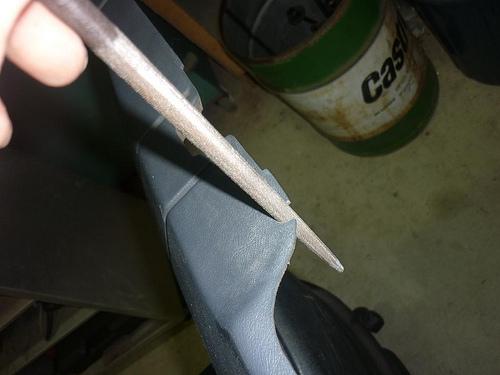
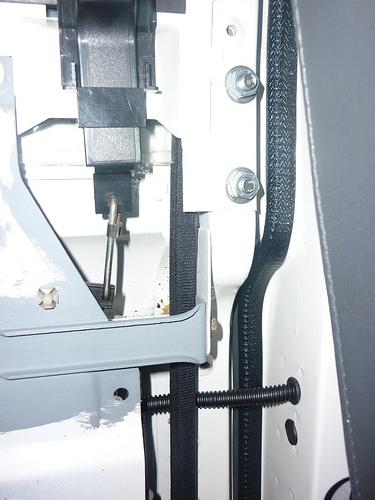
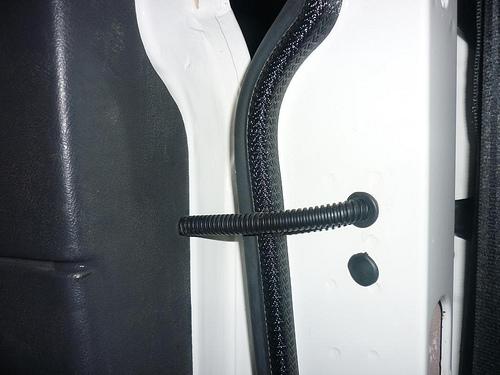
    Door card on, door open (as with front doors, a U-shaped hole filed into the card):
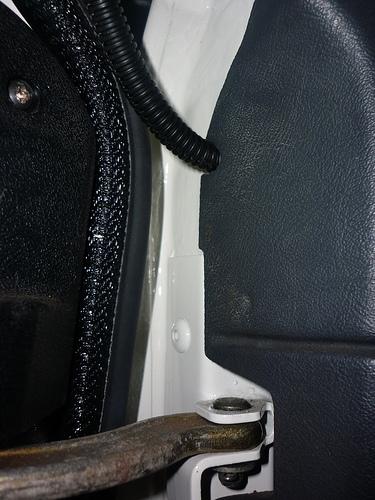
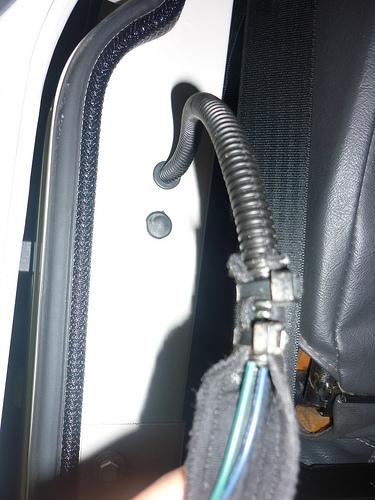
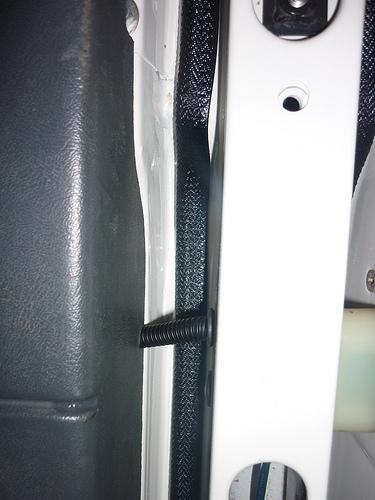


    Door closed:


    The reason I didn't tension the front door wiring conduit in the same way is because the wiring to them comes out out the dash about 100mm above where it enters the doors. This means the conduit is on an angle with the door open (the hypotenuse of the triangle) and therefore has a better opportunity to fold away and downwards as the door closes. There is also plenty of room for it between the dash and the door so there's no potential for sharp bends or crushing.

    Job done! Onto the next.........


    James.

  3. #13
    Join Date
    May 2008
    Location
    Cherrybrook, Sydney
    Posts
    237
    Total Downloaded
    0
    Thanks guys, lots of detail. I'm doing the same to my '94 Defender, if I want all 5 doors including the rear to work can I buy a kit from Jaycar with 5 actuators? Would the rear door use the same as the other 4?

    Any pics of the rear door fitment?

    Lastly, can I use any aftermarket alarm/immobiliser?

  4. #14
    Join Date
    Jan 2009
    Location
    Samford
    Posts
    704
    Total Downloaded
    0
    Hi GyroLandy,

    Jaycar sells the actuators separately for about $10 so getting an extra one won't be a problem. I'm sure it can be piggy backed onto the wiring harness, but the Jaycar staff would be able to advise on that.

    The unit has a dedicated wire to feed to an alarm system, so all good there too.

    James.

    P.S. Sorry. Forgot - my installation is on a 130 dual cab so no rear door.
    Last edited by rainman; 2nd July 2012 at 10:27 AM. Reason: Info added

  5. #15
    Join Date
    May 2008
    Location
    Cherrybrook, Sydney
    Posts
    237
    Total Downloaded
    0
    Thx, any idea where I can get electric window conversion kit?

  6. #16
    Join Date
    Jan 2009
    Location
    Samford
    Posts
    704
    Total Downloaded
    0
    Quote Originally Posted by GyroLandy View Post
    Thx, any idea where I can get electric window conversion kit?
    I looked into it but the price was going to be too prohibitive ~ like $800 - $1000. If you find a cheaper way let me know .

    James.

  7. #17
    Join Date
    May 2008
    Location
    Cherrybrook, Sydney
    Posts
    237
    Total Downloaded
    0
    I found a place in the UK which is $368 for 4 windows. Looking to order this week.Don't know what the shipping is.

  8. #18
    Join Date
    Jan 1970
    Location
    Brisbane, north of the river
    Posts
    1,924
    Total Downloaded
    0
    Probably not the same place but here's a mob that does an electric window kit: SPAL AUTOMOTIVE (UK) LIMITED ELECTRIC WINDOW KITS

  9. #19
    Join Date
    Oct 2010
    Location
    Mackay QLD
    Posts
    262
    Total Downloaded
    0
    Thanks to Mark and James for the pictures and info. It made my install heaps easier. The only things I can add is that my actuators were really fat and so I had to saw off the mounting tabs off the front ones, and give the door inner frame a good bending so as it didn't scratch my new window tinting. I also had to rivet on a small plate to get the actuator to sit at the right angle as per the photo. I also stripped the insulation off some 6mm wire and pushed it over the bent end of the actuating rod (then added some heat shrink) to reduce the rattles.

    Alan
    Attached Images Attached Images

  10. #20
    VladTepes's Avatar
    VladTepes is offline Major Part of the Heart and Soul of AULRO Subscriber
    Join Date
    Feb 2004
    Location
    Bracken Ridge, Qld
    Posts
    16,055
    Total Downloaded
    0
    So has anyone done this with a Tdi and somehow incorporated a remote fob for opening?
    It's not broken. It's "Carbon Neutral".


    gone


    1993 Defender 110 ute "Doris"
    1994 Range Rover Vogue LSE "The Luxo-Barge"
    1994 Defender 130 HCPU "Rolly"
    1996 Discovery 1

    current

    1995 Defender 130 HCPU and Suzuki GSX1400


Page 2 of 3 FirstFirst 123 LastLast

Bookmarks

Bookmarks

Posting Permissions

  • You may not post new threads
  • You may not post replies
  • You may not post attachments
  • You may not edit your posts
  •  
Search AULRO.com ONLY!
Search All the Web!