


 Reply With Quote
Brilliant Instructions ... Love to see the photos ... Where did you get the new tracks from

 Master
So I attempted to replace the window felt on my perentie driver's side window today - after discovering new felt stashed in the map pockets.
I learnt alot and wanted to pass it on, as there was no clear tutorial that I could find here, and some of this process was not exactly obvious to a newbie such as myself.
I'll come back and add photos when I do the passenger's side (hopefully tomorrow).
---------------------------------------
So you're going to replace the felt...
---------------------------------------
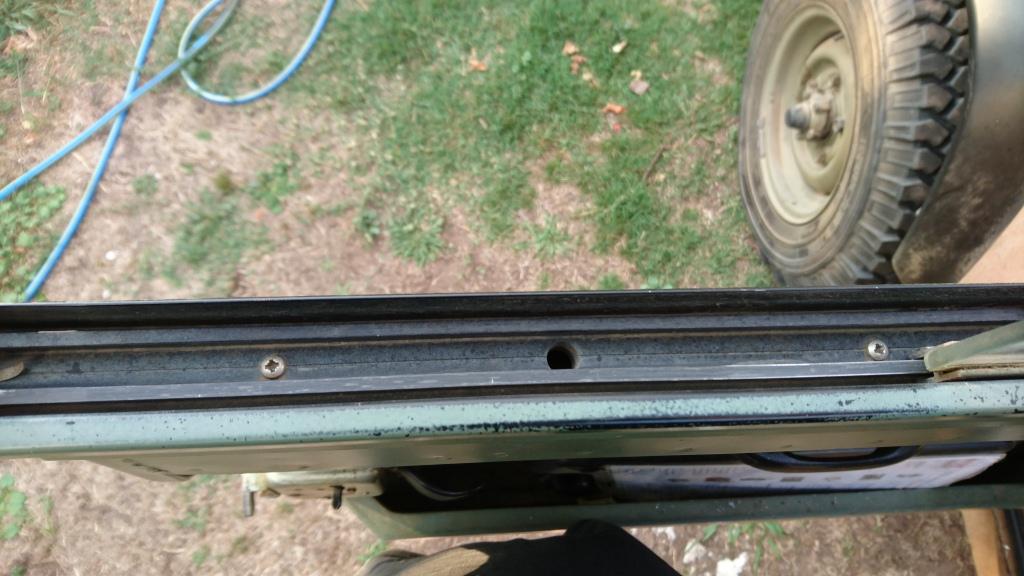
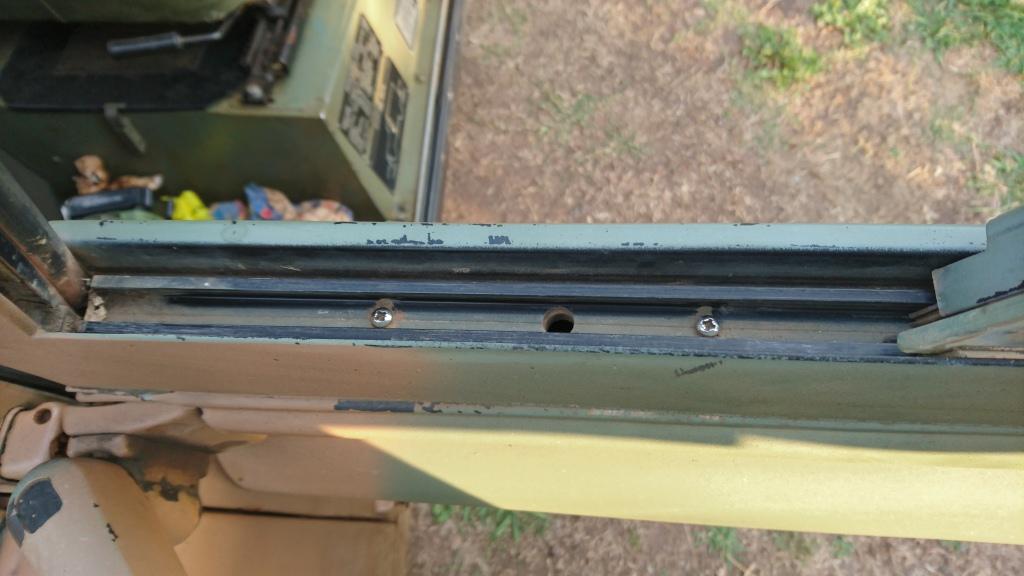
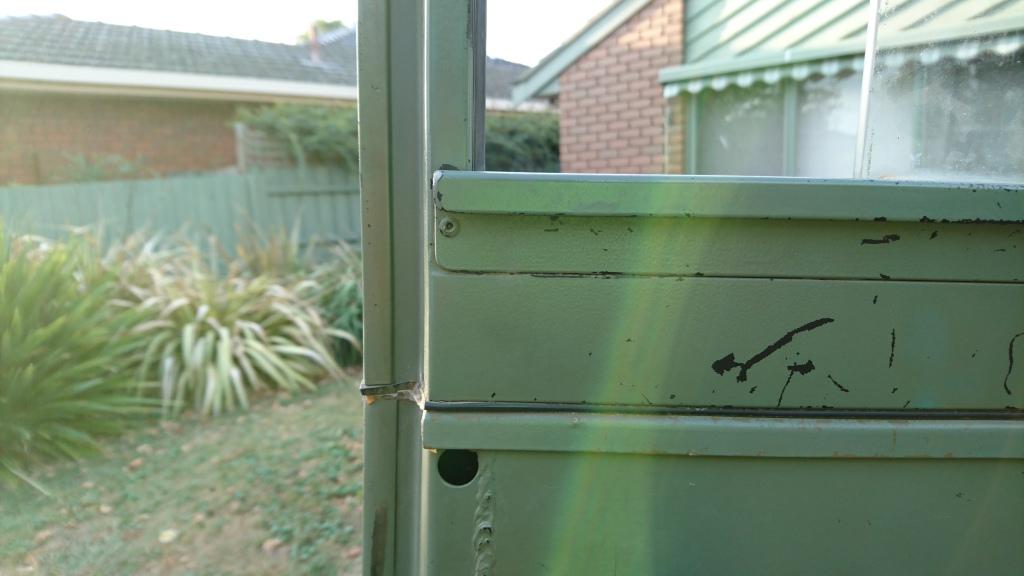
1 - remove the four posidrive screws from the window runner.
(they are NOT phillips - this is important, as you can and will strip the head out otherwise.), place screws in safe place.
This will require some shuffling of windows to access them all. The last one you will get stuck on, can be made easier by partially removing the rubber stop at the top front inner track. you only need to remove a half inch or so.
I suggest pliers and a medium flat blade screwdriver - if you aren't worried about the paintwork inside the track.
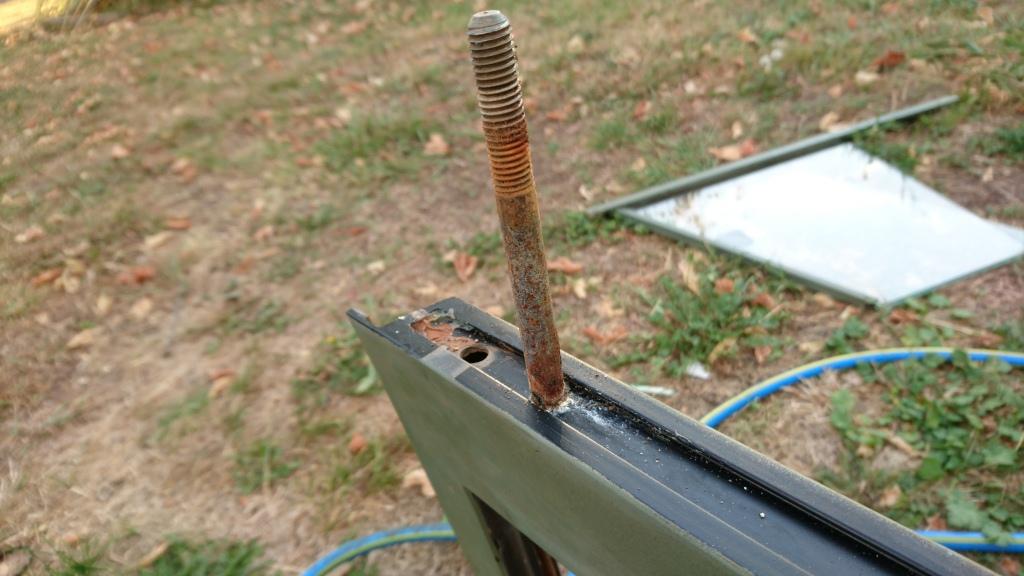
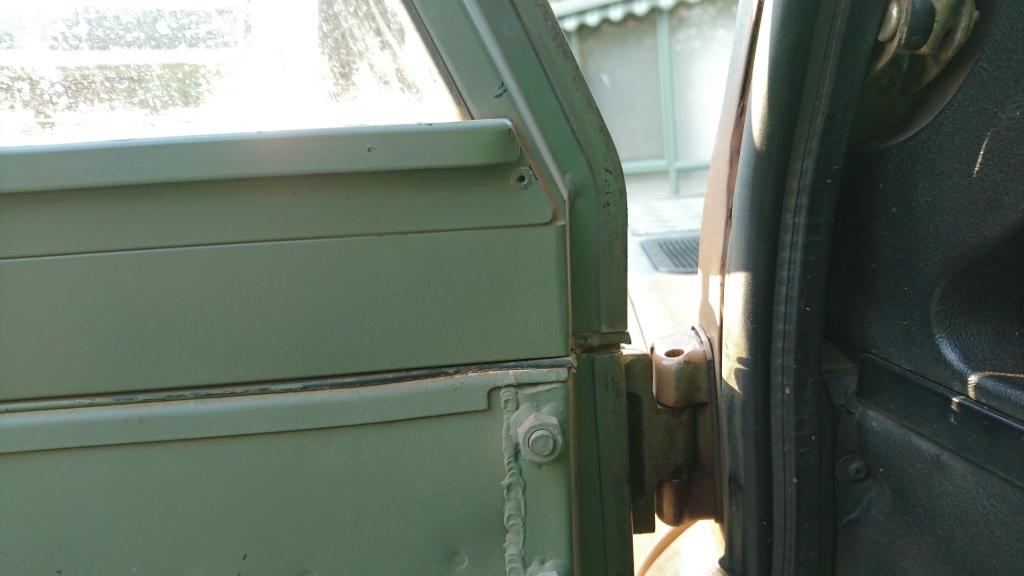
2 - remove the door top
It's done by removing the two nuts on the interior side of the door, under the ledge above the map pocket.
Firm and constant pressure here as the seal may be stuck and will take a bit to let go.
an extra pair of hands may assist to prevent window breakage.
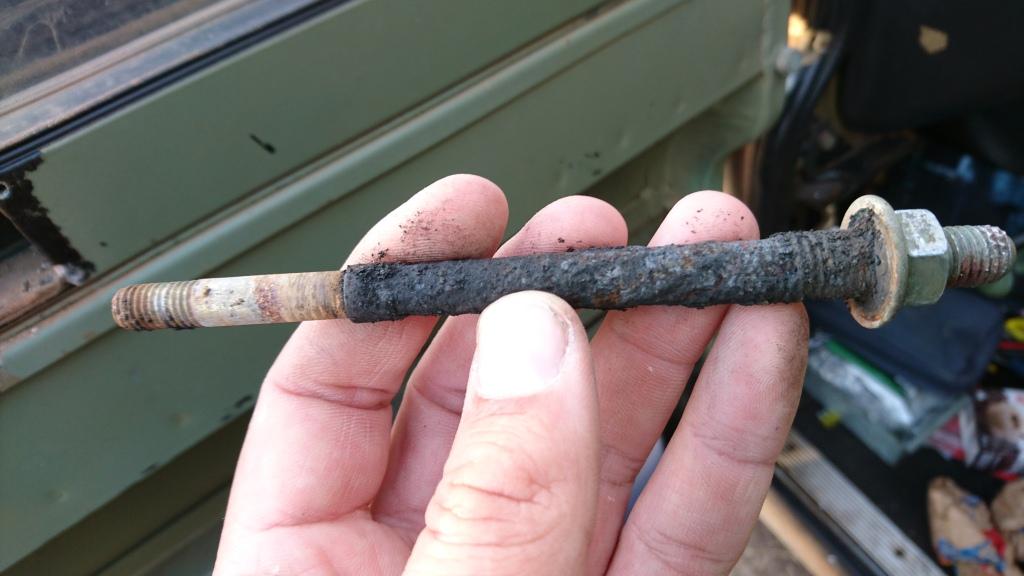
If like me - it has been a while since this was checked, your bolts may be screwed (metaphorically)
fish oil and wd40 on hand will help, but consider new bolts if they look like my inner bolts.
Tip: there is no head on these bolts, rather they are threaded into a stud that's welded into the door top frame - this makes them replaceable.
3 - get a drill, and drill bit to suit the size of the rivets
The rivets are smaller than most on the rest of the vehicle - and aluminium.
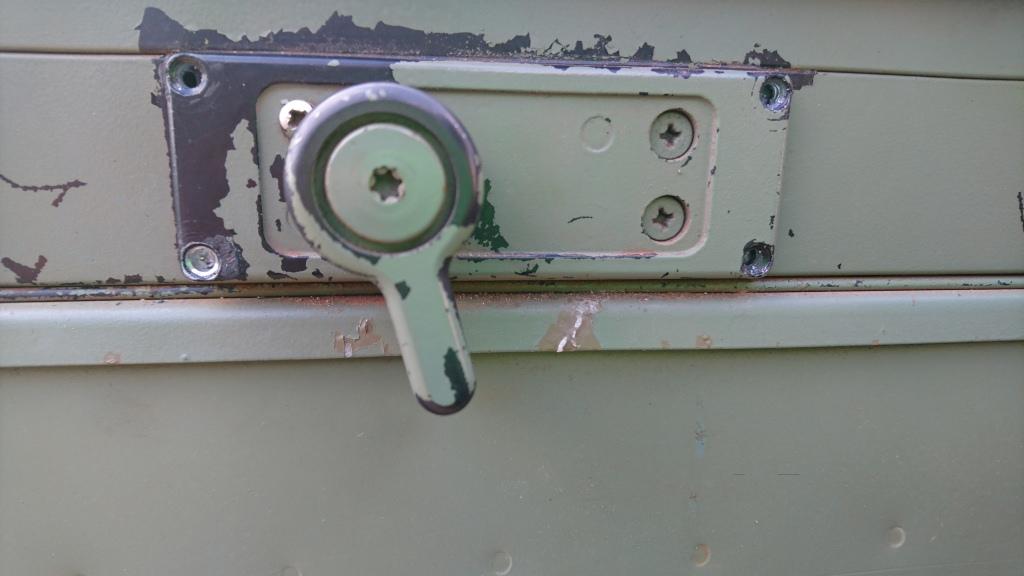
You need to drill out the 4 rivets holding in the window lock (leave the screws alone)
You also need to drill out the two rivets holding in the lower window frame ledge.
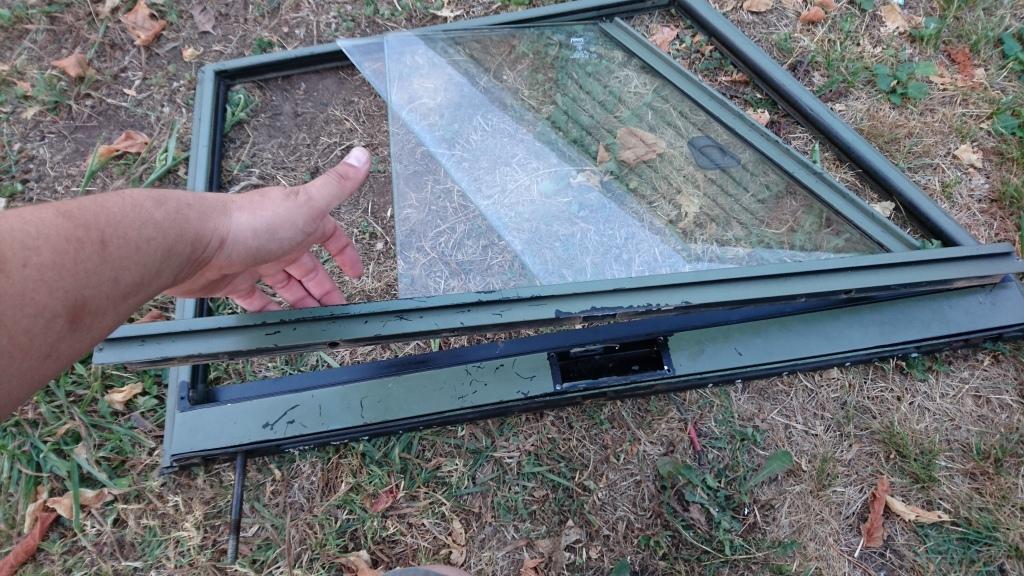
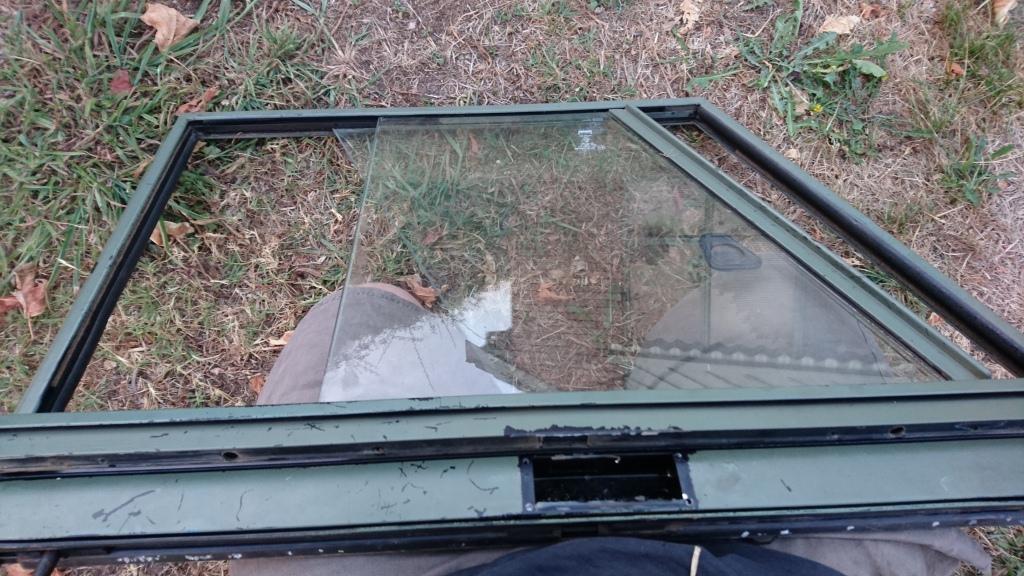
4 - lay the door top outside facing down on a soft, possibly grassy or soft area.
Gently lift the window ledge upwards, and the windows should drop out of the top of the frame.
5 - remove old felt (if present) , install new.
I added a very small amount of neutral cure roof and gutter silicone to each end of the felt (outer side) in an uneducated attempt to combat the felt sliding with the window - as this was the cause of the old stuff falling out. I'm yet to see how well this worked.
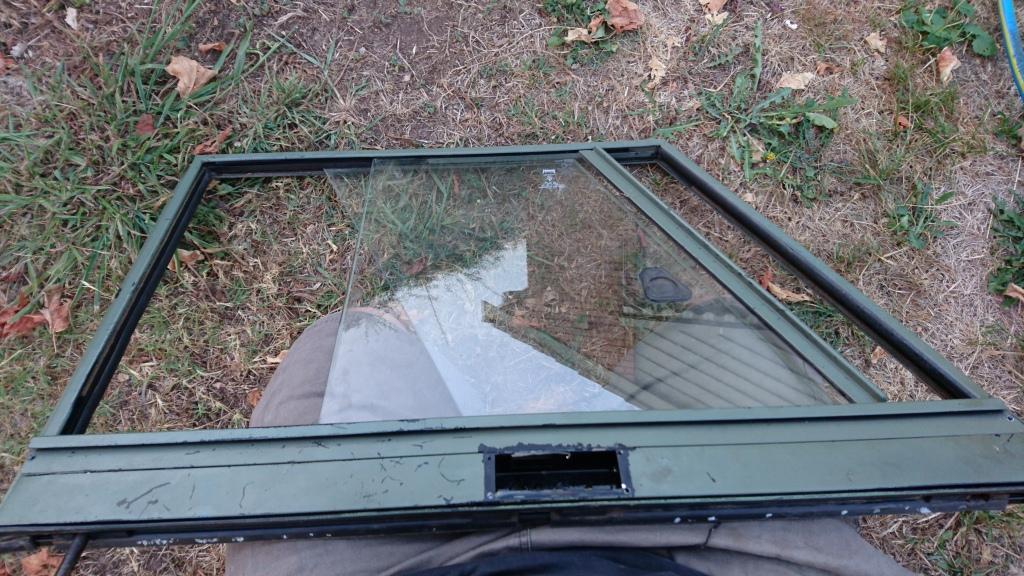
5 - this is the tricky part. orient the window frame, up-side down.
I tried various methods here, but the best seemed to be the following:
carefully maneuver both windows into the felt slots, while still situated on the runner.
again, extra pair of hands may make this easier.
a bit of a wriggle to ensure they fit all the way in.
6 - apply firm, but not excessive downward force on the windows, and swing it sideways back into the window frame. there will be a positive "clunk" when they are in.
It should look like this:
7 - Insert new pop rivets and "pop" them as designed.
8 - Inspect, repair (if needed) and re-install window lock mech - will need more aluminium rivets.
9 - lube felt and track with appropriate product, I used easyglide spray.
10 - clean fingerprints off glass.
I found that the drainage holes in the door were plugged with silicone and I had a small reserve water tank in the door. zinc bolts had turned black - and so when replaced and cleaned, I treated the area with fish oil... it's not the most pleasant of things to use.... especially when trying to keep the windows clean.
--------------------------------------------------------------
How to increase window lock force - The poor man's method:
--------------------------------------------------------------
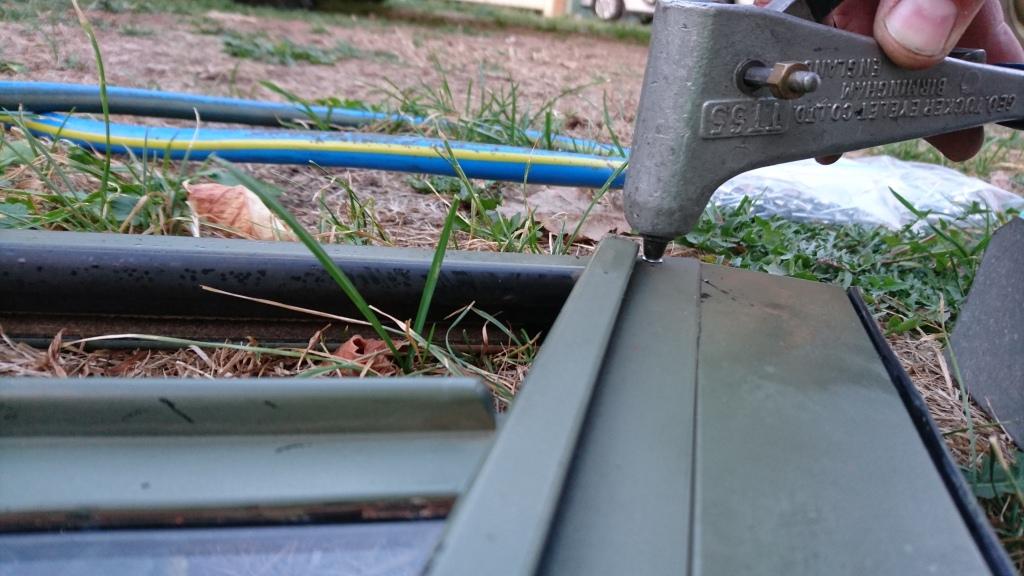
1 - Drill out rivets and remove window lock as shown above:
2 - Inspect lock for damaged parts - and lubricate with a plastic safe or PTFE dry lube. (spray packs available from jaycar dealers.)
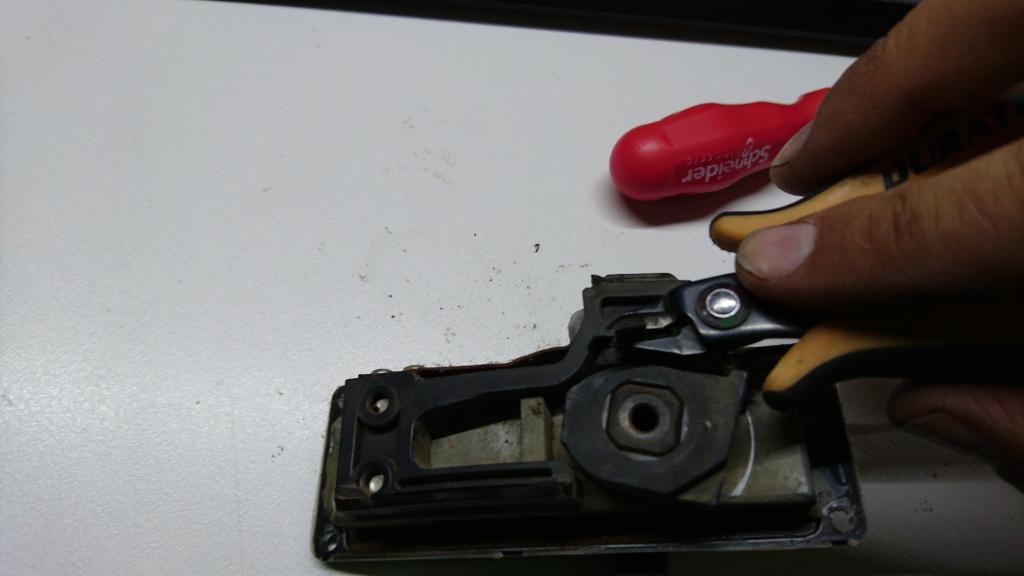
3 - Insert small screwdriver as shown, with careful force separate the plastic.
4 - insert small piece of 3, 4 or 5mm rubber according to the desired increase. I used 4mm (shown above also)
5 - remove screwdriver, and trim flush.
6 - re-install window lock.
Master
Brilliant Instructions ... Love to see the photos ... Where did you get the new tracks from
Master
The new felts were stashed in the passenger side map pocket, along with wrinkled old ones.
I'll be removing the passenger door top today. I'll add the first few photos after that.
Sent from my E6653 using AULRO mobile app
Master
Thanks
Master
So a little unfortunate news, the inner door top bolt for the passenger's side is so rusted that the bolt is rotating inside the door top frame.
I'll need to do some disassembly and surgery.
this appears to have been full of water for a long time, presumably due to the excessive amount if silicone used around the bolt and it blocking the drainage galleries in the rubber seal.
this also means pictures will be delayed.
Master
Hmmm that's frustrating for sure ... Good luck mate, let us know how you go
Master
Photos have been added for your interest...Originally Posted by Themadmob

RoverLord
couple of pro tips.
its easier on your back to do it on the tailgate of the GS or a workbench....
you dont have to remove the window from the door, if you decide to do it this way because some butcher has hacked and rounded the nuts close the door prior to doing the drilling
there is also a way of doing it without taking the glass out or drilling by undoing the screws then prying and turning the tracks up and out then slowly pulling them out replacement is the reverse of removal but if you,re not both careful and lucky the tracking will kink. You can straighten the kinks out but not if you force it too much and break metal backing.
Dave
"In a Landrover the other vehicle is your crumple zone."
For spelling call Rogets, for mechanicing call me.
Fozzy, 2.25D SIII Ex DCA Ute
TdiautoManual d1 (gave it to the Mupion)
Archaeoptersix 1990 6x6 dual cab(This things staying)
If you've benefited from one or more of my posts please remember, your taxes paid for my skill sets, I'm just trying to make sure you get your monies worth.
If you think you're in front on the deal, pay it forwards.
Master
I had looked up several of those "tips" and found them more time consuming and frustrating - leading to my final resolve.
But I am aware that they work for some people, for me however I had to look up a few new profanities to describe my mood at the time.
I had originally attempted this with the door tops attached - but learnt quickly, it's much easier with the door tops removed.
Two nuts takes a few seconds to undo - saved me a great deal of time and frustration, and was also a good chance to inspect possible corrosion/rust ingress.
I don't particularly have back problems, and the tailgate of my GS has insanely long pop rivets sticking out of it - seemed like a great way to scratch things up, even through a thick wool blanket - however you will note, I did allow some variability here.
I will be drilling and replacing those tailgate rivets, they seem to have been for the number plates, and they have nearly cost me a kneecap ligament a few times already.
Lastly - note that I did not profess to be an expert here - just someone attempting to fill in the information I could not find elsewhere.
I'm happy if someone else know better - we all learn that way.
RoverLord
given that what you've just presented is essentially a neater easier to follow presentation of whats in the manual, youve paid significcant attention to detail (do you know how many people cant spot the diference between phillips and posidrive) and extending to include considerations that go beyond the basic core task of "heres how to change the strips" with workmanship that puts some dealerships "profesional" standard to shame.....
you go right on ahead, keep posting your work and call yourself an expert. I'll back the claim.
Dave
"In a Landrover the other vehicle is your crumple zone."
For spelling call Rogets, for mechanicing call me.
Fozzy, 2.25D SIII Ex DCA Ute
TdiautoManual d1 (gave it to the Mupion)
Archaeoptersix 1990 6x6 dual cab(This things staying)
If you've benefited from one or more of my posts please remember, your taxes paid for my skill sets, I'm just trying to make sure you get your monies worth.
If you think you're in front on the deal, pay it forwards.
 Posting Permissions
| Search AULRO.com ONLY! |
Search All the Web! |
|---|
|
|
|
")
Bookmarks