


 Reply With Quote
Hi,
Includes: 2 x fitted 12V H3 55W globes (P/No. 48321)
At 110W I would definitely be not running that through normal switching, I would use a relay from your switch and wire it through that to the battery.
cheers

I'm wanting to install a Narva 55w dual halogen lamp I have, on the back of my Disco and need some help n inspiration!
The light in question is the model #72401 in the link below:
Double Beam - Products - Narva
I'm wanting to mount it behind the spare tyre so that I can flood behind the rig with light for reversing out in the bush. I will be using an ARB/Carling switch to engage/disengage the light when in reverse.
I'm wanting to mount it similar to this but not as high:
Now for the questions...
1. What materials/designs has anybody used for this? (pics are great if you have them!)
2. What is the best way of running the wiring through from the outside to the inside? (I don't mind drilling holes, etc)
3. What materials and bits n pieces are recommended to buy?
4. Could somebody kindly draw up a quick schematic or give clear instructions of how to wire it up?
Massive thanks for your time in advance! I'm so under the pump timewise atm to get the Disco finished, so your help is definitely appreciated!
__________________
 YarnMaster
Hi,
Includes: 2 x fitted 12V H3 55W globes (P/No. 48321)
At 110W I would definitely be not running that through normal switching, I would use a relay from your switch and wire it through that to the battery.
cheers
Any idea which config relay I should be getting?Originally Posted by austastar

Wizard
SupporterWire exactly the same as driving lights Via a relay. Activate the relay coil by running it to the reverse light for the positive feed instead of the headlight high beam. You may want to run a switched positive to the coil as well so you can turn it on when camping without having to put it in reverse.
Cheers, David.
My Land Rover has made me a better Mechanic........
D2 TD5 Manual, CDL, Detroit Rear, Truetac Front, 2" OME lift, 32" MT Tyres, ARB Bull Bar, Winch, TJM Roof Rack, Driving Lights, Dual Batteries, ARB Side Steps, Rear Draws, Uhf.
Super Moderator
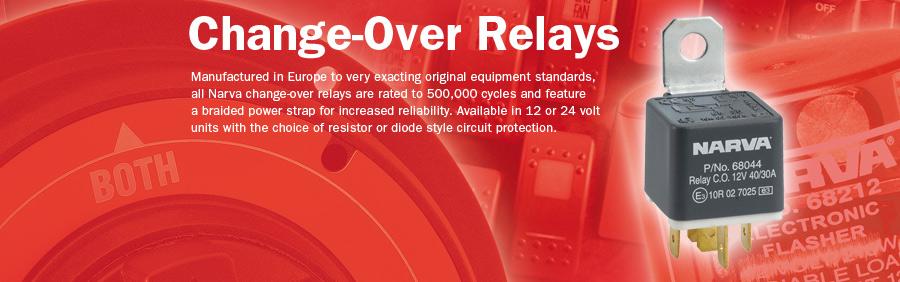
Id' be using a change over relay, something like Narva 68044 or 68048
Change-Over - Products - NarvaI use a similar relay in my RRc to bring on the rear fog lamps with the stop lamp circuit but still be able to use the fog lamps in fog.
- terminal 30 goes to the lamp
- terminal 87 goes to a fused ign/acc +ve (supply for lamp when in reverse)
- terminal 87a goes to a switched +ve (use as a worklight)
- terminal 85 goes tap into the reverse lamp circuit (after switch)
- terminal 86 chassis/ground -ve
Addit: Are you going to use both globes simultaneously or independently and where will the switch be to make this choice?
Last edited by Lotz-A-Landies; 13th May 2010 at 03:33 PM. Reason: addit
You won't find me on: faceplant; Scipe; Infragam; LumpedIn; ShapCnat or Twitting. I'm just not that interesting.
Thanks, those are brilliant answers and exactly the type of thing I was after...nice one guys, a massive time saver!
Both globes have a positive each, and they share an earth. I want to run them simultaneously ideally...or i could use one for reversing and one for a worklight come to think of it.
In that case, I'd be best to get a 3-way ARB rocker switch...1 setting for reversing, 1 for off, and 1 for worklight. I want to mount the switch on the dash where there are blanks readily available (underneath the clock). If there's any legality issues, then it'll have to be 2x rocker switches...one on the dash for reversing, and the worklight switch in the tailgate I guess.
Super Moderator
It can be an offence in some places if you can activate a rearward facing white lamp from the drivers position.
The risk is if a copper is ever going to check, although it may be the copper that is trying to pass you with his high beam on that you choose to flash with your worklight.
You won't find me on: faceplant; Scipe; Infragam; LumpedIn; ShapCnat or Twitting. I'm just not that interesting.
ForumSage
Something like this ??
This is a Hella equivalent to the Narva light you are talking about.
To make the bracket is simple.
Take your spare wheel carrier off and make up two shims from lengths of flat bar - the left shim is the same length as the length of the wheel carrier, the right shim is about 4 inches longer. Drill to match the carrier, with the 4 inch extension protruding at the top of the right side.
Weld a length of about 20mm square tubing to the flat bar extension and cut to the length required to give you the height that you want. Alternatively, you can make up a telescopic leg to go in this position so that you can adjust the height of your light. I welded a small tab at right angle to the top of the square tubing to mount the light on - there are various ways that you can do it.
Paint it all up and allow to dry.
Run the wiring for your light down the centre of the square tubing.
I drilled a hole through the back door and fitted a rubber grommet to get the wire inside the door.
Bolt your spare wheel carrier back on, with the two "shims" and light pole in position. If you are looking at fitting larger rolling diameter tyres, you can use this opportunity to turn the wheel carrier upside down. You will need to re-drill the centre holes on the wheel carrier, and make sure you drill your shims accordingly. (This is actually what prompted me to do the job - I was reversing my wheel carrier after having new tyres fitted and thought why not make up a light pole while I've got it all in bits).
You should find that the original bolts which hold the wheel carrier in position will all still be OK except for one - I had to get one slightly longer bolt, the rest still fit OK.
Once you have got your wiring inside the door, getting it into the back of the car is easy. There is a rubber tube running from the bottom of the door to the inside of the rear right guard with the original wiring inside it. If you remove the plastic trim inside the right rear guard, you will be able to get to both ends of this tubing. I poked a length of stiff wire (coat hanger) from one end through to the other, taped my new wiring for the light to the end inside the rear door, then pulled the lot through to the inside of the rear guard.
One suggestion though - 2 x 55W still pulls a bit of power (hence other people's recommendations to use a relay). If you want to use this for a work / camp light without the engine running, you will pull a battery down pretty quickly. Have you thought about one of the new LED worklights available. They put out a pretty good light at a fraction of the power draw. If you were to use a LED light (they are available in a similar configuration to what you are looking at), you would be much safer running it with the engine tturned off, and you could also get away with not running a relay. A simple switched and fused direct supply would be quite OK - unless you wish to also connect this light to your reversing lights, in which case a relay would still be the best way to go.
I'm actually thinking of replacing the light on mine with a LED worklight in the near future. I've already used a relay in wiring mine, but would feel much more comfortable with the lower draw on my battery when camping.
Cheers .........
BMKAL
Super Moderator
Nah that wouldn't work on El Duderino's vehicle as his is a D1!
Diana
")
You won't find me on: faceplant; Scipe; Infragam; LumpedIn; ShapCnat or Twitting. I'm just not that interesting.
Cheers for the heads-up! The Disco's going to be roadworthied in a few months time when I change over to NT plates, so in that case, I'd prefer to be safer than sorry...looks like a reverse switch in the cabin, and worklight switch in the tailgate.
 Posting Permissions
| Search AULRO.com ONLY! |
Search All the Web! |
|---|
|
|
|


Bookmarks