Page 8 of 8 FirstFirst ... 678
Results 71 to 74 of 74

Thread: D2 Dual Battery Setup

  1. #71
    Join Date
    Jan 1970
    Location
    Melbourne, Australia
    Posts
    738
    Total Downloaded
    0
    Quote Originally Posted by Mundy View Post
    That's why I only insulated on two sides not 4. I'm thinking the aluminium L shaped heat shield is a good idea, too.

    However, I think I'm going to have to move my battery to rear left panier. I've gone through 3 batteries in 5 years under the bonnet. The issue is not just the radiant heat from the turbo but the fact that it heats up the whole bay. In Nth Qld in winter it was still 35deg in the shade and the heat under the bonnet was enormous. I suspect the yellow top might last longer than most under the bonnet, but its too expensive to shorten its life so.
    I think 2 sides is OK. So long as the air coming from the front can reach the battery the airflow will help.

    This is my second D2 since 2001 and I've lost count of how many auxillary batteries I've gone through. The last battery I purchased went into the drivers side rear bin - we'll see how long it lasts.

    Cheers,

    Franz

  2. #72
    rob tilbury is offline AULRO Holiday Reward Points Winner!
    Join Date
    May 2016
    Location
    nowra
    Posts
    220
    Total Downloaded
    0

    Mate thats a neat job !

    Quote Originally Posted by Fluids View Post
    Damo ... pic's as promised.

    I basically did what UP shows on his web site.

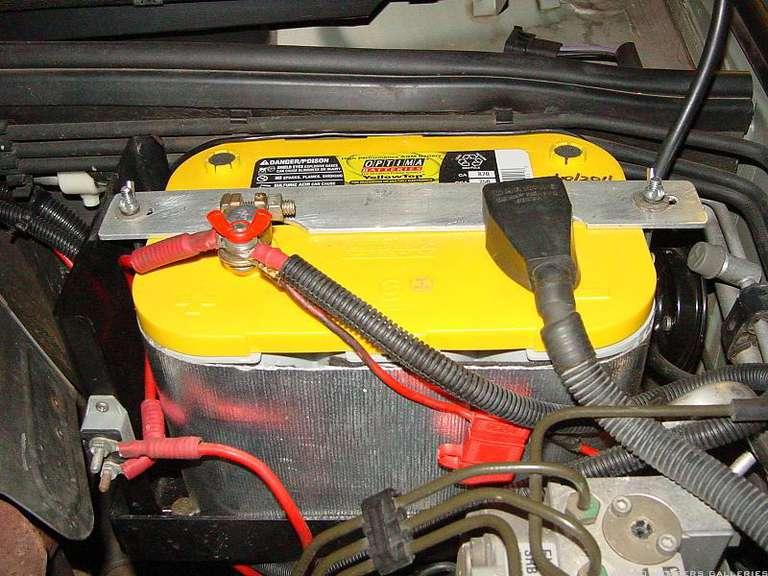
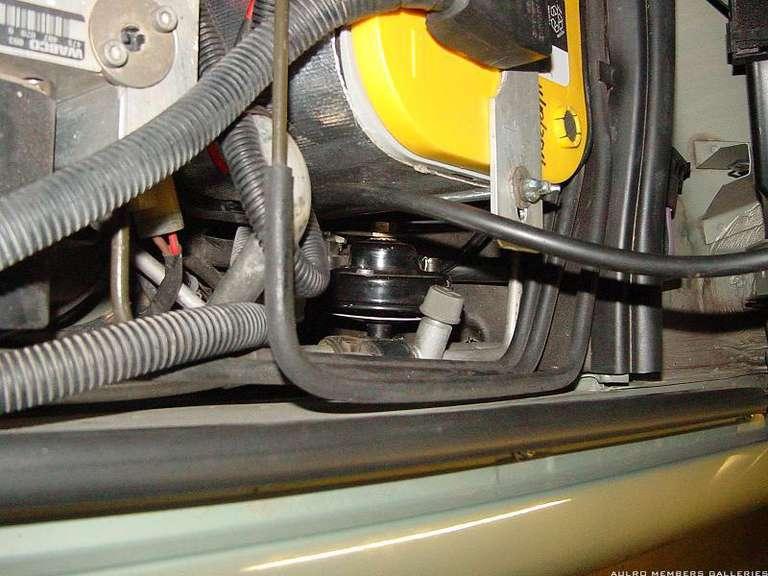
    Flip the ARB heat sheild 180 degrees, and slot the bolt holes to allow the heat sheild to move all the way to the left. (The D34 is 16mm wider than the standard battery that fits).


    The lip on the heat sheild for holding down the battery now fouls the battery tray edge ... took it off with a grinder, and the slot that's left is used for the new battery tie down rod to hook into (you can see in the pic' it's been bent a little so it runs parallel to the side of the battery)

    .

    The other side of the battery trays metal hold down lip has metal taken out to allow the battery to move to the right so it's not sitting on the heat sheild bolts. Took a carbide burr in a power drill and perserverance.


    Drill a second hole for the rhs battery tie down rod. You might notice the tie down strip across the top of the battery has slotted holes for the tie down rods ... the rhs one needs to be hard up against the battery or the top of it fouls the rolled section of the underside of the bonnet and stops the bonnet from closing.


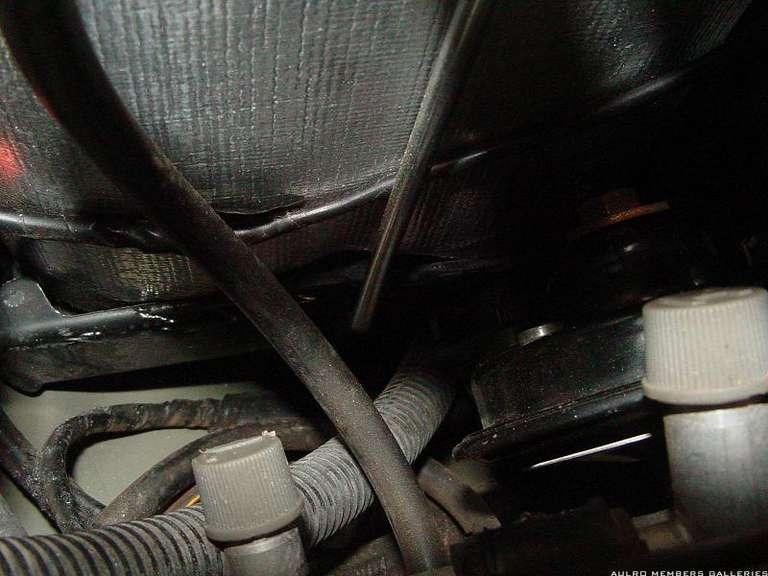
    You can just see the heat sheild bolt head in the bottom of the tray in the picture above, and below.


    Here's a shot from the drivers side of the engine bay ...


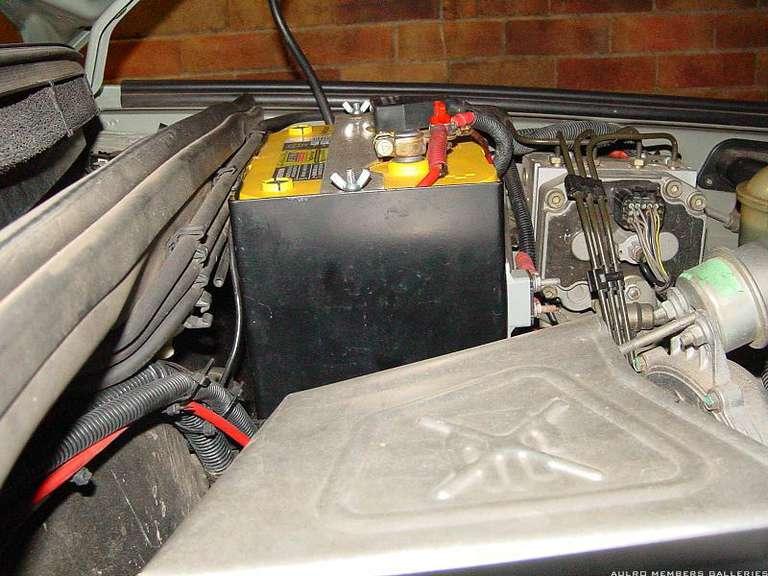
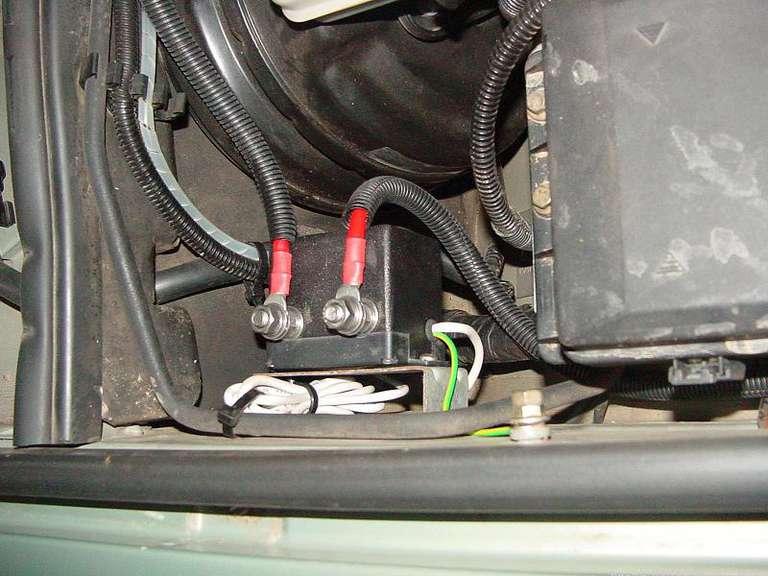
    ... and a shot showing the alarm horn ... it's mounting bracket needs to be flattened then rebolted back to the tray ... this takes a little bit of tricky manouvering.


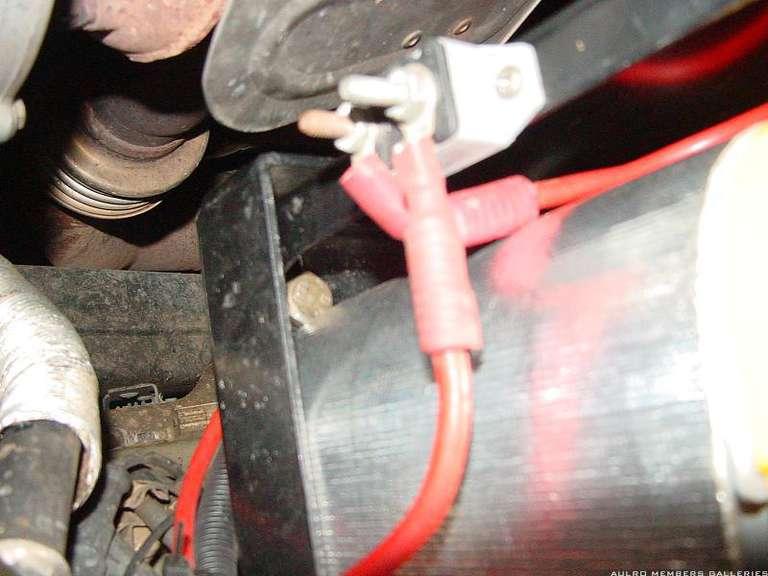
    The isolator is on the drivers side, on a steel bracket mounted to the two studs already existing in the inside guard skin. Earth is to the earth stud just next to that. See http://www.aulro.com/afvb/projects-t...overy-2-a.html


    Hope all that helps a bit. It's a tight fit, like a finger in a bum so to speak, but it's a good fit if you take the time. I added the Thermo-Tec battery heat sheild as an extra insurance for heat. The battery is sitting on a sheet of the stuff, plus it's been wrapped with the overlapped part of the sheilding wrap at the turbo side of the battery tray. Was about $30 off Ebay for the kit.
    NEAT AND TIGHT <<<
    Must have thought really ?Is this going to fit >
    one of the neatest instals i have seen ,,,
    Is that an OPTIMA BATTERY ?
    will have to check out the pricing ..

  3. #73
    Join Date
    Jan 1970
    Location
    Avoca Beach
    Posts
    14,152
    Total Downloaded
    0
    Hmm the actual physical setup (ARB tray) is similar to mine although I use a blue top Optima and it is my starting battery. They have more CCA than a yellow top of the same size.
    I have used stainless sheet as the heat shield and covered it with ALDI high brightness aluminium tape for reflection.
    As well I polished the turbo heat shield.
    I also used a foam insulator around the battery.
    So far 3.5 years and no swelling or leakage at the terminals and seems to hold charge well. This included a round Oz trip with temps to low 40s in WA and GRR.
    I have a 130AH AGM hybrid in the original position as my house battery, with an ABR controller with 12.4 cutoff, and the optional dash mount auto plus A+B switch on the dash.
    For earth because it is the starting battery I have one neg to block and one to LH inner guard.
    Regards Philip A

  4. #74
    Join Date
    Mar 2009
    Location
    Port Stephens N.S.W
    Posts
    3,158
    Total Downloaded
    0
    Thanks Rob. Yes, an Optima D34 ... fits like a finger in a bum !

    Almost 5yrs since fitted and still going strong. The tray was already there when I purchased the D2, but I prefer it up front as there's already plenty of weight behind the rear axle with drawers, tools, gear, etc ... +200kg on the ball when i'm towing. Rear space in a D2 is at a premium already.

    The Optima yellow/blue batteries are happy at higher charge voltages and will recharge at at a faster rate than other types of batteries. Seems to be coping with the engine bay temps' without issues.
    Kev..

    Going ... going ... almost gone ... GONE !! ... 2004 D2a Td5 Auto "Classic Country" Vienna Green

    2014 MUX LST with fruit
    2015 Kimberley Kamper "Classic"

Page 8 of 8 FirstFirst ... 678

Bookmarks

Bookmarks

Posting Permissions

  • You may not post new threads
  • You may not post replies
  • You may not post attachments
  • You may not edit your posts
  •  
Search AULRO.com ONLY!
Search All the Web!