Page 3 of 4 FirstFirst 1234 LastLast
Results 21 to 30 of 31

Thread: 12S Tow electrics (white plug) removal

  1. #21
    Join Date
    Aug 2015
    Location
    WA
    Posts
    69
    Total Downloaded
    0
    Not sure what happened here, I posted a quick reply asking Strydes for some pics, then I seen a few pics further down so went back and edited my post so all got muddled up, apologies for any confusion.

  2. #22
    Join Date
    Nov 2014
    Location
    WA
    Posts
    126
    Total Downloaded
    0
    Quote Originally Posted by LRD414 View Post
    I'd appreciate any photos or details you'd care to post. I'm considering doing this.

    Scott
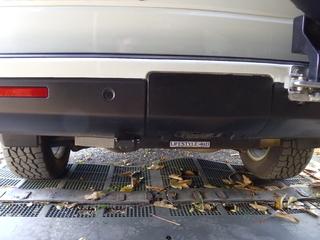
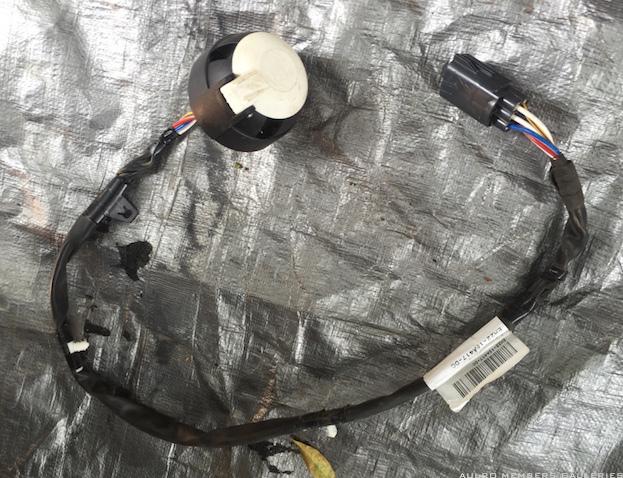
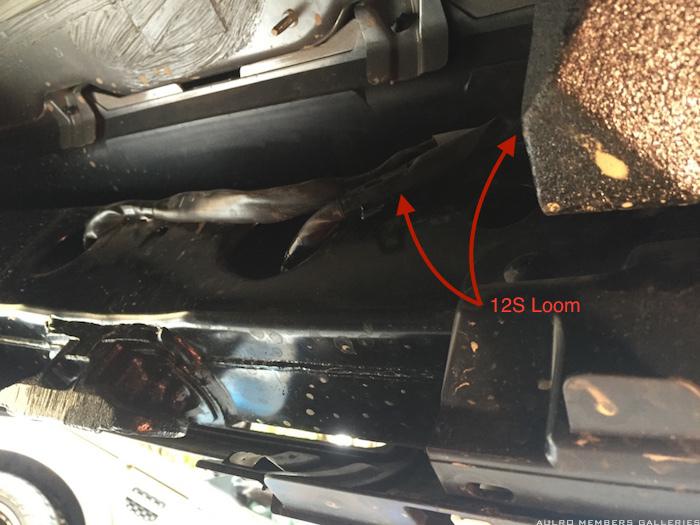
    My Traxide should arrive in the next week or two and I'll post photos once it's in. At the moment it's just a hole where the 12S plug used to be.

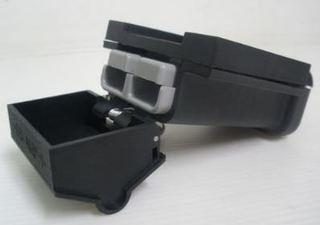
    I'm thinking of putting in one of these as a mounting block but on Tim's advice I'm going to do the normal install first then see what I think. His view was that most people end up preferring for it to be loose as it's easier to connect/disconnect than when rigid.

  3. #23
    Join Date
    Aug 2015
    Location
    WA
    Posts
    69
    Total Downloaded
    0
    Have located the plug in the wiring loom to disconnect the white plug, problem is can only get one hand to it so going to be difficult to unplug it.
    Did you drop the rear bar off ?
    Just cutting the wires is looking very tempting.
    Have installed Llamas, dual battery system, new brake pads and sensors all round, roof rack, all in the last week so my hands are in a bit of a mess.
    Cheers
    Last edited by sandgroper57; 21st September 2015 at 01:09 PM. Reason: typo

  4. #24
    Join Date
    Nov 2014
    Location
    WA
    Posts
    126
    Total Downloaded
    0
    Might be different for an RRS but the easiest part was the unplugging. I took it off the 'hanger' on the body that hold the plug in place and then I got one hand onto each end of the plug, form memory with a small screwdriver to push in the release tab. The hard part was getting the loom to feed out neatly once it was disconnected.

    Didn't drop the bar off.

    I'm in the Belmont area, if you're not to far away and feel like a drive I'm happy to give you a hand over the weekend if you're left scratching your head still.

  5. #25
    Join Date
    Aug 2015
    Location
    WA
    Posts
    69
    Total Downloaded
    0
    Thanks for the offer but no way will two hands fit in there on the RRS, I will drop the bumper off one day, sometimes can just pull one corner back to get enough access. All is working fine for now so just want to tidy it up.
    Picking up a new camper tomorrow so heading bush this weekend.
    Got the linear electronics LED adapter to fit from the large black plug to a 7 pin small round plug which is on both my trailers so also considering mounting the unit permanently to the car hence the large black plug will also become redundant.
    Cheers

  6. #26
    Join Date
    Nov 2014
    Location
    WA
    Posts
    126
    Total Downloaded
    0
    Bit of an update, sorry it's taken so long. The Traxide kit is in and working. I got the Anderson lead through the vacated 12S spot and as Scott suggested it was only just long enough.

    It's perfectly functional as is for now, but I'm a big fan of solid fixings so I'll buy a flush mount kit for it and hopefully it'll fit through the hole without needing to modify (kit says it needs 40mm wide and 20mm high and I haven't measured yet). Will aim use the factory bolt holes also, just redrill the provided bracket. Will update again when it arrives and I get some time to have a go.
    Attached Images Attached Images

  7. #27
    Join Date
    Nov 2014
    Location
    WA
    Posts
    126
    Total Downloaded
    0
    Last update....

    After getting my 'Trailer Vision' mounting piece some time ago I finally got around to installing it. Pretty straight forward. There is a factory plastic mounting block that screws into 4 captive nuts in the body which you can see was still in place in my posts above. I basically just cut a piece of ally to the same size with same holes for the body fixing, and the suitably sized cutout to mount the Trailer Vision piece to that. It's got long bolts so I just put a spring washer and nut onto the end of those to fix it to my custom bracket.

    Easy job, might take you an hour to make up the bracket but is strong and fairly neat once done. The washers on the top mount I have to admit are because I didn't get the bolt holes exactly right and had to open them a bit. Probably not necessary (and not quite as neat) but I want it to be solid for constant use.

    Overall I think its worth it. Unplugging becomes a one-handed job and no bouncing around .
    Attached Images Attached Images

  8. #28
    Join Date
    Mar 2007
    Location
    Gawler SA
    Posts
    48
    Total Downloaded
    12.74 MB

    12S Connector PIN 6

    Can anyone advise what the current rating and wire size is on a D3 for PIN 6 on the 12S plug, which is for a fridge I believe. Is this switched with the ignition or live all the time?

    Cheers John
    Johnny Ruch

  9. #29
    Join Date
    Mar 2007
    Location
    Kalgoorlie WA
    Posts
    5,546
    Total Downloaded
    0
    Quote Originally Posted by strydes View Post
    Last update....

    After getting my 'Trailer Vision' mounting piece some time ago I finally got around to installing it. Pretty straight forward. There is a factory plastic mounting block that screws into 4 captive nuts in the body which you can see was still in place in my posts above. I basically just cut a piece of ally to the same size with same holes for the body fixing, and the suitably sized cutout to mount the Trailer Vision piece to that. It's got long bolts so I just put a spring washer and nut onto the end of those to fix it to my custom bracket.

    Easy job, might take you an hour to make up the bracket but is strong and fairly neat once done. The washers on the top mount I have to admit are because I didn't get the bolt holes exactly right and had to open them a bit. Probably not necessary (and not quite as neat) but I want it to be solid for constant use.

    Overall I think its worth it. Unplugging becomes a one-handed job and no bouncing around .
    I like the way you've done this. Because I am rarely towing and can't be bothered removing the plastic panel in the bumper to expose towing plugs etc I have done it slightly differently on mine.

    I bought one of these Trailer Vision housings -

    and mounted it up under the bumper, just to the left of centre and clear of the tow hitch socket. It is protected by the long range tank (there's a few scrapes and gouges in the bottom of the tank where I've dragged its bum a few times, but have never hit the plug or the bottom of the bumper).


    I've modified the output cables on both my CTEK charger and a folding 80W solar panel using standard CTEK plugs (purchased at Ashdown Ingram) so that they can be used either with an Anderson plug or alligator clips so that I can plug them either into the rear of the vehicle, or directly to a battery if required.


    I have three batteries in the vehicle and a Traxide system connecting them all. I have found that plugging the CTEK into the rear socket overnight once every two months or so (if I'm not doing any long trips) charges all three batteries and is keeping them in good condition. If I do ever need to use the CTEK (or the solar panel) to charge an individual battery, I simply swap the end of the lead over to alligator clips and go directly to the battery. The only times I have done this so far though is when charging the battery in SWMBO's Camry.

    When camping, I have a decent LED strip light from DRIFTA which slides into the spare sail track under the awning. This has an Anderson plug, which I plug into the socket on the rear of the vehicle without either having to remove the plastic panel in the bumper, or run wires into the car through windows / tailgate. I have also fitted an Anderson plug to my portable compressor and plug this into the socket on the rear of the vehicle when pumping up tyres / air mattresses etc.

    Works for me.
    Cheers .........

    BMKAL


  10. #30
    LRD414's Avatar
    LRD414 is offline Super Moderator Subscriber
    Join Date
    Oct 2014
    Location
    Brisbane
    Posts
    3,737
    Total Downloaded
    0
    Here's a couple more photos of the wiring loom removal, completed today to make Mitch Hitch installation easier.
    I have put the loom back in place with zip ties so if it ever needs changing or removing again (Mitch Hitch re-torque for one thing) it will be very simple.


    The loom is easy enough to remove but one of the four plastic plugs that holds it to the 12N (black) loom is right above the body weights and I found it tricky to undo, with some skin scraped off my hand.
    The body weight is visible to the right in this photo.


    Plug removed at the other end of the loom....


    The plug can be opened with one hand if you manage to press the release tab correctly, which is not easy and requires perseverance.
    Don't forget to lower the spare wheel to the ground to gain access.

    Cheers,
    Scott
    D4 TDV6 MY14 with Llams, Tuffant Wheels, Traxide DBS, APT sliders & protection plates, Prospeed Winch Mount w/ Carbon 12K, Mitch Hitch & Drifta Drawers
    Link to my D4 Build Thread
    D3 2005 V8 Petrol
    Ex '77 RRC 2 door. Long gone but not forgotten.

Page 3 of 4 FirstFirst 1234 LastLast

Bookmarks

Bookmarks

Posting Permissions

  • You may not post new threads
  • You may not post replies
  • You may not post attachments
  • You may not edit your posts
  •  
Search AULRO.com ONLY!
Search All the Web!