

 Reply With Quote
Nevermind. 2 bolts hold a plate on the back of that bracket (8mm head) and then 3 bolts hold the bracket to the head (10mm heads). Got the plate off and loosened the bracket enough to move it out the way.
On on!

 Super Moderator
Oh, so I've bitten the bullet and torn into the car. I can't get the drivers side high pressure fuel line out.
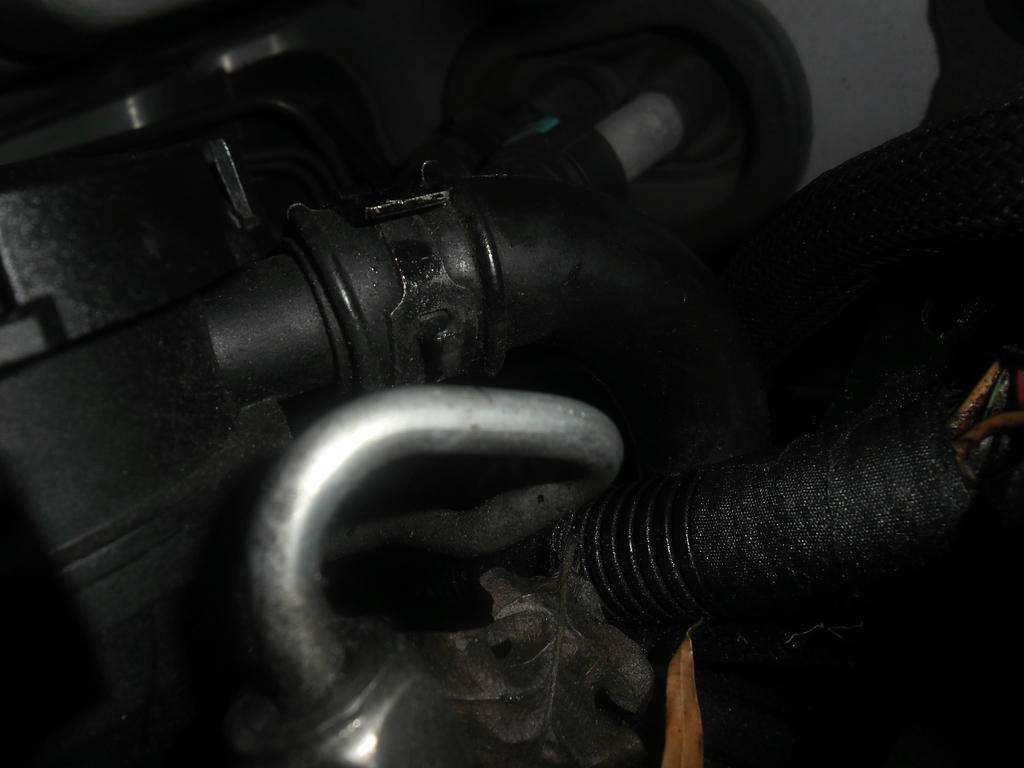
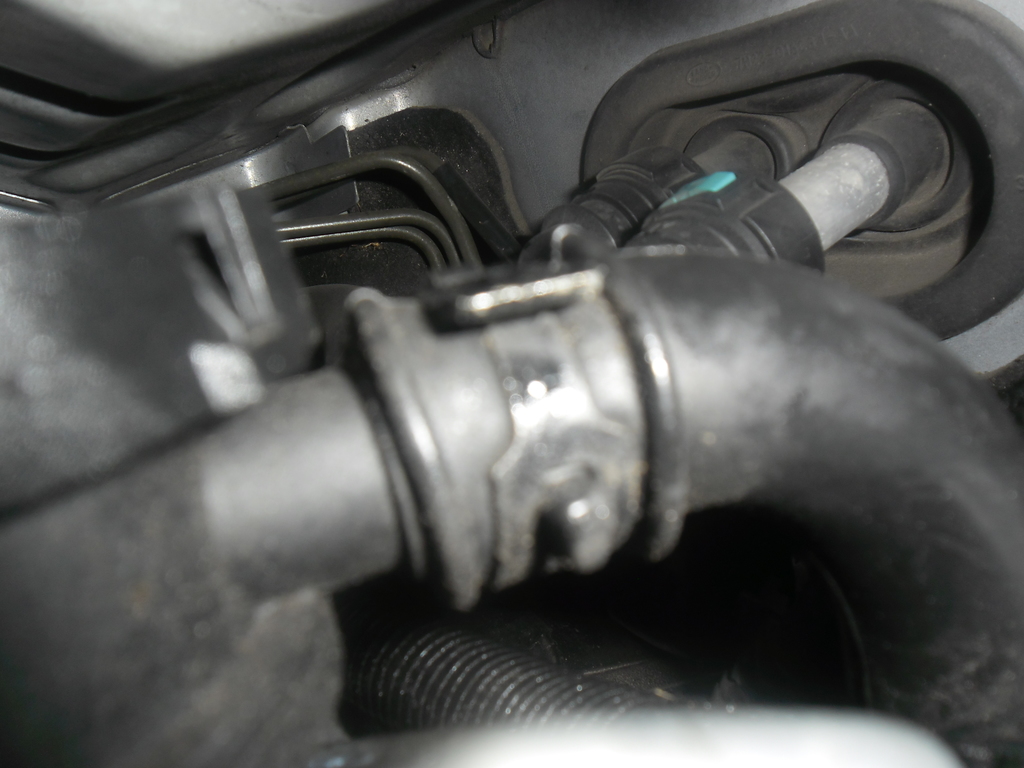
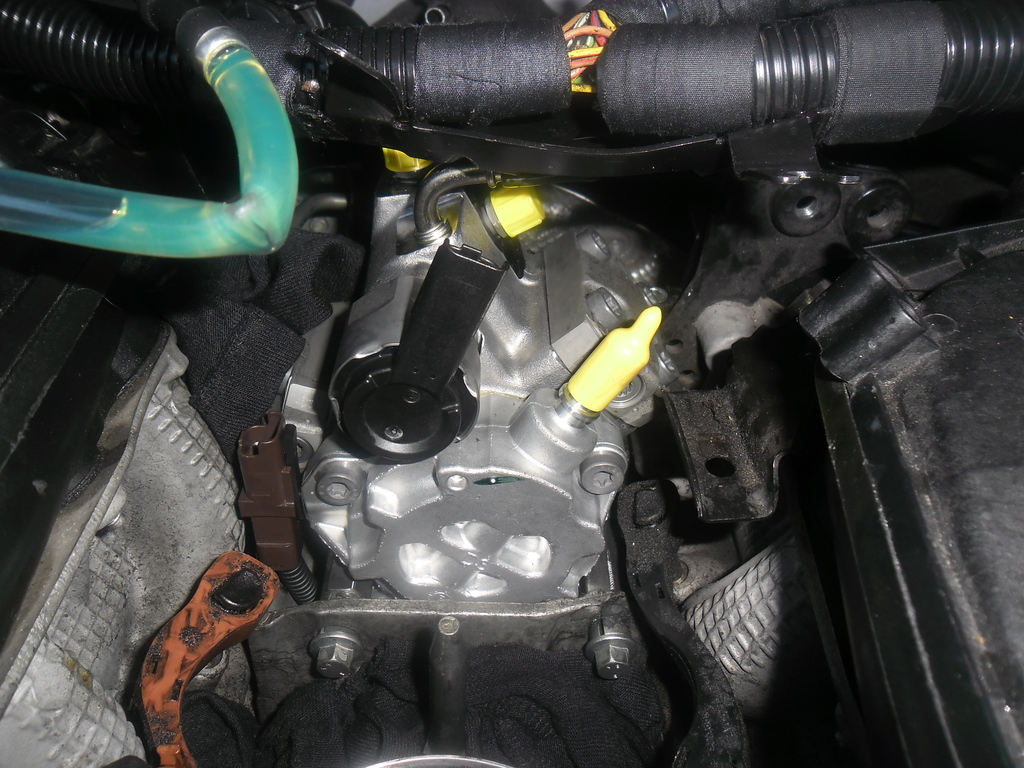
There is a bracket behind the head, and a plastic dashpot sort assembly on the back of the rocker cover, and the gap between them is too small to pass the fuel pipe. I can't see a way of removing the bracket as it feels like it's bolted right down behind the head, and the dashpot for all intents and purposes looks like it is part of the rocker cover. Anyone bumped up against this before?

Super ModeratorNevermind. 2 bolts hold a plate on the back of that bracket (8mm head) and then 3 bolts hold the bracket to the head (10mm heads). Got the plate off and loosened the bracket enough to move it out the way.
On on!
Super ModeratorRight. End of day 1. 4.5 hours. close enough to 3 of those figuring out how to get the oil separator out. That's an arsehole of a job, and I'm still not convinced I'll ever get it back in. I've been taking pics and notes as I go, so it's a lot slower going than if I were just at it. I might do a write up if I get some time.
Turns out yet again the previous mechanics have screwed me and the gaskets between the oil separator and the block are missing. Result is the whole vee is full of ****. So I'll have to see if I can find some locally if I want to get it back together again any time this century.
So, we are at the point where we are ready to remove the belt. Cover is off, and then stumps were called (Are you done yet? Come and deal with the kids before I do something I'll regret). Let's see what happens tomorrow.
Ok, got some quiet time on the sofa, so I'll start writing it up and see what pictures I can put in later.
As part of this go-around I'm blanking the EGRs (I'd already done that but this time I'm removing the pipework), replacing the coolant outlet and the EGR cooler inlet pipework (as mine had to be cut-and-shut with some 19mm copper pipe to patch a leak).
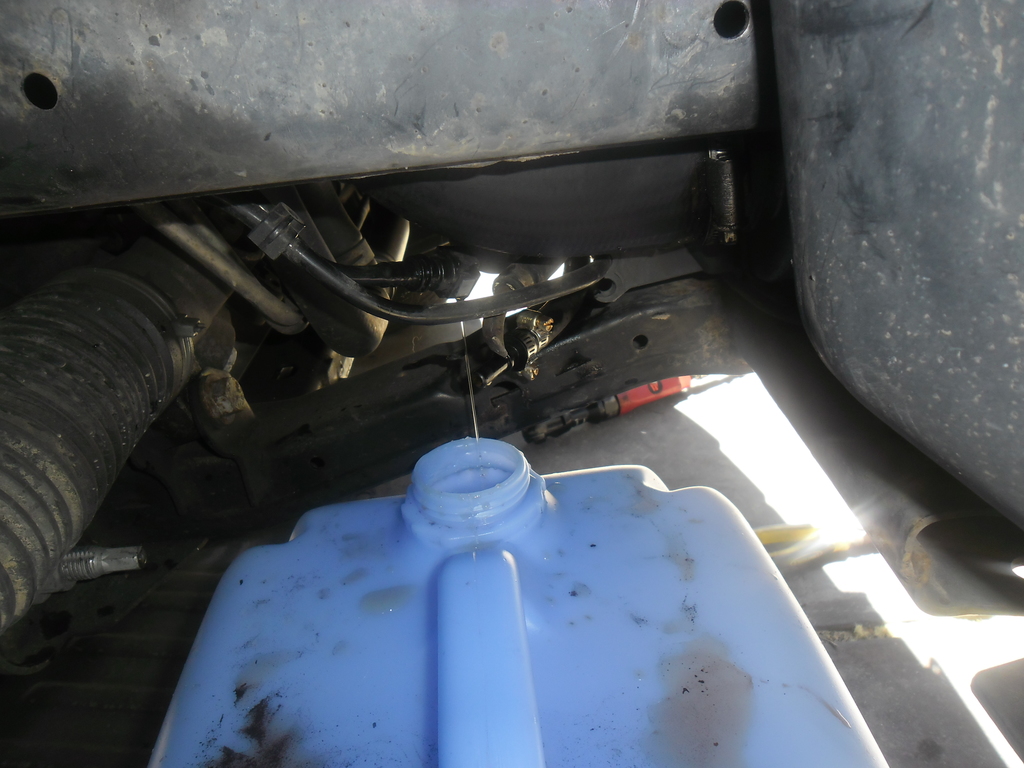
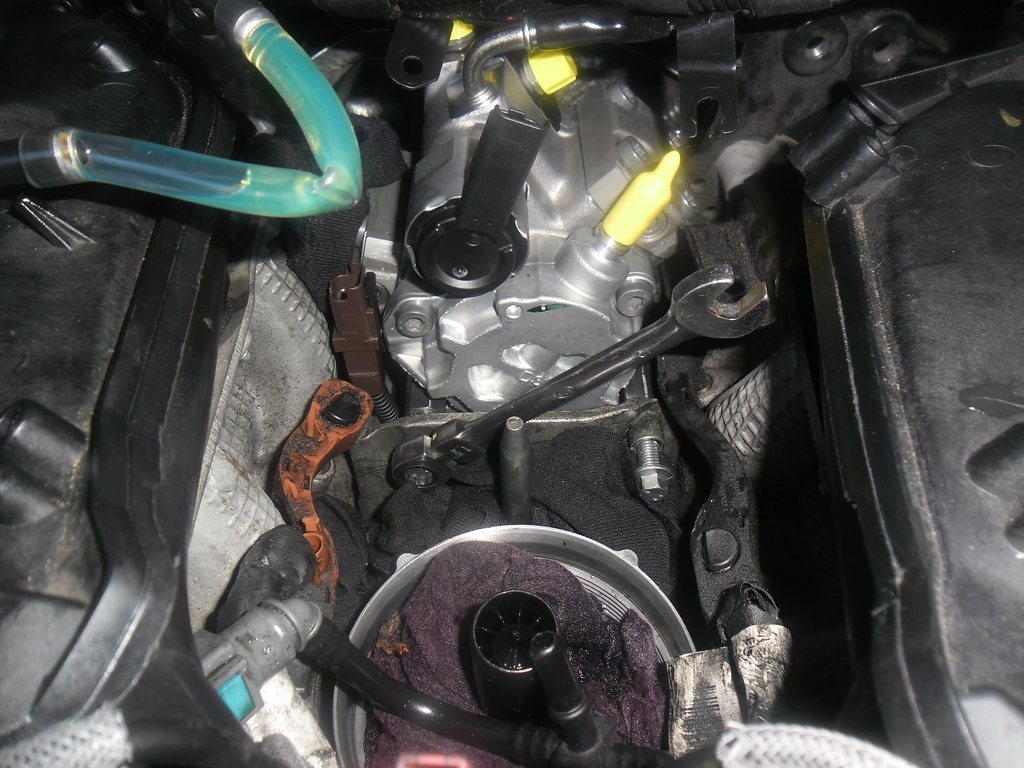
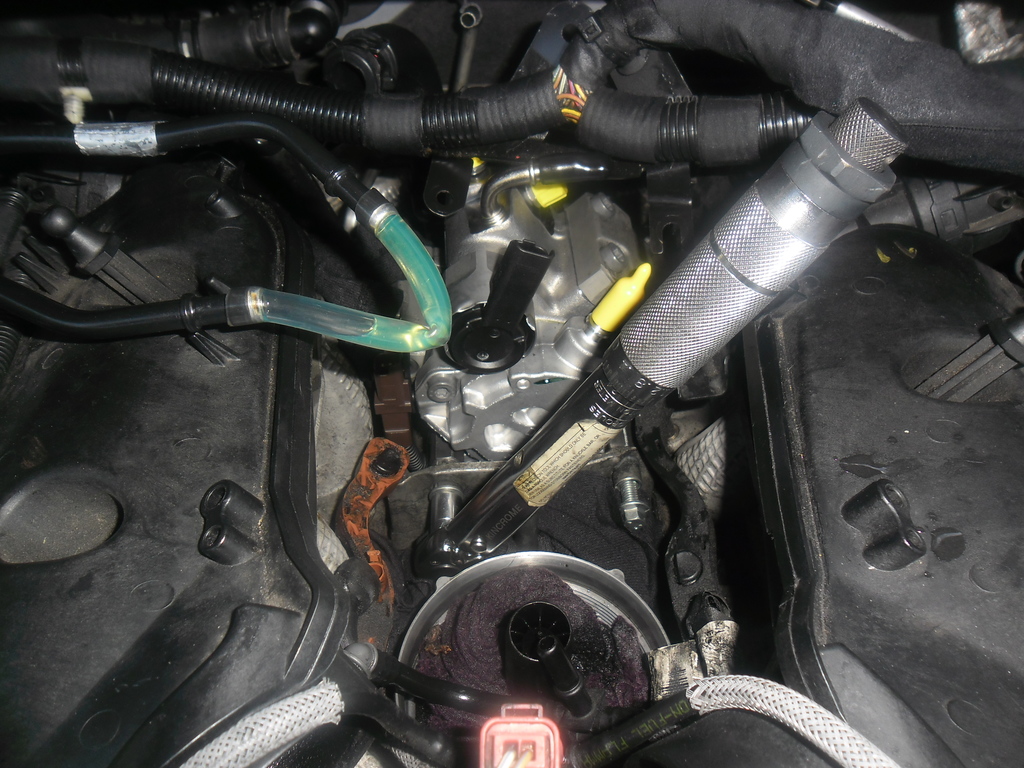
So, as this will require removal of the EGR coolant crossover pipe, and I'm attacking other parts of the system I started by draining whatever I could out of the system from one of the fuel cooler pipes (got about 8-9L) :
The EGR cooler pipe is supposed to have 2 bolts apparently. Mine had one.
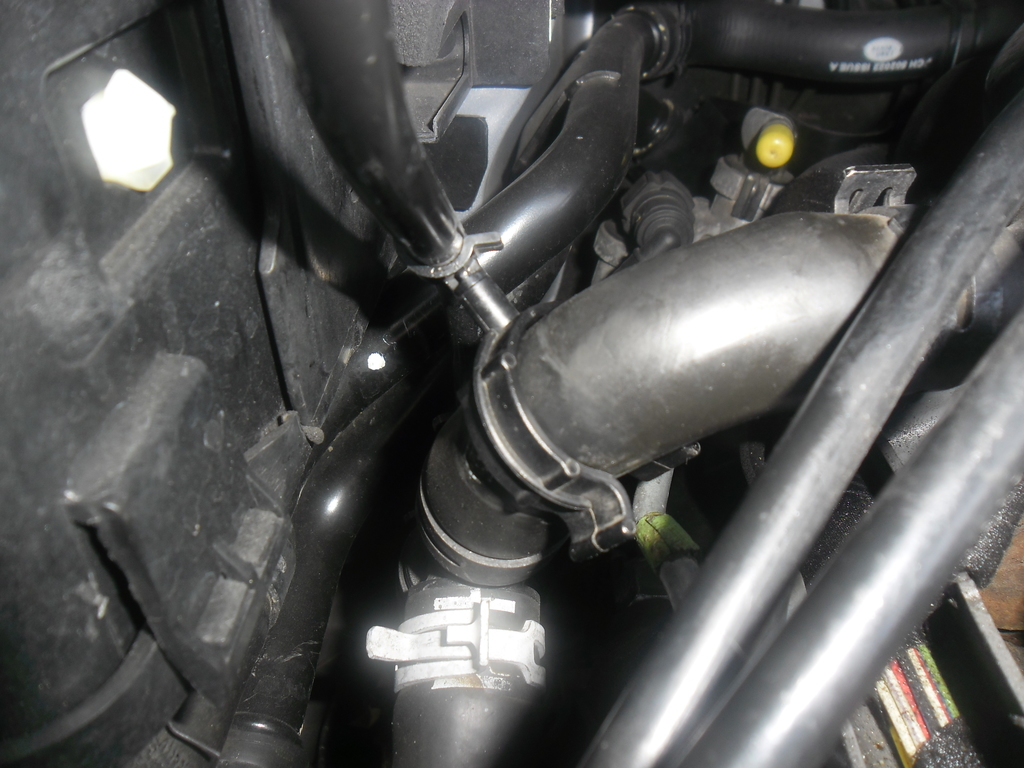
Clip holding clutch pipe and clip holding wiring harness on passenger side
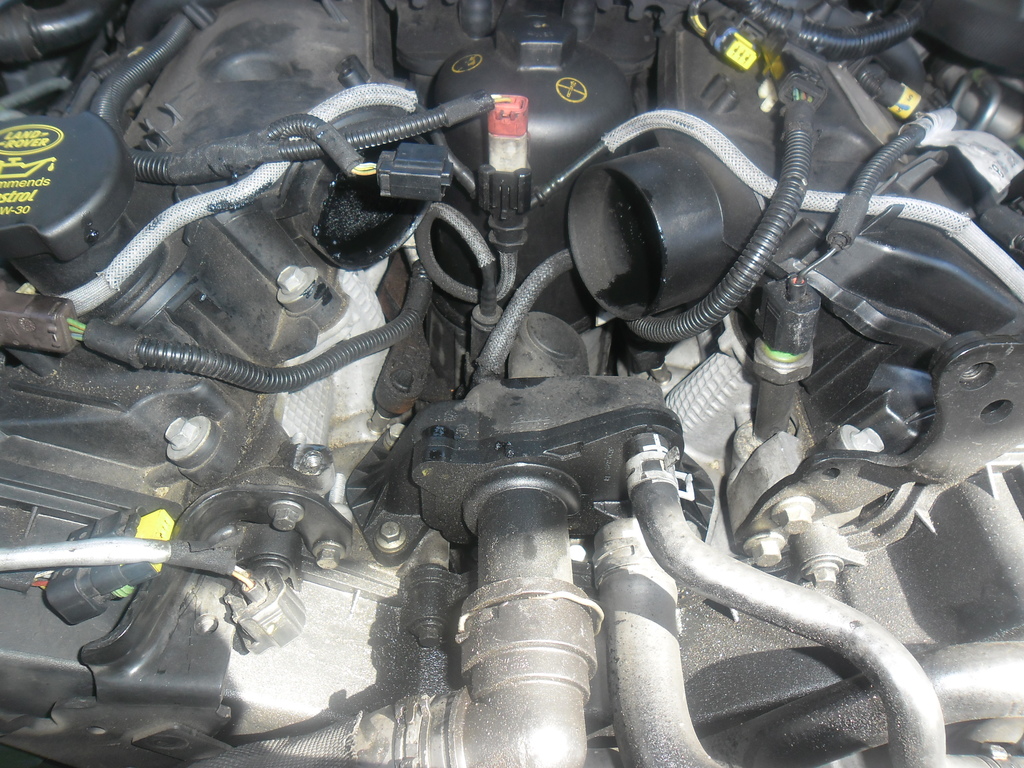
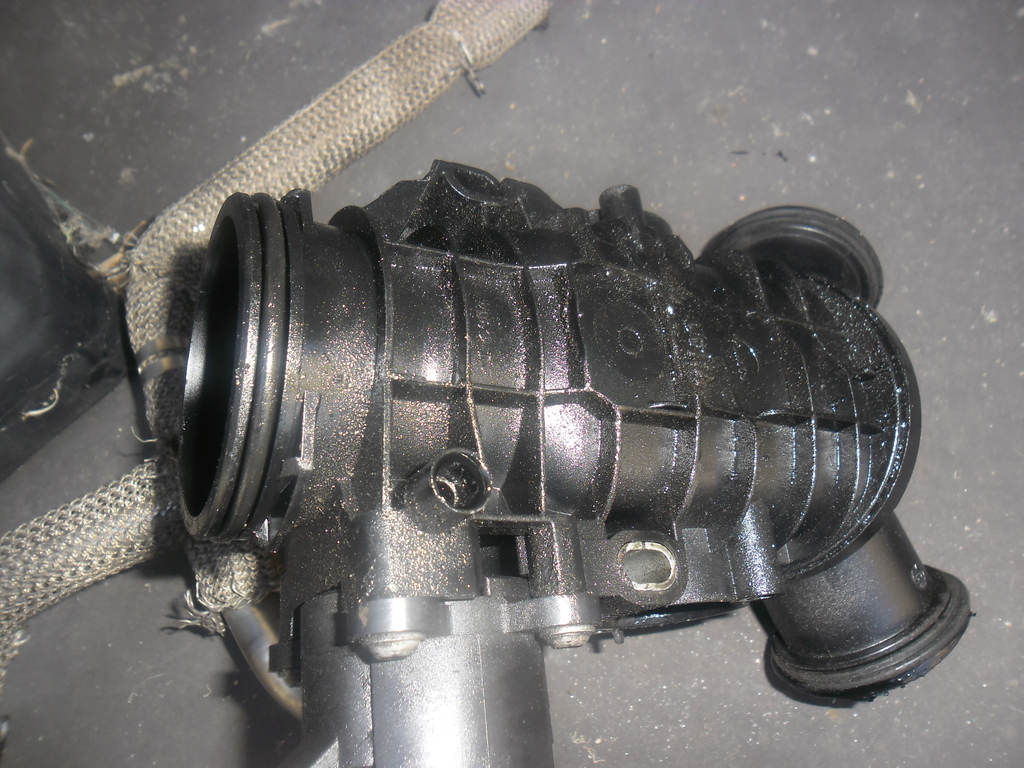
Then removing the throttle Y body. That turned out to be a good idea as it gave me some more room to move, and it's pretty grungy so I'll clean it while it's out.
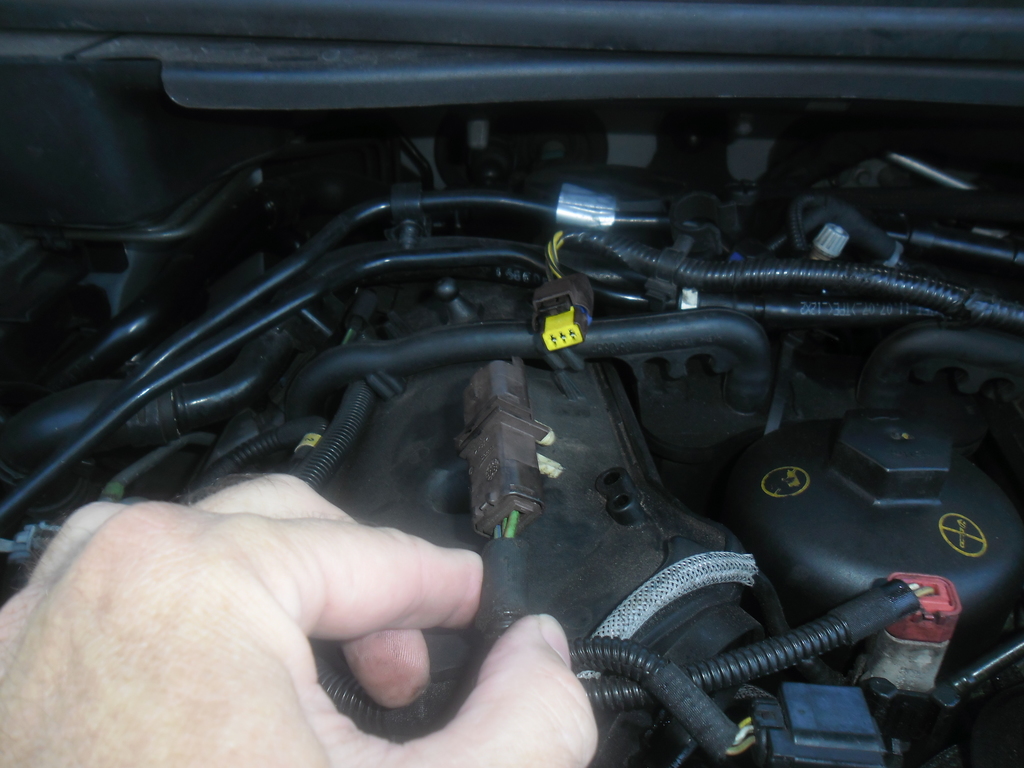
Disconnect both glow plug connectors.
Remove both PCV hoses from the top of the rocker covers.
Mine has a large hose at the back of the oil separator that goes down the back somewhere. That had a spring clip on it and the orientation was such that no multi-grips or pliers I owned would get on it. I spent a lot of time swearing at it and I was just about to resort to cutting it off and ordering a new hose when I remembered I had some small G clamps, so I put a little G Clamp on the spring clip and wound it closed. Magic.
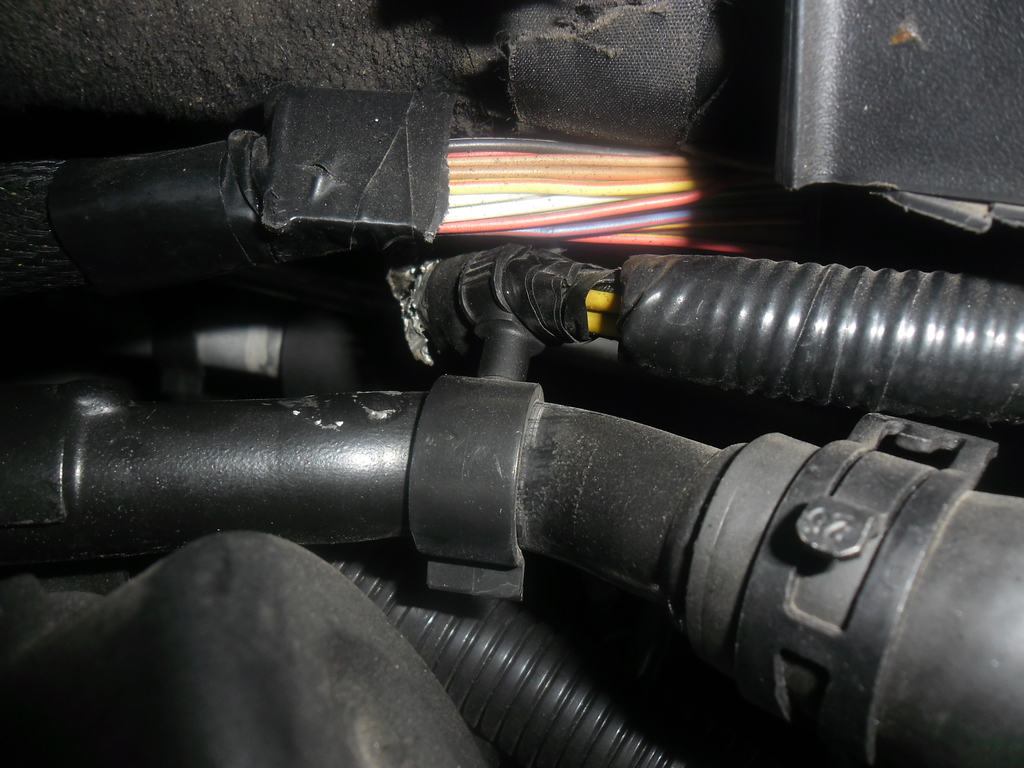
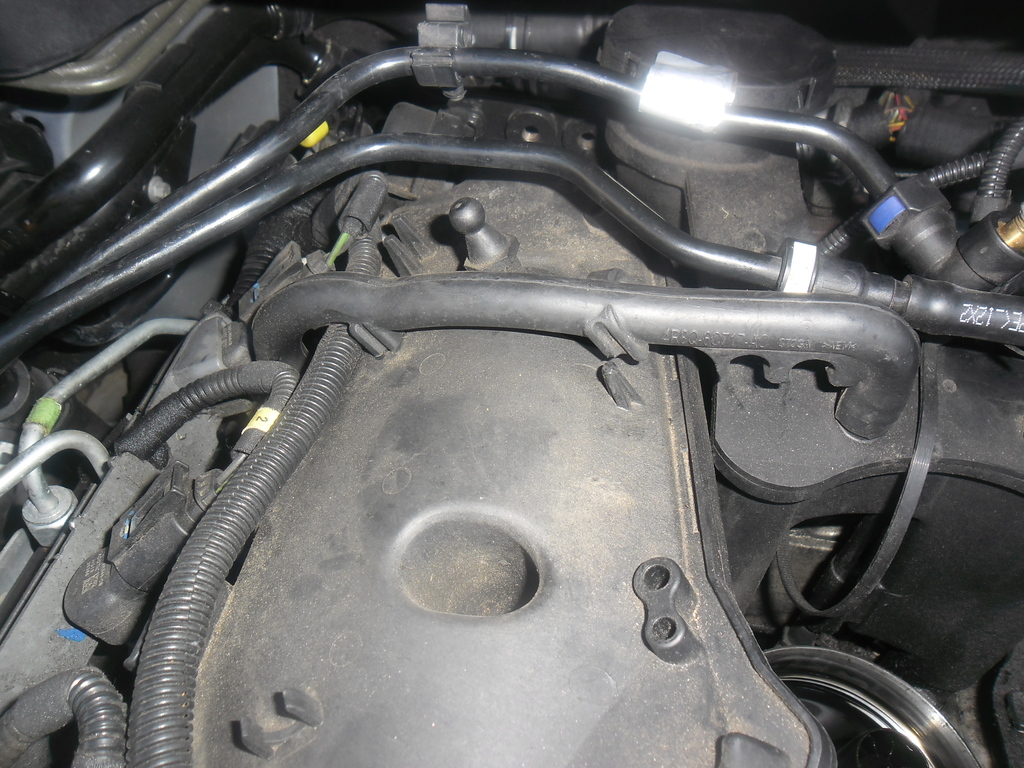
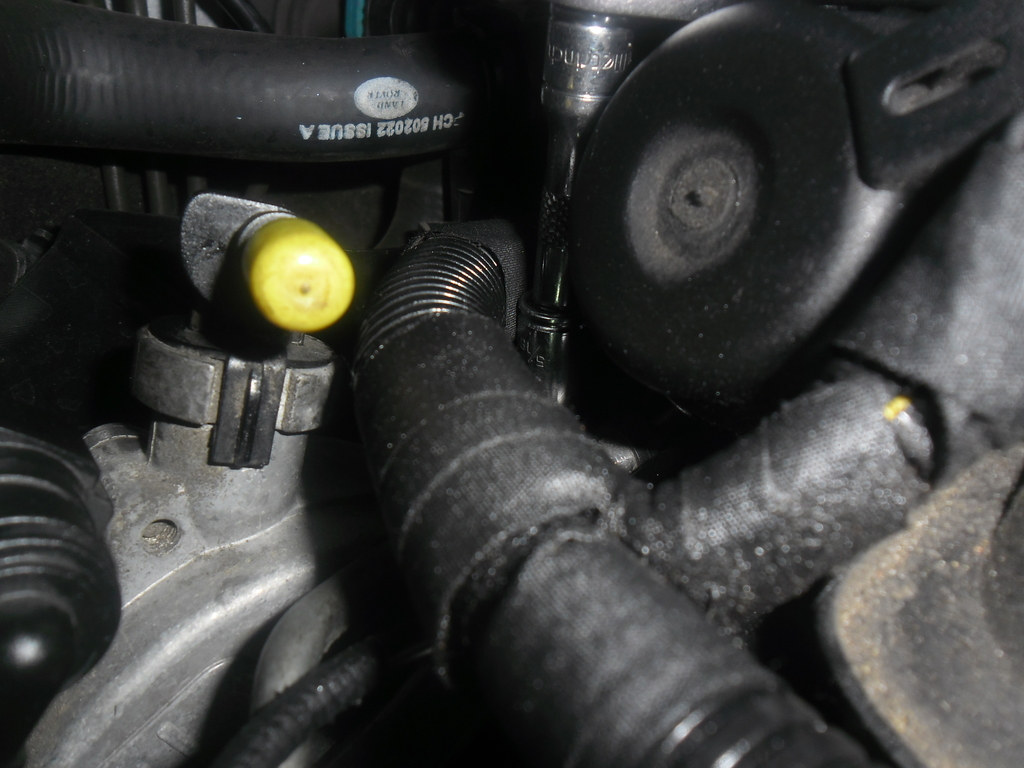
Next up, pull the oil separator straight up to give room to pop the harness connectors off the HPFP PCV & VCV, and remove both low pressure fuel lines. I had nothing to cover the low pressure hard lines with so I grabbed a bit of vinyl tubing and looped them together. The low pressure return line has a fiddly little T junction toward the back of the passenger side head inside the Vee. That *needs* to be unclipped so it can be pushed out the way to remove the oil separator.
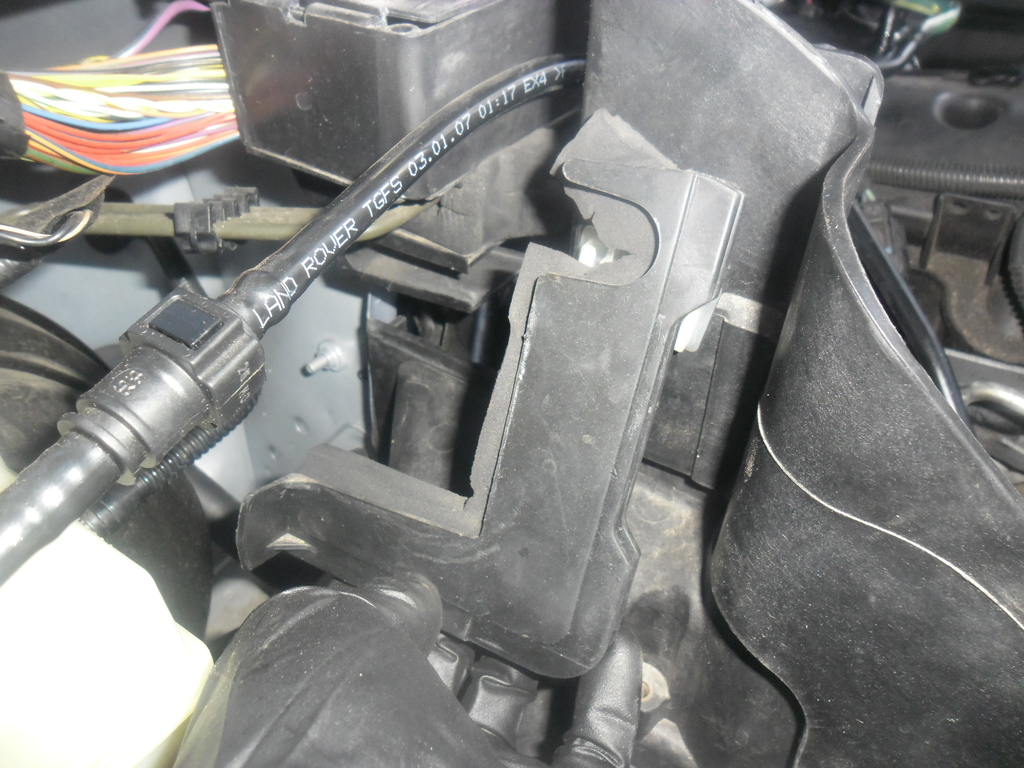
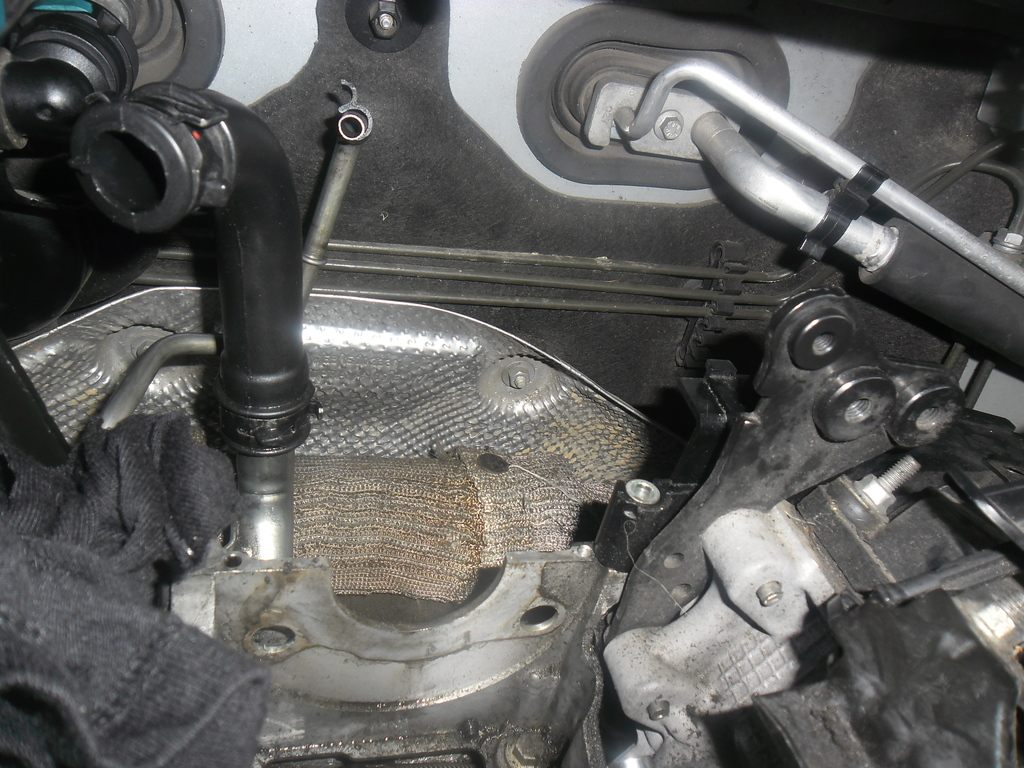
Now, the drivers side high pressure fuel pipe. On the top of the pump it's a doddle. On the rail it requires completely removing the box that encloses the braking hardware. Once you get that out the way you can get a 17mm spanner on it to crack it loose. I undid those and wiggled the pipe out of the way and put a plastic cap on the rail.
Preemptive strike on passenger side.
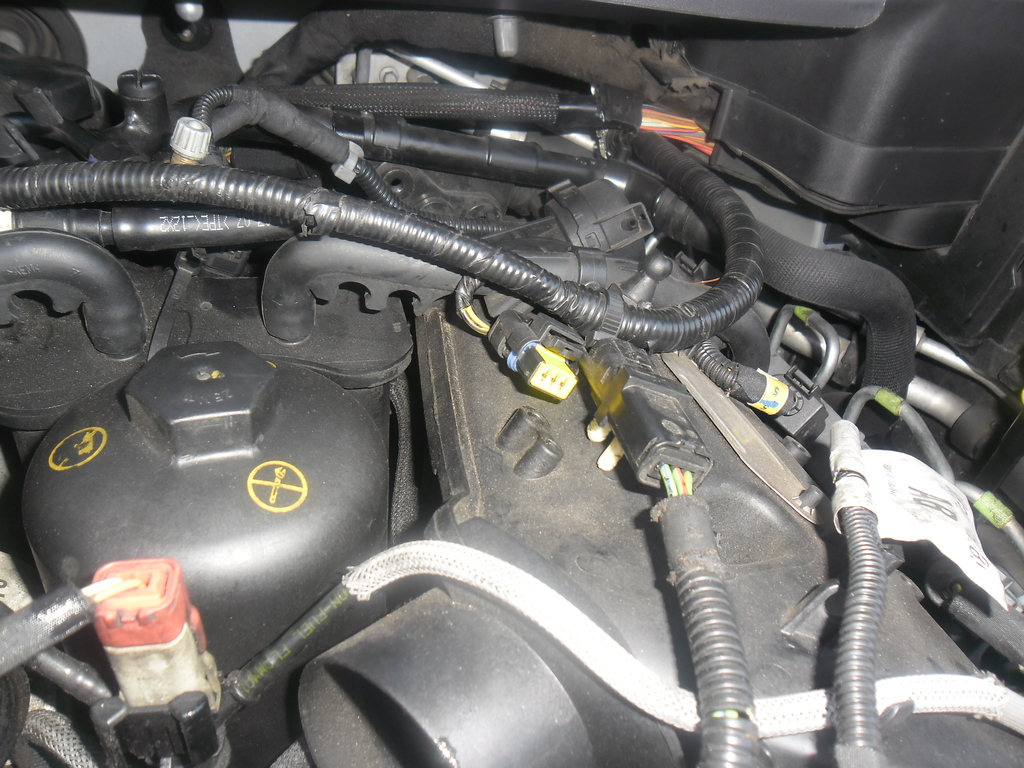
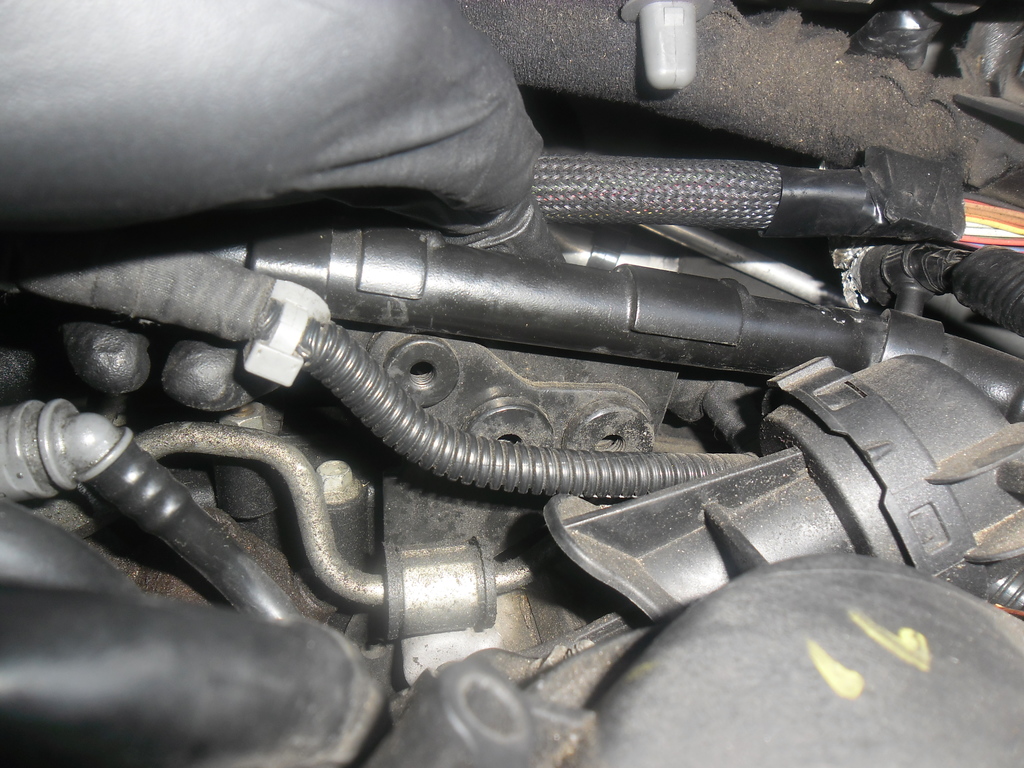
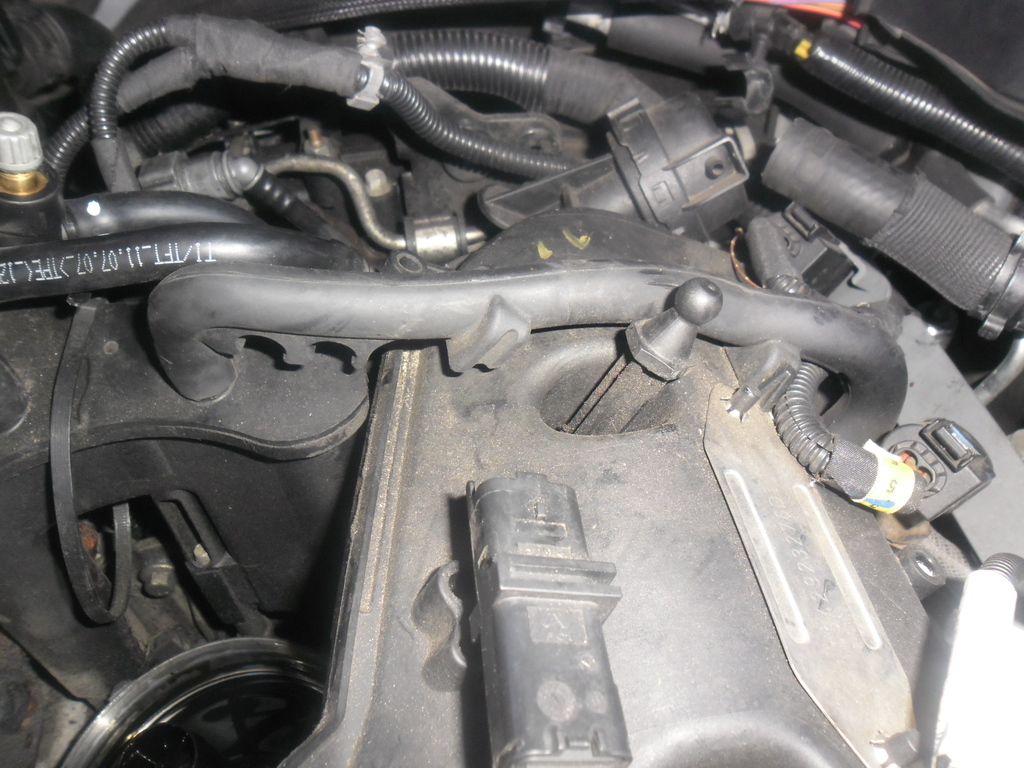
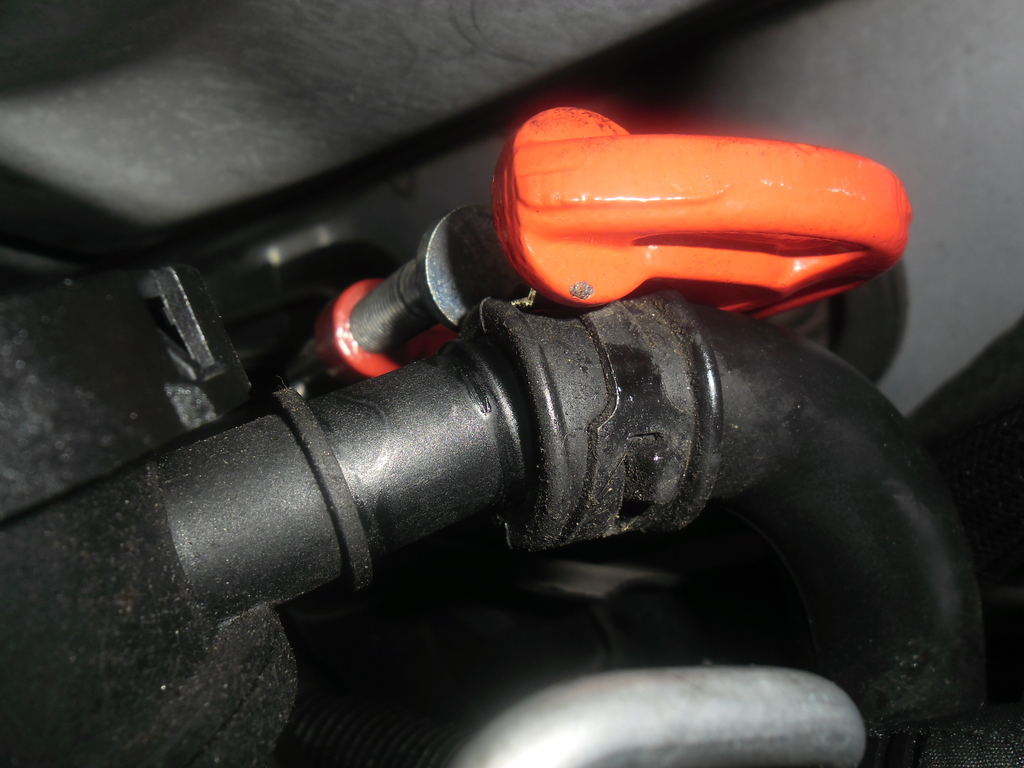
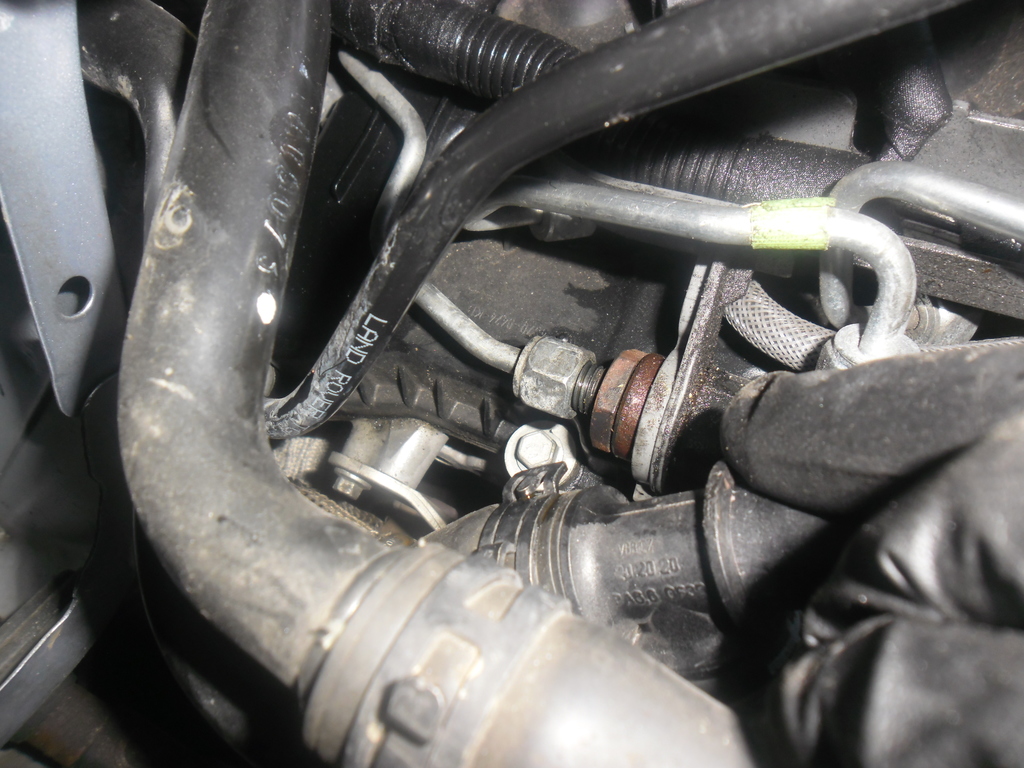
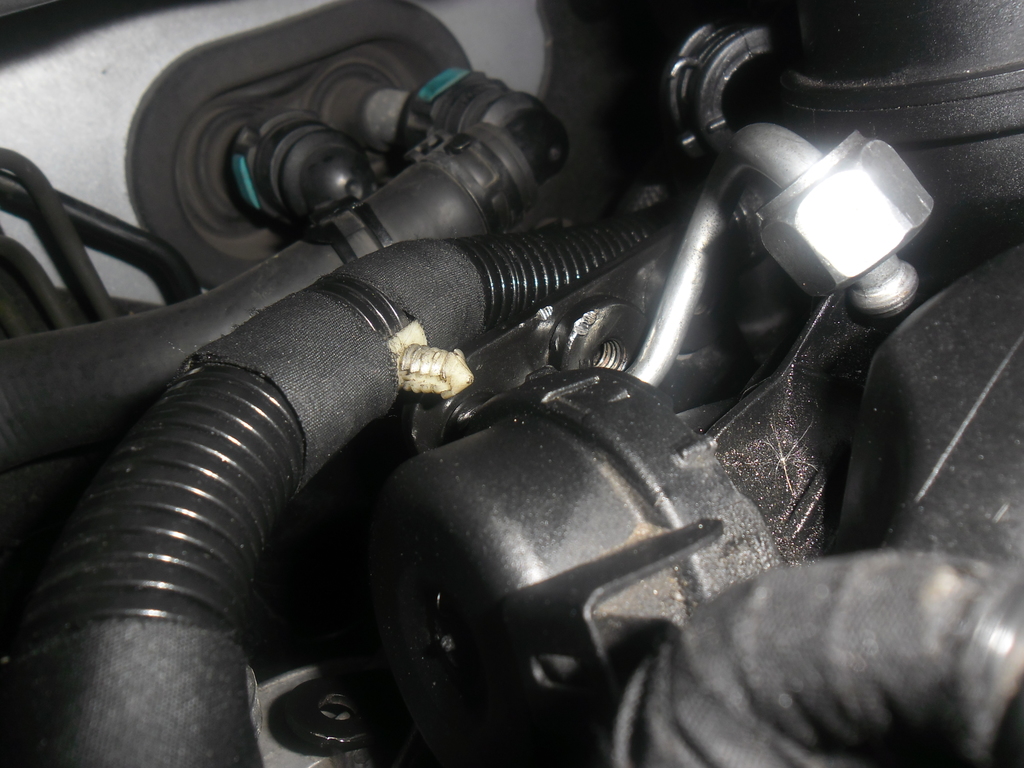
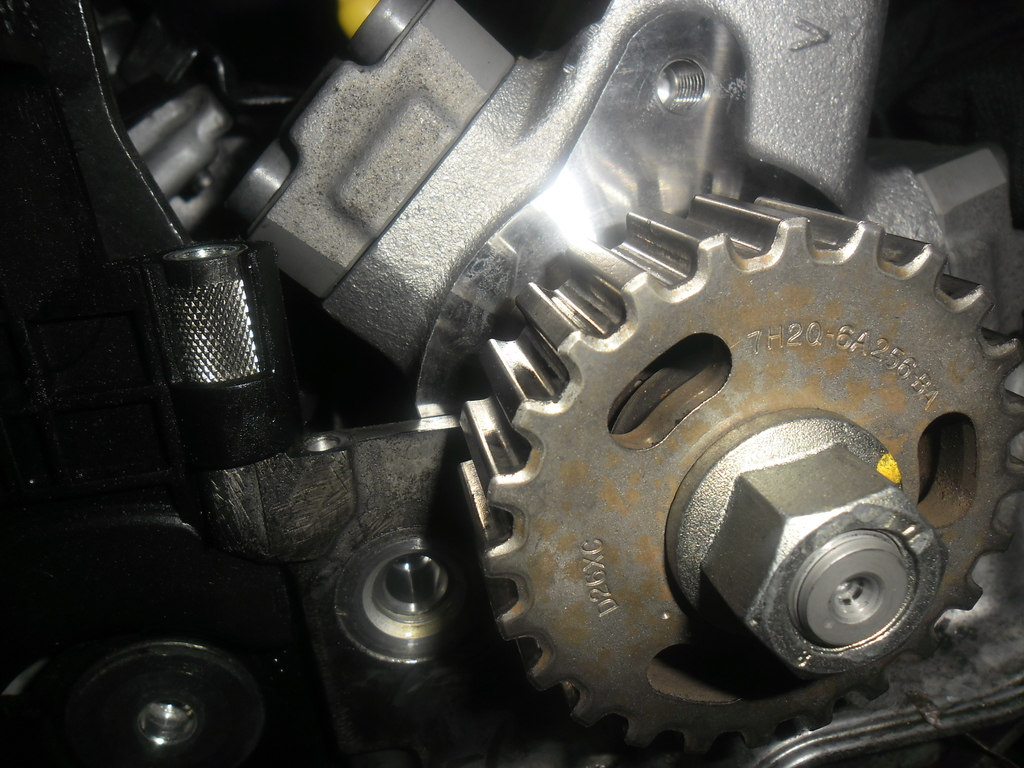
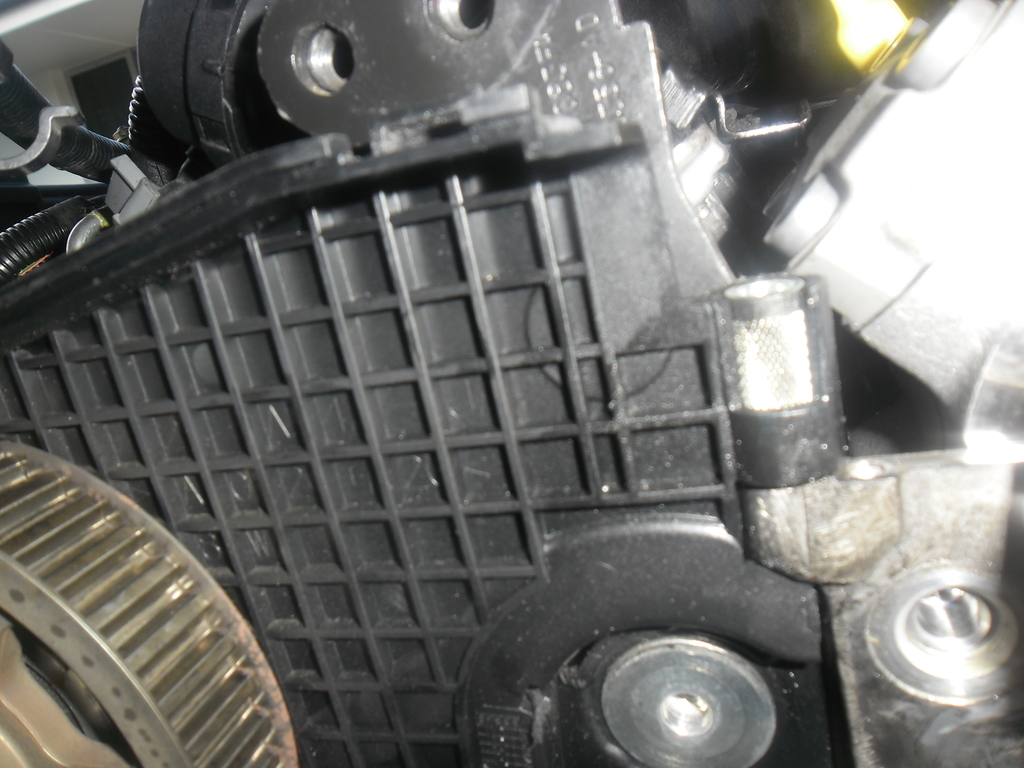
This is where I lost a couple of hours. The pipe has an insulated "P" clip holding it down. This is tucked under the wiring harness at the back of the drivers side head. Bolt has an 8mm head.
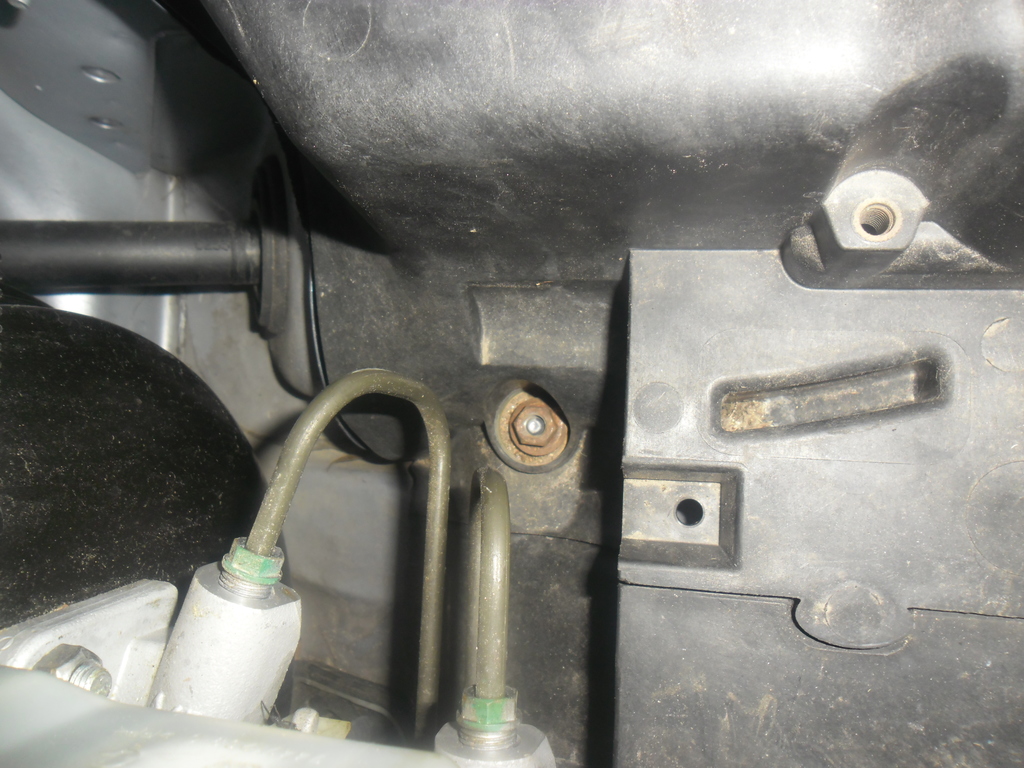
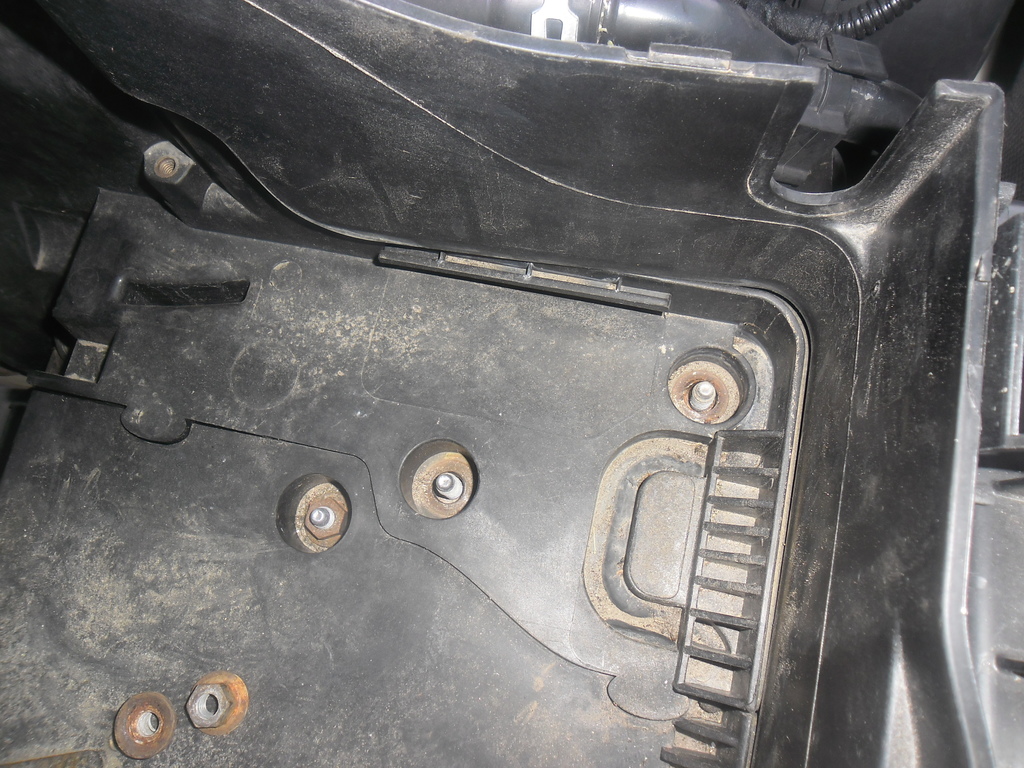
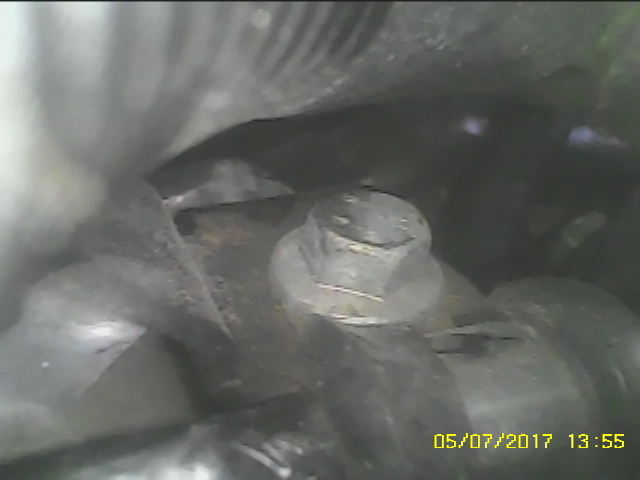
Now is where it got stuck, as the gap behind the rear of the manifold and the supporting bracket was *way* too small. I tried bending the bracket and ended up clouting my hand with a 2kg lump hammer. The bracket didn't move. So, I jumped on Microcat and saw a diagram of the bracket which indicated it didn't go down as far as I though it did. The bracket had a plate over it which was held in place with 2 bolts with 8mm heads. They are long bolts and when removing them with a ratchet about 10 degrees at a time they feel about 14 foot long. Once they are out of place there are 3 bolts holding the bracket to the head (10mm heads). 2 or 3 turns on each of those and the bracket moves enough to release the pipe.
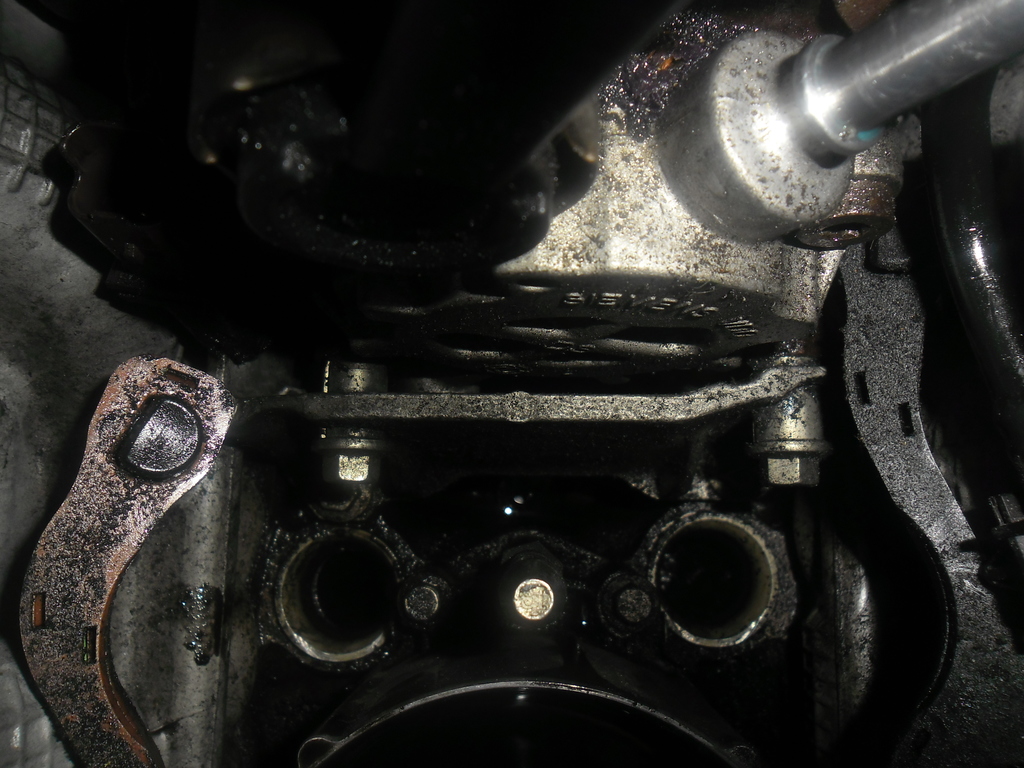
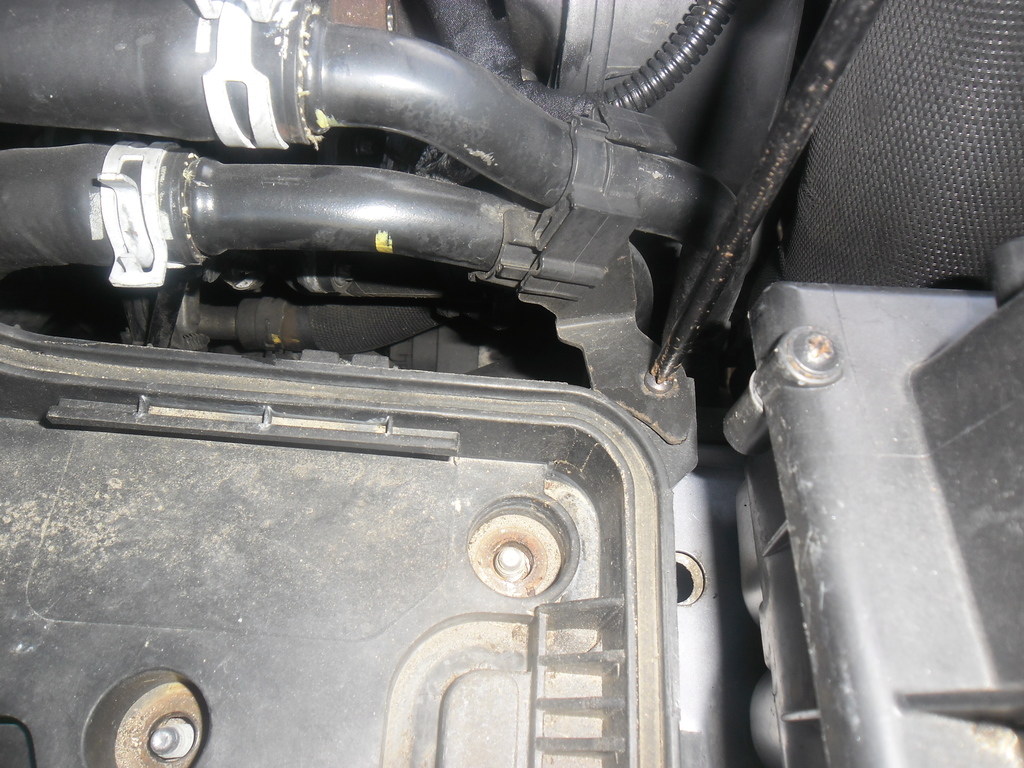
Once the pipe is out the way you can channel your inner contortionist and get the oil separator out. This took me a *long* time.
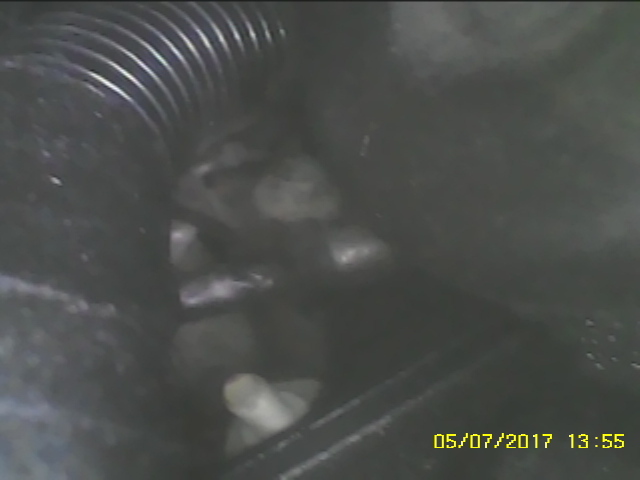
With the oil sep out the way it was clear there are no gaskets in the block and plenty of **** all over the place. Yay!
So, loosen off the remainder of the wiring harness and the belt cover comes off. Lots of wiggling and abortive attempts with moving it left and/or rotating it around, but the easiest way to move it was to pull it straight up and over the pump.
Day one done.
ChatterBox
SubscriberWhat about some Permatex or that loctite red stuff hi temp gasket maker?
Super ModeratorThe problem is the process of hooking everything back up sees the oil sep up and down more than a pro's knickers, so it really does need the little rubber gaskets to allow repeated insertion.Originally Posted by Eric SDV6SE

There is an identical gasket on the back of the oil sep where it goes into the oil return pipe. At least that one is in place.
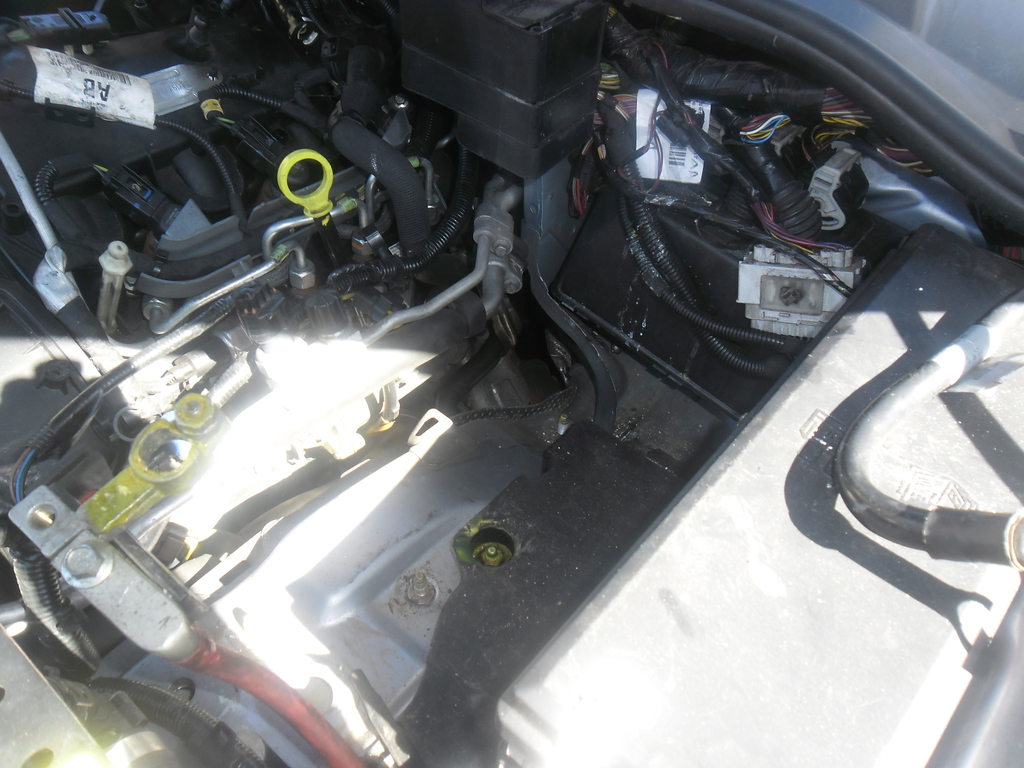
I just can't get over it. Every damn time I get under the car I find something else "someone" who has worked on it previously has either not fitted, not secured or just broken. I've just found an unsecured steel pipe somewhere in the order of 8mm hanging loose behind the HPFP. It's open as the end has been sawed off. I can't wait to find out where it goes. Unfortunately with the battery out and it on the bump stops I can't get under there and follow it, but what the hell?
 TopicToaster
Subscriber
TopicToaster
SubscriberThis is why I want to move house and build a garage with a nice high ceiling. Two post hoist and body off the damn thing.
2010 TDV6 3.0L Discovery 4 HSE
2007 Audi RS4 (B7)
Super Moderator2 kids birthday parties means I got a sum total of 10 minutes today. So.
Removed wiring harnesses (should have done that yesterday).
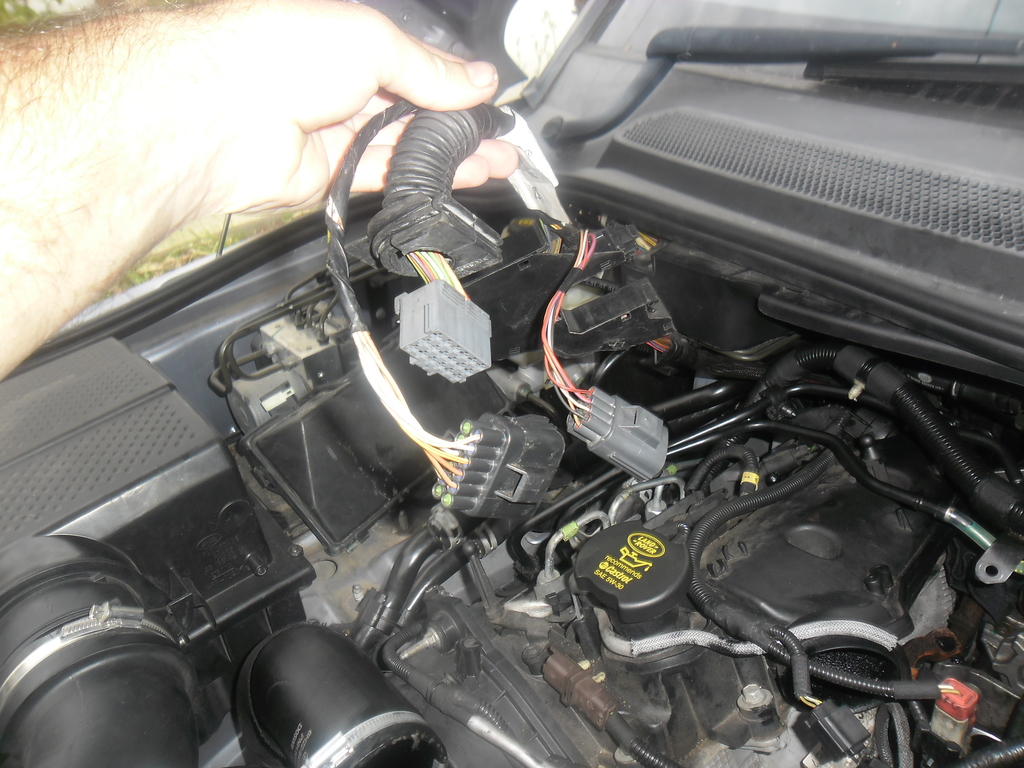
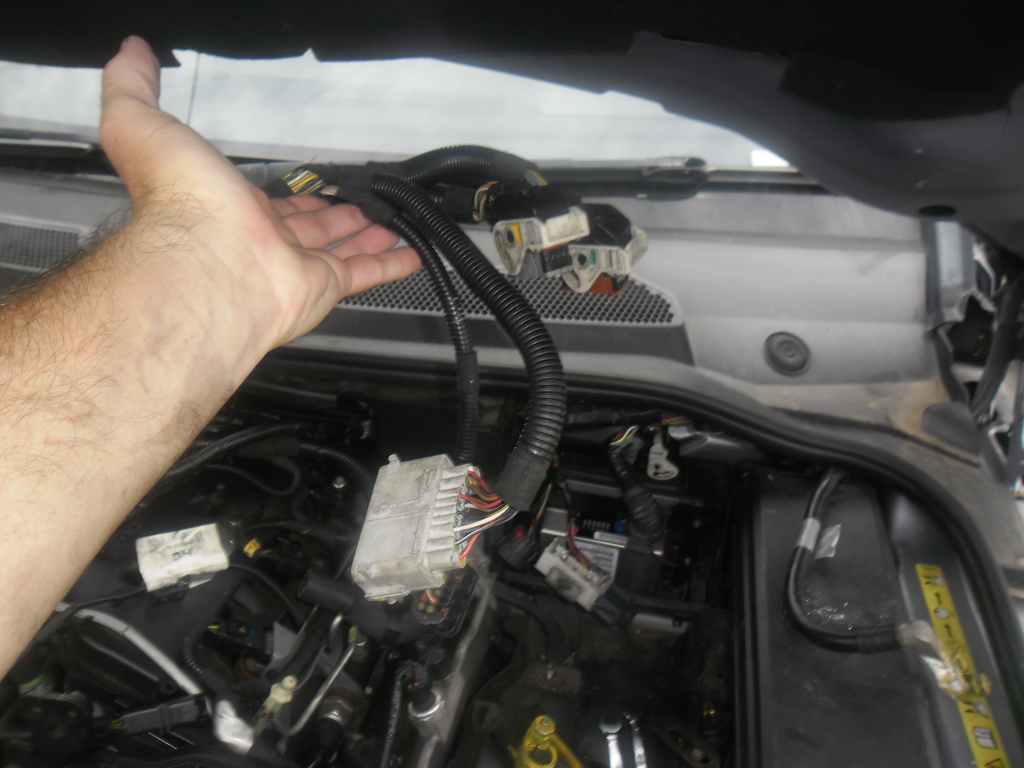
Body harness :
Fuel system harness :
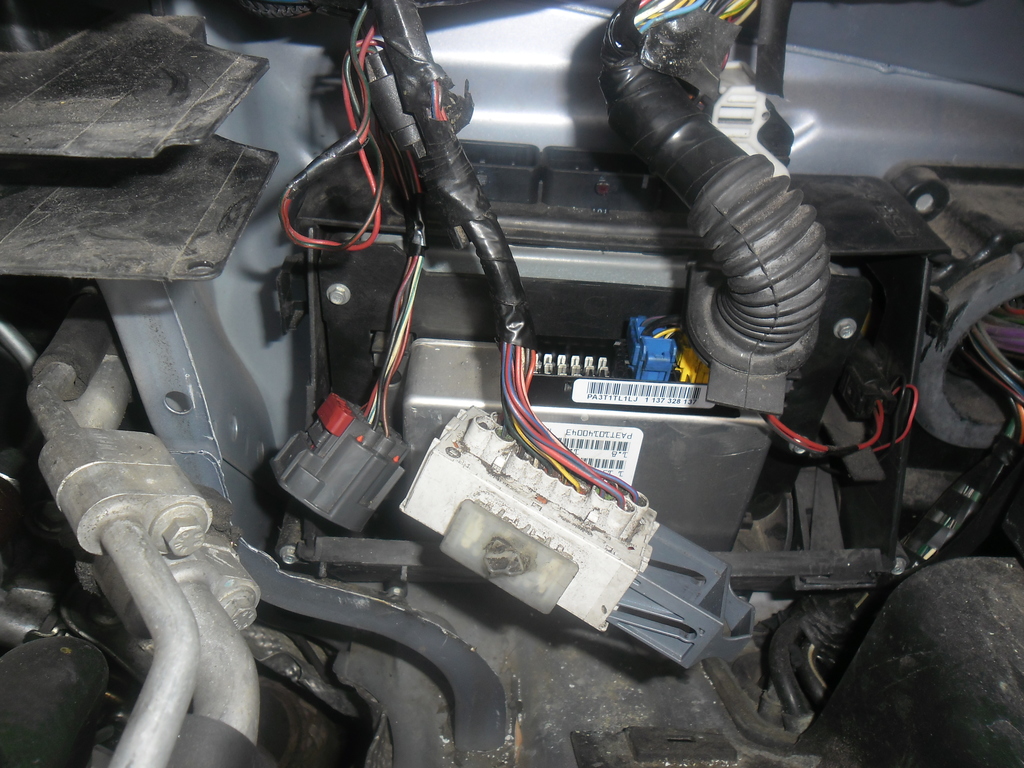
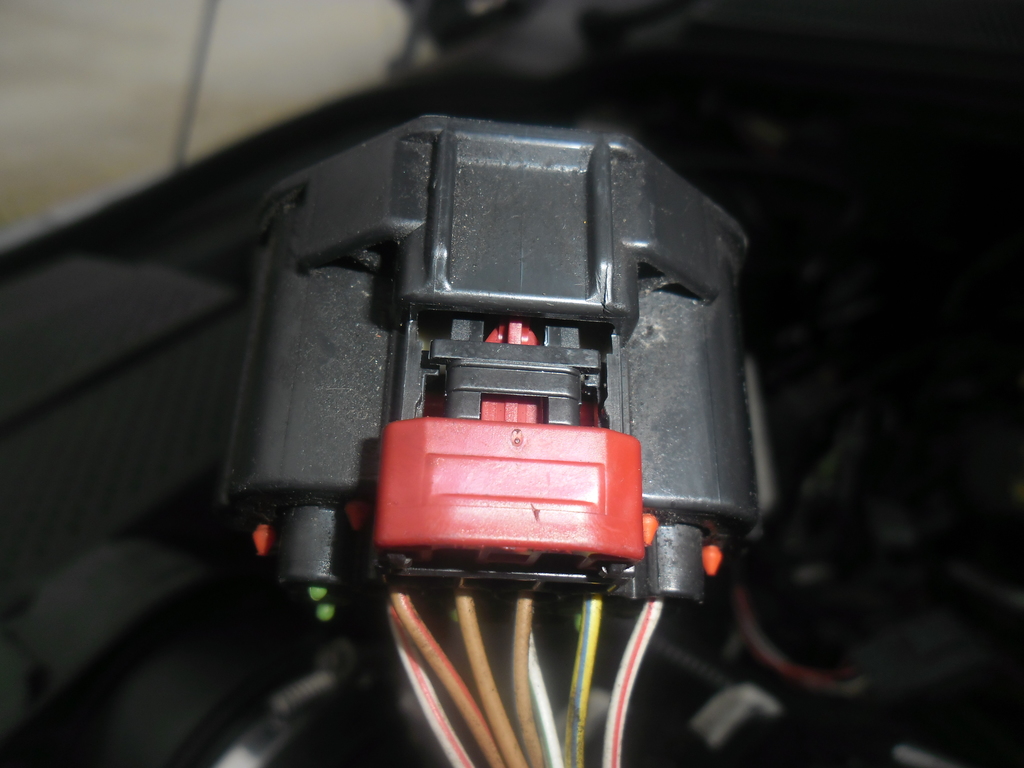
Remains. The white connector has a grey bit on the end. You need to pull it out to release the connector :
Tricky clips. The red clip slides back which reveals the black clip underneath you need to *press* to get it unlocked.
From there the belt and tensioner came straight off. 10mm socket for the tensioner and the bolt feels about 6 feet long. I might have actually had room to get my pneumatic ratchet back there, but that's for next time. When it comes out the bolt and tensioner just pop off in your hand. No snap, crackle or pop. From there the belt just slips off. Bit of an anti-climax really.
2 bolts hold the remainder of the belt cover on (8mm heads) and the whole thing just slips out.
Hope it goes back together as easily, and there would appear to be room back there to swing a small torque wrench to tighten the tensioner bolt back up.
Fossicker
Following with the aim of helping my son do his D3 if it looks like we can do it.
Cynical Moi?
Who in the hell "designs" an engine with so many iggly squiggly bits & pieces of pipe at all angles & sets, not to mention cables, plugs (assorted) brackets, clips, components, little or no access etc etc etc ad finitum.
It should be a piece of cake when the engine is not fitted to the vehicle but somehow they always seem to fit bolts, nuts, clamps, at the wrong angles with no space to scratch your balls.
Christ, it must be a bloody nightmare to work on & better you than me Gunga din.
I think I'll stick to my olde worlde 2.25 Rover donk.
Just sayin'.
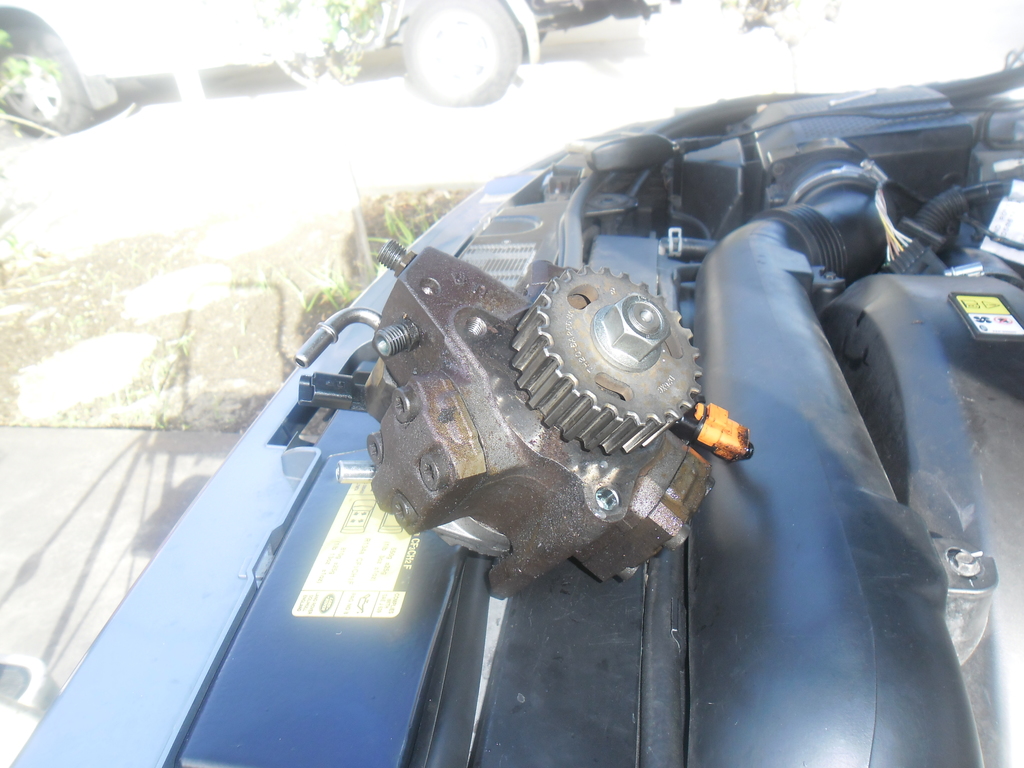
Super ModeratorRight. Day 3 done. There was *no* way I was going near this thing on April Fools day! This was about an hour and a half, although there was probably 15 minutes in there involved with a couple of Asahi's.
2 T40 Torx on the front of the pump, 2 10mm head bolts on the back of the pump. Harder to get out than to get in because Landrover use bolts that are 14 foot long and have loctite on them. You can spin them in pretty easily, but coming out they need to be ratcheted up until about the last 3 turns.
Found out what that pipe is looking at me from the back. It's the breather for the gearbox.
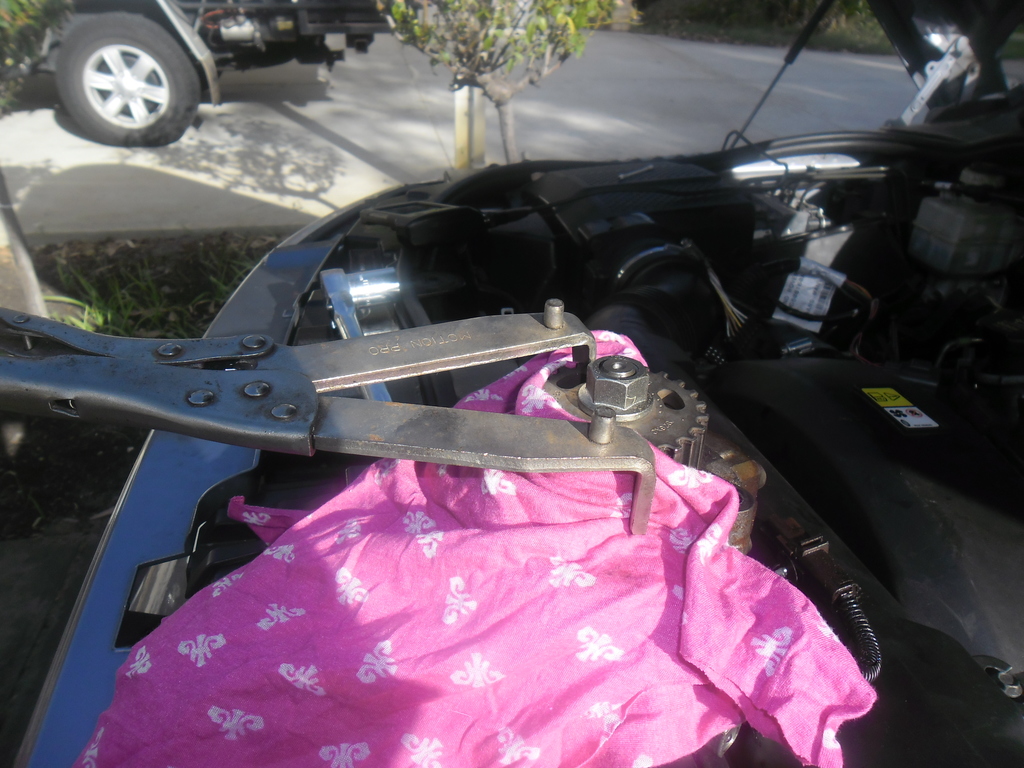
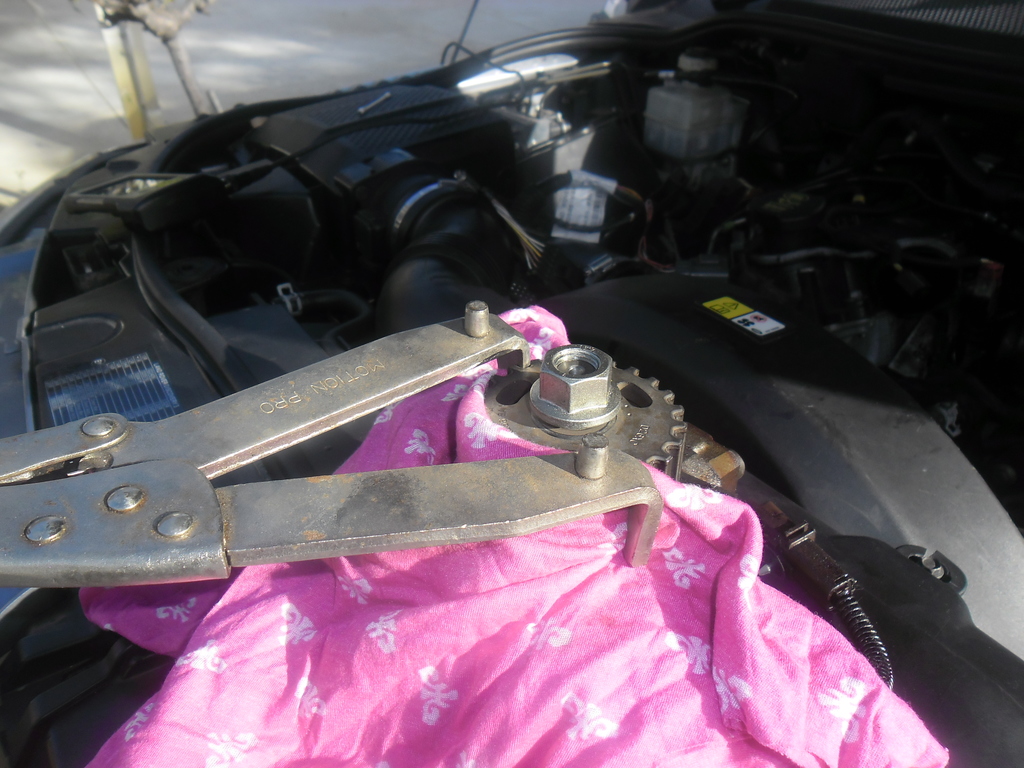
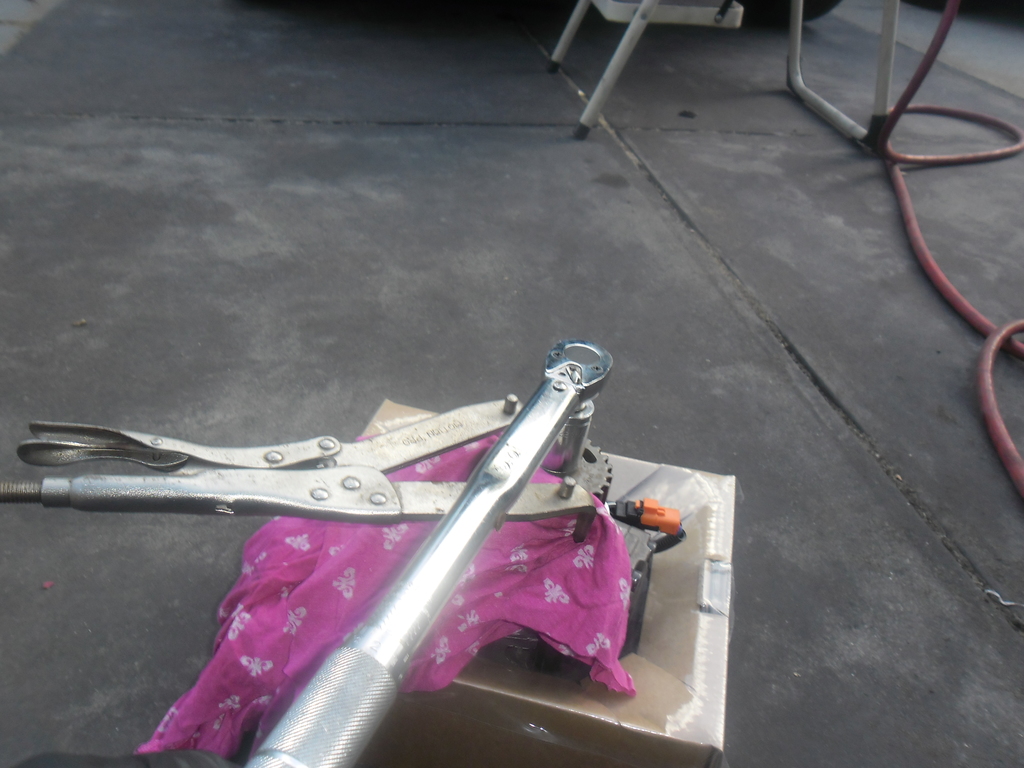
Pulley off. Used a motorcycle clutch tool padded with rags on the pulley. 22mm nut on the shaft and a 1/2" drive ratchet. Since I wasn't worried about the pump (as this will be stripped to destruction for a fault analysis) I removed the pulley by unscrewing the nut 1/2 a turn and knocking it with a plastic faced dead blow hammer while lifting the pump by the pulley. 2 taps (and I mean tap rather than thwack) and the pulley came loose. If you wanted to save the pump a 3 legged puller would do this without any stress.
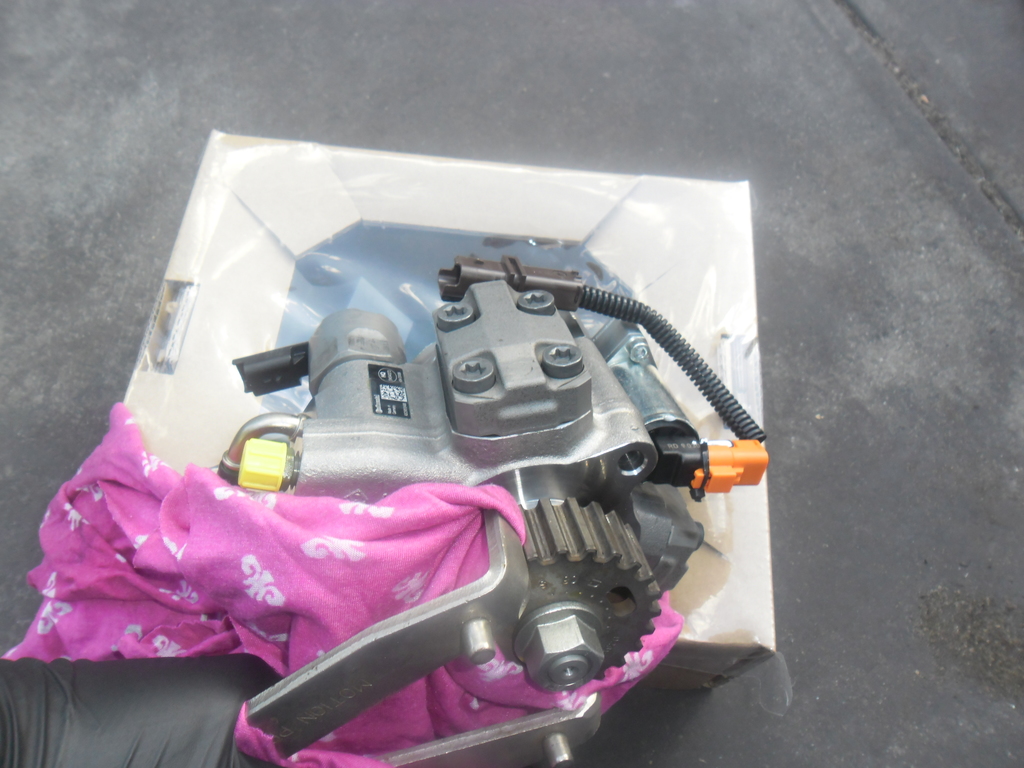
New shiny, shiny!
Yes, the manual specified a torque so I used a torque wrench.
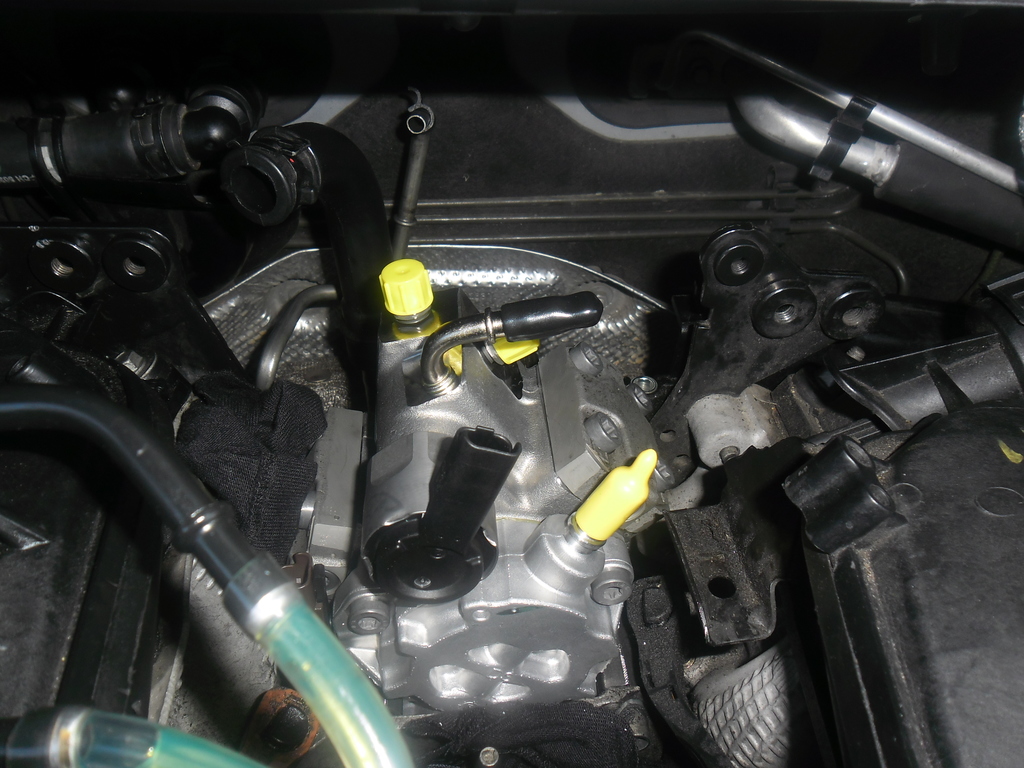
All sat in place and a couple of blind pics from in front to show the holes. Oh, and the vinyl tube used to loop the low pressure lines!
Damn it, I was *sure* I had a photo of the torx being tightened up. Anyway, T40 on a small 1/4" extension into the torque wrench and there *is* room to actually torque it to setting. The passenger side bolt needs to be nipped up with a short handled ratchet as there is only room to swing the torque wrench 1 click at a time (seriously).
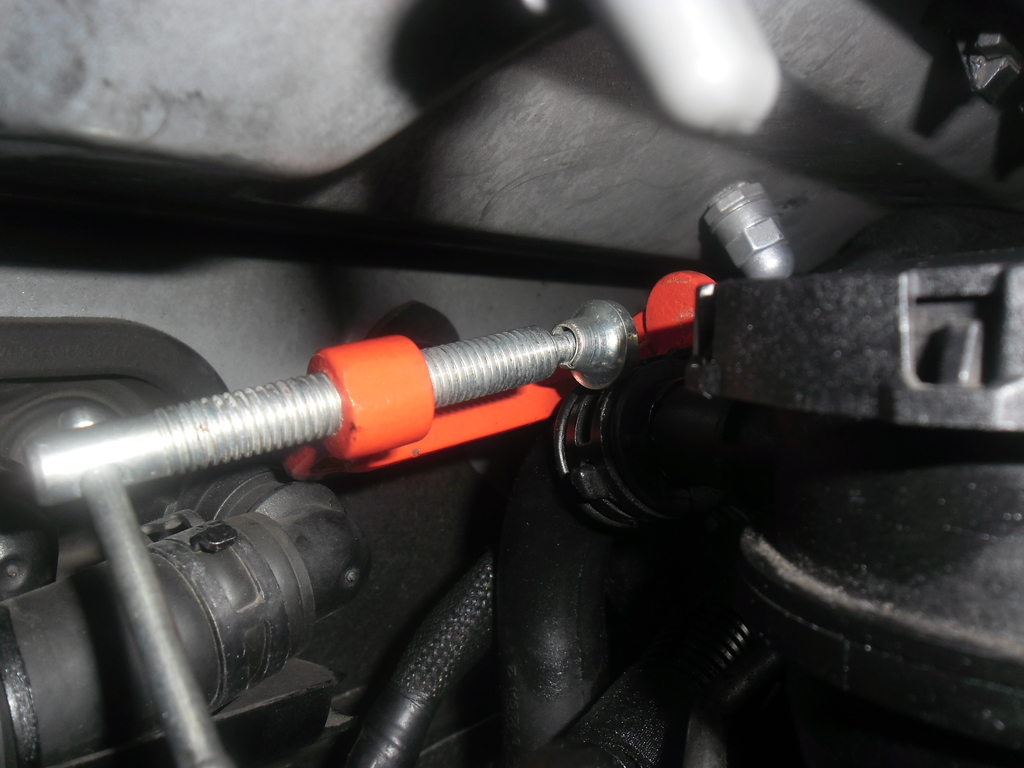
The bolts at the back get wound up with a 10mm ratchet spanner and then torqued. The new bolts at the back come with the springy expansion sleeves fitted. I *should* have knocked the existing ones out of the bracket and wound the new ones in, but I'd already got the pump in place by the time I realised what I'd done and as they are just spacers I decided to take the chance. Both sets of bolts come with blue loctite on them and they are specified as single use. They're cheap enough so I bought new ones.
*LOOK AT ME* Do make sure you put all 4 bolts in and nip them up prior to torquing them up or else you'll get to bolt 4 and find it won't screw in, you'll have to loosen them all off a turn and re-torque them!
All snug up tight in bed.
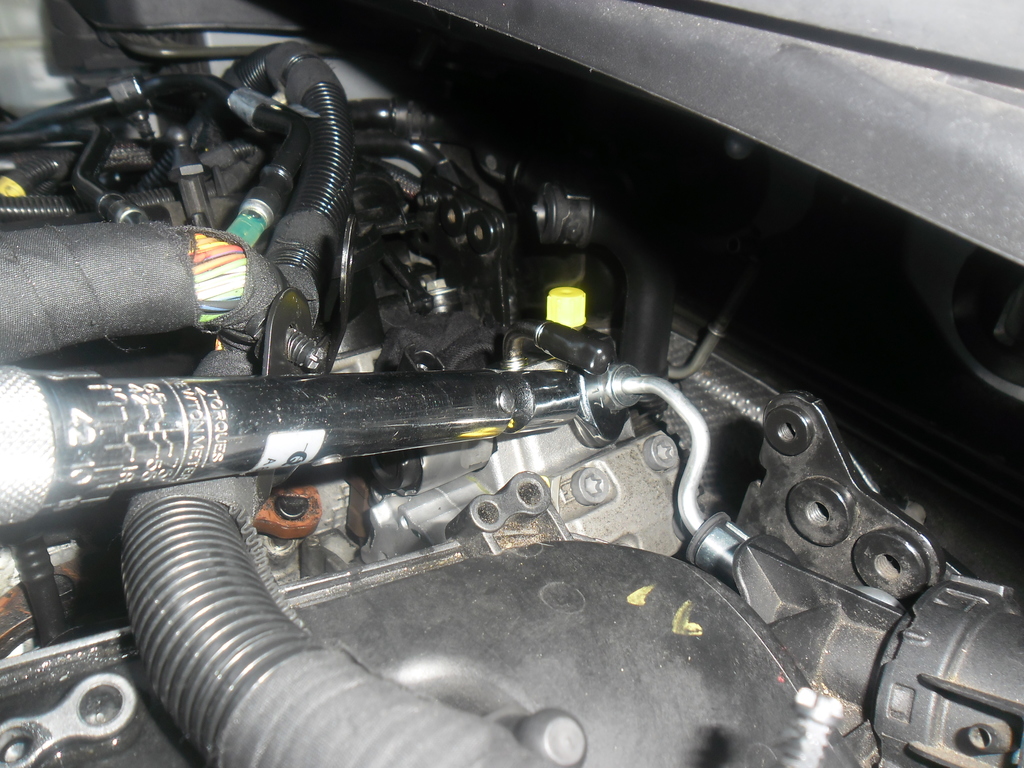
Install and *torque* the passenger side fuel pipe.
Now. Torquing up that nut is a serious pain in the arse if you have a fixed head torque spanner. So it was a matter of turn it until it hit the low pressure fuel pipe, then use a fixed head spanner to nudge it onto the next spot the torque wrench would have fit. Same as the fuel rail end on that side. Just not enough room to properly swing the torque spanner, but thankfully enough resolution with the two spanners that the torque value will be within the uncertainty of the torque spanner, so I'm ok with that. I already had the torque spanner as I use them on refrigerant flares.
Harder getting it out than in, but it's done and we're on the downward slide.
I picked up new breather gaskets this afternoon, but I'm really concerned as to why someone would remove the rubber off the gasket rings and re-insert them, so I'm hoping I don't end up with crankcase ventilation issues.
I bought a remote pipe spring-clip tool yesterday to enable me to get that rear breather hose back on, and replace the EGR inlet pipe without destroying the remainder of the car. That should make the remainder of the assembly a bit nicer.
| Search AULRO.com ONLY! |
Search All the Web! |
|---|
|
AULRO.com Copyright 2001 - 2025 Independently Owned and Operated by Dave Blears Computing - DavecandoIT - AULRO.com LAND ROVER and its logo are the registered trademarks of Land Rover. Land Rover is not affiliated with AULRO.com. |
|


Bookmarks