Page 6 of 8 FirstFirst ... 45678 LastLast
Results 51 to 60 of 80

Thread: A snorkel - kind a! Work in progress

  1. #51
    Join Date
    Feb 2013
    Location
    Gosford, NSW, Australia
    Posts
    2,556
    Total Downloaded
    0
    Great job, lots of work but worth the outcome.

    BTW do you ever sleep

    Steve

  2. #52
    Join Date
    Feb 2012
    Location
    Carnegie
    Posts
    1,226
    Total Downloaded
    0
    [QUOTE=SteveFarmer;2009406]Great job, lots of work but worth the outcome.

    BTW do you ever sleep

    Steve[I have to confess to burning the midnight oil at times, when the misses has gone to bed. She might be heard to say "you're bloody obsessed with that car". Rarely in a playful voice. She calls it my mistress. All kinds of sad and wonderful. Never imagined my life would develop this way - in to a P38 obsession - do we need a P38's anonymous society? Too late for that I guess - what with the forum./QUOTE]

  3. #53
    Join Date
    Aug 2010
    Location
    Pakenham
    Posts
    587
    Total Downloaded
    0
    Quote Originally Posted by davidsonsm View Post
    Well it's been a long drawn out job. Plenty of hours. Once I was happy with the mould, I did some fibre glassing off the car using the jig I'd made. But of course the jig wasn't rigid enough and when offering the snorkel back up to the car, it didn't line up the way I had intended.

    Therefore I had to make two partial cuts top and bottom of the filler piece and then fix it back to the car and apply more fibre glassing to the joints I'd cut. Bingo. Happy bunny. But of course that was only the start of getting it to look right and be strong enough.

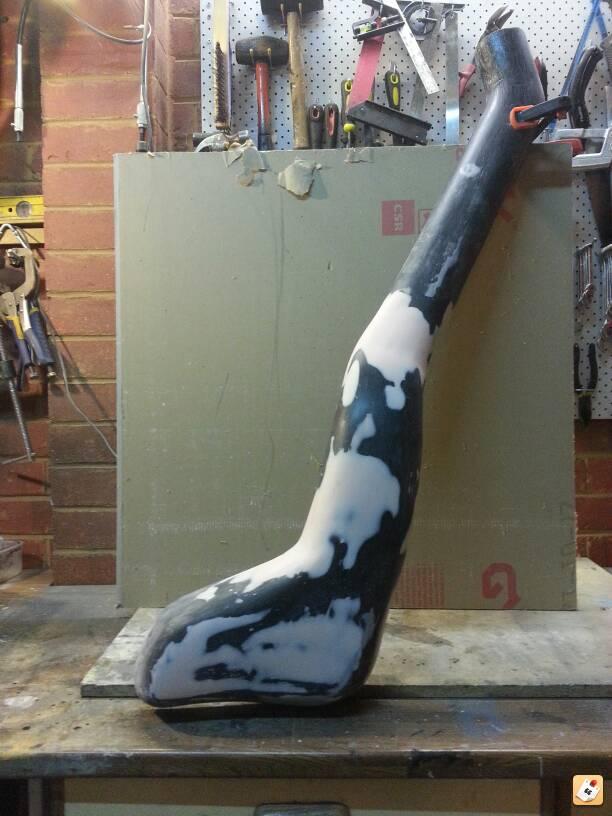
    So I've been applying more layers. Sanding. Some more sanding. And then a little more sanding. Then some body filler. And back to sanding.

    I had some fun getting the extruded polystyrene out. I used a combination of smashing (bbq rotisserie spit), drilling using flexible cable, rotary wire brushing plus a few other tries with compressed air and a pressure washer. Oh and some petrol to dissolve the leftovers. But that was messy and sticky.

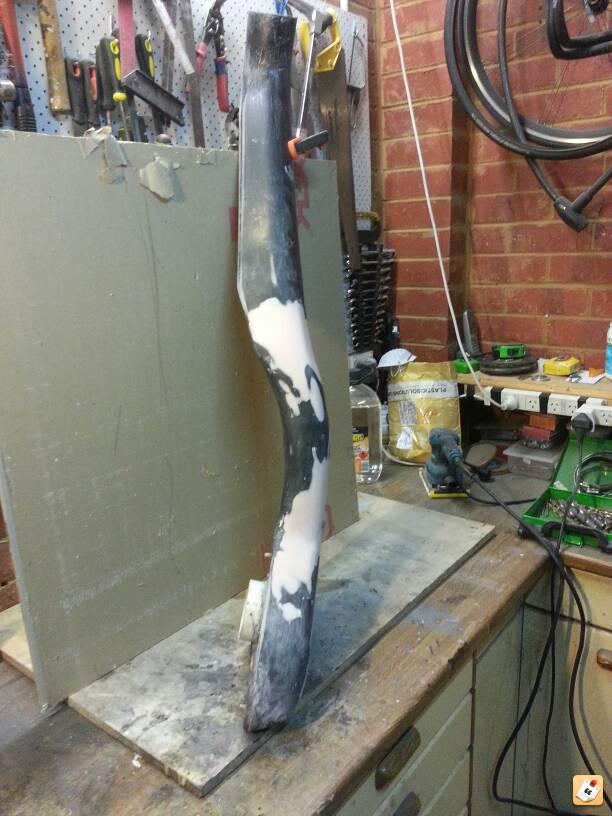
    So here's where is at. Ready for high build primer (then sanding of course) and the top coat. Hopefully so I can install it soon. All the prep for the actual installation is done. It's just a matter of finishing the snorkel now.

    I'll obviously post some pictures of the finished article.

    I'd like to apply a sticker or badge to the side other snorkel. Any suggestions?


    Looks fantastic. Bit like a Disco 3 snorkel.

    Not to put a dampener on the subject, but how strong is it? I. e when you brush up against bushes or a tree, let alone a bird strike.

  4. #54
    Join Date
    May 2010
    Location
    Mindarie, Western Australia
    Posts
    1,141
    Total Downloaded
    0
    [quote=davidsonsm;2009418]
    Quote Originally Posted by SteveFarmer View Post
    Great job, lots of work but worth the outcome.

    BTW do you ever sleep

    Steve[I have to confess to burning the midnight oil at times, when the misses has gone to bed. She might be heard to say "you're bloody obsessed with that car". Rarely in a playful voice. She calls it my mistress. All kinds of sad and wonderful. Never imagined my life would develop this way - in to a P38 obsession - do we need a P38's anonymous society? Too late for that I guess - what with the forum./QUOTE]
    I think most of on here can relate to the p38 obsession.....it becomes addictive in a strange sort of way. I seem to recall the same conversations with my wife re the obsession. Maybe the p38a the "a" should stand for anonymous?

    Gary

  5. #55
    Join Date
    Feb 2012
    Location
    Carnegie
    Posts
    1,226
    Total Downloaded
    0
    [QUOTE=redandy3575;2009448]Looks fantastic. Bit like a Disco 3 snorkel.

    Not to put a dampener on the subject, but how strong is it? I. e when you brush up against bushes or a tree, let alone a bird strike.[/

    Bloody tough I reckon. It was a major consideration. There is very little body filler actually on the snorkel - it was used exclusively for smoothing.

    I reckon the section I've added to join to the two LDPE sections is actually stronger than the LDPE that the original Patrol GU snorkel was made from.

    I've used 3 layers of fibreglass that each overlay on themselves. I've used nearly the whole tub of the 1.5litre size of this stuff (the Solid Bond 300 Epoxy Gel Glue):

    https://secure.solidsolutions.com.au...ucts.php?cat=5

    Bloody good stuff, chosen as it is compatible with the extruded polystyrene mould I used.

    If I was starting over (which I'm never going to do now), I might change the following:

    - I'm not sure moving the original snorkel outlet was necessary.
    - The hole in the wing is bigger than it needs to be - but the snorkel covers it.
    - I'd probably stick with 75mm internal ductwork, instead of the 90mm I've used.

    Otherwise - profile wise, I reckon it gets as close to the bodywork (I hope it does - will try one final time prior to painting) as you can get using this solution/routing. I'll show some pictures with the bonnet lifted as well - once fitted.


    QUOTE]

  6. #56
    Join Date
    Feb 2012
    Location
    Carnegie
    Posts
    1,226
    Total Downloaded
    0
    So do you reckon the air inlet to the EAS compressor also needs a its own "mini" snorkel?

    If the air inlet filter to the compressor was sited outside the EAS box (as you can with an uprated pump to allow more room in the box), it would be wise to seal it inside an engine snorkel (which we all have don't we? ).

    Maybe its safer where it is, inside the black plastic box - that has drain holes and holes for the tubing, but is considerably higher than the original engine air intake.

    Maybe taking things too far. Interested to hear if anybody's EAS has ever injected water? I'm sure the compressor wouldn't like it.

  7. #57
    Join Date
    Dec 2007
    Location
    Sydney, you know. The olympic one.
    Posts
    4,853
    Total Downloaded
    0
    FWIW I've got my compressor mounted under the bonnet (D2 for tyres and winch clutch release) and have run both the compressor intake and clutch solenoid valve dump lines into the cabin just to keep things dry and clean. The extensions on the breathers (diffs, gearbox and transfer) run to a manifold and then a single line extends into the snorkel and up, then folds over up inside the head.

  8. #58
    Join Date
    May 2010
    Location
    Mindarie, Western Australia
    Posts
    1,141
    Total Downloaded
    0
    Quote Originally Posted by davidsonsm View Post
    So do you reckon the air inlet to the EAS compressor also needs a its own "mini" snorkel?

    If the air inlet filter to the compressor was sited outside the EAS box (as you can with an uprated pump to allow more room in the box), it would be wise to seal it inside an engine snorkel (which we all have don't we? ).

    Maybe its safer where it is, inside the black plastic box - that has drain holes and holes for the tubing, but is considerably higher than the original engine air intake.

    Maybe taking things too far. Interested to hear if anybody's EAS has ever injected water? I'm sure the compressor wouldn't like it.
    If you plan on wading for an extended period just pull the EAS relay out from under the passenger seat or switch the EAS of as many of us now have switches mounted in/on dash and under seats

    Gary

  9. #59
    Join Date
    Feb 2012
    Location
    Carnegie
    Posts
    1,226
    Total Downloaded
    0

    Talking

    Had some mixed results painting the snorkel in the chosen satin black colour.

    I used high build primer, then Hammerite smooth - which actually leaves a textered finish with the glass shards/beads that is in the paint formula.

    Wasn't happy with the result. My compressor isn't up to the job of feeding a HVLP spray gun. The finish was blotchy. So I flatted the Hammerite, and applied some engine enamel out of an aerosol. Still not happy - cheap aerosol cans are false economy.

    So I flatted that back as well. There's now plenty of paint on the darn thing.

    Ended up using PlastiKote, which I'm a lot happier with. Didn't want a glass finish - wanted some texture, which I have. But it looks one piece, which was the key element.

    Will get it fitted this weekend hopefully. Time and family allowing.

  10. #60
    Join Date
    Feb 2010
    Location
    3029 Melbourne
    Posts
    618
    Total Downloaded
    0
    Look forward to seeing the end result but i'm betting it will look great!

Page 6 of 8 FirstFirst ... 45678 LastLast

Bookmarks

Bookmarks

Posting Permissions

  • You may not post new threads
  • You may not post replies
  • You may not post attachments
  • You may not edit your posts
  •  
Search AULRO.com ONLY!
Search All the Web!