Page 2 of 2 FirstFirst 12
Results 11 to 19 of 19

Thread: Adding Air Con - Bulkhead Install (TD,TDI,?)

  1. #11
    Join Date
    Jan 2010
    Location
    Melbourne
    Posts
    1,801
    Total Downloaded
    0
    Thanks Pete. If I had the storage space I would. I already have a compressor and the MUC I have should be fine for now. I don't have a condenser yet but I was after a defender TD5 one with factory mounting brackets and fan so I can bolt on with minimum fuss.


    If your condenser is in decent condition with fan and mounting brackets and it looks like it might bolt to fixing points I have on the front of my defender - I would be interested. Any chance of a photo?

  2. #12
    Join Date
    Jan 2010
    Location
    Melbourne
    Posts
    1,801
    Total Downloaded
    0
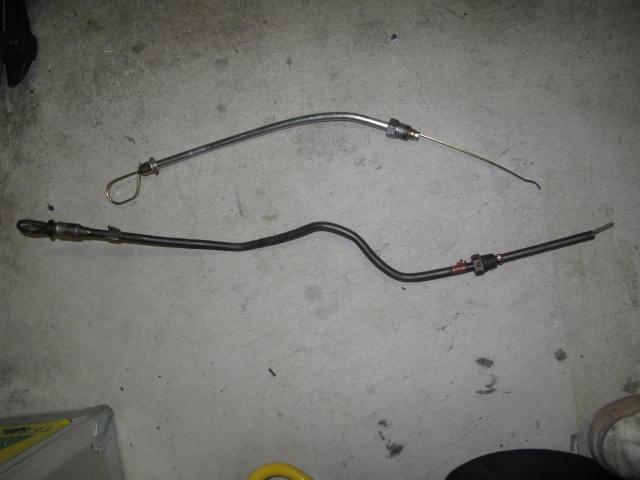
    Little step forward this morning. Sorted out the dipstick issue.


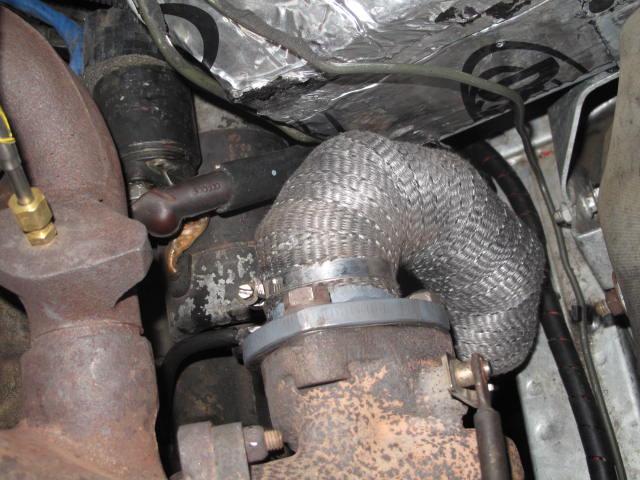
    The long wangly one is the disco 200tdi dip tube and stick with all the added bends needed to get it away from the MCU and allow the tube in and out of the sump without removing the manifolds. The dipstick is stuck in there now - it needed too many bends!

    The short one is the 200tdi defender tube and all it needed was a little more bend at the bottom and a slight bend (towards the camera) at the top. You can see only the stick goes into the sump unlike the disco one, this makes it super easy to install/remove (no need to remove manifolds!). Also the defender tube is rigid and short enough that it can stand on its own without needing to be anchored at the top.


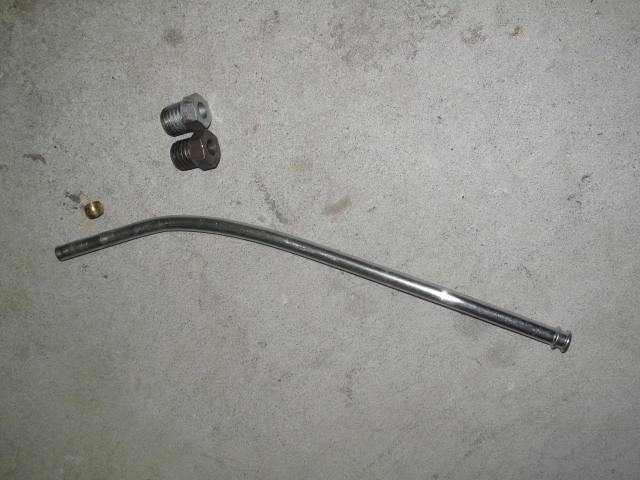
    The bolt threads appear the same to the eye but I could not get the defender one to wind in so I had to pull off the olives and swap the bolts around.


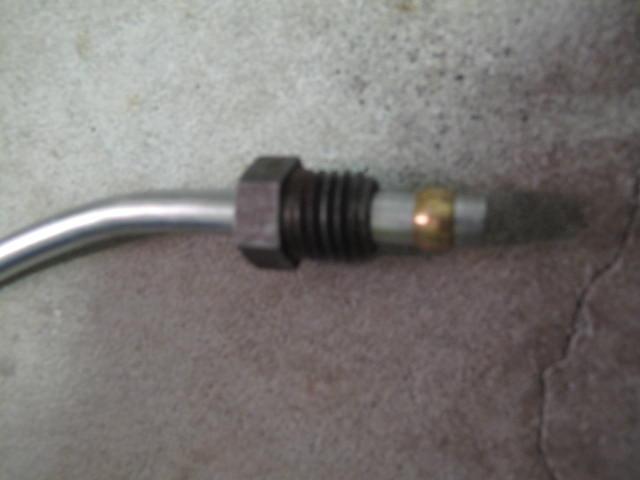
    Olive back in same place, bottom edge 5mm from end of tube.


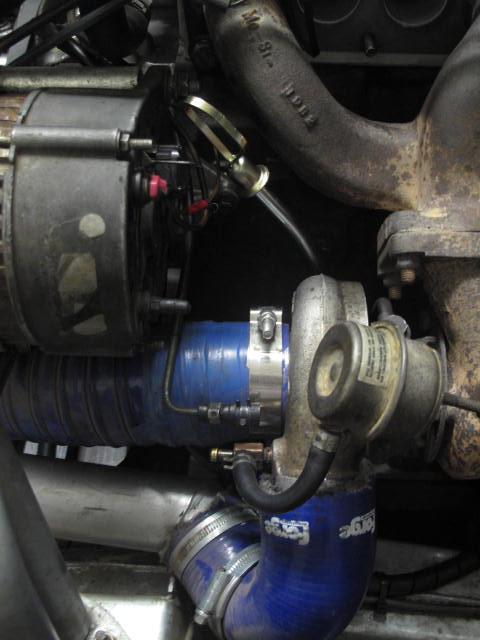
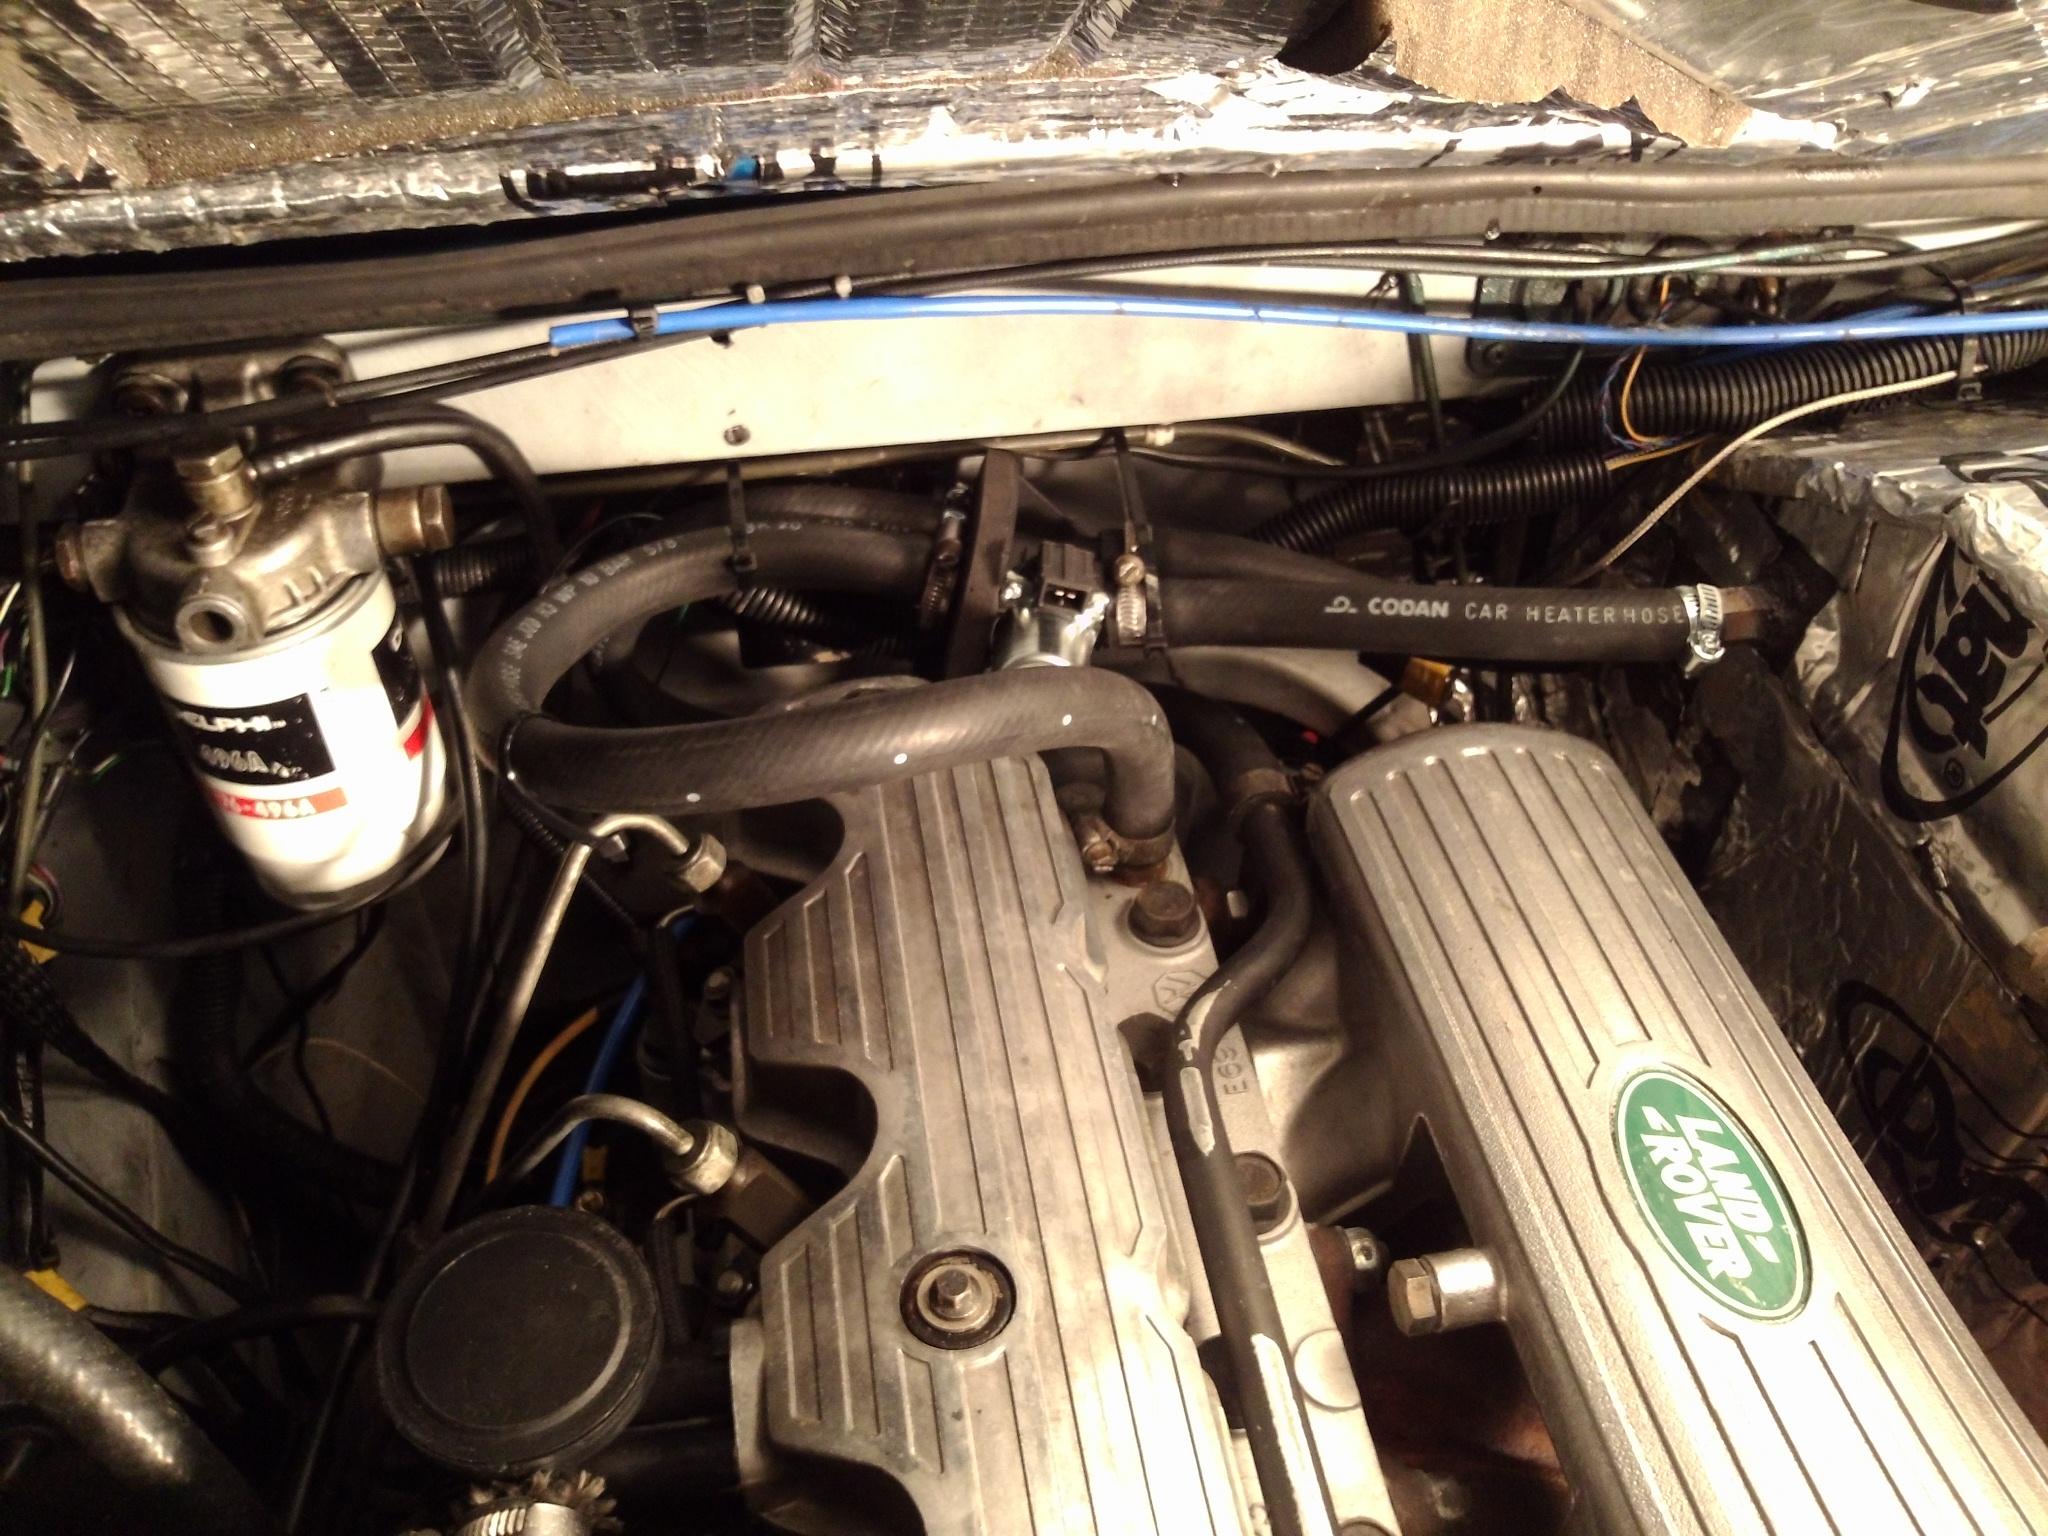
    Dipstick now tucked well out of the way, much better!

  3. #13
    Join Date
    Jan 2010
    Location
    Melbourne
    Posts
    1,801
    Total Downloaded
    0
    Sorted out the routing of the clutch pipe using an L shaped bracket attached to the original mounting point for the clutch hose union. So clutch line now goes down the inside edge of the footwell and is held securely in place by a pipe clip on the bracket.

    The bracket sticks out along side the starter wire so I stuck some underhood soundproofing to the bracket as a buffer, and for good measure I wrapped the wire and it's existing plastic sleeve in thick rubber coolant hose. Maybe an overkill, but it gives me peace of mind.

    I also got time to add some dynamat to the outside of the MUC. This should help reflect some heat coming from the exhaust manifold, turbo and dump pipe. I left the screw heads exposed and didnt cross the seams to aid future dis-assembly.
    Attached Images Attached Images

  4. #14
    Join Date
    Sep 2007
    Location
    Aussie Expat in NZ
    Posts
    3,451
    Total Downloaded
    0
    Good idea to cover it. When I removed mine, a part of it had heat damage from the exhaust.
    Hercules: 1986 110 Isuzu 3.9 (4BD1-T)
    Brutus: 1969 109 ExMil 2a FFT (loved and lost)

  5. #15
    Join Date
    Jan 2010
    Location
    Melbourne
    Posts
    1,801
    Total Downloaded
    0
    Little bit of progress

    High temp zinc primer on the dump pipe:


    Dump pipe heat wrapped and back on.


    The four captive nuts on the mounting brackets, bottom of MUC needed some holes drilled in the bulkhead. I only drilled two out of the four because of limited access and because I think four bolts so close together on the lower bracket is a bit overkill. The inside of the footwell had a template layer outlining the four holes but as you can see below - they were not in the best position for my install (two holes I drilled filled with grommets in this pic).


    To mark where to drill I mounted the MUC so that the top bracket was centred with equal room to wiggle it to the left or right and centred the captive nuts in the lower bracket. Once happy I punched a couple of dents into the dynamat through the captive nuts. I removed the MUC and drilled my markers out to 10mm f(M8 bolts) to give me a bit more wiggle room. Zinc paint on the new holes, big stainless washers on top of rubber sealing washers and it should sit pretty

    The wing and all the rest is back on but I have taken the MUC off and covered over the vent in the bulkhead with leftover cut of dynamat and plugged the mount holes with grommets. I've got a long run Mel-Adl at the end of the month and won’t have time to finish hooking it up, that and the heater core condition is unknown so…. I'll get back on it after the trip.


  6. #16
    Join Date
    Jan 2010
    Location
    Melbourne
    Posts
    1,801
    Total Downloaded
    0
    Alrighty got some cool little bits for the heater bypass control.

    As mentioned earlier in the thread I want my heater flap hot/cold lever on the dash to turn my matrix bypass solenoid on/off.


    So I got this

    The microswitch was less than $1 delivered to my door (free postage rs-online.com). It can switch 0.1Amp@250VAC which I figure is around 2amps on a 12VDC!? The heater bypass solonoid pulls a peak of 0.8amps so I may be able to use this as a negative switch direct to the solenoid without a relay?

    The mini nuts/bolts I had to order in separately (1.6 x 10mm)

    The switch is good for 15,000,000 cycles so should be able to take some abuse.


    I took the lever mechanism and placed switch so that the switch arm ran along the levers edge. Above shows the only position I could find that allows the switch to activate at the levers halfway position.

    Holding it in the approx position I marked and drilled for one of the bolts. I got the switch on tight enough with one bolt so that I could pivot it about but with enough resistance to stay put when the lever was thrown. The switch makes an audible click so it was just a case of getting the position for it to click at the halfway point and then drilling through the second hole.


    Completed:


    I've rammed the lever up and down as vigorously as possible many times to see if the switch position moves - it holds firm so no problems there. I have put some loctite on the nuts so it should be good to go. If the bolts do allow it to shift over time I will go back and add some glue.

    The switch has an odd behavior. It clicks on/off either side of the half way mark which is perfect BUT when the lever is clicked to the top cold position it will not activate the switch when moving back down past the halfway point. So after you hit the maximum cold top position you need to go all the way down to hot to activate the heater matrix and re-instate the half way switching points. This happens every time without fail so it's not so bad - may even prove to be a useful feature.

  7. #17
    Join Date
    Jan 2010
    Location
    Melbourne
    Posts
    1,801
    Total Downloaded
    0
    Ok after consulting wiser men it turns out that the switch I have is rated 0.1amps even at 12VDC.
    www.aulro.com/afvb/showthread.php?p=1871414

    Not enough for direct switching of the solenoid.

    Sooo I will make use of the DB1 microswitch I ordered as a backup option.


    Rated at 6 Amps 12VDC this one should handle the solenoid no probs. The body is exactly the same size as the DB3 and the arms can be switched over. The connectors are shorter so I may have to solder on some spade connectors.

    Fitted, it looks exactly the same as previous so no point showing pic. This 6A switch does not have the odd behaviour mentioned before - it consistently switches at the exact same point mid swing. Result.

  8. #18
    Join Date
    Jan 2010
    Location
    Melbourne
    Posts
    1,801
    Total Downloaded
    0
    Found some time to sort out the wiring for fan control and close off the back of the intake duct that I chopped.

    The Tdi fan control lever has three click positions. The throw of the lever progressively opens the output flap. The first click holds the flap slightly open but does not activate the fan. The second activates a ground feed as does the third.

    On the county air-con set up the flap is in the intake duct under the wing. I have removed it, so I will not have a cable operated shut off flap. This means click one on my lever will do nothing and outside air will always be able to come through into the cabin. I might look at setting up the flap if it becomes bothersome.

    The three pin plug on the bulkhead for the original heater box:
    Purple = Constant 12V (IGNITION)
    Green Yellow= Ground activated on second click of lever
    Green Grey = Ground activated on full throw of lever (full output).

    Two spade plugs for the blower on the MUC.

    White = + 12v
    Grey = - 12V

    goingbush kindly sent me the resistor elements out of a TD5 blower to allow for speed control. I decided to place the resistor pack in the air intake duct under the wing.

    To do this I used a small plastic organiser box, cut off the ends and cut out a hole for the resistors to pass through. Photo time.


    You can see there are two resistors, I will only be using one. The TD5 must have three fan speeds.

    Here it is on the 'test bench' glowing hot under load.


    This plastic unit is then riveted on the inside wall of the intake duct so that the resistor elements are cooled by the airflow.


    The resistor mount partially closes the rear section. I used a grommet to allow the cables to pass through and hold a closed cell neoprene cover.


    The neoprene can be stretched over the edges of the void and stapled or strapped with self fusing silicone tape. I've yet to decide. I'm sure there are better ways to close of the back of the vent but this solution presented itself today and can easily be undone if it doesn't work out. I do like the idea of an elastic sock that stretches over the back.

    The wiring loom. One positive feed , one direct neg and one neg via the resistor. Bullet connectors for the land rover bulkhead plug and spades for the blower fan. Actual land rover plugs would have been nice, but there are limits to my patience.

    Behold my 'Coral Snake' Loom

  9. #19
    Join Date
    Jan 2010
    Location
    Melbourne
    Posts
    1,801
    Total Downloaded
    0
    Some progress today. Unfortunately I didn't get many pictures. I'll do better next time.

    The MUC is back in the engine bay all mounted up alongside the intake duct. I used silicon tape to close my neoprene flap around the back of the duct. It has worked quite well. I can easily cut the silicone tape for access and re-use the neoprene flap if needs be. I like silicon tape

    Whats not great is that the fan intake and the duct do not line up very well so the seal between the two is not 100%. It's OK for now but I may come up with something better next time it has to come out.

    The coral snake loom has been connected so I have fan control at two speeds. At full blast it seems to push through quite a bit more air than the defender heater blower unit it has replaced. Nice

    The heater pipes have been hooked up with the bypass solenoid, no drama's there, it all fits quite nicely. The only change to the bypass unit was to cut off the plastic mounting prongs. On the bypass unit there are arrows on the pipe connections to show flow direction. The flow on the 200tdi comes out the top of the Cylinder head and down the return pipe to the thermostat housing.

    The bypass solenoid is light so with two rubber hoses attached on each side it can almost sit inline unsupported. I have put some zip ties here and there to reduce vibration. The bypass unit could be anchored to the bulkhead without to much hassle but I don't think its necessary... I will see how it holds up.

    The loom to connect the dash lever switch to the bypass solenoid still needs to be sorted out. I'm looking for the correct connector from a ford puma/fiesta/ka. So for now there is no bypass action. Because the intake duct has no cut off flap, heat will get pushed into the cab when rolling at speed, like it or not. It is winter and cold here in Melbourne so I'm in no rush to activate the bypass.


    I just went for a drive with the heater on full bore --- HOT HOT!

Page 2 of 2 FirstFirst 12

Bookmarks

Bookmarks

Posting Permissions

  • You may not post new threads
  • You may not post replies
  • You may not post attachments
  • You may not edit your posts
  •  
Search AULRO.com ONLY!
Search All the Web!