


 Reply With Quote
That is a after market Railko conversion for the earlier 1954 to 1958 swivel pin housings.
IMHO, a much better arrangement than the spring loaded, steel cone in the brass bush that the series ones were built with.
.

 Wizard
Supporter
Wizard
SupporterAll,
Im looking for some help with my swivels
The complete assembly on the passenger side - represents what the drivers side looked like before I stripped it!
Swivels by Jon_Kelly, on Flickr
This is a picture of the steering arm (was located on top of swivel housing) and bottom pin once de-greased:
Swivels by Jon_Kelly, on Flickr
And this is the swivel, oriented the same as removed from the axle - Railko bush visible at top:
Swivels by Jon_Kelly, on Flickr
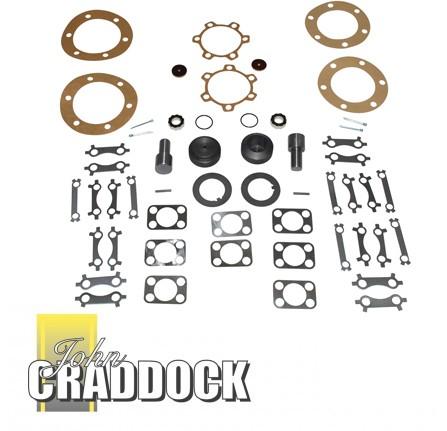
Im confused because the S1 parts catalogue shows the steering arms on the top of the swivel assembly (as mine are), but mine seem to have been converted to the Railko bushes (I didn't find the original bearing and spring arrangement on the top arm) and I understood to do this required the steering arms changing such that the bolted to the bottom of the swivel housing. I found this "how to" image which also suggests the same:
Swivels by Jon_Kelly, on Flickr
My question is what have I got? Was it ever possible to retain the original Steering arms and bottom pin and fit a Railko bush & thrust washer? This link would suggest so:
http://www.roverparts.com.au/inc/sdetail/23951 - Indeed, is this what I need?
At the end of all this Id like to be able to buy new bearings, pins, shims, thrust washers etc but don't know what I need!
The last image above shows the following part numbers:
- Railko bush -- 539742
- Railko Thrust Washer -- FRC2906
- Bottom Roller Bearing -- 217268
... but Im not sureif this is correct for my setup because the steering arm pin (that fits into the Railko bush) is a larger diameter than the bottom pin (Are the pins on the later S2 steering arms a smaller diameter than the S1's?)
Any thoughts?
Thanks
Jon
Regards,
Jon
ForumSage
That is a after market Railko conversion for the earlier 1954 to 1958 swivel pin housings.
IMHO, a much better arrangement than the spring loaded, steel cone in the brass bush that the series ones were built with.
.
Wizard
The top pin doesn't look to be in great condition so the full kit may be what you need. You will need a press to get the pin out and may need to remove a roll pin from the side first if it was put in when originally converted. Bottom pin may be ok from the look of it and it is not actually a bearing surface anyway as there is a race for the bearing.
Snowy - 2010 Range Rover Vogue
Clancy - 1978 Series III SWB Game.
Henry - 1976 S3 Trayback Ute with 186 Holden
Gumnut - 1953 Series I 80"
Poverty - 1958 Series I 88"
Barney - 1979 S3 GS ex ADF with 300tdi
Arnie - 1975 710M Pinzgauer
ForumSage
ChatterBox
Here is another thread which covers some of the above. I am currently in a dilemma in which way to go as my swivel housing spline connection is worn. To go original, or top Railko or bottom Railko?
http://www.aulro.com/afvb/series-ii-...rt-railko.html
Erich
Wizard
SupporterThanks for all the replies, a great help.
I could not find a conversion kit locally so I ended up buying the bits separately.
I set about reassembling my swivel assembly yesterday and quickly ran into a bit of a problem.
I got the swivel bolted back onto the axle after pressing in the new Railko bush and Timken roller bearing race.
My first thought was that the steering arm pin was a very close and tight fit with the Railko bush and needed more than the recommended 3.5kg of force for the whole assembly to turn just the arm alone (I had soaked the Railko in oil for a short while before trial fitting). I wiggled the steering arm around for a while and it free'd off a little.
Then (as per the book) I bolted the bottom pin into the housing (no shims), dropped the Thrust washer into the Railko bush and offered the whole assembly upto the swivel and put the top steering arm back into the Railko bush.
When the steering arm was tapped home (i.e. it wouldn't go down any further) I was amazed to see a gap of 4.75mm between top of housing and underside of steering arm.
This means (unless Ive done something wrong) that I need 4.75mm of shims!!!
At this point its hard to see what I may have done wrong. The bottom roller bearing race is fully home and square in the swivel, as too is the Railko bush.
I have not replaced the steering arm pin as that was in pretty good condition.
With the modern Railko bushes, is the thrust washer needed? The new ones supplied (one for each side) are approximately 2mm thick and the bottom of the Railko seems to be made of the same stuff the side of the bush is made from - just wondering if there is a need for this 2mm thrust washer / spacer?
Any thoughts / ideas / words of wisdom for my little predicament?
I made a couple of 2mm shims yesterday from some Mild Steel I had in the shed. IF 4.75mm is correct / OK, I'll put one on the top aand one on the bottom and equalise the shims so as to keep the hub assembly central around the swivel.
Regards,
Jon
Wizard
SupporterOK, update time...
I am going to blame my lack of progress yesterday on fatigue!!
Went back to the garage this morning and had another go...
I double checked there wasn't already a thrust washer in the bush, thus making the one I added = 2 washers - there wasn't.
I read last night a few people saying there should be a 1.0mm shim in the bottom peg, so this time putting a 1.0mm shim on the bottom peg - figured I had nothing to loose.
I then tapped the steering arm all the way home in the Railko and proceeded to tighten the 4 x nuts to pull the housing up. At this stage I had no shims in the top but stopped tightening the nuts when I thought the pre-load was about right, I then measured the "shim depth" with some feeler gauges.
After a couple of goes I got 1.90mm of shims in the top and 1.0mm in the bottom.
This gave 3.0kg with the front wheels essentially on full left lock and it increased upto about 6 - 7kg through the straight ahead position and reduced to about 5kg on full right lock.
I suspect I will need to revisit the pre-load and shim depth once the car has done a few miles.
Does 1.0mm at the bottom and 1.90mm at the top sound about right? Should I transfer 0.45mm to the bottom pin and remove it from the top (to equal out the shims)??
Thanks
Jon
Regards,
Jon
ForumSage
I have been thinking about this, but it has been a bit too long since I did a set up on the swivel pin housings, I did my first ones when I was in my mid teens and that was nearly fifty years ago.
I do remember that the swivel pin housing seal needed some sealant between the seal and the where it sat in the outer housing ( because of the rust pits ) and it was important to set the housing so the gap between the ball and the housing was equal, so the seal sat against the swivel pin ball evenly top and bottom.
Do the preload before the seal is finally in place, using a bit of string and a spring scale to measure the resistance to the pull. All the info is in the series one workshop manual.
.
Wizard
SupporterA quick update.
The drivers side swivel is now almost rebuilt.
#1
11" Brake Backing Plate by Jon_Kelly, on Flickr
#2
Original Hub plus 11x3 brake back plate - NO spacer #2 by Jon_Kelly, on Flickr
#3
Original Hub plus 11x3 brake back plate - NO spacer by Jon_Kelly, on Flickr
I have a few questions...
Question 1 if I may:
On reassembly, should the stub axle butt up against the swivel housing and then the brake backing plate butt up against the stub axle?
This is how the passenger side is put together (and I haven't dismantled that yet) but thought I better ask / check. All seems OK on re-assembly.
Question 2:
The 11" x 3" brakes came with a 9.5mm spacer (one for each side) that had originally been installed on the inside of the brake drum (witness marks visible). I am presuming I don't need this for the 86" because the wheel bearing assembly won't slide home on the stub axle if I do, and if Ive got the order in Q1 above correct!
Thanks
Jon
Regards,
Jon
Super Moderator
Very nice looking job!
The stub axle goes onto the swivel housing and then the backing plate fits on the outside followed by the bolts. You will notice that there is a shoulder in the stab axle that is the same thickness as the backing plate. (Or you could fit a set of cookey's disk brake conversion which bolts to the same place where the backing plate was originally.)
Going back a step, did your swivel housings have two studs with the shoulder for the steering levers? This is sometimes the reason for the steering lever to sit up untill you get them into the correct position, but may only be a function of the SIIa and SIII swivels with the larger studs.
How did you check and adjust your preload?
You can add or subtract shims to the top or bottom, but it is also important to centre the seal on the swivel ball.
You won't find me on: faceplant; Scipe; Infragam; LumpedIn; ShapCnat or Twitting. I'm just not that interesting.
 Posting Permissions
| Search AULRO.com ONLY! |
Search All the Web! |
|---|
|
|
|


")

Bookmarks