


 Reply With Quote
Hey Paul - How is the ol ute going ? Any photos or the like to show us ?")

 Super Moderator
Fully floating rear axles were optional equipment in 1957 and available for retrofitting to earlier vehicles, so why not leave it as is!Originally Posted by Sleepy

Unless someone drives it, no one will know about the SIII gearbox and if you do put a 2 litre IOE engine back in you can swap the bellhousing and clutch withdrawal off a late SIIa 6 cyl to fit the SIII box.
Diana
You won't find me on: faceplant; Scipe; Infragam; LumpedIn; ShapCnat or Twitting. I'm just not that interesting.
Hey Paul - How is the ol ute going ? Any photos or the like to show us ?
ForumSage
Two months and haven't really done much. Fiddled around with the blinkers but I have been offered the services of an electrician friend - As much as I want to learn-as-I-go I think I'll get some expert help for the elctrickery!
I am patiently waiting for my driveway/carport to be finished - should have been done in June but being stuffed around
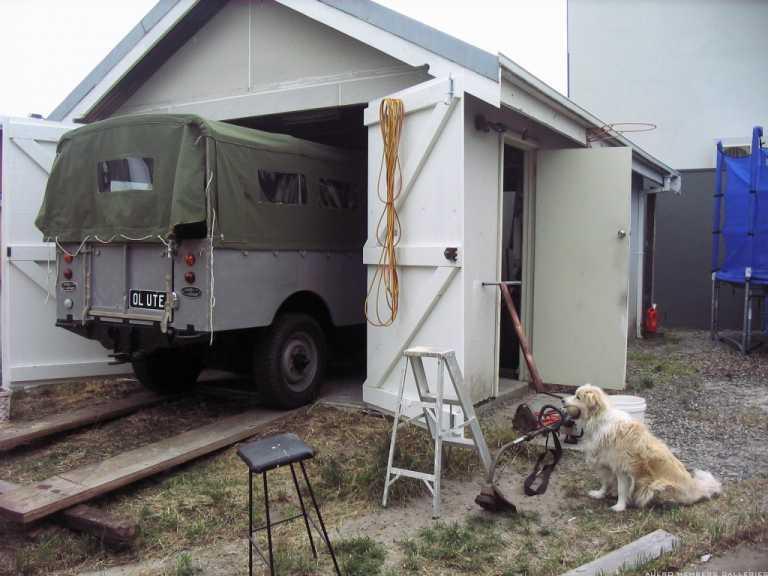
Signed the plans off, finally!, so hope to have that all done by Xmas - I'll believe it when I see it! That'll give me a good spot out of the weather. OLute is living in the shed but is only small and no rooom to work in there!
So - sold off the Series 2 (and donor) to "Supermodel" who is a relatively new member of aulro. That'll give me a bit more space (and a few more dollars to spend on Olute). I think I'll start up a list of what I need to do and then post up for some advice. As you know there is not a lot to do - but working so much lately - not getting much time for landrovering!
I'll take some pictures this weekend and post up a few questions!
I am somewhat jealous of your progress on Shorty! You make it look so easy!
Look forward to some pics Paul
ForumSage
I'm shagged - Two days of building garage doors and sorting out all the stuff* I keep in the shed. It's only a single car garage (an old fibro one from the 60's) but it's now easy to drive Olute in and out.
Sorting out tools too and it looks like I'll need to purchase some more as most of mine are metric- anyone with any suggestions on a basic tool kit for a series 1 would be appreciated
Nonetheless it's great to get all the tools in one place - now I can find things!!
Gotta work tomorrowbut only 5 hours so should get time for a few piccies of my handywork and olute's nice clean shed.
No excuses now for getting on with Olute's preparation for rego!
* stuff [stuhf]
–noun ~ used by Australian Males to cover all personal items collected over the years. Including torches that don't work, airbeds with holes, out of date gas bottles, push bikes with flat tyres, fuel pump from a Subaru, That funny root that looks like an old mans walking stick…………….
ChatterBox
i'll second that
TopicToaster
I'll second your second.
[B][I]Andrew[/I][/B]
[COLOR="YellowGreen"][U]1958 Series II SWB - "Gus"[/U][/COLOR]
[COLOR="DarkGreen"][U]1965 Series IIA Ambulance 113-896 - "Ambrose"[/U][/COLOR]
[COLOR="#DAA520"][U]1981 Mercedes 300D[/U][/COLOR]
[U]1995 Defender 110[/U]
[SIGPIC][/SIGPIC]
YarnMaster
Paul, I have survived well with these tools, for about 30 years of fiddling with cars glued together with Whitworth-based fasteners.
1. A small box of BS sockets from Sidchrome 1/4" up to 1/2".
2. About 4 open-ended spanners in the same sizes as above.
3. A handful of large size BS sockets and two very large BS open-enders that I bought at a stock clearance sale years ago.
4. A set of P&N BSF taps and dies in four common sizes, supplemented with
9/16" and 3/16" as needed.
They are the only "specialist" tools that we need really, although not so long ago everyone had them, but for some reason the manufacturers seem to have given up making them (except for the threading tools). A good place to look for them is in second-hand stores, they are the sort of thing that end up there when Grandad dies and no one knows what to do with the stuff in his shed. One of the good points is that they are usually of good quality; as cheap Japanese, or Chinese spanners were virtually unknown in the 1950/60's.
Apart from that, you need the normal workshop tools that you probably already have and you will need to make, or borrow the jigs and tools to work on the axles, diffs, transfer box and engine; or pay someone to do it for you. If you haven't got it already, the TP138 workshop manual available from the S1 club in England, has drawings of the special tools with dimensions - the later manual I originally had does not have the drawings,
Cheers Charlie
ForumSage
Thanks Chazza,
I must join the Series 1 club - I have had that advice before.
Will also start looking for some quality tools - I must admit much of my "collection" of tools are cheap and nasty - Time to start seeding SWMBO with my christmas wish list
....and a trip down to cash converters!
ForumSage
Working a lot of weekends and nights so easy to make excuses but finally got a few days off
I am very much a novice so please excuse the basicality of my approach!
Note: Workshop supervisor (Max) suggesting we should be playing ball!
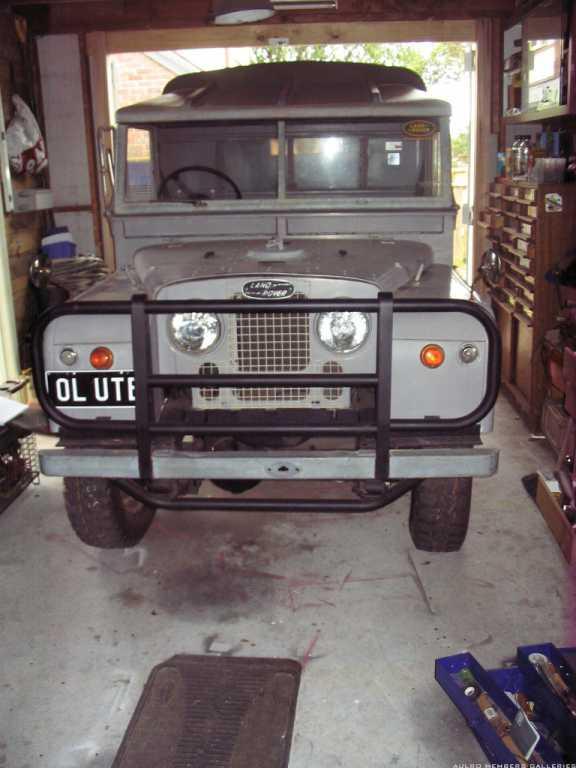
It's not a big area I have got to work in but is cosy and now that I have my tools organised I have just enough room if I back her half out.
I am determined to learn how this all works so coming from a low knowledge base I expect progress will be a bit slow
First the electrickery.
With the multimeter and a bit of fingers (and wires) crossed I have worked out some of it.
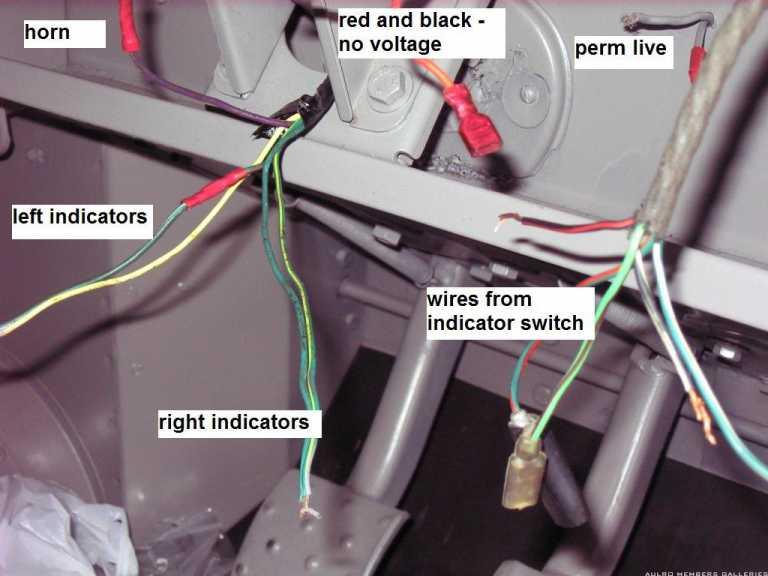
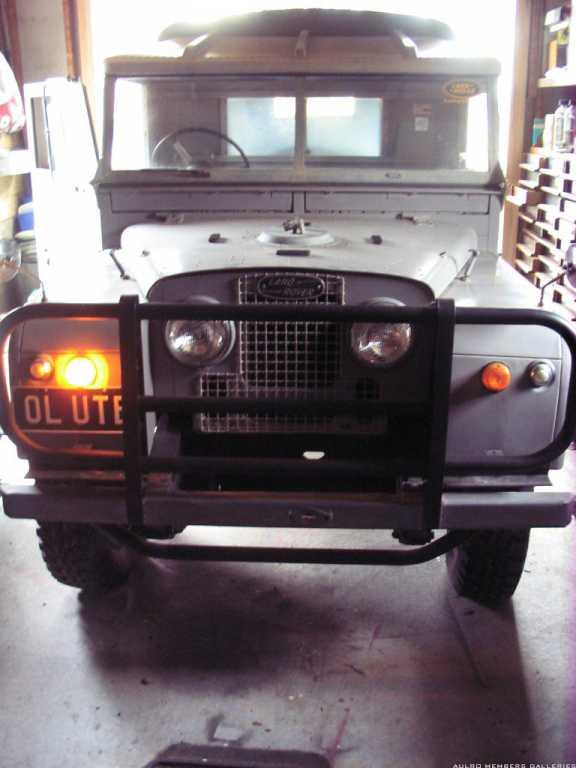
Wired up the horn
Next is the indicators:
Put some power to the circuit and....
Now all of got to do is work out how to make them flash.
I've got no idea where the flasher relay is....or if it has one!
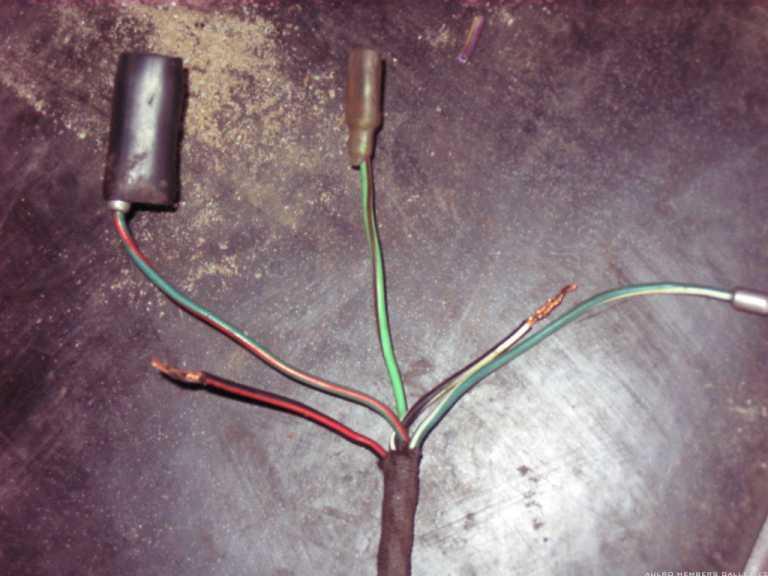
These are the wires coming from the indicator stalk:
Centre wire (Green/Brown) and Green/Red gives me a closed circuit with left selected.
Centre wire (Green/Brown) and Green/White gives me a closed circuit with right selected.
Haven't worked out what the Red/Black and White/Black do yet.
I've also got to other pairs of wires coming from the bulkhead - two to the right are marked "perm live" and another red and black pair that have no current regardless of ignition position or lights.
Anyone with any tips, ' be happy to hear them
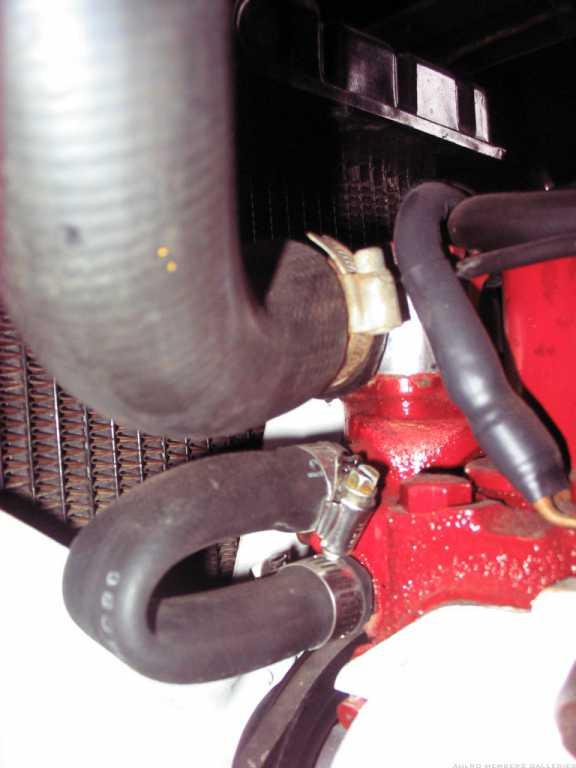
I noticed this hose below the thremostat housing is a half collapsed
- will probably need something with a U shape.
Right rear hub is leaking a bit:
I can't imagine this is a big job but nonetheless something new to learn how to do!
Rubber door seals are in need of replacement. (As is most of the body rubber!)
Found a place on the net Scott's Old Auto Rubber , just up the road from me. Don't no anything about them other than they are close and they have the Series 1 rubber advertised - also new boots for the Lucas L489 side lights (at $30 bucks each)
Other jobs:
- Speedo - needle has fallen off - could probably repair this one but picked one up on e-bay for not much yesterday
- Seat belts,
- Brake lights
- Right rear tail light U/S (yeah I checked the bulb
)
- New exhaust bracket (and maybe some exhaust replace!)
- Upholstery - emailed Exmoor yesterday to see if they have retrim kit!
Probably need to buy myself a Holden workshop manual for the 202. Have started looking for an original 2 litre motor but the 202 will do for now.
So, not a lot done but I am slowly getting my head around it all.
At least I got the horn working
 Posting Permissions
| Search AULRO.com ONLY! |
Search All the Web! |
|---|
|
|
|

")


Bookmarks