Page 9 of 12 FirstFirst ... 7891011 ... LastLast
Results 81 to 90 of 115

Thread: Project Serenity

  1. #81
    Join Date
    Dec 2009
    Location
    Queensland (though occasionally elsewhere)
    Posts
    1,431
    Total Downloaded
    0
    Great to see this thread kick off again. Sometimes a 3197 day break is just what we need.

  2. #82
    Join Date
    May 2011
    Location
    Burnie, Tasmania
    Posts
    155
    Total Downloaded
    0
    Quote Originally Posted by Johnno1969 View Post
    Great to see this thread kick off again. Sometimes a 3197 day break is just what we need.
    Misquoting Jeff Goldblum in Jurassic Park, "Life, uh, gets in the way". It's nice to be in a position to work on it again.

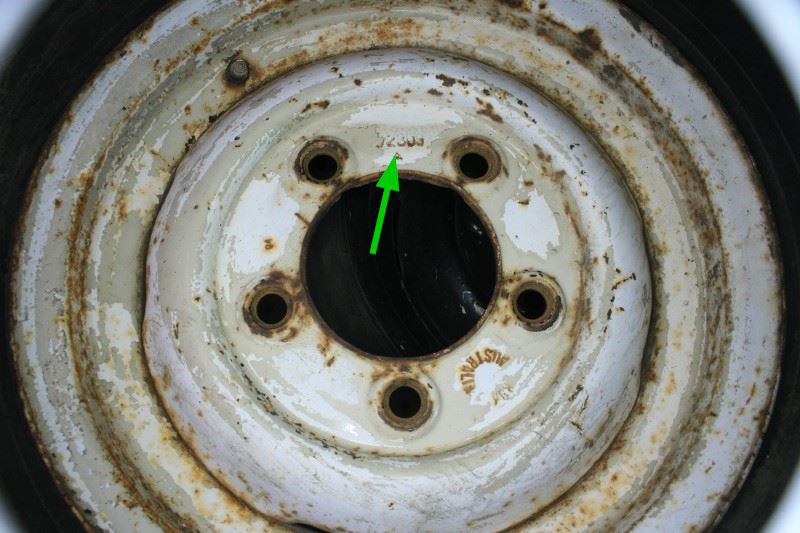
    Answering a question I had earlier in case it helps somebody in the future: where do you find the part number on a Land Rover Series wheel rim? It's on the outer face between stud holes. They are apparently easily covered by multiple layers of paint, hence not being able to find it on the first rim I looked at. To be fair, I still haven't found it on the other rim, but at least I know where to look.


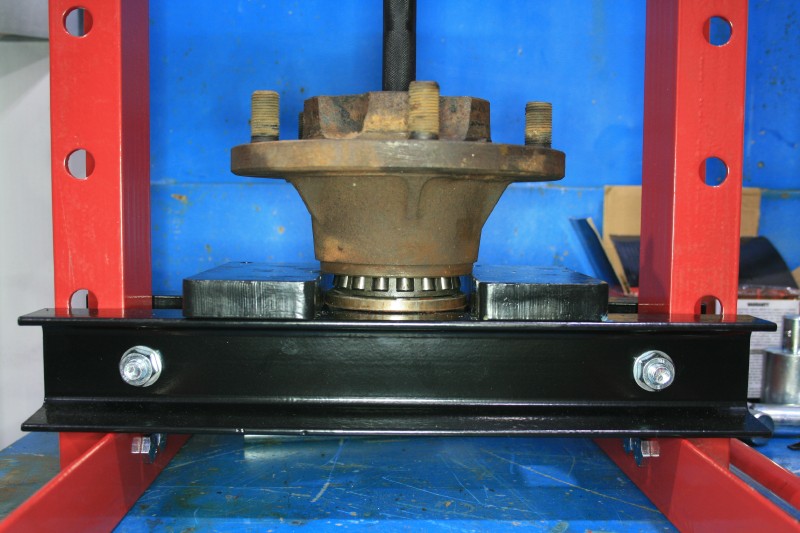
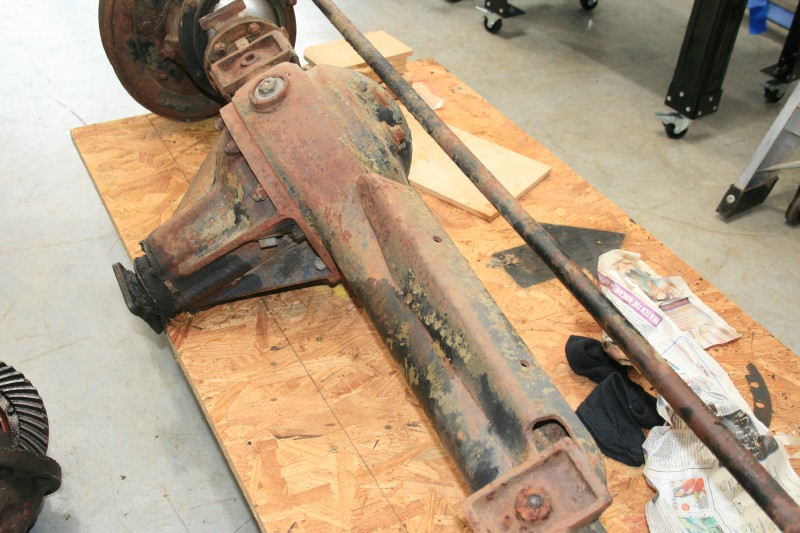
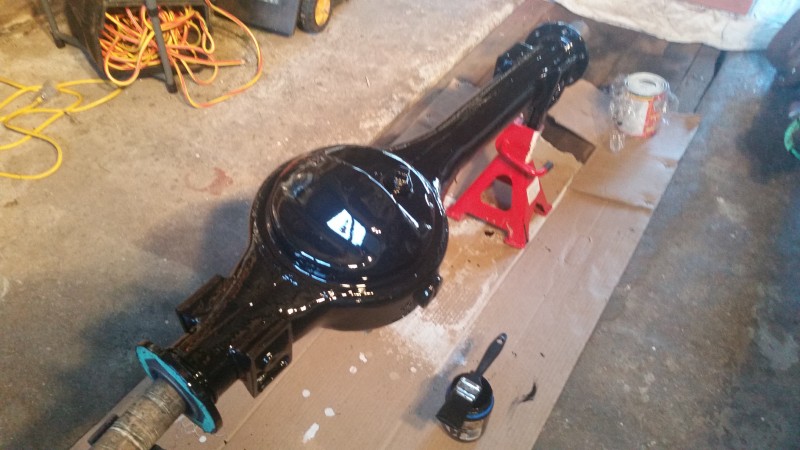
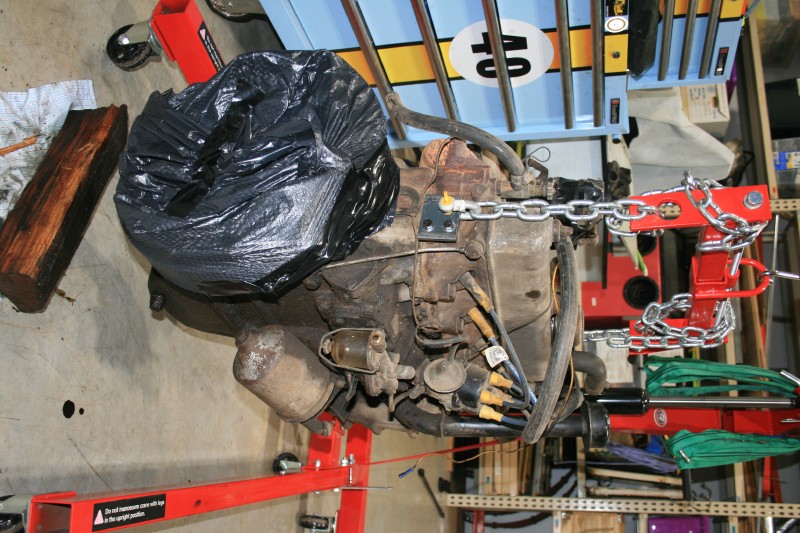
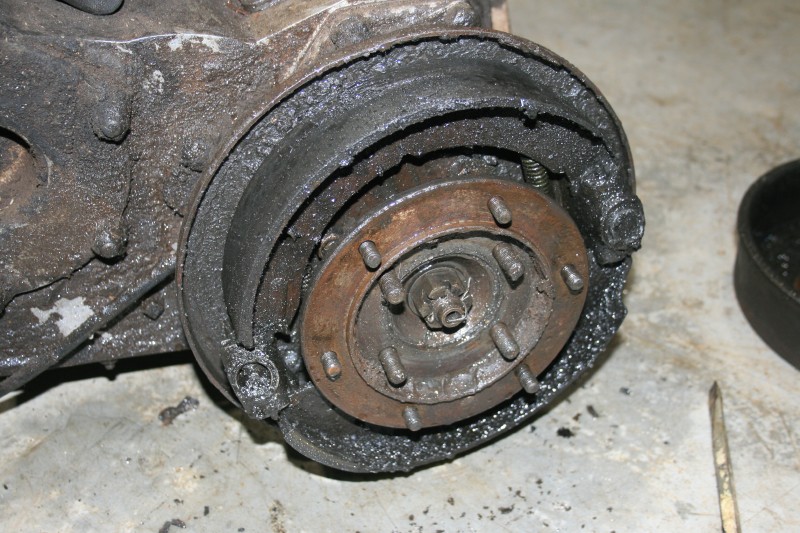
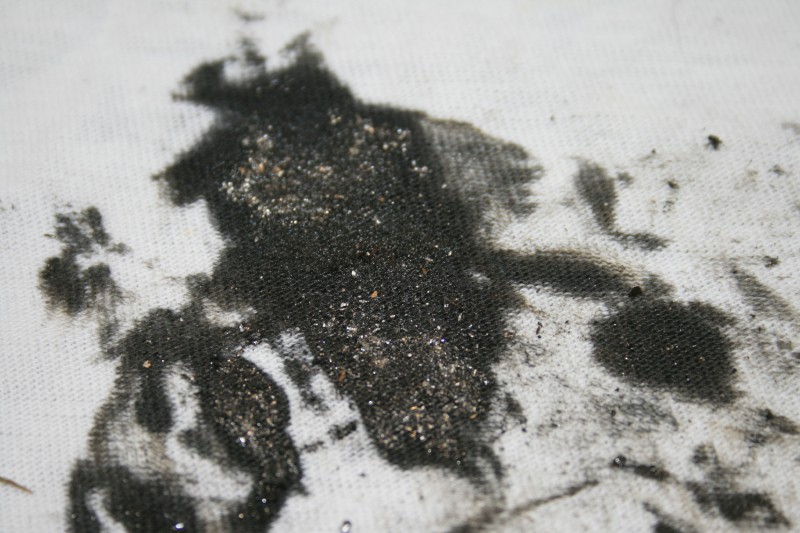
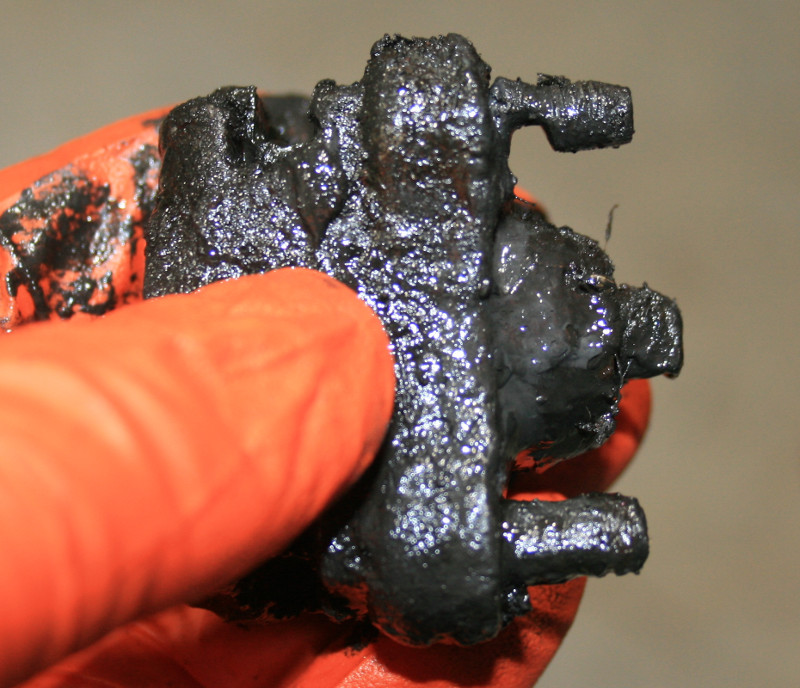
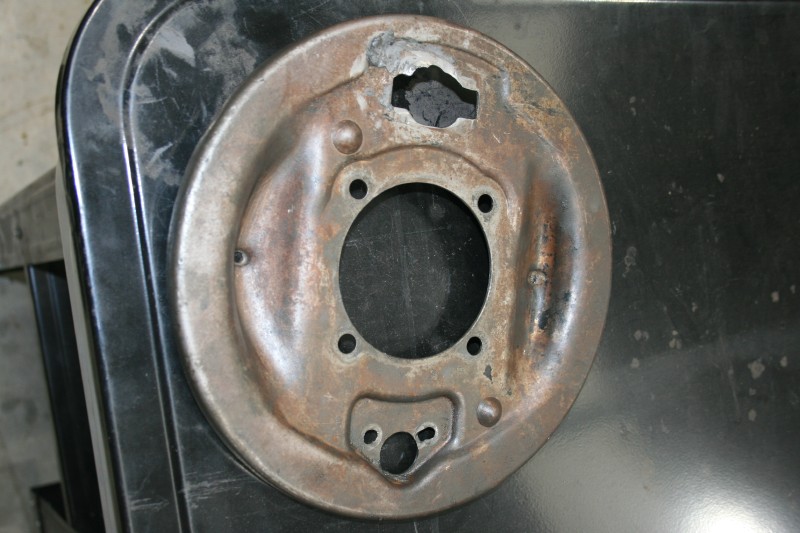
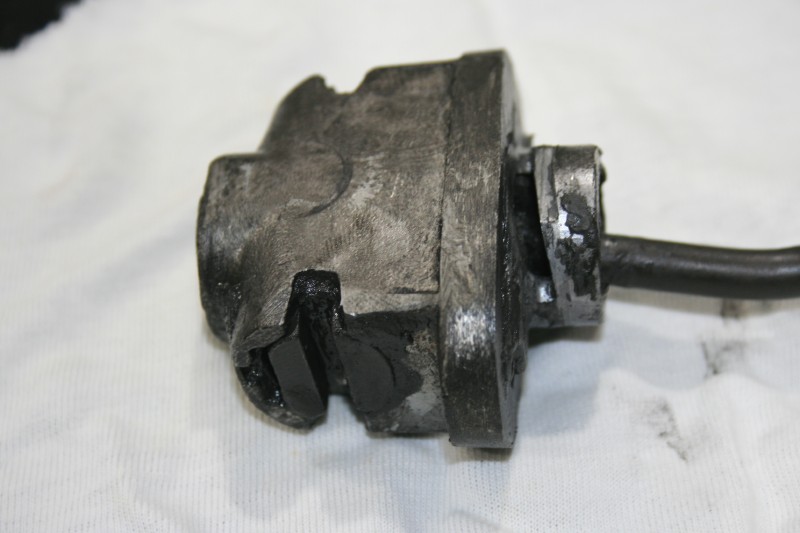
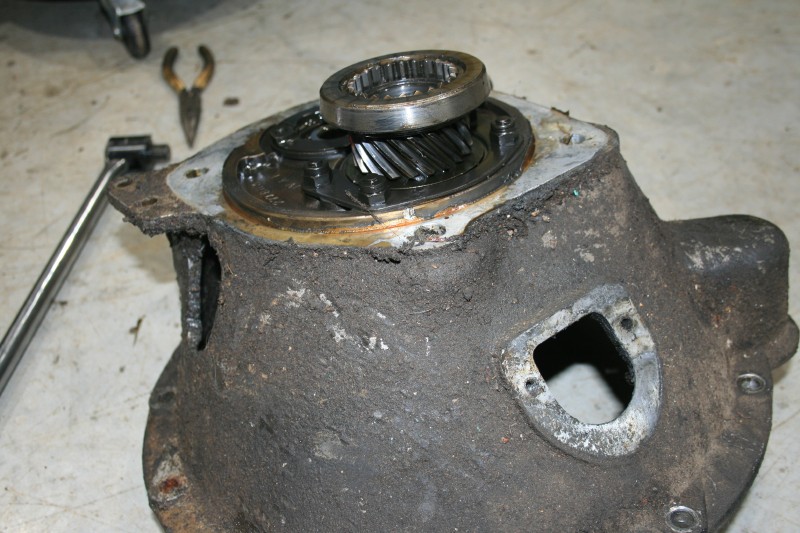
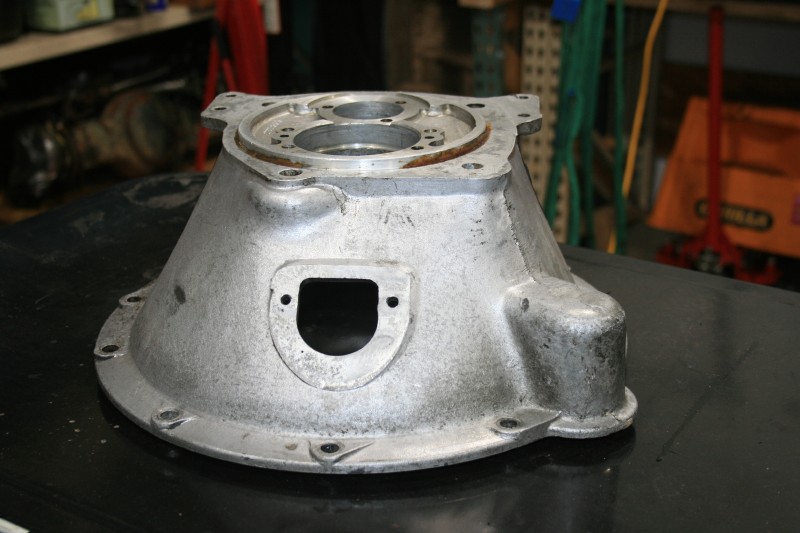
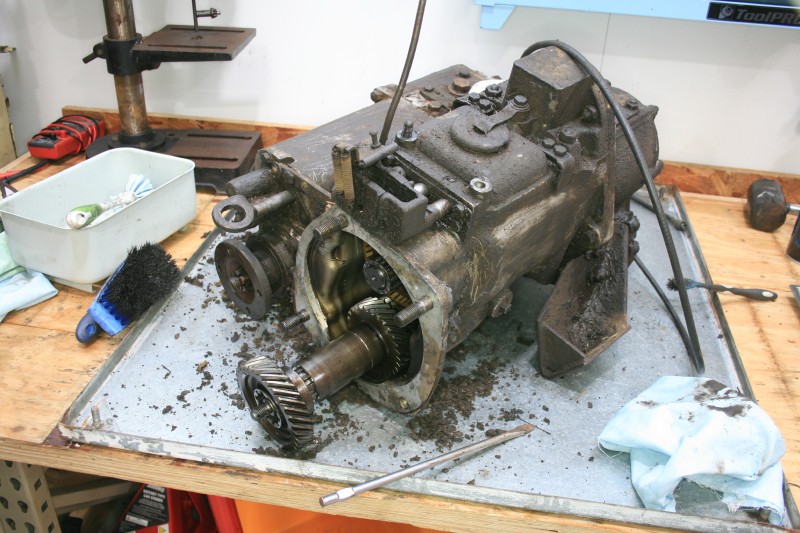
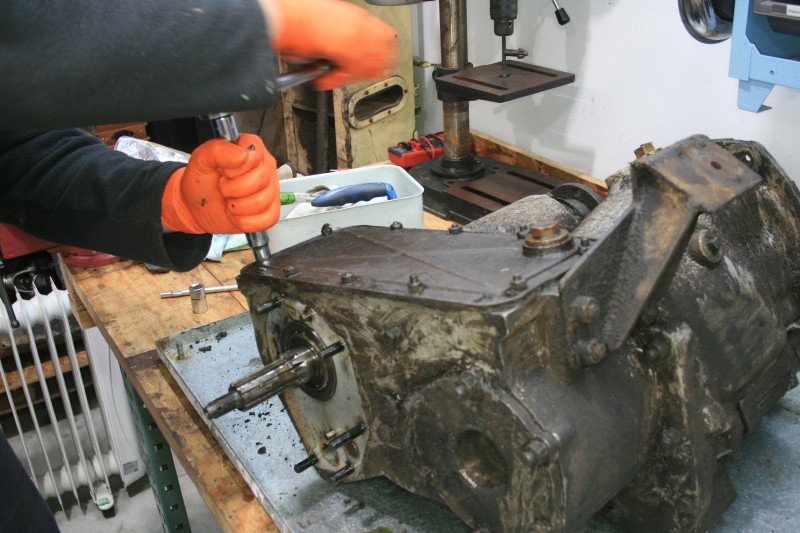
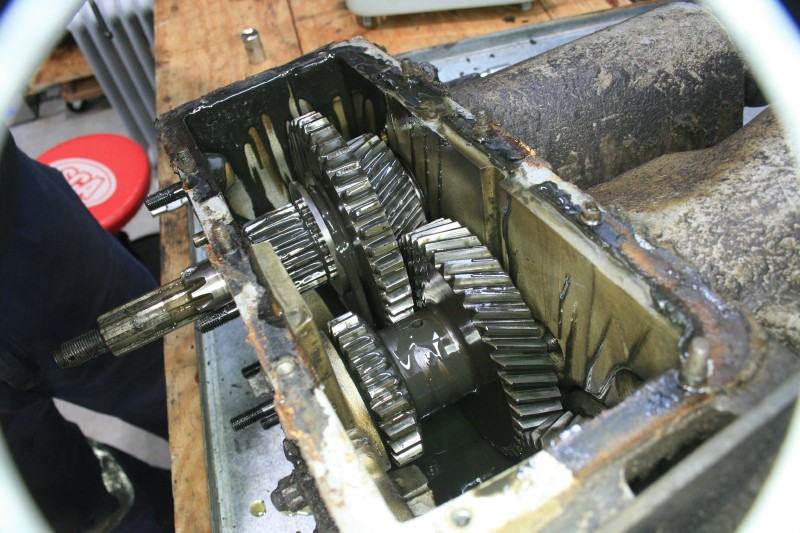
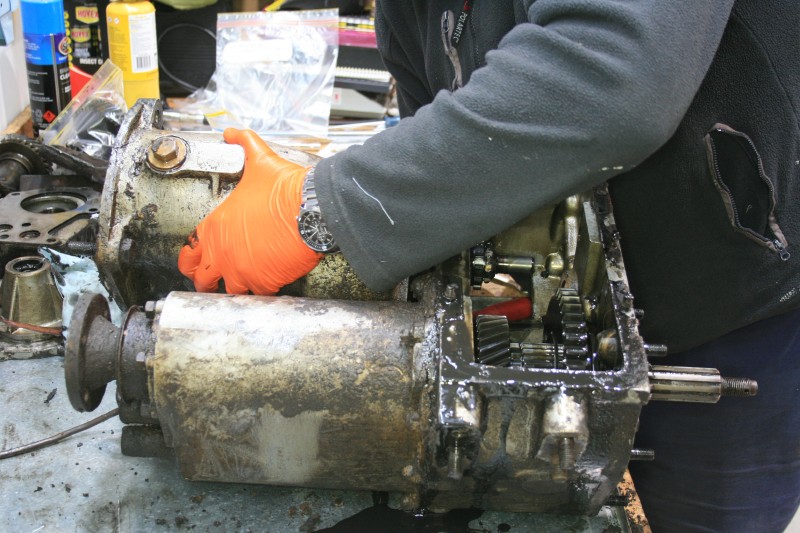
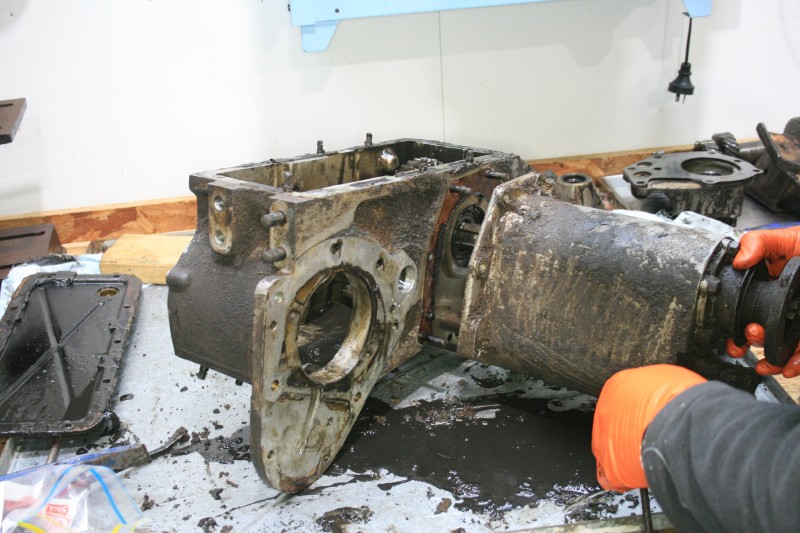
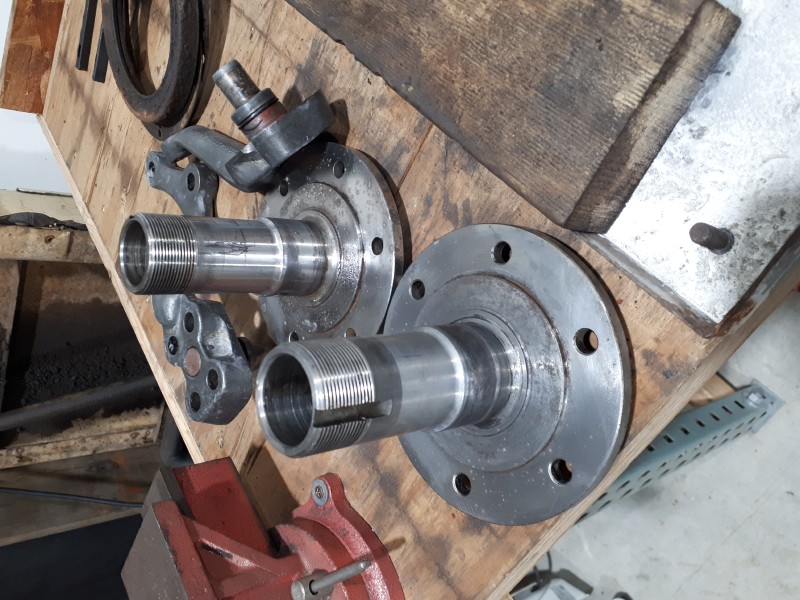
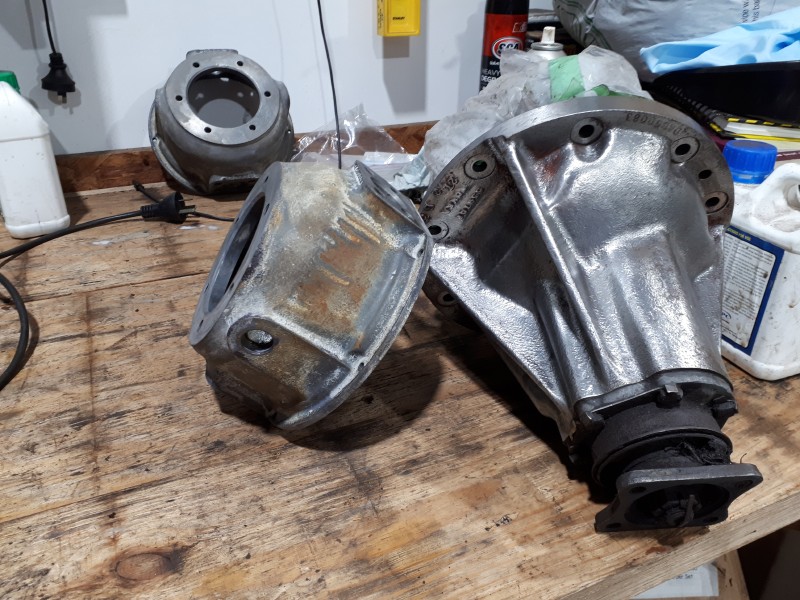
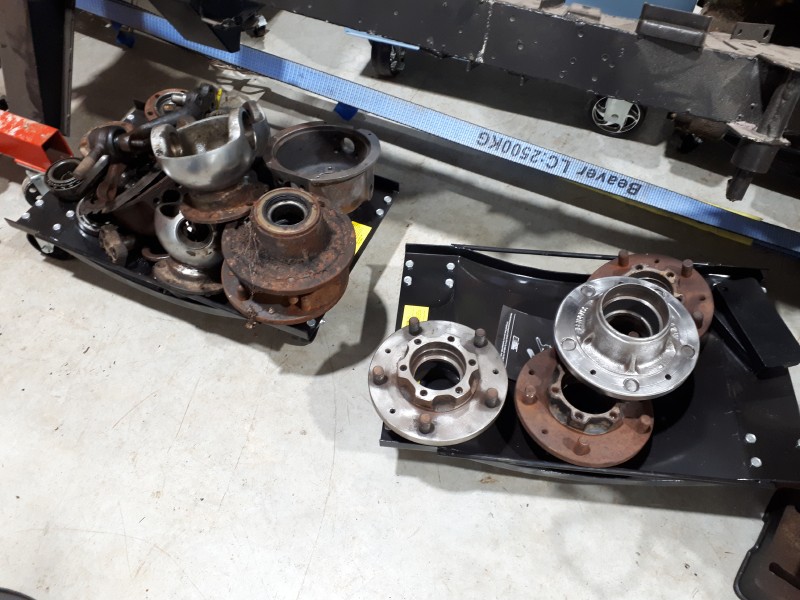
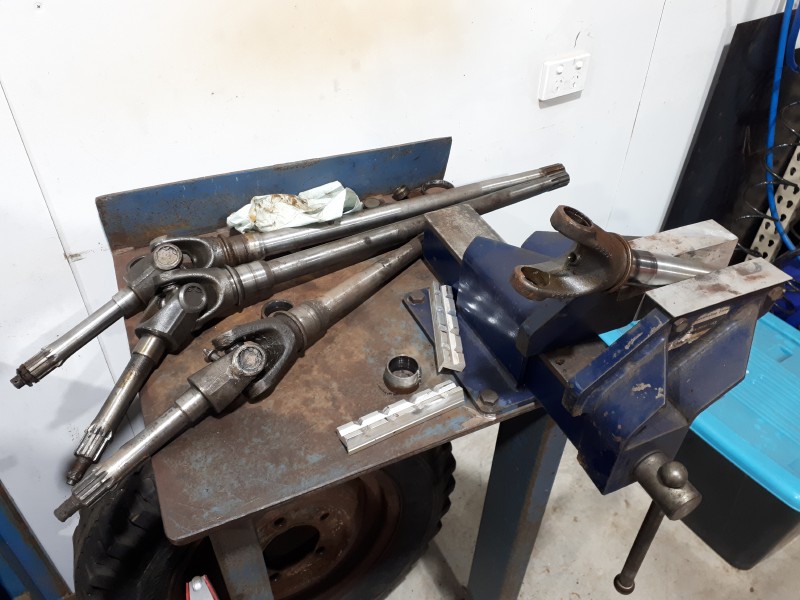
    Not much progress today, just cleaning 65-odd years of gunge and grease off parts so they can be blasted and repainted. Hopefully this process will become much less time consuming once the degreaser for my parts washer arrives. I also need to purchase some softish brushes, screwdrivers and rags are only so good.


    Cheers,
    Martin

  3. #83
    Join Date
    Sep 2010
    Location
    The Hills.
    Posts
    19,170
    Total Downloaded
    152.79 MB
    You call all this "Serenity" ??
    ​JayTee

    Nullus Anxietus

    Cancer is gender blind.

    2000 D2 TD5 Auto: Tins
    1994 D1 300TDi Manual: Dave
    1980 SIII Petrol Tray: Doris
    OKApotamus #74
    Nanocom, D2 TD5 only.

  4. #84
    Join Date
    May 2011
    Location
    Burnie, Tasmania
    Posts
    155
    Total Downloaded
    0
    The name is most certainly ironic.

    "How's the serenity?"
    -Darryl Kerrigan, The Castle

    It's only in the last couple of months I've actually figured out the true appeal of pretty much any of my hobbies, thanks to "Mr. Happy Finds a Hobby". I've never identified more with a character in a book than I did with Mr. Grumble.

    Cheers,
    Martin

  5. #85
    Join Date
    Sep 2010
    Location
    The Hills.
    Posts
    19,170
    Total Downloaded
    152.79 MB
    Tell 'im 'e's dreamin'?
    ​JayTee

    Nullus Anxietus

    Cancer is gender blind.

    2000 D2 TD5 Auto: Tins
    1994 D1 300TDi Manual: Dave
    1980 SIII Petrol Tray: Doris
    OKApotamus #74
    Nanocom, D2 TD5 only.

  6. #86
    Join Date
    May 2011
    Location
    Burnie, Tasmania
    Posts
    155
    Total Downloaded
    0
    Quote Originally Posted by turkeybrain View Post
    From the research I've done since then, it seems that neither of these had the standard setup of bolts and studs. There should be 3x 531494 and 1x 531043 studs through the steering arm, and 4x 237357 bolts through the top Railko bearing. Please correct me if I'm wrong.
    Looks like I was wrong. There are supposed to be 2x of each stud on the bottom of each swivel. The special stud 531043 has a larger diameter section in the middle and is used similar to a dowel to locate the steering arms.

    Some new tools have arrived in the shed. A press, and some bearing drivers. Obviously the best thing to do is give them a go.


    Success! I even tried on actual bearing races. Both Series 3 hubs have finally had their bearings and races removed, ready to be tidied up and new bearings to be fitted.

    I couldn't get a bearing press plate onto the the outer race of the inner bearing, so had to, ahem, manufacture a tool.


    Honestly, I can't believe that screwdriver has lasted as long as it has. It's copped a lot of abuse (and very few screws) over the past 15 years. Anyway, even without a handle it's still useful for removing bearing races, and axle hub caps. The poor screwdriver isn't as straight as it was at the beginning of today.

    As I alluded to in my previous post, I have a couple of mystery axles which I picked up in a paddock. The only thing I know about them is that the Salisbury has a 4.7:1 diff in it (it would have stayed in the paddock if it didn't).


    But it also has M16 wheel studs, so I'll clean these hubs up and press them (sorry) into service. I'm not super keen on 9/16 BSF on the front axle and M16 on the rear. I suppose I could get creative and use a cross pattern, but it probably doesn't have the same advantages as crossing different tyre compounds on your rally car.

    I would show you photos of the hubs removed from the Salisbury as that has happened, but apparently I didn't take any photos. To be fair, I don't need that much oil on my camera. I'm wearing nitriles underneath my cut resistant gloves to keep my hands a bit cleaner, and have noticed I'm leaving hand prints on whatever I touch.

    On the topic of mystery axles, I have some questions about the front mystery axle.


    It has drum brakes, 9/16 BSF wheel studs, and a later style swivel hub as the steering arms are on the bottom. I'm guessing it's from a Series 2A given the configuration of stud size and steering arm position. It also has some pretty serious reinforcing. Serenity's original housing does not have this. Would this reinforcing have been used on military vehicles? Is the stiffening worthwhile? I could swap to this housing, but I'm disinclined to do so without good reason as Serenity's original housing has already been cleaned up and is ready to have parts reinstalled.


    Just look how shiny it is! 3rd time's the charm.


    Anyway, back to the mystery axle, it also seems to have what may have once been some olive drab, which has certainly made me think military thoughts. I'm curious to know more.


    The mystery axle also has a sensible number of studs through the steering arms. Much less of a death trap. I'll have to pull these out and inspect to see if they're still serviceable. There' a lot of rust on them.


    Cheers,
    Martin
    Attached Images Attached Images

  7. #87
    Join Date
    May 2011
    Location
    Burnie, Tasmania
    Posts
    155
    Total Downloaded
    0
    Things have been quietly moving on Serenity (excepting a 5 week gap doing pro bono consulting on an interesting, yet completely separate from any of my normal hobbies and profession, project for a family member), but posting has been more difficult, not a lot has been worthy of photographs, and I've been so completely covered in grease I haven't been brave enough to touch my camera.

    My 5 year (~35 cm) long beard is gone, replaced with a clean shaven face, all in the name of being able to properly wear a half mask respirator. My 4 year old daughter had to be involved in shaving that off so I didn't frighten her. The dog took a few days to warm back up too.

    Having fired up my parts washer, I've been cleaning up axle components. Both original front stub axles are, in short, ruined. This yet again proves mud is a useless lubricant. Tidying up the swivel hubs, I have discovered a previous owner decided not to go out and buy the correct 7/16 BSF studs, but instead to send 1/2" UNC bolts in their place. The threads aren't particularly tidy, so I suspect they were formed with a bolt. I noticed the issue when the 7/16 tap fell into the hole I was planning to clean.

    Instead of rushing out and spending money on parts, I've pulled down the mystery axle featured in my last post. even though it has obviously been stored outside for a long time, it has remained largely sealed and most internals are still good. The short side swivel seal has leaked and the UJ is corroded, but the inner seal has done its job and no water made it further than that. The long side swivel hasn't leaked, so I've got a spare UJ shaft in heaps better condition than my original. The external condition of all parts is really rough, but should still clean up OK. Both stub axles appear to be serviceable, as do both swivels. I think I'll need to replace a spacer on one of the stubs, but as far as I can tell they're practically consumable. All in all, I think I've got enough bits in good enough condition to continue.

    I've also decided now, as I already had to break open some brake drums, is a good time to get rid of all the various possibly asbestos components floating around the shed. The engine and gearbox were separated last night and the clutch and clutch housing are in an asbestos bag alongside the brake drums, shoes and backing plates from the axle. I've been debating what to do with the flywheel and its housing, and have landed on leaving it on the engine, wrapping it in a garbage bag and pretending nothing happened, mostly because I'm not planning to use the engine in the short term. It's tucked well out of the way under a work bench up against a wall so shouldn't be disturbed.


    I'm part way through pulling the handbrake apart at the moment. There's little risk of dust coming off that though, as there's more than enough grease and oil to keep it fully contained... I'm pleased I'd already decided to splurge on an Ashcroft high ratio transfer case as the axial and radial movement at the rear output flange of the transfer case feels like it could be measured in whole millimetres. The handbrake drum is also the only drum I've pulled off so far that might possibly be reusable, so that's nice.


    Overall, no show stoppers, but not nearly as much progress as there should have been.

    Cheers,
    Martin

  8. #88
    Join Date
    May 2011
    Location
    Burnie, Tasmania
    Posts
    155
    Total Downloaded
    0
    In my hunt for asbestos dust I've accidentally begun to strip the gearbox and transfer cases so I can clean up bell housings and the like. I was planning to get into the gearbox sooner rather than later so this is the opposite of a problem, but it has come as a surprise to me.

    I've finally got around to draining the gearbox and transfer case oils. The gearbox initially came out a nasty black colour before clearing up. The sump plug cavity shows signs of brass, but no large chunks. I am planning a complete gearbox rebuild, so this isn't the end of the world, just something to note before stripping anything further.


    The transfer case oil looked much cleaner, but the sump plug cavity threw a lot of glitter and the odd tooth chunk. Again, I'm planning a rebuild, so not the end of the world, but not ideal.


    I'm also guessing the shafts shouldn't move quite this much by hand. I'm curious to know what I'll find when I crack open the casings.


    When I bought the vehicle the handbrake lever was physically disconnected from the drum actuator. I had always assumed a pin had fallen out of its own accord and nobody had bothered to fix it as it was a farm bus. Having now pulled the handbrake apart, I'm suspicious it may have been intentionally disabled...

    The first thing I noticed (other than all the grease and oil seen in the image in the last post) was the adjuster unit was sitting crooked after I removed the drum (this is also noticeable in the image in the previous post). Pulling the shoes off was easier than anticipated because the adjuster came out with them. Wondering why the adjuster came straight out, I consulted a workshop manual and realised the fasteners and backing plate holding the adjusters in had vanished prior to me looking at it. It turns out the only reason the adjuster was still vaguely in the correct position is one of the studs had caught and not made it all the way out of the hole. And there it stayed for a long time judging by the size of the groove worn in the stud (top right of image)!


    One immediately wonders what the backing plate thought of this...


    It didn't enjoy it much, by the looks of things.

    Then there's the actuator. It was extremely sloppy in the hole. Eventually I managed to clean off enough grime to be able to figure out how it was attached and removed the clips.


    I'm guessing the groove isn't supposed to be deep enough to see the rod on one side.

    It looks like I'm going to need to source practically an entire handbrake assembly as none of this looks particularly serviceable. Except maybe the drum, but there's evidence of that being out of round too. Given the state of everything else, I'd consider putting money on it having been skimmed far enough that it can't be done again.

    Cheers,
    Martin

  9. #89
    Join Date
    May 2011
    Location
    Burnie, Tasmania
    Posts
    155
    Total Downloaded
    0
    I've been languishing on the project in recent times for a variety of reasons, but with the long weekend my brother in law, a fellow old 4wd enthusiast (he's a G60 Patrol collector) who was heavily involved in me buying Serenity in the first place, offered to give me a hand. With an extra set of hands, it seemed like a good time to tackle the gearbox tear down as one of us could operate a camera to document what goes where while the other spun spanners.

    I had previously removed the bell housing and given it a good clean, it seems to be in reasonable shape.


    On to the main event.


    With an extra pair of hands manning the camera, we can now get action shots.


    The transfer case oil might not look too good, and there's definitely signs the transfer case has been used, but from a cursory inspection I'm pleasantly surprised by its overall condition. No obvious damage other than typical wear. Though with the new engine, I do plan to put in an Ashcroft high ratio gear set so it will be largely rebuilt anyway.


    Removing the gearbox from the transfer case.


    And removing the front output shaft housing from the transfer case.


    We tried to begin stripping down the transfer case itself, but came unstuck when we realised I hadn't replaced the circlip pliers I broke 6 years ago (sigh). Instead we've begun on the front output housing. Overall, everything is looking OK, hopefully there won't be too much to replace overall, just bearings and the like, but that remains to be seen. It perhaps wasn't as much progress as I'd wanted, but at least it was some, hopefully I can keep the momentum going.

    On another note, if anybody is in any doubt, buying a set of Whitworth sockets and spanners is well worth it if working on these gearboxes. I removed the bell housing without them and bought a set in the intervening time. It's much easier to work on these when you're not approximating between a metric and AF set.

    Cheers,
    Martin

  10. #90
    Join Date
    May 2011
    Location
    Burnie, Tasmania
    Posts
    155
    Total Downloaded
    0
    While I may not have been posting much, there's been a little bit of progress quietly happening.

    The gearbox is still in pieces, and will be for the rest of the year. It's no longer getting a full rebuild either, just a reassemble. As I'm swapping the engine, I've decided to rebuild the transfer case with Ashcroft's high ratio kit. Reading thoroughly, it turns out that requires a 36 tooth low range output gear, and my box appears to be a Series 2/2A suffix A box with a 39 tooth gear. (I still haven't found a serial number for the gearbox, which I assume is because bits have been swapped around at some stage, there are other signs I've spotted which indicate it's been apart before.) I did look at whether I could modify it to work still, but have decided all of the changes which were brought in with later versions are worth having, so I've gone and bought a Series 3 box to rebuild instead, partly because it's going to be a bit stronger than the early 2A box, partly because it will suit the high ratio kit, and partly because I don't want to learn to drive a non-synchromesh box which I've just rebuilt. The 2A box will be reassembled and kept for when I inevitably turn the S3 box into glitter at some point in the future.


    In an attempt to make more consistent progress, I've externalised my motivation. That is, I have given a mate, Ben, permission to hound me, daily, with what needs to be done and whether I've done it. We have weekly project management meetings, and he chases up action items throughout the rest of the week. He is relishing the role a little too much. However, the proof is in the pudding, and I've made much more progress since he's been bugging me daily.

    The main goal at the moment is to have a rolling chassis before Christmas. It's coming along, but we do have a number of risk items, namely the chassis has not yet had its repair weld tests completed, and I'm not prepared to put it on wheels prior to that, and I apparently need to replace the steering relay. It sounds like it's full of sand. It may well be, it was fitted when the chassis was sandblasted. I am not looking forward to getting the old one out.

    I've elected to use the mystery front axle housing, as it isn't covered in dents and scrapes, and it has substantial reinforcement sections fitted to it. It's been an invaluable source of parts, donating the differential, housing, one swivel hub, one half shaft, and two stub axles to the cause. Or most of the front axle, if you prefer!

    I'm primarily prepping for paint at the moment, with most parts having been degreased and acid washed prior to coating (which I should have been doing tonight, but I've done pretty much anything I can to avoid it, including writing this post, Ben will not be pleased).


    Old, most likely to be discarded bits on the left, parts partly prepared for use on the right.


    I'm also working on rebuilding the half shaft universal joints and replacing bearing races ready for imminent installation.


    My shed is a mess...

    Does anybody have any suggestions for reinstalling the bearings on the half shafts? My current leading theory is a piece of plate with a DIA 36.0 mm hole welded to a chunk of pipe to use as a slide hammer.

    Cheers,
    Martin

Page 9 of 12 FirstFirst ... 7891011 ... LastLast

Bookmarks

Bookmarks

Posting Permissions

  • You may not post new threads
  • You may not post replies
  • You may not post attachments
  • You may not edit your posts
  •  
Search AULRO.com ONLY!
Search All the Web!